Advertisement
Quick Links
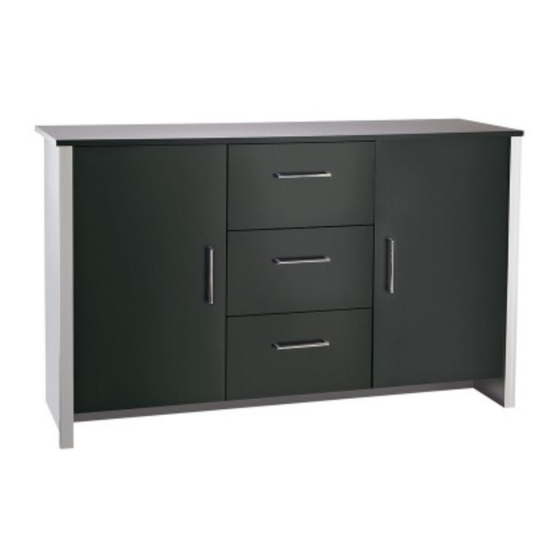
2 Door 3 Drawer Sideboard
Assembly Instructions
041 xx 6006
- Please keep for future reference
497/1630
Dimensions
Width - 117.2cm
Depth - 38.8cm
Height - 73.6cm
MADE IN
GREAT BRITAIN
Important -
Please read these instructions fully before starting assembly
If you need help or have damaged or missing parts, call the Customer Helpline: 01709 534123
Please turn to back page for important information when contacting Customer Helpline.
Rev A - 28.09.15
Advertisement

Related Manuals for Argos 497/1630


Summary of Contents for Argos 497/1630
- Page 1 2 Door 3 Drawer Sideboard Assembly Instructions 041 xx 6006 - Please keep for future reference 497/1630 Dimensions Width - 117.2cm Depth - 38.8cm Height - 73.6cm MADE IN GREAT BRITAIN Important - Please read these instructions fully before starting assembly If you need help or have damaged or missing parts, call the Customer Helpline: 01709 534123 Please turn to back page for important information when contacting Customer Helpline.
- Page 2 Safety and Care Advice Important - Please read these instructions fully before starting assembly Do not stand or put weight on Check you have all the We do not the product, this could cause components and tools listed on recommend the damage.
- Page 3 Components - Panels Please check you have all the panels listed below Important - Thick lines indicate finished edges 622xx7000 Left drawer side x3 (30x15cm) 9990 (117.2x38.8cm) 623xx7000 9992 9993 Right drawer side x3 (30x15cm) Left End Panel Right End Panel (72x38.2m) (72x38.2cm) 9991...
- Page 4 If you have damaged or missing components, call the Components-Fittings Customer Helpline: 01709 534123 Please turn to back page for important information when contacting Customer Helpline. Please check you have all the fittings listed below Note: The quantities below are the correct amount to complete the assembly, In some case more fittings may be supplied than are required.
-
Page 5: Exploded View
Exploded View Please check you have all the fittings listed below 9990 9992 9997 7293 9995 9994 7419 9997 9991 7293 684xx6530 9993 9164 622xx7000 624xx7019 684xx6530 2601 9996 623xx7000... - Page 6 Assembly Instructions Step 1 Fitting dowels to top panel. Insert 8 metal dowels into the top panel 9990 9990 Note: Tighten metal dowels up fully against the panel. Do not over tighten. Step 2 Fitting cams to the bottom panel Insert 4 cams into the bottom panel 9991...
- Page 7 Assembly Instructions Step 4 Fitting hingeplates to the end panels. 9992 Insert 2 hinges into left end panel 9992 Edge of panel Insert 2 hinges into right end panel 9993 Note: Ensure that the hinge points towards the 9993 grooved edge of the panel.
- Page 8 Assembly Instructions Step 6 Front of Runner Attaching runners to the division panels. Position the runner so that the second hole from the front of the runner lines up with the pre-drilled hole nearest to the edge of the panel. 9995 Use screws to secure...
- Page 9 Assembly Instructions Step 8 Correct Attach hinges and handles to 2 doors Important: Insert hinges into holes, ensure Incorrect the hinge is straight 7293 (90 degree angle). Bradawl Before securing the hinges , we recommend you pre - mark the doors using a bradawl.
- Page 10 Assembly Instructions Step 9 Drawer assembly Right hand side Insert small cams 623xx7000 622xx7000 into left and right 623xx7000 drawer sides. Note: Ensure cam arrow points towards the edge with hole. Left hand side 622xx7000 Insert wooden dowels in drawer back 624xx7019 into holes in left...
- Page 11 Assembly Instructions Drawer assembly continued..Slide drawer bottom into grooves in the left and right drawer sides and the drawer back. 2601 SLIDE! Foil surface facing upwards. Plain chipboard surface to underside. : Locate the metal dowels (already inserted) in the drawer front into the small cams in the left and right hand drawer sides.
- Page 12 Assembly Instructions Step 11 Attach right hand end panel, left hand 9994 division and right hand divsion to the top panel Locate cams in panels 9994 9995 9993 9995 onto dowels in top 9990 panel 9993 Then lock. 9990 Front finished edge Front grooved edge Turn cam 180 degrees to lock...
- Page 13 Assembly Instructions Step 13 Secure bottom panel to left and right hand divisions Locate wooden dowels already inserted in 9994 9995 divisions 9991 into holes in bottom panel 9991 Now locate screw through holes in bottom 9991 panel and screw into holes in divisions 9994 9995...
- Page 14 Assembly Instructions Step 15 Attach left hand end to top, bottom and plinth 9164 Locate cams in panel 9992 onto dowels 9991 in top panel 9990 Then lock. 9992 Locate dowels left hand end panel 9992 into cams 9991 in bottom 9164 plinth Then lock.
- Page 15 Assembly Instructions Step 17 Lay unit down to square unit up Measure to external corners Warning: 9160 2 people to lift. DIAG 1 7397 Lift with care. Important: Ensure a tape measure is used to square up unit! DIAG 2 Before securing the back it is necessary to square up the unit.
- Page 16 Assembly Instructions Step 19 Add stability blocks. Slide the thin point of the stability blocks between the back panel and the grooves. 7419 Once inserted fully, tighten the screws in the stability blocks. 7419 Step 20 Fittings you will need for this step: Attach silver trim Silver Trims Turn unit over.
- Page 17 Assembly Instructions Step 21 (x6) Lift unit up and locate drawers Warning: 2 people to lift. Lift with care. For this step we recommend you follow the helpful hints page. Detailed View 2nd Hole...
- Page 18 Assembly Instructions Step 21..cont Locate drawers helpful hints Pull sliding part of drawer runners so they are fully extended. Locate drawer onto runners. Locate screwdriver into second threaded hole in drawer runner Keeping screwdriver in place push the drawer in until the screwdriver pushes against the 2nd Hole panel.
- Page 19 Assembly Instructions Step 22 Locate shelf studs Push shelf studs 9992 9993 into panels 9994 9995 9992 9995 9993 Step 23 Locate shelves onto shelf studs 9997 Locate shelves onto shelf studs 9997 9997...
- Page 20 Assembly Instructions Step 24 Hanging doors With help, slot door hinges onto hinge plates Ensure screw on hinge 7293 slides into the slot on hingeplate See Diagrams 1,2 and 3. 9993 Tighten screw shown to lock hinges in position. Repeat a and b for opposite door.
- Page 21 Assembly Instructions Step 25 Hinge adjustment To move doors up or down: loosen screws shown and move doors to suit. Re-tighten screws. To move doors in or out: loosen screw shown and move doors to suit. Re-tighten screws. To move doors left or right: loosen or tighten screw as shown.
- Page 22 Assembly Instructions Congratulations! Your unit is complete. Important Information If you need help or have damaged or missing parts, call the Customer Helpline: 01709 534123 8am - 4.30pm (Monday to Thursday) 8am - 2.30pm (Fridays) (by contacting the customer service line your statutory rights are not affected) Please have the following information to hand: >>...
Need help?
Do you have a question about the 497/1630 and is the answer not in the manual?
Questions and answers