
Related Manuals for AXIOMTEK GOT321W-521


Summary of Contents for AXIOMTEK GOT321W-521
- Page 1 GOT321W-521 All-in-One 21.5” FHD TFT Fanless PCT Multi-Touch Panel PC User’s Manual...
-
Page 2: Disclaimers
Axiomtek does not make any commitment to update any information in this manual. Axiomtek reserves the right to change or revise this document and/or product at any time without notice. No part of this document may be reproduced, stored in a retrieval system, or transmitted in any forms or by any means, electronic, mechanical, photocopying, recording, among others, without prior written permission from Axiomtek Co., Ltd. -
Page 3: Safety Precautions
Most electronic components are sensitive to static electrical charge. Disconnect the power cord from the GOT321W-521 prior to any installation. Be sure both the system and all external devices are turned off. Sudden surge of power could ruin sensitive components. -
Page 4: Table Of Contents
Table of Contents Disclaimers ..................... ii Safety Precautions ..................iii SECTION 1 INTRODUCTION ........1 General Descriptions ................1 Specifications ..................2 Dimensions and Outlines ..............4 I/O Outlets .................... 6 Packing List ..................7 SECTION 2 HARDWARE INSTALLATION ....9 Open Back Cover ................ - Page 5 3.4.5 CPU Configuration ..................36 3.4.6 SATA Configuration ................... 37 3.4.7 PCH-FW Configuration ................38 3.4.8 USB Configuration..................39 Chipset Menu ..................39 3.5.1 System Agent (SA) Configuration ............. 39 Security Menu ..................44 Boot Menu ..................45 Save & Exit Menu ................47 SECTION 4 DRIVER and INSTALLATION ....
- Page 6 This page is intentionally left blank.
-
Page 7: Section 1 Introduction
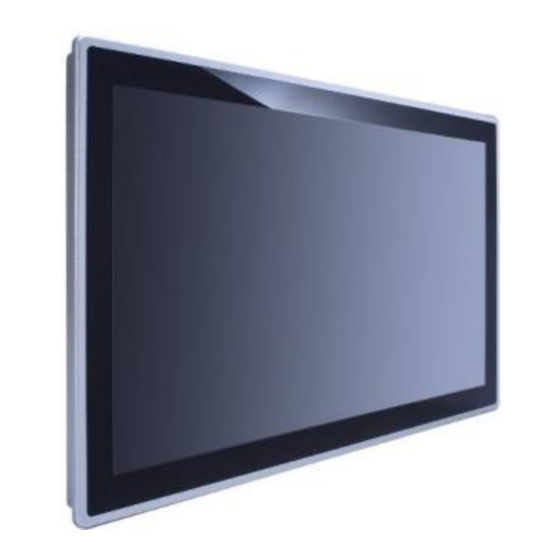
⚫ General Descriptions The GOT321W-521 multi-touch panel PC adopts a 21.5-inch FHDTFT LCD with 250nit brightness and supports the LGA1151 socket 8/9th gen Intel® Core™ i7/i5/i3 & Pentium® processor (Tj 100°C) up to 35W, providing excellent computing performance and thermal resistance. -
Page 8: Specifications
WLAN antenna supported (optional) The GOT321W-521 includes two Mini Card slots as an add-on option for connecting to a wireless LAN card under 802.11 a/b/g/n protocols or with other 4G/GPRS applications. These slots also come with three fixed rotational WLAN/WWAN antennas as optional components for wireless network connection. - Page 9 GOT321W-521 User’s Manual ⚫ Expansion ➢ 1 x Full-size PCI-Express Mini Card slot (PCIe + SATA + USB) ➢ 1 x M.2 Key E 2230 (for Wi-Fi) Power connector ⚫ 1x Phoenix power connector for DC power input ➢ System Specifications 21.5”...
-
Page 10: Dimensions And Outlines
GOT321W-521 User’s Manual Dimensions and Outlines The figures below show the dimensions and outlines of the GOT321W-521 panel PC. Front dimensions: 547.6(W) * 75.6(D) * 339.1(H) (mm) Figure 1-2: Outlines of the GOT321W-521 Introduction... - Page 11 GOT321W-521 User’s Manual Figure 1-3: Back outline of the GOT321W-521 Figure 1-4: Cut-out dimensions of the GOT321W-521 Cut-out dimensions: 534.2 x 325.7 mm The wall depth limit for panel mount is 9 mm. NOTE Introduction...
-
Page 12: I/O Outlets
GOT321W-521 User’s Manual I/O Outlets Please refer to figure 1-4 for the I/O locations of the GOT321W-521. Figure 1-4: Bottom view of the GOT321W-521 For reference Note. Note. Power button 2x USB3.0 Phoenix type power connector 2x RJ-45 for Giga Ethernet... -
Page 13: Packing List
GOT321W-521 User’s Manual Packing List A complete bundled package should contain the following items: GOT321W-521 unit x 1 ⚫ Phoenix connector (DC power version only) ⚫ Please contact an Axiomtek distributor immediately if any of the above-mentioned items is missing. Introduction... - Page 14 GOT321W-521 User’s Manual This page is intentionally left blank. Introduction...
-
Page 15: Section 2 Hardware Installation
SECTION 2 HARDWARE INSTALLATION The GOT321W-521 provides rich I/O ports and flexible expansion features for users to perform various tasks. This section provides detailed information on the hardware components of the panel PC as well as installation instructions, including the following subsections: Open Back Cover ⚫... -
Page 16: Jumper And Connector Settings
Figure 2-3: Definitions of pin settings Before applying power to GOT321W-521, please make sure all of the jumpers and connectors are in default positions, as listed in Table 2-1. -
Page 17: Auto Power On Jumper (Jp6)
GOT321W-521 User’s Manual Function Setting Normal operation (default) 1-2 closed Restore BIOS optimal defaults 2-3 closed 2.2.2 Auto Power On Jumper (JP6) If JP6 is enabled for power input, the system will be automatically power on without the need to press the soft power button. -
Page 18: Ethernet Connector
GOT321W-521 User’s Manual Ethernet Connector The GOT321W-521 has two RJ-45 connectors: LAN1 and LAN2. Ethernet connection can be established by plugging one end of the Ethernet cable into this RJ-45 connector and the other end (phone jack) into a 1000/100/10-Base-T hub. -
Page 19: Mounting The Panel Pc
To prevent accidental damage to the product or human injury when mounting the product, at least two people are required to perform WARNING the installation. The GOT321W-521 panel PC supports four types of mounting methods. Panel mount ⚫ Wall mount ⚫... - Page 20 GOT321W-521 User’s Manual Step 3 Locate the screwing holes and the positions of the hook brackets on the back side of the panel PC, as shown in the Figure 2-5. Figure 2-5: Panel mount dimensions (back chassis) Hardware and Installation...
-
Page 21: Wall Mount
Figure 2-6: Screwing the Panel PC firmly to the panel frame. 2.4.2 Wall Mount The GOT321W-521 can be mounted onto a wall using the wall mount bracket. Step 1 On the back chassis of the panel PC, locate the screwing holes for assembling the wall mount bracket, as shown in Figure 2-7. - Page 22 GOT321W-521 User’s Manual Step 2 Attach the wall mount bracket to the back of the panel PC by aligning the screwing openings on the top and bottom edges of the bracket with the screwing holes on the back chassis. Then screw the bracket firmly to the back of the panel PC, as illustrated in Figure 2-8.
-
Page 23: Vesa Arm Mount
GOT321W-521 User’s Manual 2.4.3 VESA Arm Mount Alternatively, the GOT321W-521 supports VESA arm mount by using a VESA arm kit attached to the back, allowing users to tilt or rotate the panel PC for best visibility. Refer to the following steps when adopting VESA arm mount for the panel PC. - Page 24 GOT321W-521 User’s Manual Hardware and Installation...
-
Page 25: Desktop Mount
GOT321W-521 User’s Manual 2.2.4 Desktop Mount Desktop mount is used to mount the GOT321W-521 on the desk using a desktop stand. After assembling the desktop mount kit to the back of the panel PC, users can mount the unit on the desk. -
Page 26: Hardware Installation
Hardware Installation 2.5.1 Installing an HDD The GOT321W-521 provides a convenient swappable Hard Disk Driver (HDD) bracket for users to install a 2.5” (supports 7mm & 9.5mm) wide temperature SATA HDD. Please follow the steps below to install the HDD: Step 1 Refer to Section 2.1 to open the back cover... -
Page 27: Installing Dram
GOT321W-521 User’s Manual 2.5.2 Installing DRAM The GOT321W-521 provides one 260-pin DDR4 2666/2440Mhz SO-DIMM socket that supports system memory up to 32GB. Please follow the steps below to install a memory module: Step 1 Refer to Section 2.1 to open the back cover. - Page 28 GOT321W-521 User’s Manual Hardware and Installation...
- Page 29 GOT321W-521 User’s Manual Figure 2-17: Thermal pad position of mainboard Figure 2-18: Installing a memory module Figure 2-19: Thermal pad position of back cover Hardware and Installation...
-
Page 30: Installing A Cpu
GOT321W-521 User’s Manual 2.5.3 Installing a CPU The main board’s CPU socket type supports the 8th/9th Gen Intel® Core™ processors up to 35W: Step 1 Opening the socket Disengage the load lever by pressing the lever down and pulling it slightly away by the ⚫... - Page 31 GOT321W-521 User’s Manual Prior to installing the processor, pay attention to the processor package’s orientation by ⚫ aligning the connection 1 indicator chamfers on the processor and the socket. Also make sure that the processor keying features (positioning notches) on both sides of the processor line up with the posts along the socket walls.
-
Page 32: Connecting The Power Input
NOTE 2.5.4 Connecting the Power Input The GOT321W-521 is equipped with a Phoenix type power connector which supports 12V/19V/24V DC. Please follow the signs on the power connector to connect to DC power source (see Figure 2-26 for reference). -
Page 33: Section 3 Ami Bios Setup Utility
GOT321W-521 User’s Manual SECTION 3 AMI BIOS SETUP UTILITY This section provides users with detailed descriptions about how to set up basic system configurations through the AMI BIOS setup utility. Starting To enter the setup screens, follow the steps below: Turn on the computer and press the <Del>... -
Page 34: Main Menu
GOT321W-521 User’s Manual Main Menu When you first enter the setup utility, you will enter the Main setup screen. You can always return to the Main setup screen by selecting the Main tab. System Time/Date can be set up as described below. -
Page 35: Advanced Menu
GOT321W-521 User’s Manual Advanced Menu The Advanced menu allows users to configure the CPU and other system devices. You can select any of the items in the left frame of the screen to go to the sub menus ► IT8625 Super IO Configuration ►... -
Page 36: It8625 Super Io Configuration
GOT321W-521 User’s Manual 3.4.1 IT8625 Super IO Configuration You can use this screen to select options for the Super IO Configuration, and change the value of the selected option. A description of the selected item appears on the right side of the screen. - Page 37 GOT321W-521 User’s Manual ⚫ Serial Port 2 Configuration Serial Port Enable or disable serial port 2. The optimal setting for base I/O address is 2F8h and for interrupt request address is IRQ3 AMI BIOS Setup Utility...
-
Page 38: Hardware Monitor
GOT321W-521 User’s Manual 3.4.2 Hardware Monitor This screen monitors and displays the hardware health status of the system in real time, including system and CPU temperatures, cooling fan speed in RPM and system voltages (VCC_CPU, +3.3V, +12V, +5V, +5V standby ,+3.3V standby and VBAT). -
Page 39: Trusted Computing
GOT321W-521 User’s Manual 3.4.3 Trusted Computing If the user install a security device, such as TPM, the system will show the following TPM device information and functions for specifying the TPM settings. Security Device Support Enable or disable BIOS support for the security device. OS will not show security device. TCG EFI protocol and INT1A interface will not be available. - Page 40 GOT321W-521 User’s Manual PTT: Intel ® built-in TPM. Pending operation Schedule an operation for the security device, as shown in the image below. None TPM Clear: Clear all data secured by TPM. AMI BIOS Setup Utility...
-
Page 41: Acpi Setting
GOT321W-521 User’s Manual 3.4.4 ACPI Setting ACPI Sleep State When the suspend button is pressed, the default ACPI (Advanced Configuration and Power Interface) sleep state is S3 (Suspend to RAM). AMI BIOS Setup Utility... -
Page 42: Cpu Configuration
GOT321W-521 User’s Manual 3.4.5 CPU Configuration Intel (VMX) Virtualization Technology Enable or disable Intel Virtualization Technology. When enabled, a VMM (Virtual Machine Mode) can utilize the additional hardware capabilities. It allows a platform to run multiple operating systems and applications independently, hence enabling a single computer system to work as several virtual systems. -
Page 43: Sata Configuration
GOT321W-521 User’s Manual Power Limitation Setting If the system power input is 12V DC, please enable the “Limited at 20W when 12V-DC” , the CPU TDP will be limited at 20W to avoid unexpected power off issues due to electric current overload. -
Page 44: Pch-Fw Configuration
GOT321W-521 User’s Manual SATA Mode Selection Use this function to determine how SATA controller(s) operate. 3.4.7 PCH-FW Configuration This screen displays ME Firmware information. AMI BIOS Setup Utility... -
Page 45: Usb Configuration
GOT321W-521 User’s Manual 3.4.8 USB Configuration Display all detected USB devices. Chipset Menu The Chipset menu allows users to change the advanced chipset settings. You can select any of the items in the left frame of the screen to go to the sub menus: ►... - Page 46 GOT321W-521 User’s Manual Graphics Configuration Select to open sub menu for parameters related to graphics configuration. Memory Configuration Select to open sub menu for information related to system memory. Graphics Configuration Primary IGFX Boot Display Select the video device which will be activated during POST (Power-On Self Test). The secondary boot display selection will appear based on your selection.
- Page 47 GOT321W-521 User’s Manual Secondary IGFX Boot Display After selecting other than “AUTO” on “Primary IGFX Boot Display”, the Secondary IGFX Boot Display will show up and its options are DP and HDMI. LVDS Control Enable or disable LVDS Control. When installing Linux OS and if DP, HDMI or VGA display is connected to your system, make sure to set this option to Disabled.
- Page 48 GOT321W-521 User’s Manual LVDS Panel Type The resolution of GOT321W-521 is fix on 1920 x 1080 48 bit. Brightness Setting This option appears only when LVDS panel is connected. It allows user to adjust the brightness level of the LVDS panel.
- Page 49 GOT321W-521 User’s Manual Memory Configuration This screen shows the system memory information. PCH-IO Configuration This screen allows you to set PCH parameters. PCH LAN Controller Enable or disable onboard PCH LAN controller. Wake on LAN Enable After enabling PCH LAN Controller, enable or disable integrated LAN to wake the system.
-
Page 50: Security Menu
GOT321W-521 User’s Manual Security Menu The Security menu allows users to change the security settings for the system. ⚫ Administrator Password Set administrator password. ⚫ User Password Set user password. Figure 3-15 Security Menu AMI BIOS Setup Utility... -
Page 51: Boot Menu
GOT321W-521 User’s Manual Boot Menu ⚫ Setup Prompt Timeout Number of seconds to wait for setup activation key. 65535(0xFFFF) means indefinite waiting. ⚫ Bootup NumLock State Use this item to select the power-on state for the keyboard NumLock. ⚫ Quiet Boot Select to display either POST output messages or a splash screen during boot-up. - Page 52 GOT321W-521 User’s Manual ⚫ Launch UEFI PXE OpROM policy Control the execution of UEFI PXE OpROM. When enabled, you may select I219, I211 or Disabled as PXE LAN port. ⚫ Boot Option Priorities These are settings for boot priority. Specify the boot device priority sequence from the available devices.
-
Page 53: Save & Exit Menu
GOT321W-521 User’s Manual Save & Exit Menu The Save & Exit menu allows users to load your system configuration with optimal or fail-safe default values. Figure 3-17 Save & Exit Menu ⚫ Save Changes and Exit When you have completed the system configuration changes, select this option to leave Setup and return to Main Menu. - Page 54 GOT321W-521 User’s Manual ⚫ Discard Changes Select this option to quit Setup without making any permanent changes to the system configuration. Select Discard Changes from the Save & Exit menu and press <Enter>. Select Yes to discard changes. ⚫ Restore Defaults It automatically sets all Setup options to a complete set of default settings when you select this option.
-
Page 55: Section 4 Driver And Installation
SECTION 4 DRIVER and INSTALLATION Operating System The GOT321W-521 is compatible with operating systems Windows 10 and Windows 10 IoT Enterprise. To facilitate the installation of system drivers, please carefully read the instructions in this section before any of such installation. -
Page 56: Touch Screen
GOT321W-521 User’s Manual Touch Screen The GOT321W-521 adopts a projected capacitive multi-touch screen of which specifications are listed below. The touch driver will be installed automatically to allow the user to operate the touch panel using two-finger touch functions on the Windows 10 and Windows 10 IoT Enterprise environments. -
Page 57: Appendix A Watchdog Timer
GOT321W-521 User’s Manual APPENDIX A WATCHDOG TIMER About Watchdog Timer Software stability is a major issue in most application. Some embedded systems are not watched by human for 24 hours. It is usually too slow to wait for someone to reboot when computer hangs. - Page 58 GOT321W-521 User’s Manual This page is intentionally left blank. Watchdog Timer...
-
Page 59: Appendix B Iamt Settings
GOT321W-521 User’s Manual APPENDIX B iAMT SETTINGS Utilizing built-in platform capabilities and popular third-party management and security applications, the Intel ® Active Management Technology (Intel ® iAMT) has significantly lowered a major barrier to IT management efficiency, helping IT professionals discover, repair and better protect their networked computing assets. - Page 60 GOT321W-521 User’s Manual You will be asked to change the password before setting ME. You must confirm your new password while revising. The new password must consist of eight characters, including at least: ⚫ One upper case ⚫ One lower case ⚫...
-
Page 61: Iamt Settings
GOT321W-521 User’s Manual B.3 iAMT Settings Select Intel® iAMT configuration and press <Enter>. Select Network Setup to configure iAMT. iAMT Settings... - Page 62 GOT321W-521 User’s Manual Select TCP/IP to enter the Network Setup menu. Select DHCP Mode and set it to Disabled. iAMT Settings...
- Page 63 GOT321W-521 User’s Manual If DHCP Mode is disabled, set the following settings: ⚫ IP address ⚫ Subnet mask Return to Intel ® iAMT Configuration, then select Activate Network Access and press <Enter>. Exit from MEBx after completing the iAMT settings.
-
Page 64: Iamt Web Console
GOT321W-521 User’s Manual B.4 iAMT Web Console On a web browser, type http://(IP ADDRESS):16992, which connects to iAMT Web. Example: http://10.1.40.214:16992 To log on, you will be required to type in your username and password for access to the Web. - Page 65 GOT321W-521 User’s Manual Enter the iAMT Web. Click Remote Control, and select commands on the right side. When you have finished using the iAMT Web console, close the Web browser. iAMT Settings...
- Page 66 GOT321W-521 User’s Manual This page is intentionally left blank. iAMT Settings...
Need help?
Do you have a question about the GOT321W-521 and is the answer not in the manual?
Questions and answers