Table of Contents
Advertisement
Quick Links
Advertisement
Table of Contents

Related Manuals for AXIOMTEK GOT-3150T


Summary of Contents for AXIOMTEK GOT-3150T
- Page 1 GOT-3150T/3150TL 15” XGA TFT Fanless PANEL PC User’s Manual...
- Page 2 AXIOMTEK assumes no responsibility for any inaccuracies that may be contained in this document. AXIOMTEK makes no commitment to update or to keep current the information contained in this manual. AXIOMTEK reserves the right to make improvements to this document and/or product at any time and without notice.
-
Page 3: Safety Approvals
Safety Approvals CE Marking FCC Class A FCC Compliance This equipment has been tested and complies with the limits for a Class A digital device, pursuant to Part 15 of the FCC Rules. These limits are designed to provide reasonable protection against harmful interference in a residential installation. -
Page 4: Safety Precautions
Safety Precautions Before getting started, read the following important cautions. 1. The GOT-3150T/3150TL not comes equipped with an operating system. An operating system must be loaded first before installing any software into the computer. 2. Be sure to ground yourself to prevent static charge when installing the internal components. - Page 5 Trademarks Acknowledgments AXIOMTEK is a trademark of AXIOMTEK Co., Ltd. IBM, PC/AT, PS/2, VGA are trademarks of International Business Machines Corporation. Intel and Pentium are trademarks of Intel Corporation. MS-DOS, Microsoft C and QuickBASIC are trademarks of Microsoft Corporation.
- Page 6 This page does not contain any information.
-
Page 7: Table Of Contents
Table of Contents Disclaimers..............ii Safety Approvals ............iii Safety Precautions ............iv CHAPTER 1 Introduction ..........1 1.1 General Description ..........1 1.2 Specifications ............2 1.2.1 Main CPU Board ............2 1.2.2 I/O System..............2 1.2.3 System Specification ..........3 1.3 Dimensions.............. -
Page 9: Chapter 1 Introduction
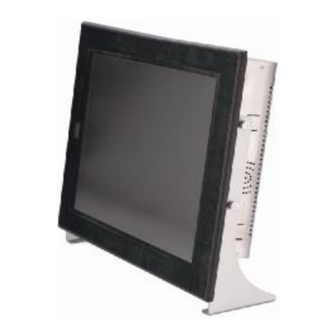
Dimensions Package List General Description The GOT-3150T is a fanless touch panel computer, and is equipped with a 15" XGA TFT LCD display and low power consumption CPU. The GOT-3150T supports Windows® XP, Windows® CE.NET, Windows® XP embedded. The panel is also able to install a MiniPCI module for extended wireless card and a CompactFlash™... -
Page 10: Specifications
Aluminum front bezel (GOT-3150T/3150TL) meets the IP65/NEMA4 standard. For connecting other devices, the GOT-3150T/3150TL also features several interfaces: USB, Ethernet, and RS-232/422/485. Wireless support- MiniPCI slot The GOT-3150T/3150TL offers a MiniPCI slot that allow for wireless application requirements. Specifications 1.2.1 Main CPU Board Intel®... -
Page 11: System Specification
GOT-3150T/3150TL User’s Manual n Ethernet: - Realtek RTL 8100C PCI Bus 10/100M Base-T - RJ-45 interface equipped Expansion Slot: - MiniPCI wireless module 1.2.3 System Specification 15” XGA TFT LCD Heat dispensing design One slot for MiniPCI Net weight: −... -
Page 12: Dimensions
GOT-3150T/3150TL User’s Manual Dimensions The following diagrams show the dimensions and outlines of GOT-3150T/3150TL. GOT-3150T/3150TL dimension 371.4 372.4 54.3 54.3 396.0 56.9 45.7 140.0 140.0 45.7 PANEL CUT-OUT DIM. 101.7 168.0 101.7 110.3 110.3... -
Page 13: I/O Outlets
GOT-3150T/3150TL User’s Manual I/O Outlets The following figure shows the I/O locations of the GOT-3150T. Most of the I/O connectors are located on the back panel of the GOT-3150T/3150TL. COM 2 COM 3 (USB) COM 2 COM 3 (USB) USB 2.0 USB 2.0... -
Page 14: Package List
GOT-3150T/3150TL User’s Manual Package List When you receive the GOT-3150T/3150TL there are following items in the package. If you can not find it, please contact AXIOMTEK distributors. 1. GOT-3150T/3150TL x 1 2. CD driver x1 3. Panel mount kit x 6 4. -
Page 15: Chapter 2 Hardware Installation
GOT-3150T/3150TL User’s Manual CHAPTER 2 Hardware Installation The GOT-3150T/3150TL provides lots of flexible ways for you to select different configuration such as HDD,(recommend adopt wide temperature HDD in harsh environment) CF card and more. The chapter will show you how to install the hardware. It includes:... - Page 16 GOT-3150T/3150TL User’s Manual 3. Fix the HDD kit to system by 4 screws and connect IDE cable.
-
Page 17: Cf Card Installation
GOT-3150T/3150TL User’s Manual CF Card Installation The GOT-3150T/3150TL offers a solution for users to install CF card. When installing the CF card, refer to the following instructions and illustration: 1. Take apart GOT-3150T/3150TL and find SBC board (EP810) from system and turn it to back side. -
Page 18: Memory Installation
GOT-3150T/3150TL User’s Manual Memory Installation The GOT-3150T/3150TL offers a solution for customer to upgrade its memory. When installing the memory, refer to the following instructions and illustration: Take apart GOT-3150T/3150TL and find SBC board (EP810) from system and turn it to back side. -
Page 19: Minipci Wireless Card Installation
GOT-3150T/3150TL User’s Manual MiniPCI Wireless Card Installation The GOT-3150T/3150TL provides one MiniPCI slot for wireless module.(Default Wireless module:AX92203 ) When installing the wireless card, refer to the following instructions and illustration: 1. Find SBC board (EP810). - Page 20 GOT-3150T/3150TL User’s Manual 2. Install user’s Wireless card. 3. Assembly SBC board back into GOT-3150T/3150TL.
-
Page 21: Serial Ports
GOT-3150T/3150TL User’s Manual Serial Ports COM Port Connector: COM1 The connector, COM 1, is a DB-9 connector, and the following table shows the pin assignments of this connector. Signal Name DCD, Data carrier detect RXD, Receive data COM1 TXD, Transmit data... - Page 22 GOT-3150T/3150TL User’s Manual The RS-422/485 pin assignments for COM2 are listed below. Signal Name Pin # R2-422 RS-485 DATA- No connector No connector DATA+ No connector No connector No connector No connector No connector No connector No connector No connector...
-
Page 23: Vga
GOT-3150T/3150TL User’s Manual The GOT-3150T/3150TL has an analog RGB interface connector. It is able to connect to an expansion CRT monitor, and the system can display on both the flat panel and the CRT simultaneously. Ethernet Ethernet RJ-45 Connector: LAN1... -
Page 24: Mountings: Panel / Wall / Desktop / Vesa
Mountings: Panel / Wall / Desktop / VESA There are 4 application options for the GOT-3150T/3150TL, Panel/Wall/Desktop/VESA mountings. 2.8.1 VESA-ARM/Wall-Mount The GOT-3150T/3150TL provides two ways for VESA mount: 75x75 mm and 100x100 mm. Screw six screws to fix the kit (optional) in the back chassis. -
Page 25: Desktop Kit Assembly
4 screws to fix the kit (Optional) in the side chassis. 2.8.3 Panel-mount Kit Assembly The GOT-3150T/3150TL is designed for panel mount application. To mount the GOT-3150T/3150TL, the standard set of mounting kit (included in the system packaging) is needed. -
Page 26: Chapter 3 Driver Installation
GOT-3150T/3150TL User’s Manual CHAPTER 3 Driver Installation GOT-3150T/3150TL could support with Windows XP. To facilitate installation system driver, you should read the instructions in this chapter carefully before you attempt installation. Insert Driver CD and select the “\Driver\EP810” or “\Driver\EP820”. -
Page 27: Driver Installation- Windows Xp
-10℃ ~ 60℃ Humidity less than 85% RH Operating Temperature: 3.1.1 Driver Installation- Windows XP The touch screen of GOT-3150T/3150TL provides a driver for use with Windows XP. To facilitate installation of the touch screen driver, you should read the instructions in this chapter carefully before you attempt installation. - Page 28 GOT-3150T/3150TL User’s Manual Calibration: To adjust the display with touch panel, click “Calibration” and follow the calibrate point to do calibration; there are five points on screen for calibration. Press OK.
-
Page 29: Embedded O.s
Onboard audio Audio Touch Screen PenMount Touch screen GOT-3150T/3150TL has Penmount touch screen on USB. Before you can use and calibrate it, you should : 1. Set up Penmount touch device driver by executing c:\Program Files\Penmount USB\Install.exe. When installation finished, an icon “PM” appears on Taskbar . - Page 30 GOT-3150T/3150TL User’s Manual IDE HDD PS2 Keyboard and mouse CRT/LCD display 10/100 base-T Ethernet Compact flash Onboard audio Audio Touch Screen Calibration Touch Screen In this image we add PenMount Touch drivers and utilities. It is customized for 1024x768. Calibration: 1.
Need help?
Do you have a question about the GOT-3150T and is the answer not in the manual?
Questions and answers