Seca mVSA 535 Instructions For Use Manual
Hide thumbs
Also See for mVSA 535:
- Instructions for use manual (194 pages) ,
- Quick start manual (9 pages) ,
- Instructions for use manual (160 pages)

Related Manuals for Seca mVSA 535


Summary of Contents for Seca mVSA 535
- Page 1 535 Instructions for use Software version 2.0 from Build 1444 Art no: 17-10-05-368-002c_12-2021 B...
-
Page 2: Table Of Contents
Exporting a seca patient file ... . . 39 seca patient files ..... . . 7 Deleting a seca patient file . - Page 3 13. Optional accessories and spare parts ..101 14. Compatible seca products....102 15. Disposal ....... . . 103 15.1 Device .
- Page 4 Definition of mandatory fields ... 147 seca mVSA 535 ......105 Language selection.
-
Page 5: Instructions For Use For Seca Mvsa 535 • 5
Indicates areas on the display which require particular attention Indicates directions in overview graphics Correct handling method Correct handling result Incorrect handling method Incorrect handling result Instructions for use for seca mVSA 535 • 5... -
Page 6: Description Of Device
535 software accessory for reception from and data transfer to external Hospital Information Systems. lf used in conjunction with seca medical weight and height measurement devices the can receive and display weight and height values. seca mVSA 535 2.2 Restrictions on use of seca mVSA 535... -
Page 7: Device Components
In stand-alone mode, measured results are managed in seca patient files. seca patient files can be set up, edited, exported and deleted directly on the device. Patient data from EMR systems... -
Page 8: Data Transmission And Network Functions
• Connection of the device to the software available as seca connect 103 an option: Using the user and patient data of an EMR system and submitting measured results to the EMR system •... -
Page 9: Safety Precautions
English 3. SAFETY PRECAUTIONS ➔ Terms and definitions ➔ Safety precautions in these instructions for use ➔ Basic safety precautions 3.1 Terms and definitions Term Definition The use of this device is focused on but not limited to a medical environment. To keep Patient wording concise a person being measured with this device is referred to as „patient“. -
Page 10: Basic Safety Precautions
Only have ser- vicing and repairs performed by an authorized seca Service partner. You can find service partners in your area at www.seca.com or by sending an e-mail to service@seca.com. -
Page 11: Handling A Wheeled Stand
1 meter away to prevent incorrect measurements or wireless transmission interference. ► The actual transmission output of HF equipment may require mini- mum distances of more than 1 meter. Details can be found at www.seca.com. Handling a wheeled stand WARNING! Injury from falling, damage to device ►... -
Page 12: Preventing Damage To Device
Some devices offer the ability to display measuring results in other units. This is only an additional function. ► Use the results exclusively in SI units. ► The use of measuring results in non-SI units is the sole responsibility of the user. 12 • seca mVSA 535... -
Page 13: Handling Packaging Material
Inconsistent measuring results ► Before you electronically save measured values determined using this device and use them further (e.g. in seca software or in an EMR system), make sure that the measured values are plausible. ► If measured values are transmitted to seca software or an EMR sys- tem, make sure prior to further use that the measured values are plausible and are assigned to the correct patient. -
Page 14: Device Overview
4. DEVICE OVERVIEW ➔ Monitor controls for seca mVSA 535 ➔ Fields in the touchscreen display ➔ Login/navigation: Keys and symbols in the touchscreen display ➔ Operating state: Symbols ➔ Measuring: Keys and symbols ➔ Unsubmitted measurements list: Symbols ➔... -
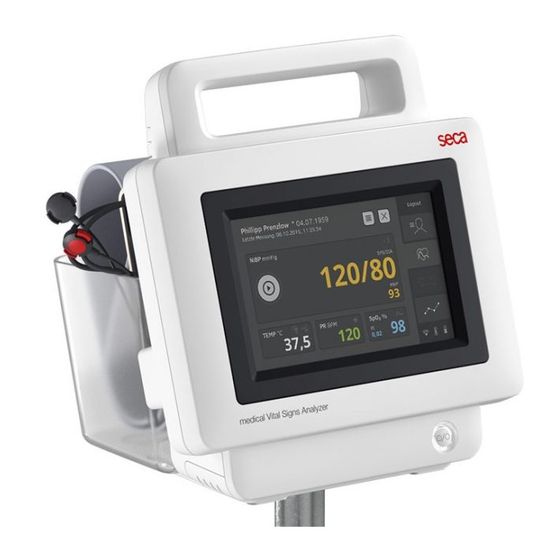
Page 15: Monitor Controls For Seca Mvsa 535
English 4.1 Monitor controls for seca mVSA 535 NOTE This section shows product versions. The functional scope of your device may deviate from this. 7 8 9 10 Control Function Handle Transporting the device Touchscreen display Central control/display element LED white: Device on... - Page 16 Power supply and data transmission between monitor and SmartBucket connector For SpO sensor Holder Connection for SpO Masimo SET patient cables and sensors ® measurement Connection for blood pressure For seca blood pressure cuffs measurement Power supply socket For connecting the power supply cable 16 • seca mVSA 535...
-
Page 17: Fields In The Touchscreen Display
English 4.2 Fields in the touchscreen display Login/logout Status/error field messages Side navigation Tab contents Battery charge status/ connection status Bottom navigation bar 4.3 Login/navigation: Keys and symbols in the touchscreen display Key/symbol Meaning Patient tab Vital signs tab Clinical observations tab Analysis tab Open instructions for use Instructions for use: Return to section... -
Page 18: Operating State: Symbols
Operating state: Symbols in the touchscreen display Symbol Operating state Monitor: Controls permanently on: Rechargeable battery charge status (%) Controls flashing: Rechargeable battery charging Monitor: Controls permanently on: Rechargeable battery full Controls flashing consecutively: Rechargeable battery charging Monitor: Rechargeable battery discharged 18 • seca mVSA 535... - Page 19 English Symbol Operating state LAN connection set up: on/off WiFi connection set up: on/off ()EMR: seca connect 103 connection active (EMR): seca connect 103 connection interrupted Pop-up window: Information for the user Pop-up window: Error message Pop-up window: Setting option for the user...
-
Page 20: Measuring: Keys And Symbols
Search for seca patient file Switch sorting direction Edit seca patient file Export seca patient file Delete seca patient file Adopt value from previous measurement Close seca patient file, changes will not be saved Vital signs tab Key/symbol Meaning NIBP... -
Page 21: Clinical Observations Tab
English Key/symbol Meaning Blood pressure: Upward measurement, downward measurement Blood pressure: Single measurement, multiple measurement TEMP Temperature Temperature measuring mode: Predictive, direct Manual measured value input COVIDIEN FILAC 3000 temperature probe Measuring position: Oral, axillary, rectal Pulse rate Measuring range for pulse rate: Default, extended Oxygen saturation in % Devices with Masimo SET... -
Page 22: Analysis Tab
Meaning Clinical observations Weight (W) Height (H) Body mass index (BMI) Pulse rate (PR) Blood pressure (NIBP) Oxygen saturation (SpO Temperature (Temp) Blue marking: Mean value Yellow marking (when connected to EMR system): Unconfirmed offline measurement 22 • seca mVSA 535... -
Page 23: Markings On The Device And On The Type Plate
English 4.7 Markings on the device and on the type plate Text/symbol Meaning Name and address of manufacturer, date of manufacture Model number Serial number, consecutive Product identification number, consecutive ProdID Variant number Mat.No. Warning: Federal (U.S.A.) law restricts this device to sale by or on the order of a licensed health care practitioner Follow Instructions for Use... - Page 24 Text/symbol Meaning ON/OFF key Inductive charging interface LAN interface USB interface NIBP Connection of blood pressure cuff TEMP Connection of temperature sensor Connection of SpO sensor Do not dispose of device with household waste 24 • seca mVSA 535...
-
Page 25: Markings On The Blood Pressure Cuff
English 4.8 Markings on the blood pressure cuff Text/symbol Meaning Follow instructions for use Cuff size (here: L) Cuff suitable for specified arm size Artery position: These arrows must be on the brachial or femoral artery when blood pressure cuff is put on. Cuff end: These markings must be within the adjustment range when closing the blood pressure cuff. -
Page 26: Markings On The Packaging
Small parts present a danger of suffocation if swallowed. Keep out of sunlight Only use indoors Non-ionizing radiation DEHP-free Latex-free Not resistant to magnetic resonance Do not use if packaging damaged Lot number Person with authority in the EU 26 • seca mVSA 535... -
Page 27: Starting Up The Device
5.1 Scope of delivery NOTE This section shows version 535-1210-131 by way of an example. The scope of delivery of your device may deviate from this. An overview of versions can be found at www.seca.com seca mVSA QUICK START Standard scope of delivery Pcs. -
Page 28: Setting Up Device
► Always keep the SmartBucket connected to the USB interface. ► Only connect accessories, for example a USB memory stick, to the other USB interface. ► Connect the USB cable of the SmartBucket to a free USB port of the monitor. 28 • seca mVSA 535... -
Page 29: Connecting The Blood Pressure Cuff
English Connecting the blood pressure cuff 1. Connect the tube coupling for the blood pressure cuff to the compressed air connection of the device until you hear the tube coupling engage. => => Click! 2. Stow the blood pressure cuff in the SmartBucketas shown in the illustration below. -
Page 30: Connecting The Masimo Set ® Spo 2 Sensor
SpO sensor. 5.3 Establishing a power supply 1. Plug the device connector of the power supply cable into the connecting socket of the device. 2. Plug the power supply connector into a power supply socket. 30 • seca mVSA 535... -
Page 31: Charging Rechargeable Battery
English 5.4 Charging rechargeable battery Before starting up the device for the first time, the rechargeable battery for the monitor must be fully charged. 1. Connect the device to the power supply ➔ Establishing a power supply. 2. Press the ON/OFF key of the monitor. The LED of the ON/OFF key is white. -
Page 32: Initial Login
► Perform measurements using the power supply: ➔ Operation ► Configure device using the power supply: ➔ For administrators: Configuring seca mVSA 535 5.6 Initial login The following user accounts are available on the device initially: • admin: Configure and manage device •... -
Page 33: Operation
Logging in Logging in You must log in to the device if you want to do one of the following: • Assign vital signs measurement to a seca patient file • Analyze measured results • Manage the system Operation • 33... -
Page 34: Logging Out/Switching User
4. Press the input field. 5. Enter your password using the keypad The Patient tab is displayed. 6. Continue with ➔ Managing seca patient files. Logging out/switching user ► Press the Logout key. You will be logged out. The login window is displayed. -
Page 35: Saving Power/Switching Off
English Saving power/switching off 1. Briefly press the ON/OFF key of the monitor. 2. The Save energy dialog window appears. 3. Select an option in accordance with the table: NOTE The device automatically switches to standby/shuts down if it is not used for an extended period (phased by idle time) Idle time key Device behavior... -
Page 36: Managing Seca Patient Files
6.2 Managing seca patient files ➔ Creating a seca patient file ➔ Calling up a seca patient file ➔ Editing a seca patient file ➔ Exporting a seca patient file ➔ Deleting a seca patient file Creating a seca patient file 1. - Page 37 If you do not edit the ID input field, the device saves the automatically-generated patient ID. 8. Press the Save key. The seca patient file has been created and is displayed. You have the following options for continuing: ► Measure vital signs: ➔...
-
Page 38: Calling Up A Seca Patient File
3. Select a seca patient file: ► Desired entry not visible: Continue at step 4. ► Desired entry visible: Continue at step 5. 4. Search for the desired seca patient file in the list: a) Press the input field b) Use the keypad... -
Page 39: Exporting A Seca Patient File
English Exporting a seca patient file 1. Connect a USB memory stick to the monitor. 2. Call up a seca patient file ➔ Calling up a seca patient file. 3. Press the key. A confirmation dialog opens. 4. Press the Confirm key. -
Page 40: Measuring Vital Signs
Alternatively, a patient’s vital signs can also be entered manually ➔ Entering vital signs manually. Weight and height can be recorded by compatible seca measuring devices or entered manually: ➔ Adding weight and height. 40 •... -
Page 41: Measuring Blood Pressure
English Measuring blood pressure ➔ Preparing the blood pressure measurement ➔ Starting a single measurement ➔ Performing a multiple measurement ➔ Modifying presets WARNING! Hazard to patient ► Do not use luer lock adapter on the blood pressure measurement tubes. The use of luer lock adapters can lead to accidental connec- tion of the blood pressure tubes to intravenous lines and thus lead to an infusion of air into the bloodstream of the patient. - Page 42 ► Inflating the blood pressure cuff may lead to occasional malfunc- tions of other medical electrical devices used on the same limb. ► Use only blood pressure cuffs from seca. ► Before every measurement, ensure that the blood pressure mea- surement tubes and connections are free of damage and airtight.
- Page 43 English NOTE Get the patient to sit quietly for 5 minutes before recording measured values. The patient should remain relaxed and not talk during the measurement. You have the following options for continuing: ► ➔ Starting a single measurement ► ➔ Performing a multiple measurement NOTE Your administrator will specify whether Single measurement or Multi-...
- Page 44 ► Put a tick against the part-measurements to be used for calculating the mean (example:) ► Click Confirm Average blood pressure is displayed. You have the following options for continuing: ► Measure more vital signs ➔ Measuring vital signs ► Stop the measurement ➔ Stopping a measurement 44 • seca mVSA 535...
- Page 45 English NOTE • Use the Start key to interrupt and continue the mean measurement or to cancel and re-start it. • If upward measurement does not deliver a measured value, the device automatically switches to downward measurement. • If necessary, the device re-pumps several times during the down- ward measurement (re-pumping: Increasing cuff pressure by approx.
-
Page 46: Measuring Temperature, Oral/Axillary (Covidien Tm Filac Tm 3000, Blue)
► For axillary temperature measurements, ensure that the tempera- ture probe, with probe cover, makes direct contact with the skin of the patient and does not come into contact with clothing or other objects. 46 • seca mVSA 535... - Page 47 English Starting an oral/axillary temperature measurement 1. Remove the temperature probe (blue) from the probe holder (blue). 2. Pick up a probe cover: Click! a) Insert the probe in a probe cover in the pack b) Allow the probe cover to engage audibly with the probe c) Remove probe and probe cover from the pack d) Ensure that the probe cover is undamaged 3.
- Page 48 • Axillary 5. Press the Confirm key. The dialog window closes. Changed settings are adopted for the current measurement. 6. Perform a temperature measurement as described in the section entitled ➔ Starting an oral/axillary temperature measurement. 48 • seca mVSA 535...
-
Page 49: Measuring Temperature, Rectal (Covidien Tm Filac Tm 3000 Red)
English Measuring temperature, rectal ➔ (COVIDIEN FILAC 3000 red) Starting a rectal temperature measurement ➔ Modifying presets WARNING! Patient hazard, incorrect measurement ► The decision to use this device with children, pregnant or lactating patients is the responsibility of the user. ►... - Page 50 5. Discard the probe cover and dispose of it in line with your institution’s policy. Press! NOTE You can only perform a further temperature measurement if you dis- card the probe cover and push the temperature probe back into the probe holder completely. 50 • seca mVSA 535...
- Page 51 English 6. Push the temperature probe into the probe holder completely. => You have the following options for continuing: ► Measure further vital signs ➔ Measuring vital signs ► Stop the measurement ➔ Stopping a measurement Modifying presets NOTE Your settings apply to the current measurement procedure. If you stop the measurement ➔...
-
Page 52: Reading Off Pulse Rate
Interrogating pulse rate source 1. Press the PR field. The PR settings dialog window opens. The source of the pulse rate (NIBP or SpO ) is displayed. 2. Press the Confirm key. The dialog window closes. 52 • seca mVSA 535... -
Page 53: Measuring Oxygen Saturation (Spo 2 )
English Measuring oxygen saturation (SpO ➔ Starting an SpO measurement ➔ Modifying presets WARNING! Patient hazard, incorrect measurement ► The device has no alarm function. Never leave the patient unobserved during a measurement. ► The pulse oximeter is not an apnea monitoring device. ►... - Page 54 Patient hazard, damage to device ® ► For devices equipped with Masimo SET measurement equipment, only use Masimo sensors and patient cables. ► For devices equipped with seca SpO measurement equipment, only use seca sensors and patient cables. 54 • seca mVSA 535...
- Page 55 English CAUTION! Patient hazard, incorrect measurement ► Do not use damaged sensors or damaged patient cables, for example with exposed optics. ► Do not place the pulse oximeter where the controls can be changed by the patient. ► Electrical shock and flammability hazard: Before cleaning, always turn off the device and disconnect from any power source.
- Page 56 If your device is equipped with Masimo SET pulse oximetry, perfu- ® sion index (PI) is displayed in addition to oxygen saturation. This helps you assess perfusion at the measurement point and to find a better measurement point if necessary. 56 • seca mVSA 535...
-
Page 57: Weight And Height
English Modifying presets NOTE Your settings apply to the current measurement procedure. If you stop the measurement ➔ Stopping a measurement, the presets defined by the administrator become active again. 1. Ensure that no SpO sensor has been applied to the patient. 2. -
Page 58: Stopping A Measurement
► Stop the current measurement before you start a new one. You have the following options: ► Press the key: Save measurement ► Assign anonymous measurement to a seca patient file: ➔ Assigning anonymous measurement to a seca patient file ► Press the... -
Page 59: Adding Weight And Height
Example display: Beispiel-Darstellung: seca 285 measuring station with seca 452 interface module and Messstation seca 285 mit Interface-Modul seca 452 und seca mVSA 535 seca mVSA 535 1. If you have not yet done so, call up a patient file: ➔... -
Page 60: Entering Weight And Height Manually
3. Submit the measured values as described in the instructions for use for the measuring device. The values appear on in the Weight and Height fields seca mVSA 535 (here: Vital signs tab): You have the following options for continuing: ► Measure more vital signs ➔... -
Page 61: Entering Vital Signs Manually
1. Measure blood pressure as described in the instructions for use for your blood pressure measuring device. 2. Call up a patient file ➔ Calling up a seca patient file. 3. In the Vital signs tab, keep the NIBP field depressed for at least three... -
Page 62: Entering Temperature Manually
1. Measure body temperature as described in the instructions for use for your thermometer. 2. Call up a patient file ➔ Calling up a seca patient file. 3. In the Vital signs tab, keep the TEMP field depressed for at least three... -
Page 63: Entering Pulse Rate Manually
1. Measure pulse rate as described in the instructions for use for your pulse rate measuring device. 2. Call up a patient file ➔ Calling up a seca patient file. 3. In the Vital signs tab, keep the PR field depressed for at least three seconds: Operation •... -
Page 64: Entering Oxygen Saturation Manually
1. Measure oxygen saturation as described in the instructions for use for your oxygen saturation measuring device. 2. Call up a patient file ➔ Calling up a seca patient file. 3. In the Vital signs tab, keep the SpO field depressed for at least three seconds: 64 •... - Page 65 English 4. A numerical keypad appears: 5. Enter the oxygen saturation: a) Enter the value b) Press the key: Confirm entry The value entered appears in the SpO field of the Vital signs tab. The symbol for manual input of measured values is displayed above the measured value.
-
Page 66: Analyzing Measurement
Analyzing vital signs (history) NOTE • In order to be able to view analyses, you must assign the current measurement to a seca patient file ➔ Stopping a measurement call up a seca patient file ➔ Calling up a seca patient file. -
Page 67: Analyzing Vital Signs (History)
English Analyzing vital signs (history) To view the history of an analysis parameter, proceed as follows: 1. Call up a parameter overview ➔ Viewing current measured results. 2. Press the parameter whose history you wish to view. All measurements for the selected analysis parameter are displayed. The latest measurement is selected automatically: You have the following navigation options: ►... - Page 68 The history is displayed (in this case three measurements) You have the following navigation options: ► Press the key: Select other values for history ► Press the keys: View more analysis parameters ► Press the key: Return to the previous view 68 • seca mVSA 535...
-
Page 69: Operation When Connected To An Emr System
English 7. OPERATION WHEN CONNECTED TO AN EMR SYSTEM ➔ Switching on the device ➔ Measuring ➔ Logging in with EMR system user ID ➔ Calling up patient data from the EMR system ➔ Saving measurements in the EMR system ➔... -
Page 70: Measuring
EMR system. The measurements are temporarily saved on the device and can be submitted as soon as the connection to the EMR system is active again. To perform a measurement with an interrupted connection to an EMR system, proceed as follows: 70 • seca mVSA 535... - Page 71 English 1. Log yourself in: a) Scan EMR system user ID b) Confirm status message The User ID not verfied message appears: NOTE If you are not sure if this function is enabled, contact your administrator. 2. Call up a patient file: a) Scan patient ID b) Confirm status message The patient ID is displayed:...
-
Page 72: Logging In With Emr System User Id
Your EMR system user ID is displayed in the input field. 3. Enter your EMR system password. The Patient tab is displayed. You can call up patient data from the EMR system ➔ Calling up patient data from the EMR system. 72 • seca mVSA 535... -
Page 73: Calling Up Patient Data From The Emr System
English 7.4 Calling up patient data from the EMR system You have the following options for calling up patient data from the EMR system: ➔ Scanning patient ID (recommended) ➔ Manually entering patient ID Scanning patient ID (recommended) If you logged in from the Vital signs tab using a scanner (➔ Logging in with EMR system user ID), the Vital signs tab continues to be shown after login:... -
Page 74: Manually Entering Patient Id
The patient data are shown in the Patient information dialog window. 3. Ensure that the patient data displayed are correct. 4. Press the key. The patient data are transmitted to the device and displayed in the Vital signs tab. 74 • seca mVSA 535... -
Page 75: Saving Measurements In The Emr System
English 7.5 Saving measurements in the EMR system ➔ Submitting the measurement directly to the EMR system ➔ Saving measurement temporarily and submitting it later ➔ Using the Unsubmitted measurements list Submitting the measurement To submit a measurement directly to the EMR system, proceed as follows: directly to the EMR system 1. -
Page 76: Using The Unsubmitted Measurements List
2. Ensure that the Patient and Vital signs tabs are active. 3. Press the key. The Unsubmitted measurements list is displayed: NOTE Measurements marked yellow (offline measurement) contain uncon- firmed patient data - because the connection to the EMR system was interrupted, for example. 76 • seca mVSA 535... - Page 77 English Confirming offline measurement (EMR system connection) Measurements marked yellow (offline measurement) contain unconfirmed patient data - because the connection to the EMR system was interrupted during patient/user identification, for example. These measurements have to be confirmed before you can view details or submit the measurement to your EMR system.
- Page 78 • Only confirmed measurements are submitted ➔ Confirming offline measurement (EMR system connection). • In the EMR system, measurements from the Unsubmitted mea- surements list are assigned to the user who submitted them, not to the user who performed them. 78 • seca mVSA 535...
- Page 79 English Deleting a measurement 1. Press the checkboxes of the measurements to be deleted: 2. Press the key. The selected measurements are deleted. Operation when connected to an EMR system • 79...
-
Page 80: Recording Clinical Observations
You can enter clinical observations without login and without patient identifi- cation. We recommend calling up a patient file ➔ Calling up a seca patient file before making your entry. Clinical observations can be submitted to the EMR system together with other vital signs in the Vital signs tab. - Page 81 English 3. Press the parameter for which you would like to enter or amend an observation. You have the following options for input depending on configuration: ► Free text ► Numerical value ► Simple selection via option field (example): 4. Enter the observation. You have the following options for continuing: ►...
-
Page 82: Hygiene Treatment
► Do not use caustic or abrasive detergents. ► Do not use organic solvents (e.g. white spirit or petroleum spirit). ► Use disinfectants including the active ingredient 70 % isopropanol only for measuring accessories for measuring vital signs. 82 • seca mVSA 535... -
Page 83: Cleaning
Cleaning 1. Remove all the measuring accessories (measuring devices and consumables) from the device (depending on version) : Monitor with seca mVSA 535 As required • ➔ Removing the probe holder SmartBucket 2. Moisten a soft cloth with a soap solution 3. -
Page 84: Disinfecting
1. Remove all the measuring accessories (measuring devices and consumables) from the device (depending on version): : Monitor with • ➔ seca mVSA 535 Removing the probe holder As required SmartBucket 2. Moisten a soft cloth with disinfectant (active ingredient: quaternary ammonium compounds) 3. -
Page 85: Removing The Probe Holder
English Removing the probe holder 1. Open the covering cap. 2. Remove the probe holder. Press! Fitting the probe holder 1. Insert the probe holder in the SmartBucket as shown in the illustration below. Click! 2. Close the cover cap until you hear it engage. Hygiene treatment •... -
Page 86: Function Check
“Troubleshoot- ing” in this document, you may not use the device. ► Have the device repaired by seca Service or by an authorized ser- vice partner. ► Follow the section entitled “Servicing” in this document. -
Page 87: Troubleshooting
English 11.TROUBLESHOOTING ➔ Monitor ➔ Vital signs measurement ➔ Network connection ➔ EMR system connection via seca connect 103 software ➔ Clinical observations ➔ seca 360°proximity connection 11.1 Monitor Fault Cause Remedy No power supply Provide power supply Monitor cannot be... -
Page 88: Vital Signs Measurement
• Restart the device is being seca mVSA 535 operated on a wheeled • Original seca USB connecting cable • Use original seca USB connecting cable stand: Measured results not being used (in scope of delivery for the wheeled stand) for vital signs are •... -
Page 89: Covidien Tm Filac Tm 3000 Temperature Measurement
English COVIDIEN FILAC 3000 temperature measurement Fault Cause Remedy Administrator: No temperature Temperature module of the Activate temperature module: measurement possible SmartBucket not activated System\SmartBucket tab • Assess patient vital signs using alternative Special patient condition, such as means hypothermia •... -
Page 90: Network Connection
Distance between monitor and WiFi No WiFi connection • Transmit measured results to router is too big software via LAN seca connect 103 Transmit measured results to WiFi not available in your institution software via LAN seca connect 103 Administrator: Enable required ports in firewall ➔... -
Page 91: Emr System Connection Via Seca Connect 103 Software
English 11.4 EMR system connection via seca connect 103 software For more information on using the software, see the seca connect 103 seca 103/452 system instructions for use. Fault Cause Remedy Administrator: Data transmission cannot Use a compatible version of the... -
Page 92: Clinical Observations
103 (default: 22020) ➔ Setting up a connec- tion to the seca connect 103 software • Follow seca 103/452 system instructions for use No measurement has yet been Perform measurement as described in the... -
Page 93: Technical Data
➔ Analysis parameters ➔ Analysis modules ➔ Standards and directives 12.1 Monitor Dimensions, weights Monitor with SmartBucket ( seca mVSA 535 Dimensions, empty ( for temperature probe) seca mVSA 535 • Depth 278 mm • Width 254 mm • Height 262 mm Net weight ( approx. -
Page 94: Monitor Interfaces And Network Ports
Up to 72.2 Mbps – Manual network configuration required if connection is Network configuration DHCP to be made to software or via seca connect 103 seca 360° proximity Firewall/ Connect port: 22020 No connection to software seca connect 103 ports to be opened... -
Page 95: Vital Signs Measurement
➔ Masimo SET measurement ® ➔ Manual input of vital signs Blood pressure measurement seca blood pressure module • Oscillometric • Possible to switch between upward and downward measurement Measuring method • Single measurement • Multiple measurement can be config- ured: Max. -
Page 96: Covidien Tm Filac Tm 3000 Temperature Measurement
IEC 60601-1: Medical electrical device, type BF (defibrillation-protected) COVIDIEN FILAC 3000 temperature measurement COVIDIEN FILAC 3000 temperature module Measurement modes Direct, predictive Measuring position: Blue probes Oral, axillary Red probes Rectal Measuring range • Direct mode 30 °C - 43 °C (86 °F - 109,4 °F) -
Page 97: Masimo Set Spo Measurement
English Masimo SET measurement General technical data ® a b c d e f g Masimo SET module ® Measurement Functional oxygen saturation Measuring method Spectrophotometry (red/infrared) LED wavelength: 660 nm Infrared 905 nm Maximum light output 15 mW This information may be of particular interest to clinicians Measuring time: •... -
Page 98: Manual Input Of Vital Signs
25 mmHg - 280 mmHg • Diastolic BP 10 mmHg - 220 mmHg Pulse rate 25 min - 240 min Temperature 32 °C - 44 °C (89,6 °F - 111,2 °F) 0 % - 100 % 98 • seca mVSA 535... -
Page 99: Analysis Parameters
English 12.4 Analysis parameters NOTE These instructions for use describe the maximal available functional scope of the device. The actual functional scope of your device may be less than this. Analysis parameter Display Analysis module Body mass index (BMI) Absolute in kg/m Development/growth Weight (W) Absolute in kg... -
Page 100: Analysis Modules
Supports the monitoring of weight changes • Height • Body mass index (BMI) • Blood pressure (NIBP) • Body temperature (TEMP) Vital signs Overview of vital signs to support a diagnosis • Pulse rate (PR) • Oxygen saturation (SpO 100 • seca mVSA 535... -
Page 101: Standards And Directives
475-05-35-009 seca 475 seca mVSA 535 carry case 432-00-00-009 seca 432 Scanner (medical device): • Honeywell Xenon 1900H (2D) Cannot be ordered through seca • Datalogic Gryphon I (GD4430 HC (2D)) Optional accessories and spare parts • 101... -
Page 102: Compatible Seca Products
959 Yes, with accessories (7021092) www.seca.com seca 959 seca 963 a.seca 452 external interface module (firmware version R1.3 Build 79 or higher) required b.seca 452 external interface module can only be retrofitted by authorized service technicians 102 • seca mVSA 535... -
Page 103: Disposal
The warranty shall become null and void where the device is opened by per- sons not expressly authorised to do so by seca. In the event of a warranty issue, please contact your local seca office or the dealer from whom you ordered the product. -
Page 104: Declaration Of Conformity
• This device must accept any interference received, including interference that may cause undesired operation. NOTE Changes or modifications made to this equipment not expressly approved by seca may void the FCC authorization to operate this equipment. NOTE Radiofrequency radiation exposure information: This equipment complies with FCC radiation exposure limits set forth for an uncontrolled environment. -
Page 105: For Administrators: Configuring
➔ Configuration options 1.1 Administrator login 1. Switch on the device. 2. Log in as the administrator: ► Initial login: ➔ Activating initial user accounts ► Routine login: continue at step 3. For administrators: Configuring seca mVSA 535 • 105... - Page 106 The list of user accounts is displayed. 5. Press your user account. Your user account is displayed in the input field. 6. Press the input field. 7. Enter your password using the keypad The administrator area is displayed. 106 • seca mVSA 535...
-
Page 107: Configuration Options
Connecting to the EMR system via the • • software seca connect 103 seca 360° proximity connection: Available for seca measuring devices with an seca 452 internal interface module or external interface module (firmware version R1.3 Build 79 or higher) Overview of access rights •... -
Page 108: User Accounts
► Select a password which satisfies your institution's security requirements. 7. Enter the password again. The login window is displayed. 8. Activate the “user” user account ➔ Assigning a password to the “user” user account. 108 • seca mVSA 535... -
Page 109: Assigning A Password To The "User" User
5. Enter the password again. 6. Press the Save key. The password has been saved. The “user” user account can be used. 7. Configure the device as required for your specific situation ➔ administrators: Configuring seca mVSA 535. User accounts • 109... -
Page 110: Working With User Accounts
► Select a password which satisfies your institution's security requirements. ► Use the user accounts without password protection only for special applications (e.g. configuring interfaces with EMR systems). seca Service will be pleased to assist if you have any questions relating to interface configuration. - Page 111 English NOTE The display language is specified for each user individually. If no user is logged in, the user interface is displayed in the system language ➔ Making regional settings. 5. Ensure that the Password protected field is activated (default setting). 6.
-
Page 112: Making Settings For Measuring Mode
► Stand-alone operation: Ensure that the date and time information on the device is correct. ► Network operation: Ensure that the date and time information in the seca software is correct. These settings are adopted by the device. 1. Press the Settings tab. 2. Press the Regional settings key. -
Page 113: Setting Display Brightness And Volume
English 3. Specify the regional settings by pressing the relevant input field: ► Select system language ► Select decimal separator ► Enter date ► Select date format ► Enter time ► Select time format ► Select naming convention ► Activate/deactivate name hyphen NOTE •... -
Page 114: Calibrating The Touchscreen Display
We recommend using a stylus (touchpen) for calibration. 1. Press the Settings tab. 2. Press the Display and volume key. 3. Press the Calibrate touchscreen key. 4. Confirm that you wish to proceed. The calibration display appears: 114 • seca mVSA 535... - Page 115 English 5. Press the symbol with a stylus. The symbol changes position. 6. Press the symbol with a stylus again. The symbol changes its position again. 7. Repeat step 6. until you get a request to confirm calibration. 8. Confirm calibration. The touchscreen display is calibrated.
-
Page 116: Setting Units Of Measurement
► Unit for weight ► Unit for height ► Unit for temperature ► Unit for blood pressure NOTE Settings you make in this tab are active directly. You do not need to save or confirm them. 116 • seca mVSA 535... -
Page 117: Deactivating Analysis Modules
English 3.5 Deactivating analysis modules 1. Press the Settings tab. 2. Press the Analysis modules key. All analysis modules are activated at the factory. 3. Press the checkboxes of all the analysis modules you would like to deactivate. The deactivated analysis modules are no longer displayed in the analysis ➔... -
Page 118: Making Presets For Vital Signs Measurement
This is where to specify default settings which the user can modify for the respective current measurement procedure. The settings from the default settings then become active again. Making general settings 1. Press the Settings tab. 2. Press the Vital signs key. 118 • seca mVSA 535... - Page 119 English 3. Press the NIBP key. The presets are displayed. 4. Press the desired measurement method. • Upward measurement, continue at step 6. • Downward measurement, continue at step 5. 5. Adapt initial pressure if necessary. 6. Press the desired measuring sequence. •...
- Page 120 Configuring multiple measurement NOTE Settings you make here cannot be changed by the user. 1. Press the Settings tab. 2. Press the Vital signs key. 3. Press the NIBP key. The presets are displayed. 120 • seca mVSA 535...
- Page 121 English 4. Press the key. The Configure multiple measurement dialog window appears: 5. Specify the number of part-measurements: • Maximum six part-measurements • Deactivated part measurements at the start and during the measuring sequence are performed but not used to form the mean value •...
-
Page 122: Presets For Spo
The measuring profile is saved. The name of the measuring profile appears in the NIBP settings dialog window instead of the text Multiple measurement. Presets for SpO 1. Press the Settings tab. 2. Press the Vital signs key. 122 • seca mVSA 535... -
Page 123: Presets For Temperature
English 3. Press the SpO key. The presets are displayed (here: seca pulse oximetry): 4. Press the desired sensitivity: NOTE ® The Maximum setting (Masimo SET pulse oximetry) is not available as a preset. Select this setting for each measurement directly ➔... - Page 124 5. Press the desired measurement method. • Predictive • Direct 6. Press the desired measuring position (COVIDIEN FILAC 3000 blue only). • Oral • Axillary 7. Press the Confirm key. The dialog window closes. The modified settings are adopted. 124 • seca mVSA 535...
-
Page 125: Selecting Color Mode For Vital Signs Tab
English Selecting color mode for Vital signs 1. Press the Settings tab. 2. Press the Vital signs key. 3. Press the Color mode input field. 4. Select a color mode. • Standard • Color, day • Color, night 5. Log off. 6. -
Page 126: Managing System Components
2. Select a system component. The system information for the selected system component is displayed (here: SmartBucket). You have the following options: ► View details ► Perform software update (not for SmartBucket) ➔ Updating the monitor software 126 • seca mVSA 535... -
Page 127: Updating The Monitor Software
This function allows you to update the software of the device. Current software packages can be found at www.seca.com. NOTICE! Data loss ► Export seca patient files and user accounts manually before updating the software. 1. Press the System tab. 2. Press the Monitor key. -
Page 128: Data Export And Backup
Exporting patient and user data manually ➔ Restoring patient and user data manually Exporting patient and user data This function allows you to export seca patient files and user accounts in manually order to create a backup copy, for example. 1. Press the System tab. -
Page 129: Restoring Patient And User Data Manually
► Export seca patient files and user accounts manually before restoring older data manually. 1. Load the archived seca patient files and user accounts onto a USB memory stick. 2. Press the System tab. 3. Press the Data management key. -
Page 130: Power Management
► Press the key to switch off the device at a lower battery charge status (minimum: 10 %). ► Press to switch off the device at a higher battery charge status (maximum: 100 %). 130 • seca mVSA 535... -
Page 131: Setting Up Peripherals
Setting up a LAN connection to the network (stationary operation) ➔ Setting up a WiFi connection (mobile operation) ➔ Setting up a connection to the seca connect 103 software ➔ Setting up a seca 360° proximity connection 5.1 Setting up a LAN connection to the network (stationary operation) ➔... - Page 132 4. Make the setting applicable to your network: ► To set up connection manually, continue at step 5. ► To set up automatic connection: Press the DHCP key and continue with ➔ Setting up a connection to the seca connect 103 software 132 • seca mVSA 535...
-
Page 133: Deactivating The Lan Connection
➔ 7. Set up the connection to the Setting up a seca connect 103 connection to the seca connect 103 software Deactivating the LAN connection 1. Press the Peripherals tab. Setting up peripherals • 133... - Page 134 3. Press the LAN active checkbox. The LAN function is deactivated. The connection data are deleted. 4. To reactivate the LAN function, proceed as outlined below: a) Press the LAN active checkbox b) ➔ Activating the LAN connection 134 • seca mVSA 535...
-
Page 135: Setting Up A Wifi Connection
103 tion of the software (server IP and connect port) is known. seca connect 103 WiFi WiFi seca mVSA 535 seca Software Monitor Server/Stand-Alone-PC WiFi-Router Activating the WiFi connection 1. Press the Peripherals tab. -
Page 136: Deactivating The Wifi Connection
➔ 9. Set up the connection to the Setting up a seca connect 103 connection to the seca connect 103 software Deactivating the WiFi connection 1. Press the Peripherals tab. 2. Press the WiFi key. 3. In the WiFi mode drop-down menu, press the WiFi off setting. - Page 137 English 4. Press the key to confirm your entry. The WiFi function is deactivated. The connection data are deleted. Setting up peripherals • 137...
-
Page 138: Setting Up A Seca 360° Proximity Connection
(in each case firmware version R1.3 Build 79 or higher). • The seca measuring device is connected to your LAN or WiFi network. • The seca measuring device is configured as follows: –... - Page 139 English 2. Press the key. seca 360° proximity The seca 360° proximity (seca 360° proximity) dialog window opens 3. Search for available devices: ► Press the key: Search for devices on the network ► Press the key: Enter the IP address of a device ►...
- Page 140 The device is marked blue in the list. The connection is set up. In measuring mode, the seca measuring device is reserved as soon as a patient file is called up. The device is released again once the measure- ment is stopped ➔...
-
Page 141: Connecting To An Emr System
6. CONNECTING TO AN EMR SYSTEM ➔ Information about user and patient data ➔ Assigning a clear device name ➔ Setting up a connection to the seca connect 103 software ➔ Configuring data transfer to the EMR system ➔ Use of certificates ➔... -
Page 142: Assigning A Clear Device Name
4. Enter a clear device name in line with the naming conventions of your institution: a) Press the input field Device name b) Use the keypad : Enter the device name c) Press the key: Confirm entry 142 • seca mVSA 535... -
Page 143: Setting Up A Connection To The Seca Connect 103 Software
• The EMR system is connected to the software. In- seca connect 103 formation on this can be found in the seca 103/452 system instructions for use (from version 2.0 or higher) NOTE • Follow the information in this section of the document ➔... -
Page 144: Making Workflow Settings
1. Press the Peripherals tab. 2. Press the seca connect key. 3. Ensure that in the Connect Mode drop-down menu, the option is selected. seca connect 103 4. Press the key. The seca connect 103: Workflow page is displayed. 144 • seca mVSA 535... -
Page 145: Configuring Data Transfer To The Emr System
Press the The settings are saved. 6.4 Configuring data transfer to the EMR system seca recommends performing the data transfer to the EMR system only in collaboration with seca Service and the manufacturer of your EMR system. NOTE More information on this can be found in the seca 103/452 system instructions for use (from version 2.0 or higher). -
Page 146: Use Of Certificates
6.5 Use of certificates The device is prepared for the use of certificates. If you wish to use this function, please contact seca Service. 6.6 Summary: Device behavior when connected to an EMR system Connection to EMR system via Function... -
Page 147: Options For Input
EMR system. The configuration file is not part of the scope of delivery. You create the con- figuration file for the overall integration solution in consultation with seca Ser- vice. If you wish to use this function, please contact seca Service. -
Page 148: Deleting Configuration File
The configuration file for clinical observations is loaded onto the device via the connection to the software. Further information is available seca connect 103 in the seca 103/452 system instructions for use. The configuration can be changed by loading another configuration file onto the device. NOTE •... -
Page 149: Factory Settings
Unit °C COVIDIEN FILAC 3000 Oral measurement, predictive Blue measurement Predictive measurement Pulse rate: Unit Preset (seca measuring equipment only) Default Oxygen saturation: Unit Mode Normal Decimal separator: North America Period Connection data None WiFi client (device <-> network): Connection data... -
Page 150: Resetting The Device
NOTE If all seca patient files and user accounts are to be removed from the device, proceed as described in the section entitled ➔ Resetting the device. -
Page 151: Exporting The System Log/Audit Trail
Overview of factory settings). seca patient files and user accounts will be retained. 8.4 Exporting the system log/audit trail This function allows you to export the system log/audit trail and make it available to seca Service for support purposes, for example. -
Page 152: Enabling Vnc Access
1. Press the Reset tab. 2. Press the VNC access checkbox. 3. Restart the device. The VNC service of the device is started. 4. Set up the VNC connection using the VNC viewer of your PC. 152 • seca mVSA 535...
Need help?
Do you have a question about the mVSA 535 and is the answer not in the manual?
Questions and answers