Advertisement
Quick Links
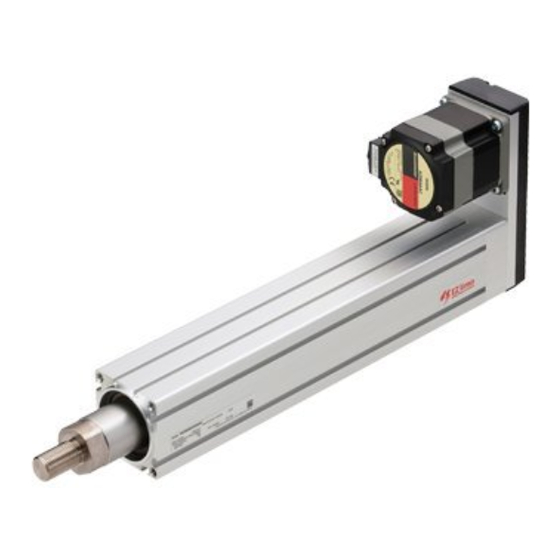
Motorized Cylinder
EAC Series
OPERATING MANUAL
1
Introduction .............................. 2
2
Safety precautions ................... 4
3
Precautions for use ................... 7
4
Preparation ................................ 9
5
Installation ............................... 13
Thank you for purchasing an Oriental Motor product.
This Manual describes product handling procedures and safety precautions.
• Please read it thoroughly to ensure safe operation.
• Always keep the manual where it is readily available.
Actuator Edition
6
Connection .............................. 22
7
Maintenance ............................ 24
8
specifications ........................... 31
HL-17170-10
Advertisement

Related Manuals for Oriental motor EAC Series


Summary of Contents for Oriental motor EAC Series
-
Page 1: Table Of Contents
HL-17170-10 Motorized Cylinder EAC Series Actuator Edition OPERATING MANUAL Introduction ......2 Connection ......22 Safety precautions ....4 Maintenance ......24 Precautions for use ....7 Standards, general specifications ......31 Preparation ........ 9 Installation ....... 13 Thank you for purchasing an Oriental Motor product. -
Page 2: Introduction
For operating manuals, download from Oriental Motor Website Download Page or contact your nearest Oriental Motor sales office. „ EAC Series equipped with the AZ Series • EAC Series OPERATING MANUAL Actuator Edition (this document) • AZ Series/Motorized Actuator equipped with AZ Series OPERATING MANUAL Function Edition •... - Page 3 Introduction Equipped motor list These are the lists of the motor model that is equipped in the EAC Series. The power supply current capacity of the drivers to be combined with the motorized cylinders are described in the operating manual of the driver.
-
Page 4: Safety Precautions
Safety precautions Safety precautions The precautions described below are intended to ensure the safe and correct use of the product, and to prevent the customer and others from exposure to the risk of injury. Use the product only after carefully reading and fully understanding these instructions. - Page 5 Safety precautions • Assign qualified personnel to the task of installing, wiring, operating/controlling, inspecting, and troubleshooting the product. Handling by unqualified personnel may result in fire, electric shock, injury, or damage to equipment. • Take measures to keep the moving part in position if the motorized cylinder is used in vertical operations such as elevating equipment.
- Page 6 Safety precautions • Use a motorized cylinder and driver only in the specified combination. An incorrect combination may result in a fire. • The motorized cylinder is very heavy. When transporting or installing the motorized cylinder, make sure two persons work together to carry out the necessary tasks. Failure to do so may result in injury. •...
-
Page 7: Precautions For Use
Precautions for use Precautions for use This section covers restrictions and requirements the user should consider when using the product. „ General z Be sure to use our cable to connect the motorized cylinder and the driver. In the following cases, purchase our cable separately. Check on the Oriental Motor Website for the model name of cables. - Page 8 Precautions for use z Use the motorized cylinder equipped with the AR Series in conditions where the motor surface temperature does not exceed 100 °C (212 °F). The motorized cylinder does not have a function to protect from overheating. The motor surface temperature may exceed 100 °C (212 °F) under certain conditions (ambient temperature, operating speed, duty cycle, etc.).
-
Page 9: Preparation
„ Motorized cylinder and driver package model EAC 4 R W - 15 - AZ M -1 - Series name EAC: EAC Series 2: 28 mm Cylinder size 4: 42 mm 6: 60 mm R: Parallel motor mounting type Motor mounting direction... - Page 10 G: With guided-shaft covers Guided-shaft cover Blank: Without a guided-shaft cover „ Motorized cylinder model EACM 15 AZ M Series name EACM: EAC Series 2: 28 mm Cylinder size 4: 42 mm 6: 60 mm R: Parallel motor mounting type Motor mounting direction...
- Page 11 Preparation Names of parts z In-line motor mounting type z Parallel motor mounting type Motor Motor Pulley cover Case Case Coupling case z With guided shafts z With guided-shaft covers Guided shafts Guided-shaft covers Shafts „ Mechanism of the parallel motor mounting type Motor mounting screw Pulley Pulley cover...
- Page 12 Preparation „ Motor z Motorized cylinder equipped with the AZ Series EACM2 EACM4, EACM6 The following figure show models for the DC power The following figure show models for the electromagnetic input. brake type and AC power input. Motor Encoder (ABZO sensor) Protective Earth Terminal Encoder (ABZO sensor) Electromagnetic brake...
-
Page 13: Installation
Installation Installation Location for installation The motorized cylinder is designed and manufactured to be incorporated in equipment. Install them in a well- ventilated location that provides easy access for inspection. The location must also satisfy the following conditions. • Inside an enclosure that is installed indoors (provide vent holes) •... - Page 14 Installation „ Releasing the electromagnetic brake When moving the rod of the electromagnetic brake type manually, connect the 24 VDC power supply for electromagnetic brake to release the electromagnetic brake. z Specifications of a power supply for electromagnetic brake Model Voltage Current capacity EACM2...
- Page 15 Installation „ When a motorized cylinder is installed using the flange side When installing a motorized cylinder which stroke is equal to 150 mm or longer using the flange side, support the cylinder with a supporting table. Mounting plate Supporting table z When installing a motorized cylinder directly Model Screw size...
- Page 16 Installation EACM2 Model Screw size Tightening torque Screw length from the mounting plate EACM2 1 N•m (142 oz-in) 6 mm or less Screws Screw length from the mounting plate EACM4, EACM6 1. Insert the nuts into the grooves on the side face of Groove the motorized cylinder.
- Page 17 Installation Changing the motor cable outlet direction The motor cable outlet direction can be changed according to the space of equipment. • When changing the motor cable outlet direction, remove the load, and perform in a state where the motorized cylinder is placed in a horizontal position. Doing the operation in a vertical condition may allow the moving part to fall, leading to injury or mechanical damage.
- Page 18 Installation 2. Remove the motor mounting screws, and dismount the motor. EACM2 EACM4 EACM6 Motor mounting screws (M2.5, 2 places) Motor mounting screws (M3, 4 places) Motor mounting screws (M4, 4 places) 3. Change the cable outlet direction, and mount the motor. Mount the motor according to the procedure opposite of dismounting it.
- Page 19 Installation Do not loosen or remove the screws other than the motor mounting screws. EACM4 EACM6 Motor mounting screws Motor mounting screws Motor mounting screws Motor mounting screws 3. Change the cable outlet direction, and mount the motor to tentatively fix the motor mounting screws. Tentatively fix the screws in a degree to be able to move the motor when touching it.
- Page 20 Installation 6. Tighten the tension adjustment screws. EACM4 EACM6 Tightening torque: 2.4 N•m (340 oz-in) Tightening torque: 1 N•m (142 oz-in) 7. Attach the pulley cover, and tighten the screws. Tightening torque: 1 N·m (142 oz-in) 8. After mounting the motor, set the home again. How to install a load „...
- Page 21 Installation Positioning pin holes for load on rod end There are two positioning pin holes on the rod end. If installation repeatability is required when a load is installed, use these positioning pin holes. EACM2 EACM4, EACM6 Positioning pin holes Positioning pin holes Model Pin hole diameter...
-
Page 22: Connection
Connection Connection Connecting the driver For details about the connection method of the driver, refer to the operating manual of the driver. Grounding the motorized cylinder Use a round terminal when grounding, and make sure to ground with a screw and washer. Ground wire and crimp terminal are not included. - Page 23 Connection 3) Grounding the Protective Earth Terminal of the motorized cylinder Be sure to ground the Protective Earth Terminal of the Protective Earth Terminal motorized cylinder. • Grounding wire: AWG18 (0.75 mm ) or more • Screw size of Protective Earth Terminal: M4 •...
-
Page 24: Maintenance
Maintenance Maintenance This chapter explains the maintenance items in order to operate motorized cylinder safely and efficiently. If an abnormal condition is noted on the motorized cylinder, discontinue any use and contact your nearest Oriental Motor sales office. Inspection items and timing If the motorized cylinder is operated eight hours a day, perform maintenance according to the applicable period specified in the table. - Page 25 Maintenance Applying grease Refer to the re-greasing interval in the table, and apply new grease after wiping off the old grease on the rod with a soft cloth. Wear protective goggles when applying grease. Pay attention to safety and handle the grease carefully by following the instructions provided with that product.
- Page 26 Maintenance 2. Check the belt condition. And check the belt does not detach or protrude from the pulley. 3. Attach the pulley cover, and tighten the screws. Tightening torque: 1 N·m (142 oz-in) Adjusting the belt tension and replacing the belt Adjust the belt tension of the parallel motor mounting type, or replace the belt.
- Page 27 Maintenance 2. Loosen the motor mounting screws. Model Screw size EACM4 EACM6 Three turns or less To prevent the motor mounting screw from falling off, keep three turns or less when turning the screw. 3. Loosen the tension adjustment screws. When loosening the screws, tension of the belt will be adjusted properly by the strength of springs.
- Page 28 Maintenance Replacing the motor • When replacing the motor, remove the load, and perform in a state where the motorized cylinder is placed in a horizontal position. Doing the operation in a vertical condition may allow the moving part to fall, leading to injury or mechanical damage.
- Page 29 Maintenance z Replacement procedure 1. Remove the pulley cover fixing screws, and detach the pulley cover. Pulley cover Pulley cover xing screws (M3) 2. Remove the motor mounting screws. Model Screw size EACM4 EACM6 3. Dismount the motor and remove the belt. 4.
- Page 30 Maintenance 6. Loosen the tension adjustment screws. When loosening the screws, tension of the belt will be adjusted properly by the strength of springs. Three turns or less To prevent the tension adjustment screws from falling off, keep three turns or less when turning the screw.
-
Page 31: Standards, General Specifications
„ EU Directives CE Marking Motors for the EAC Series AC power input type are affixed with the CE Marking under the Low Voltage Directive and EMC Directive. „ RoHS Directive This product does not contain the substances exceeding the restriction values. - Page 32 • Please contact your nearest Oriental Motor o ce for further information. Technical Support Tel:800-468-3982 Singapore Korea 8:30am EST to 5:00pm PST (M-F) Tel:1800-842-0280 Tel:080-777-2042 www.orientalmotor.com www.orientalmotor.com.sg www.inaom.co.kr Schiessstraße 44, 40549 Düsseldorf, Germany Tel:1800-806-161 4-8-1 Higashiueno, Taito-ku, Tokyo www.orientalmotor.com.my Technical Support Tel:00 800/22 55 66 22 110-8536 Japan www.orientalmotor.de...
Need help?
Do you have a question about the EAC Series and is the answer not in the manual?
Questions and answers