Advertisement
Quick Links
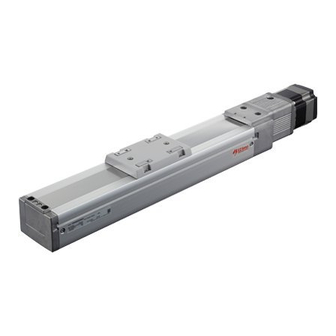
Motorized linear slide
EZSH
Series
Actuator Edition
OPERATING MANUAL
1
Introduction .............................. 2
2
Safety precautions ................... 3
3
Precautions for use ................... 6
4
Preparation ................................ 8
5
Installation ............................... 10
Thank you for purchasing an Oriental Motor product.
This Operating Manual describes product handling procedures and safety precautions.
• Please read it thoroughly to ensure safe operation.
• Always keep the manual where it is readily available.
6
Connection .............................. 19
7
Maintenance ............................ 22
8
specifications ........................... 30
HL-17198-5
Advertisement

Related Manuals for Oriental motor EZSH Series


Summary of Contents for Oriental motor EZSH Series
-
Page 1: Table Of Contents
......30 Preparation ........ 8 Installation ....... 10 Thank you for purchasing an Oriental Motor product. This Operating Manual describes product handling procedures and safety precautions. • Please read it thoroughly to ensure safe operation. • Always keep the manual where it is readily available. -
Page 2: Introduction
The product described in this manual is designed and manufactured to be incorporated in general industrial equipment. Do not use for any other purpose. Oriental Motor Co., Ltd. is not responsible for any compensation for damage caused through failure to observe this warning. -
Page 3: Safety Precautions
Safety precautions Safety precautions The precautions described below are intended to ensure the safe and correct use of the product, and to prevent the customer and others from exposure to the risk of injury. Use the product only after carefully reading and fully understanding these instructions. - Page 4 Safety precautions • Take measures to keep the moving part in position if the product is used in vertical operations such as elevating equipment. Failure to do so may result in injury or damage to equipment. • Assign qualified personnel to the task of installing, wiring, operating/controlling, inspecting and troubleshooting the product.
- Page 5 Safety precautions • Do not use the motorized linear slide beyond its specifications. Doing so may result in electric shock, injury or damage to equipment. • Keep your fingers and objects out of the openings in the motorized linear slide. Failure to do so may result in fire, electric shock or injury.
-
Page 6: Precautions For Use
Precautions for use Precautions for use This chapter covers restrictions and requirements the user should consider when using the product. „ General z Be sure to use our cable to connect the motorized linear slide and the driver. z Always use our cable to connect the motorized linear slide and driver. z When conducting the insulation resistance measurement or the dielectric strength test, be sure to separate the connection between the motorized linear slide and the driver. - Page 7 Precautions for use „ Operation z Holding torque at standstill When the motorized linear slide stops, the holding torque will be reduced by the current cutback function of the driver. When selecting the motorized linear slide, check the holding torque at standstill in the specifications on the catalog.
-
Page 8: Preparation
Check the model name of the motorized linear slide against the number shown on the nameplate. E Z S H M 6 H 1 3 0 A Z M C Series name EZSHM: EZSH Series Actuator size 6: Width 66.4 mm, Height 64 mm... - Page 9 Preparation Names of parts Motor Coupling cover Stainless steel sheet Housing cover Side cover „ When the side cover is detached Table Table cover Outer rail Ball screw „ Motor z Motorized linear slide z Motorized linear slide equipped with the AZ Series equipped with the AR Series Electromagnetic Electromagnetic...
-
Page 10: Installation
Installation Installation Location for installation The motorized linear slide is designed and manufactured to be incorporated in equipment. Install it in a well- ventilated location that provides easy access for inspection. The location must also satisfy the following conditions: • Inside an enclosure that is installed indoors (provide vent holes) •... - Page 11 Installation Installation overview The motorized linear slide can be installed in any direction. Taking account of vibration prevention as well as deflection of the motorized linear slide, install it on a metal surface of sufficient strength (thickness 10 mm or more). The following two methods are available for installation. Be sure to secure the motorized linear slide according to the screw size and tightening torque which are specified in this manual.
- Page 12 Installation „ Release the electromagnetic brake When the motorized linear slide with an electromagnetic brake is installed, the table can be moved if the power is supplied to the electromagnetic brake. Before moving the table, connect the 24 VDC power supply for electromagnetic brake to release the electromagnetic brake.
- Page 13 Installation z Installation method 1. Move the table in the center. 2. Remove the side cover fixing screws. M2.6 Length 10 mm [2 pcs.] M2.6 Length 5 mm [1 pc.] M2.6 Length 10 mm [2 pcs.] There are two kinds of length in side cover fixing screws, and only the screw in the center (one piece) is short.
- Page 14 Installation 5. Install the motorized linear slide with screws. Tightening torque: 6.2 N•m (54.9 lb-in) Positioning pin 5 mm or less Mounting plate Positioning pin Be sure to make the length of the positioning pin from the surface of the mounting plate less than the specified value.
- Page 15 Installation „ To install the motorized linear slide from the bottom side Wear gloves when working. Failure to do so may result in injury by touching the end section of the stainless steel sheet. • When installing, do not touch the stainless steel sheet with a tool. The stainless steel sheet with a relatively soft material is used, so it may be easy to flaw, leading to damage.
- Page 16 Installation Changing the motor cable outlet direction The motor cable outlet direction can be changed according to the space of equipment. • When changing the motor cable outlet direction, remove the load and keep the motorized linear slide in a horizontal position. Doing the operation in a vertical condition may allow the moving part to fall, leading to injury or mechanical damage.
- Page 17 Installation 2. Loosen the coupling fixing screw (linear slide side) first, and remove the motor mounting screws to dismount the motor. If the coupling fixing screw is in an invisible state, move the table to rotate the coupling. Motor mounting screw (M4) Coupling xing screw (linear slide side: M3) •...
- Page 18 Installation 5. Attach the coupling cover, and tighten the screws. Coupling cover xing screw Tightening torque: 0.3 N•m (42.6 oz-in) 6. After mounting a motor, set the home again. How to install a load Install a load with screws using the load mounting holes on the table. Values of the tightening torque are recommended.
-
Page 19: Connection
Connection Connection Connecting the driver For details about the connection method of the driver, refer to the operating manual of the driver. Grounding • When multiple actuators are used in combination, provide protective earth for each actuator. • Do not share the grounding wire with a welder or power equipment. „... - Page 20 Connection 2) Grounding the Protective Earth Terminal of the motor Ground the Protective Earth Terminal of the motor. Use a round terminal when grounding, and make sure to secure with a screw and washer. A grounding wire and a crimp terminal are not included. •...
- Page 21 Connection „ Connection example for the sensor set PAES-SY-6EZSH (PNP output) The connection example is shown based on the following conditions. • Home-seeking mode: 3 sensor mode • Logic of +LS output and −LS output: Normally closed • Logic of HOMES output: Normally open PAES-SY-6EZSH 24 VDC (PNP output)
-
Page 22: Maintenance
Maintenance Maintenance This chapter explains the maintenance items in order to operate motorized linear slide safely and efficiently. If an abnormal condition is noted on the motorized linear slide, discontinue any use and contact your nearest Oriental Motor sales office. Inspection item and timing If the motorized linear slide is operated eight hours a day, perform maintenance according to the applicable period specified in the table below. - Page 23 Maintenance Applying grease „ Grease to be used Use a grease gun for lubrication of the EZSH Series. Type of grease AFF grease (THK CO., LTD.) Grease gun unit Manufacturer model: MG70 (THK CO., LTD.) Parts of supplementation Linear guide, ball screw...
- Page 24 Maintenance 2. Remove the side cover fixing screws. M2.6 Length 10 mm [2 pcs.] M2.6 Length 5 mm [1 pc.] M2.6 Length 10 mm [2 pcs.] There are two kinds of length in side cover fixing screws, and only the screw in the center (one piece) is short.
- Page 25 Maintenance 5. Lubricate to the linear guide. 1) Attach the type N nozzle to the grease gun, and lubricate the grease through the grease nipple. Grease nipple Nozzle (type N nozzle) of grease gun 2) Move the table to allow the grease spread. 3.
- Page 26 When replacing the motor, refer to “1-3 Equipped motor list” on p.2 and order the motor for maintenance. For details, contact your nearest Oriental Motor sales office. • When replacing the motor, remove the load and keep the motorized linear slide in a horizontal position.
- Page 27 Maintenance 1. Remove the coupling cover fixing screws, and detach the coupling cover. Coupling cover xing screw (M2.6) 2. Loosen the coupling fixing screw (linear slide side) first, and remove the motor mounting screws to dismount the motor. If the coupling fixing screw is in an invisible state, move the table to rotate the coupling. Motor mounting screw (M4) Coupling xing screw (linear slide side: M3)
- Page 28 Maintenance 5. Tighten the coupling fixing screw (motor side). Coupling xing screw (motor side) Tightening torque: 1.5 N•m (13.3 lb-in) 6. Mount the motor to the linear slide, and tighten the motor mounting screws. Motor mounting screw Tightening torque: 2.4 N•m (21.2 lb-in) 7.
- Page 29 Adjusting the tension of the stainless steel sheet Contact your nearest Oriental Motor sales office. Warranty Check on the Oriental Motor Website for the product warranty. Disposal Dispose the product correctly in accordance with laws and regulations, or instructions of local governments.
-
Page 30: Standards, General Specifications
Standards, general specifications Standards, general specifications Standards „ Actuators equipped with the AZ Series z UL Standards, CSA Standards For recognition information about UL Standards of the motor with which the actuator is equipped, check the “APPENDIX UL Standards” of product. z CE Marking / UKCA Marking •... - Page 31 Standards, general specifications General specifications „ Installation conditions The product is designed and manufactured to be incorporated in general industrial equipment. Input power supply AC power supply Overvoltage category Protection against electric shock Class I Pollution degree Degree of protection IP20 Noise level 72 dB...
- Page 32 If a new copy is required to replace an original manual that has been damaged or lost, please contact your nearest Oriental Motor sales office. • Oriental Motor shall not be liable whatsoever for any problems relating to industrial property rights arising from use of any information, circuit, equipment or device provided or referenced in this manual.
Need help?
Do you have a question about the EZSH Series and is the answer not in the manual?
Questions and answers