
Related Manuals for Skyjack SJ6826RT


Summary of Contents for Skyjack SJ6826RT
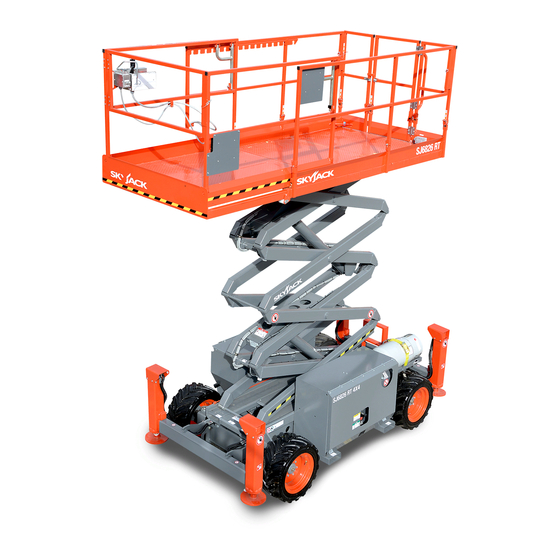
- Page 1 SERVICE MANUAL SJ6826RT, SJ6832RT ROUGH TERRAIN SCISSORS 213560AA November 2019 ANSI/CSA, CE, AS, KC...
- Page 2 We sell worldwide for the brands: Genie, Terex, JLG, MultiQuip, Mikasa, Essick, Whiteman, Mayco, Toro Stone, Diamond Products, Generac Magnum, Airman, Haulotte, Barreto, Power Blanket, Nifty Lift, Atlas Copco, Chicago Pneumatic, Allmand, Miller Curber, Skyjack, Lull, Skytrak, Tsurumi, Husquvarna Target, Stow, Wacker, Sakai, Mi-T-M, Sullair, Basic, Dynapac, MBW, Weber, Bartell, Bennar Newman, Haulotte, Ditch Runner, Menegotti, Morrison, Contec, Buddy, Crown, Edco, Wyco, Bomag, Laymor, EZ Trench, Bil-Jax, F.S.
- Page 3 This manual is for MEWPs with serial numbers: SJ6826 RT & SJ6832 RT: A200 000 001– A200 999 999 Please refer to the website (www.skyjack.com) for contact information, other serial numbers, the most recent technical manuals and USB software. Original instructions in English.
- Page 4 It may also be used to alert against unsafe practices. IMPORTANT IMPORTANT indicates a procedure essential for safe operation and which, if not followed, may result in a malfunction or damage to the MEWP . SJ6826RT, SJ6832RT 213560ABA...
-
Page 5: Table Of Contents
Fluids ................40 SJ6826RT, SJ6832RT... - Page 6 Engine Does not Crank from Platform nor Base Control Console . . . . . . . . . . . . . . . . . . . . . . . . . 87 SJ6826RT, SJ6832RT...
- Page 7 Drive Inoperative . . . . . . . . . . . . . . . . . . . . . . . . . . . . . . . . . . . . . . . . . . . . . . . . . . . . . . . . . . . . . . 123 SJ6826RT, SJ6832RT...
- Page 8 Replacing the Oil Filter Cartridge . . . . . . . . . . . . . . . . . . . . . . . . . . . . . . . . . . . . . . . . . . . . . . . . . 150 SJ6826RT, SJ6832RT...
- Page 9 Railing Maintenance and Repair . . . . . . . . . . . . . . . . . . . . . . . . . . . . . . . . . . . . . . . . . . . . . . . . . . 180 SJ6826RT, SJ6832RT...
-
Page 10: Section 1 - Scheduled Maintenance
2 years or 3000 hours, whichever occurs first. Any defective part will be replaced or repaired by your local Skyjack dealer at no charge for parts or labor. In addition, all products have a 5 year structural warranty. -
Page 11: Maintenance And Inspection Schedule
MEWP . relative law provisions obtaining in the country. Consult SKYJACK’s Service Department for optional Before attempting any repair work, disconnect the tires specifications and installation. main power connectors. -
Page 12: Hydraulic System & Component Maintenance And Repair
The use of cloth to strain the oil should be avoided to prevent lint from getting into the system. 6. When removing any hydraulic component, be sure to cap and tag all hydraulic lines involved. Also, plug the ports of the removed components. SJ6826RT, SJ6832RT 213560ABA... -
Page 13: Maintenance Hints
Dirty, dusty, high moisture environments may cause the hydraulic system to be contaminated more quickly. 2. Maintain a sufficient quantity of clean hydraulic oil of the proper type and viscosity in the hydraulic reservoir. 3. Keep all connections tight. SJ6826RT, SJ6832RT 213560ABA... -
Page 14: About This Section
Frequent PDI/Frequent inspection procedure, refer to service bulletins found Inspection every 200 days in our web site: www .skyjack .com for updates related or 200 hours. to service and maintenance of this MEWP . Perform Scheduled Maintenance and Inspection... -
Page 15: Owner's Annual Inspection Record
The Owner’s annual inspection record is located on the scissor assembly. It must be filled out after an annual inspection has been completed. Do not use the MEWP if an inspection has not been recorded in the last 13 months. SJ6826RT, SJ6832RT 213560ABA... -
Page 16: Frequent/Periodic/Annual/Pre-Delivery Inspection Checklist
Frequent/Periodic/Annual/Pre-Delivery Inspection Checklist Section 1 – Scheduled Maintenance 1.4 Frequent/Periodic/Annual/Pre-Delivery Inspection Checklist SJ6826RT, SJ6832RT 213560ABA... -
Page 17: General Inspections
1.5 General inspections 1.5-1 Service Bulletins Do an inspection of the MEWP in this sequence. Go to www.skyjack.com and use your machine’s serial number to find related open service bulletins. WARNING Do not operate a MEWP that does not function 1.5-2 Annual Inspection... -
Page 18: Base/Engine
Replace the filter element if necessary. ▪ Make sure there is no visible damage to the propane tank, hoses and fittings. ▪ Make sure there is no indication of propane leakage. SJ6826RT, SJ6832RT 213560ABA... - Page 19 ▪ If applicable, do a check on the battery fluid levels. If the plates do not have a minimum 13 mm (1/2 inch) of solution above them, add distilled or demineralized water. ▪ Replace battery if damaged or incapable of holding a lasting charge. SJ6826RT, SJ6832RT 213560ABA...
- Page 20 ▪ Make sure there is no visible damage. ▪ Grease points Do not use tires other than the tires that Skyjack specifies for this MEWP . Do not mix different types ▪ Make sure there are no loose or missing of tires or use tires that are not in good condition.
- Page 21 ▪ C - Annual Inspection ▪ Do a check on the hydraulic oil for contamination. ▪ Make sure the oil filter is in good condition. ▪ Replace the hydraulic oil and filters if necessary. SJ6826RT, SJ6832RT 213560ABA...
- Page 22 ▪ Make sure there is no visible damage. ▪ Make sure there are no loose or missing parts. ▪ AC power socket (B) ▪ Make sure there is no visible damage. ▪ Make sure there is no visible damage. SJ6826RT, SJ6832RT 213560ABA...
-
Page 23: Scissors Inspection
Make sure that the sliders and rollers on the ▪ left and right side of the MEWP are correctly attached. ▪ Make sure there is no visible damage. ▪ Make sure there is no dirt or blockages in the slider or roller paths. SJ6826RT, SJ6832RT 213560ABA... - Page 24 Units that show signs of damage must be ▪ Pin retainers are installed immediately removed from service and repaired by a qualified technician. Speak to the Skyjack service department for directions on how to repair the unit. 1. Do an inspection of the scissor pin connections.
- Page 25 Examples of damaged pin connections: Broken retainer bolt Center Pin - Outer Rust around the pin Rotated pin Rust around pin boss Center Pin - Middle Thrust washer Broken pin boss Stress cracks Center Pin - Inner SJ6826RT, SJ6832RT 213560ABA...
- Page 26 ▪ Cracks in welds or the surrounding metal, or rust forming in the area. Bearing block degradation Broken, missing, or Cracks in weld or loose retainers or bolts surrounding metal, rust in the area Note: weld intentionally not located at bolt area SJ6826RT, SJ6832RT 213560ABA...
-
Page 27: Platform Inspections
▪ Make sure there is no visible damage. bars, and extension lock bars are in good working order and that it has no loose or missing parts and there is no visible damage. 2. Use the MEWP ladder to exit the platform. SJ6826RT, SJ6832RT 213560ABA... -
Page 28: Function Tests
▪ Before you do the function tests, look for the operation manual with the same serial number as your MEWP . The operation manual has the instructions on which tests to do and how to do them correctly and successfully. SJ6826RT, SJ6832RT 213560ABA... -
Page 29: Section 2 - Maintenance Tables And Diagrams
MEDIUM 90°, FEMALE, 37° JIC, SWIVEL 100R13 SHORT 90°, FEMALE, 37° JIC, SWIVEL SHORT 90°, FEMALE, 37° JIC, SWIVEL 100R17 FEMALE, 37° JIC, SWIVEL REUSABLE MALE PIPE THREAD FITTING 300 PSI REUSABLE MALE PIPE THREAD FITTING NO FITTING 300 PSI SJ6826RT, SJ6832RT 213560ABA... - Page 30 FEMALE, 37° JIC, SWIVEL 100R19 MEDIUM 90°, FEMALE, 37° JIC, SWIVEL FEMALE, 37° JIC, SWIVEL 100R19 LONG 90°, FEMALE, 37° JIC, SWIVEL FEMALE, 37° JIC, SWIVEL 100R19 LONG 90°, FEMALE, SAE ORFS, SWIVEL FEMALE, SAE ORFS, SWIVEL 100R15 SJ6826RT, SJ6832RT 213560ABA...
-
Page 31: Torque Specifications For Fasteners (Us Imperial)
3160 2360 1 1/2-6 ft-lb 1180 2630 1979 4284 3200 1/2-20 ft-lb 2200 1640 3560 2660 1 1/2-12 1329 2983 2224 4827 3606 NOTE: Lubed includes lubricants such as lubrizing, oil, grease, or uncured Loctite . 1374AA SJ6826RT, SJ6832RT 213560ABA... -
Page 32: Torque Specifications For Fasteners (Metric)
1468 1101 2101 1576 M33 x 3.50 1990 1493 2849 2137 ft-lb 1886 1415 2699 2024 M36 x 4.00 2557 1918 3659 2744 NOTE: Lubed includes lubricants such as lubrizing, oil, grease, or uncured Loctite . 1375AA SJ6826RT, SJ6832RT 213560ABA... -
Page 33: Torque Specifications For Hydraulic Couplings & Hoses
Min. Max. Min. Max. Min. Max. Min. Max. 1/4" 6.75 1/4" 3/8" 3/8" 1/2" 27.66 1/2" 5/8" 46.33 5/8" 3/4" 72.33 3/4" 1" 100.5 1" 1 1/4" 101.5 1 1/4" 1 1/2 1 1/2 2" 2" 1276AA SJ6826RT, SJ6832RT 213560ABA... -
Page 34: Torque Specifications
110 - 115 (242 Loctite) 149 - 156 Hydraulic drive motor mounting bolts 120 (242 Loctite) 7.5 (90 in-lb) 10.2 Positive battery post cable/fuse nut Newton-meter = Nm Foot-Pound Force = ft-lb Inch-Pound Force = in-lb 1430AC SJ6826RT, SJ6832RT 213560ABA... -
Page 35: Specifications And Features
Engine (RPM) Kubota Diesel/Dual Fuel 3500 (High Throttle)/2050 (Low Throttle) Fuel Tank Capacity 80 L (21 gal) Hydraulic Oil Type Tank Capacity 86.88 L (22.95 gal) 1704AA * Weights are approximate; refer to serial nameplate for specific weight. SJ6826RT, SJ6832RT 213560ABA... -
Page 36: Floor Loading Pressure
WARNING Do not use tires other than the tires that Skyjack specifies for this MEWP . Do not mix different types of tires or use tires that are not in good condition. -
Page 37: Maximum Platform Capacities (Evenly Distributed)
Guaranteed Maximum Sound 100 dB Power Level (ISO 4871) Whole-body Vibration on Plat- 0.3995 m/s form Operating Temperatures Standard -20°C (-4°F) to +40°C (+104°F) Cold Weather Package Below -10°C (+14°F) Arctic Weather Package Below -18°C (0°F) 1904AA SJ6826RT, SJ6832RT 213560ABA... -
Page 38: Fluids
Engine Type Capacity (Liters) Capacity (US Gallons) Coolant Type Kubota 0.82 Anti-freeze 50/50 Premix Engine Fuel Engine Type Capacity (Liters) Capacity (US Gallons) Fuel Type Kubota D902 Diesel Kubota D972 86.88 22.95 Unleaded Gasoline Kubota WG752 1431AC SJ6826RT, SJ6832RT 213560ABA... -
Page 39: Section 3 - System Component Identification And Schematics
Section 3 – System Component Identification and Schematics SJ6826RT, SJ6832RT 213560ABA... -
Page 40: Electrical Symbol Chart
TILT SWITCH TRANSISTOR SINGLE POLE VACUUM POTENTIOMETER SINGLE THROWN LEVEL SENSOR SWITCH RELAY DOUBLE POLE TEMPERATURE SINGLE POLE DOUBLE POLE DOUBLE THROW SWITCH DOUBLE THROW SINGLE THROW RELAY RELAY RELAY TRIPLE POLE RHEOSTAT DIODE DOUBLE THROW RELAY SJ6826RT, SJ6832RT 213560ABA... -
Page 41: Hydraulic Symbol Chart
THREE WAY VALVE MOTOR OPEN PORT CLOSED VALVE THREE POSITION TWO POSITION TWO POSITION FOUR WAY TWO WAY THREE WAY VALVE CLOSED CENTER NORMALLY CLOSED PORT OPEN VALVE PRESSURE PILOT LINES Dashed MAIN LINES Solid TRANSDUCER SERVO SJ6826RT, SJ6832RT 213560ABA... -
Page 42: Wire Number And Color Code
This table is to be used as a wire number/color reference for electrical drawings and schematics. All wire numbers will retain their original color coding, for example if wire 7 is red, wire 7A, 7B, and 7C will also be red. SJ6826RT, SJ6832RT 213560ABA... -
Page 43: Hydraulic Parts List
VALVE, Control (Hydraulic generator) 3H-14A 106273 VALVE, Control (Lift) 3H-30 103623 VALVE, Control (Brake) 4H-15A 128321 VALVE, Control (Reverse drive) 2H-15B 153337 VALVE, Control (Parallel reverse drive) 4H-16A 128321 VALVE, Control (Forward drive) 4H-16B 153337 VALVE, Control (Parallel forward drive) SJ6826RT, SJ6832RT 213560ABA... - Page 44 PUMP , Dual hydraulic (11/6.4) 104534 VALVE, Relief (System) 104534 VALVE, Relief (Lift) 106557 VALVE, Relief (Lift cylinder) 106557 VALVE, Relief (Lift cylinder) 104534 VALVE, Relief (Drive) 107271 VALVE, Emergency lowering 137182 VALVE, Freewheel 113752 VALVE, Brake auto reset SJ6826RT, SJ6832RT 213560ABA...
-
Page 45: Electrical Parts List
RELAY, 12 Volt (40 Amp) (Large pump dump enable) 31CR 127035 RELAY, 12 Volt (40 Amp) (Glow plug) 32ACR 127035 CONTACTOR, Engine start 32CR1 127035 RELAY, 12 Volt (40 Amp) 32CR2 127035 RELAY, 12 Volt (40 Amp) (Engine start) SJ6826RT, SJ6832RT 213560ABA... - Page 46 SOLENOID, High throttle ICM1 136121 MODULE, Igniter control 137857 ALTERNATOR (Kubota Diesel D902) 136101 ALTERNATOR (Kubota Dual Fuel WG752) IGC1 136106 COIL, Ignition IGC2 136106 COIL, Ignition LED-1 137785 LIGHT, Power on LED-2 137785 LIGHT, Power on (Base controls) SJ6826RT, SJ6832RT 213560ABA...
- Page 47 • SWITCH, Joystick enable SWITCH ASSEMBLY (Horn) 147058 • SWITCH HEAD, Push button (Black) 147054 • • BLOCK, N.O. Spring contact 102853 SWITCH, Outrigger Enable 127132 SWITCH, Outrigger Enable S910 133762 BLOCK, N.O. Contact (Platform/Idle/Base) (Base controls) SJ6826RT, SJ6832RT 213560ABA...
- Page 48 COIL, 12 Volt (Parallel reverse drive valve) 4H-16A 128321 COIL, 12 Volt (Forward drive valve) 4H-16B 128321 COIL, 12 Volt (Parallel forward drive valve) 4H-20A 137513 COIL 12 Volt (Series/Parallel drive) 4H-23 128321 COIL, 12 Volt (Right steer valve) SJ6826RT, SJ6832RT 213560ABA...
- Page 49 COIL, 12 Volt (Rear left outrigger retract) 4H-75 128321 COIL, 12 Volt (Front left outrigger extend) 4H-76 128321 COIL, 12 Volt (Front right outrigger extend) 4H-77 128321 COIL, 12 Volt (Rear right outrigger extend) 4H-78 128321 COIL, 12 Volt (Rear left outrigger extend) SJ6826RT, SJ6832RT 213560ABA...
-
Page 50: Hydraulic Manifold Valve Port Identification
PUMP LIFT SMALL STEER LIFT RELIEF PUMP CYLINDER CYLINDER VALVE AUTO 2H-18C RESET SMALL VALVE PUMP DUMP VALVE TANK DRAIN CHECK SYSTEM 3H-14A EMERGENCY 4H-23 VALVE RELIEF LIFT LOWERING RIGHT STEER VALVE PULL VALVE VALVE VALVE M160833AA_SR SJ6826RT, SJ6832RT 213560ABA... -
Page 51: Hydraulic Manifold Valve Assemblies And Port
LEFT REAR EXTEND CHECK VALVE 4H-73A OUTRIGGER RIGHT REAR 4H-75A RETRACT OUTRIGGER LEFT FRONT EXTEND 2H-17C OUTRIGGER CHECK HOLDING VALVE 4H-76A VALVE 4H-77A OUTRIGGER OUTRIGGER RIGHT FRONT RIGHT REAR EXTEND EXTEND CHECK VALVE CHECK VALVE OUTRIGGER CYLINDER M138045AB SJ6826RT, SJ6832RT 213560ABA... -
Page 52: Control Box Wiring Diagram
3.8 Control Box Wiring Diagram M208611AC SJ6826RT, SJ6832RT 213560ABA... -
Page 53: Base To Platform Control Cable - Sj6832 Rt
3.9 Base to Platform Control Cable - SJ6832 RT M208044AB SJ6826RT, SJ6832RT 213560ABA... -
Page 54: Base To Platform Control Cable - Sj6826 Rt
3.10 Base to Platform Control Cable - SJ6826 RT M208020AB SJ6826RT, SJ6832RT 213560ABA... -
Page 55: Beeper Wiring Assembly
3.11 Beeper Wiring Assembly M208726AA_SR SJ6826RT, SJ6832RT 213560ABA... -
Page 56: Main Manifold Valve Harness Wiring Diagram
HOLDING VALVE (UPPER) PIN 2 - 02 WHITE HOLDING VALVE (LOWER) PIN 1 - 13 BLACK 13 - BLACK PIN 1 - 13 BLACK PIN 2 - 02 WHITE PIN 2 - 02 WHITE 02 - WHITE M139828AC SJ6826RT, SJ6832RT 213560ABA... - Page 57 SUPPLIED WITH TRACK UNIT TELEMATICS ENGINE STARTER TO KEY LINE WIRE 07 CONTACTOR TO TERMINAL STRIP DISCONNECT FROM 32CR1 10CR1 TO TERMINAL STRIP TO TELEMATICS UNIT SPUMP 28ACR1 28ACR2 28ECR1 28ECR2 TO TERMINAL STRIP SKEY TO TRACKUNIT RELAY WIRE 07 M220175AC SJ6826RT, SJ6832RT 213560ABA...
-
Page 58: Kubota Engine Harness - Diesel
3.14 Kubota Engine Harness - Diesel M137528AC SJ6826RT, SJ6832RT 213560ABA... -
Page 59: Kubota Engine Harness - Dual Fuel
3.15 Kubota Engine Harness - Dual Fuel M198923AA SJ6826RT, SJ6832RT 213560ABA... -
Page 60: Outrigger Control Box
3.16 Outrigger Control Box M129300AB_5 SJ6826RT, SJ6832RT 213560ABA... -
Page 61: Outrigger/Hydraulic Generator Control Box
3.17 Outrigger/Hydraulic Generator Control Box M129301AB_1 SJ6826RT, SJ6832RT 213560ABA... -
Page 62: Hydraulic Generator Electrical Panel Assembly
3.18 Hydraulic Generator Electrical Panel Assembly M194265AB SJ6826RT, SJ6832RT 213560ABA... -
Page 63: Telematic Harness Wiring Diagram
3.19 Telematic Harness Wiring Diagram TO TELEMATICS DEVICE TELEMATICS CONNECTIONS( PART OF STANDARD ELECTRICAL PANEL) MAIN BATTERY TO ENGINE MAIN DISCONNECT SWITCH S1 M171108AA SJ6826RT, SJ6832RT 213560ABA... -
Page 64: Electrical Panel Diagram - Ansi/Csa, Ce & As
PIN 9 - N/U D36-1 PIN 1 - 10A BLACK GREEN/WHITE (34) (10) BLUE/RED PIN 10 - 35B RED/BLACK PIN 2 - N/U GREEN (49) (13) ORANGE 3.20 Electrical Panel Diagram - ANSI/CSA, CE & AS M207980AD SJ6826RT, SJ6832RT 213560ABA... -
Page 65: Electrical Panel Diagram - Kc
RED/WHITE (31) (09) ORANGE/RED GREEN/BLACK (32) (10) BLUE/WHITE GREEN/WHITE (34) (10) BLUE/RED GREEN (49) (13) ORANGE ORANGE/GREEN (60) (14) BLACK RED/BLACK/WHITE (NOT USED) (15) BLUE (GROUND) GRN/BLK/WHT TO (00) MALE M235014AB 3.21 Electrical Panel Diagram - KC SJ6826RT, SJ6832RT 213560ABA... -
Page 66: Electrical Panel Diagram - Positive Air Shut-Off
PART # 146114 PART # 146118 PART # 146103 PIN 10 - 35B RED/BLACK PIN 11 - 02 WHITE (GROUND) GRN/BLK/WHT TO (00) PIN 12 - 10A BLUE/BLACK MALE M208030AC 3.22 Electrical Panel Diagram - Positive Air Shut-Off SJ6826RT, SJ6832RT 213560ABA... -
Page 67: Electrical Panel Diagram - Soft Stop
BLACK (14-14A) PIN 9 & 10 - RED (43-43A) RED/BLACK/WHITE (NOT USED) (15) BLUE NOTE: ONLY USED WITH OUTRIGGERS PART # 146114 PART # 146118 PART # 146103 MALE 3.23 Electrical Panel Diagram - Soft Stop M220073AC SJ6826RT, SJ6832RT 213560ABA... -
Page 68: Hydraulic Schematic - Ansi/Csa
3.24 Hydraulic Schematic - ANSI/CSA M220059AA 3.24 Hydraulic Schematic - ANSI/CSA SJ6826RT, SJ6832RT 213560ABA... -
Page 69: Hydraulic Schematic - Ce/As
3.25 Hydraulic Schematic - CE/AS 3.25 Hydraulic Schematic - CE/AS M137360AL SJ6826RT, SJ6832RT 213560ABA... -
Page 70: Hydraulic Schematic - Kc
MB8 OUTRIGGER MANIFOLD BLOCK VALVE 2H-18B (ANSI/CSA) 2H-18C (CE) SMALL AUXILIARY PUMP DUMP TANK PORT VALVE TANK DRAIN MB1 68XXRT MAIN MANIFOLD PUMP PUMP LARGE SMALL FILTER PUMP PUMP ENGINE PUMP RESERVOIR 3.26 Hydraulic Schematic - KC M156344AB SJ6826RT, SJ6832RT 213560ABA... -
Page 71: Electrical Schematic - Kubota Dual Fuel Wg752 - Ansi/Csa
16 = P2-7 15 = P2-8 35B = P2-10 14 = P2-3 28E = P3-6 28 = P3-4 13 = P2-4 10E = P2-2 60 = P3-3 10A = P2-12 3.27 Electrical Schematic - Kubota Dual Fuel M208040AB_1 SJ6826RT, SJ6832RT 213560ABA... -
Page 72: Electrical Schematic - Kubota Diesel D902 - Ansi/Csa
16 = P2-7 15 = P2-8 35B = P2-10 14 = P2-3 28E = P3-6 28 = P3-4 13 = P2-4 10E = P2-2 60 = P3-3 10A = P2-12 3.28 Electrical Schematic - Kubota Diesel - ANSI/CSA M207973AB SJ6826RT, SJ6832RT 213560ABA... -
Page 73: Electrical Schematic - Kubota Diesel D902- Ce
3.29 Electrical Schematic - Kubota Diesel D902- CE 3.29 Electrical Schematic - Kubota Diesel - CE M220060AB SJ6826RT, SJ6832RT 213560ABA... -
Page 74: Electrical Schematic - Kubota Diesel D902 - As
16 = P2-7 15 = P2-8 35B = P2-10 14 = P2-3 28E = P3-6 28 = P3-4 13 = P2-4 10E = P2-2 60 = P3-3 10A = P2-12 3.30 Electrical Schematic - Kubota Diesel - AS M220062AB_1 SJ6826RT, SJ6832RT 213560ABA... -
Page 75: Outrigger Electrical Assembly
PIN 1 - BLACK (10A) PIN 2 - WHITE (68A) PIN 14 - 35C WHITE PIN 3 - GREEN (10A) PIN 4 - RED (64) PIN 15 - 35C GREEN REF: 138052AE 3.31 Outrigger Electrical Assembly M146115AD SJ6826RT, SJ6832RT 213560ABA... -
Page 76: Outrigger/Hydraulic Generator Electrical Assembly
3.32 Outrigger/Hydraulic Generator Electrical Assembly 3.32 Outrigger/Hydraulic Generator Electrical Assembly M194317AC SJ6826RT, SJ6832RT 213560ABA... -
Page 77: Section 4 - Troubleshooting Information
“probable cause.” The information in the right-hand column, in bold text, represents the “remedy” to the “probable cause” directly beside it. See the example below for clarification. 1. Probable cause Remedy SJ6826RT, SJ6832RT 213560ABA... -
Page 78: Electrical System
Select function with switch. Check continuity between wire #05 and wire #07 on switch. (Platform selected) Check continuity between wire #05 and wire #10E on switch. (Base selected) Replace switch if no continuity during correct switch function. SJ6826RT, SJ6832RT 213560ABA... -
Page 79: No Power To Platform
Main Power Relay 10BCR. 7. Loose or broken wire #10E from Idle/PLTF/Base Key Check continuity. Replace if defective. switch S10 to Base terminal block TB-1. 8. Open diode D10E at Base terminal block TB-1. Check diode. Replace if defective. SJ6826RT, SJ6832RT 213560ABA... - Page 80 Check switch. Check continuity between wire #2B and 25. Defective Oil Pressure switch OPS1 wire #2C on switch when closed. Replace if defective. 26. Loose or broken wire #2C from Oil Pressure switch Check continuity. Replace if defective. OPS1 to Temperature switch TPS1. SJ6826RT, SJ6832RT 213560ABA...
-
Page 81: All Functions Inoperative From Platform
TB-1 to Main Power Relay 10BCR. 12. Defective Relay Main Power Relay 10BCR. Check Relay. Replace if defective. 13. Loose or broken wire #10A from Main Power Relay Check continuity. Replace if defective. 10BCR to Base terminal block TB-1. SJ6826RT, SJ6832RT 213560ABA... - Page 82 Check continuity between wire #2B and wire #2C on 26. Defective Oil Pressure switch OPS1 switch when closed. Replace if defective. 27. Loose or broken wire #2C from Oil Pressure switch Check continuity. Replace if defective. OPS1 to Temperature switch TPS1. SJ6826RT, SJ6832RT 213560ABA...
-
Page 83: Engine Does Not Crank From Platform Nor Base Control Console
Check continuity between wire #08 and wire #31 on (Platform only). switch. Replace if defective. 8. Loose or broken wire #31 from Engine Glow Plug/ Choke switch S13 to Engine Glow Plug/Choke switch Check continuity. Replace if defective. S31 (Platform only). SJ6826RT, SJ6832RT 213560ABA... - Page 84 22. Loose or broken wire #32 from Start Relay 32CR2 to Check continuity. Replace if defective. Anti-Start Relay 32CR1. 23. Defective Anti-Start Relay 32CR1. Check Relay. Replace if defective. 24. Loose or broken wire #32A from Engine Harness to Check continuity. Replace if defective. Starter Contactor 32ACR. SJ6826RT, SJ6832RT 213560ABA...
-
Page 85: Engine Cranks But Does Not Start - Kubota Diesel
Disconnect switch S1 to Glow Plug Relay 31CR. 10. Loose or broken wire #91A from Glow Plug Relay Check continuity. Replace if defective 31CR to Engine Glow Plugs EGP1. 11. Defective Engine Glow Plugs EGP1. Check glow plugs. Repair if necessary. SJ6826RT, SJ6832RT 213560ABA... -
Page 86: Engine Cranks But Does Not Start - Kubota Dual Fuel (Propane/ Gas)
11. Loose or broken wire #02 from Engine Harness to Check continuity. Replace if defective. Choke Relay 31CR. 12. Defective Choke Relay 31CR. Check Relay. Replace if defective. 13. Loose or broken wire #3A from Engine Harness to Check continuity. Replace if defective. Choke Relay 31CR. SJ6826RT, SJ6832RT 213560ABA... -
Page 87: Glow Plugs Inoperative From Neither Engine Controls Nor Platform (Diesel Models)
9. Loose or broken wire #103 from Main Power Check continuity. Replace if defective. Disconnect switch S1 to Glow Plug Relay 31CR. 10. Loose or broken wire #91A from Glow Plug Relay Check continuity. Replace if defective 31CR to Engine Glow Plugs EGP1. SJ6826RT, SJ6832RT 213560ABA... -
Page 88: High Throttle Inoperative
12. Loose or broken wire #35A from Base terminal block Check continuity. Replace if defective. TB-1 to Throttle Enable Relay 35ACR. 13. Loose or broken wire #2A from Power Relay 10CR2 to Check continuity. Replace if defective. Power Relay 10CR1. SJ6826RT, SJ6832RT 213560ABA... -
Page 89: 10 Drive And Steer Inoperative (Machines Without Outriggers Option)
4. Loose or broken wire #8A from Joystick S7 Enable Check continuity. Replace if defective. Out P1-8 to Lift/Off/Drive switch S3. Select Drive position. 5. Lift/Off/Drive Select switch S3 is set to an incorrect Check switch. position. Replace if defective. SJ6826RT, SJ6832RT 213560ABA... - Page 90 17. Loose or broken wire #16 from Forward Relay 16CR to Check continuity. Replace if defective. Control Module CM1 pin #P2-7. 18. Loose or broken wire #10A from Base terminal block Check continuity. Replace if defective. TS-1 to Tilt Override/High Drive Cutout switch LS5. SJ6826RT, SJ6832RT 213560ABA...
- Page 91 Replace if defective. Check continuity from wire #62 and wire #36 through switch when closed. 30. Left front outrigger N.O.-held closed limit switch LS61 is out of adjustment or defective. Adjust switch if out of adjustment. Replace if defective. SJ6826RT, SJ6832RT 213560ABA...
-
Page 92: 11 Brakes Do Not Release
TB-1 to Brake Valve solenoid 3H-30. 10. Loose or broken wire #02 from Brake Valve solenoid Check continuity. Replace if defective 3H-30 to Base terminal block TB-1. 11. Defective Brake Valve solenoid 3H-30. Check coil. Replace if defective. SJ6826RT, SJ6832RT 213560ABA... -
Page 93: 12 Steer Right Inoperative
Check continuity. Replace if defective. switch S3 to Reverse Relay 15CR. 4. Loose or broken wire #02 from Reverse Relay 15CR to Check continuity. Replace if defective. Base terminal block TS-1. 5. Defective Reverse Relay 15CR. Check relay. Replace if defective. SJ6826RT, SJ6832RT 213560ABA... -
Page 94: Forward Drive Inoperative
Check continuity. Replace if defective. switch S3 to Forward Relay 16CR. 4. Loose or broken wire #02 from Forward Relay 16CR to Check continuity. Replace if defective. Base terminal block TS-1. 5. Defective Forward Relay 16CR. Check relay. Replace if defective. SJ6826RT, SJ6832RT 213560ABA... -
Page 95: First Drive Speed And Steering Inoperative
5. Loose or broken wire #18A from Small Pump Relay Check continuity. Replace if defective. 17CR to Base terminal block TB-1. 6. Loose or broken wire #18A from Base terminal block Check continuity. Replace if defective. TB-1 to Small Pump Dump Enable Relay 28ACR1. SJ6826RT, SJ6832RT 213560ABA... -
Page 96: Second Drive Speed Inoperative
Check continuity. Replace if defective. TB-1 to Tilt Override/High Drive Cutout switch LS5. Operate N.C. switch. Check continuity between wire #10A and wire #35 on 6. Defective Tilt Override/High Drive Cutout switch LS5. switch when closed. Replace if defective. SJ6826RT, SJ6832RT 213560ABA... - Page 97 22. Loose or broken wire #17B from Base terminal block Check continuity. Replace if defective. TB-1 to Large Pump Dump Valve solenoid 2H-17B. 23. Loose or broken wire #02 from Large Pump Dump Check continuity. Replace if defective. Valve solenoid 2H-17B to Base terminal block TB-1. SJ6826RT, SJ6832RT 213560ABA...
-
Page 98: 18 Third Drive Speed Inoperative
Check continuity. Replace if defective. solenoid 4H-20A. 8. Loose or broken wire #02 from Series/Parallel Valve Check continuity. Replace if defective. solenoid 4H-20A to Base terminal block TB-1. 9. Defective Series/Parallel Valve solenoid 4H-20A. Check coil. Replace if defective. SJ6826RT, SJ6832RT 213560ABA... - Page 99 Check continuity. Replace if defective. Reverse Relay 20ACR2 to diode D15B. 24. Defective diode D15B. Check diode. Replace if defective. 25. Loose or broken wire #20B from diode D15B to High Check continuity. Replace if defective. Speed Valve solenoid 2H-20B. SJ6826RT, SJ6832RT 213560ABA...
-
Page 100: 20 Up Circuit Inoperative From Platform
S2 to Base terminal block TB-1. 4. Open diode D14E-1. Check diode. Replace if defective. 5. Loose or broken wire #14 from Base terminal block Check continuity. Replace if defective. TB-1 to Control module CM1 pin #P2-3. SJ6826RT, SJ6832RT 213560ABA... -
Page 101: 22 Up Circuit Inoperative From Platform Or Base Control Console (Without Outriggers)
5. Loose or broken wire #64 from outrigger limit switch Check continuity. Replace if defective. LS64 to outrigger board. 6. Loose or broken wire #64 from outrigger board to Check continuity. Replace if defective. outrigger limit switch LS63. SJ6826RT, SJ6832RT 213560ABA... -
Page 102: 24 Platform Does Not Lift From Platform Or Base Control Console With Outriggers Extended
TB-1 to pin #4 on connector CN14 at the outrigger Check continuity. Replace if defective. board. 3. Loose or broken wire #10A from outrigger board CN22 Check continuity. Replace if defective. to outrigger down limit switch LS68. SJ6826RT, SJ6832RT 213560ABA... - Page 103 LS65 to outrigger control module pin #P2-4. If no voltage present, proceed to outrigger control module troubleshooting. 15. Loose or broken wire #65 from outrigger control module at pin P2-8 to Outrigger Lift Enable Relay Check continuity. Replace if defective. 65CR. SJ6826RT, SJ6832RT 213560ABA...
-
Page 104: 26 Down Function Inoperative From Platform
3. Loose or broken wire #A from Joystick S7 to Lift/Off/ Check continuity. Replace if defective Drive Select switch S3. Check continuity between wire #A and wire #13 on switch when Lift selected. 4. Defective Lift/Off/Drive Select switch S3. Replace if defective. SJ6826RT, SJ6832RT 213560ABA... -
Page 105: 27 Down Function Inoperative From Base
Holding Valve solenoid 2H-13B-1, and/or Holding Valve Check Coils. Replace if defective. solenoid 2H-13B-2. 4.2-27 Down Function Inoperative from Base 1. Loose or broken wire #10E from Base terminal block Check continuity. Replace if defective. TB-1 to Base Up/Down switch S2. SJ6826RT, SJ6832RT 213560ABA... - Page 106 2H-13B, Holding Valve solenoid 2H-13B-1, Check continuity. Replace if defective. and/or Holding Valve solenoid 2H-13B-2 to Base terminal block TB-1. 16. Defective Main Lowering Valve solenoid 2H-13B, Holding Valve solenoid 2H-13B-1, and/or Holding Valve Check Coils. Replace if defective. solenoid 2H-13B-2. SJ6826RT, SJ6832RT 213560ABA...
-
Page 107: 28 Hydraulic Generator Inoperative
Check continuity. Replace if defective. Generator Stop Relay 86ACR. 15. Loose or broken wire #02 from Base terminal block Check continuity. Replace if defective. TB-1 to Hydr.Generator Relay 86CCR. 16. Defective Hydr.Generator Relay 86CCR. Check relay. Replace if defective. SJ6826RT, SJ6832RT 213560ABA... -
Page 108: 29 Hydraulic Generator Does Not Shut Off From Generator Switch
Check continuity. Replace if defective. Generator Stop Relay 86ACR. 5. Loose or broken wire #02 from Base terminal block Check continuity. Replace if defective. TB-1 to Hydr.Generator Stop Relay 86ACR. 6. Defective Hydr.Generator Stop Relay 86ACR. Check relay. Replace if defective. SJ6826RT, SJ6832RT 213560ABA... -
Page 109: All Outriggers Inoperative (Auto-Level And Manual)
10. Loose or broken wire #17C at pin #1 and/or wire #02 at pin #2 on connector CN21 on outrigger board to Check for continuity. Replace if defective. outrigger Holding Valve solenoid 2H-17C. 11. Defective outrigger Holding Valve solenoid 2H-17C. Check coil. Replace if defective. SJ6826RT, SJ6832RT 213560ABA... -
Page 110: 31 All Outriggers Inoperative (Auto-Level And Manual From Platform Controls)
Base terminal block TB-1. 3. Loose or broken wire # 02 at pin #3 of the Tilt Override/High Drive Cutout switch LS5 connector to Check for continuity. Replace if defective. pin P2-11 on the Outrigger Control Module OCM1. SJ6826RT, SJ6832RT 213560ABA... -
Page 111: 34 All Outriggers Inoperative (Auto Level Only)
1. Turn off power to reset the outrigger control module (OCM1). 1. Internal failure of outrigger control module 2. Turn power back on and see if the code has cleared. If problem persists, (OCM1). replace outrigger control module. SJ6826RT, SJ6832RT 213560ABA... - Page 112 Check continuity. Replace if defective. CN21 at the outrigger board. 10. Defective Left Front Up Outrigger Valve solenoid 4H- Check coil. Replace if defective. 11. Defective Left Front Down Outrigger Valve solenoid Check coil. Replace if defective. 4H-75. SJ6826RT, SJ6832RT 213560ABA...
-
Page 113: 35 Right Front Outrigger Inoperative Manually
Check continuity. Replace if defective. CN21 at the outrigger board. 10. Defective Right Front Up Outrigger Valve solenoid Check coil. Replace if defective. 4H-72. 11. Defective Right Front Down Outrigger Valve solenoid Check coil. Replace if defective. 4H-76. SJ6826RT, SJ6832RT 213560ABA... -
Page 114: 36 Right Rear Outriggers Inoperative Manually
Check continuity. Replace if defective. CN21 at the outrigger board. 10. Defective Right Rear Up Outrigger Valve solenoid 4H- Check coil. Replace if defective. 11. Defective Right Rear Down Outrigger Valve solenoid Check coil. Replace if defective. 4H-77. SJ6826RT, SJ6832RT 213560ABA... -
Page 115: 37 Left Rear Outriggers Inoperative Manually
Check continuity. Replace if defective. CN21 at the outrigger board. 10. Defective Left Rear Up Outrigger Valve solenoid 4H-74. Check coil. Replace if defective. 11. Defective Left Rear Down Outrigger Valve solenoid Check coil. Replace if defective. 4H-78. SJ6826RT, SJ6832RT 213560ABA... -
Page 116: 38 Individual Outrigger Functions Inoperative (Auto-Level)
CN14 of outrigger board to Outrigger Control Module If no ground present, check continuity of wire. OCM1 pin # P2-11. (Battery negative – signal) Replace if defective. For additional information, refer to sections 4 & 5 Outrigger Control Module – Troubleshooting . SJ6826RT, SJ6832RT 213560ABA... -
Page 117: Auto All Up Inoperative (Retract)
Check for ground at P2-11. If no ground present, check CN14 of outrigger board to Outrigger Control Module continuity of wire. Replace if defective. OCM1 pin # P2-11. (Battery negative – signal) For additional information, refer to sections 4 & 5 Outrigger Control Module . SJ6826RT, SJ6832RT 213560ABA... -
Page 118: Hydraulic Systems
Check system pressures and Large Pump functionality. 2. Worn or defective Large Pump section of Pump P1. Repair or replace if defective. 3. Check Valve CV1 or CV2 defective or stuck. Check valves. Clean or replace if defective. SJ6826RT, SJ6832RT 213560ABA... -
Page 119: Drive Inoperative
4.3-9 Drive Inoperative When in Low Drive 1. Stuck or defective Parallel Counterbalance Valve CB2. Check valve. Replace if defective. 2. Stuck or defective Parallel Forward Drive Valve 4H-16B Check valves. Replace if defective. or Parallel Reverse Drive Valve 4H-15B. SJ6826RT, SJ6832RT 213560ABA... -
Page 120: 10 Drive Inoperative When In High Drive
1. Stuck or defective main Lowering Valve 2H-13B. Check valve. Repair or replace if defective. 2. Stuck Holding Valves 2H-13B-1 and/or 2H-13B-2. Check valves. Repair or replace if defective. 3. Plugged Lowering Orifice O2. Clean or replace orifice. SJ6826RT, SJ6832RT 213560ABA... -
Page 121: 14 Hydraulic Generator Inoperative
6. Stuck or defective Right Front Down Outrigger Valve Clean valve. Replace if defective. 4H-76 (Extend). 7. Stuck or defective Check Valve CV8. Check valve. Replace if defective. Check cylinder and repack if necessary. 8. Fluid is bypassing Outrigger Cylinder C10 internally. Replace if defective. SJ6826RT, SJ6832RT 213560ABA... -
Page 122: 17 Outriggers Drift In
Clean valve(s). Replace if defective. right rear CV9 and/or left rear CV10. Check cylinder and repack if necessary. 2. Fluid bypassing Outriggers cylinder(s) left front C9, right front C10, right rear C11 or left rear C12. Replace if defective SJ6826RT, SJ6832RT 213560ABA... -
Page 123: 18 Load Sense System Codes
DYNAMIC lift. problem. 10. Flash Code F11: Not Up - Select the UP function. This message occurs at the start of the DYNAMIC lift if the operator selects a function other than UP . SJ6826RT, SJ6832RT 213560ABA... - Page 124 This message is given if the elevation switch P2-10 closed Check CALIBRATIONS / HEIGHT CALS during lower at a too high height (above 25%). Tthe ElevUp value shows the recorded height where the switch opened. SJ6826RT, SJ6832RT 213560ABA...
- Page 125 STATIC lower. An initial pressure peak when the platform lifted cannot 28. Flash Code F31:Reject Curve - be found between 0% and 15% height. The DYNAMIC pressure curve is unacceptable. Check the pressure sensor and lift cylinder hydraulics. SJ6826RT, SJ6832RT 213560ABA...
- Page 126 37. Flash Code F46:Check Elev - This message indicates that the elevation switch opened more than once during the DYNAMIC lift. 38. Flash Code F47:Check Elev - This message indicates that the elevation switch closed more than once during the DYNAMIC lower. SJ6826RT, SJ6832RT 213560ABA...
-
Page 127: Section 5 - Procedures
2 in/sec. When pushing, towing or winching, do not exceed 2 mph (3.2 km/h). Do not push, tow or winch vehicle onto a slope, or brake the towing vehicle rapidly. Do not pull the aerial platform down an incline towards a winch. SJ6826RT, SJ6832RT 213560ABA... -
Page 128: Release The Free-Wheeling Valve
7. Position the machine on a firm and level surface. 8. Chock or block the wheels to prevent the aerial platform from rolling. 9. Re-engage the parking brakes by pulling out the black brake valve plunger. SJ6826RT, SJ6832RT 213560ABA... -
Page 129: Wheel Bolt / Nut Inspection And Torquing Procedure
90 ft•lb, repeat complete sequence until there is no change in torque values. If possible, drive the machine prior to checking torques. 8. Check torque values after 8 hours of operation and then at weekly intervals. SJ6826RT, SJ6832RT 213560ABA... -
Page 130: Tightening And Torque Recommendations For Hydraulic Couplings And Hoses
6. Install any 45° and 90° hydraulic hose ends first, then align direction and tighten. Adjust 8. The control box functions may now be accessed the swivel nut on the straight hose end before from the base. tightening to create the desired flow. SJ6826RT, SJ6832RT 213560ABA... -
Page 131: Torquing Using The Flats-From-Wrench-Resistance Method
Mark the hose end and fitting Using two Box Wrenches, tighten the nut the appropriate number of flats past the mark (refer to the FFWR chart above). 6. Apply a drop of torque seal to the connection. SJ6826RT, SJ6832RT 213560ABA... -
Page 132: Checking The Holding Valve
2. Still steering fully left or right to create pressure, turn the system relief valve adjustment screw clockwise to raise the pressure, or counterclockwise the lower the pressure, until it matches the value given on the serial plate. SJ6826RT, SJ6832RT 213560ABA... -
Page 133: 11 Lift Pressure Setting
Release the latch forward 5. Connect a pressure gauge to the quick disconnect fitting located on the top of the main manifold. Lift pressure relief valve Pressure gauge attached to quick disconnect fitting SJ6826RT, SJ6832RT 213560ABA... -
Page 134: 12 Grease Points
11. Reconnect the lift hose to the main manifold lift port. Refer to 5 .2-7 Tightening and Torque Recommendations for Hydraulic Couplings and Hoses. 12. Remove the pressure gauge and reconnect the control box to the platform. SJ6826RT, SJ6832RT 213560ABA... - Page 135 4. Disconnect the grease gun. 5. Wipe off any excess grease from around the joint or bearing, and from the grease fitting. 6. Replace the grease fitting cap. SJ6826RT, SJ6832RT 213560ABA...
-
Page 136: 13 Electronic Tilt Switch Setup Procedure (Kc Only)
3. Chock or block wheels to keep the aerial platform from rolling forward or backward. 4. Push in emergency stop buttons and turn main power disconnect switch off. 5. Disconnect tilt switch from 4 pin connector. 6. Remove old tilt switch from mount. SJ6826RT, SJ6832RT 213560ABA... - Page 137 6. Pull out all emergency stop buttons. 7. Verify switch is powered. The red and green LED indicator lights should be flashing. 8. On the back side of the switch, press and hold the Set-up button for 3 seconds. SJ6826RT, SJ6832RT 213560ABA...
- Page 138 The switch does not function. After a period of 5 seconds or on power up, the switch attempts to return to normal operation. If the fault is still detected, both LEDs remain SJ6826RT, SJ6832RT 213560ABA...
-
Page 139: Engine
1452AB A: Terminal (+) C: High Tension Cord B: Terminal (–) Resistance of Ignitor 1. Disconnect the connector. 2. Measure the resistance with an ohmmeter. 3. If the resistance is not within the factory specifications, replace it. SJ6826RT, SJ6832RT 213560ABA... -
Page 140: Fan Belt Replacement And Adjustment
2. If the deflection is greater than or 1/4–5/16 in (7–9 mm), loosen the alternator adjustment bolt. Use a pry between the alternator and engine block to adjust the position of the alternator. Tighten the bolt. SJ6826RT, SJ6832RT 213560ABA... -
Page 141: Kubota Dual Fuel (Df972 / Wg752) Engine Throttle Setting
2. When measuring the engine speed using a 1. Push the solenoid plunger in, and hold it there. digital tachometer, aim the tachometer at this Measure the rpm using a digital tachometer, as reflective strip while the engine is running. described in Step 2. SJ6826RT, SJ6832RT 213560ABA... - Page 142 4. Once the correct rpm is reached, apply a drop of Loctite 242 to the thread, and tighten the nut against the threaded link. Use vice grips to hold the link stationary, and a wrench to tighten the nut. 1. Turn threaded link 2. Tighten nut SJ6826RT, SJ6832RT 213560ABA...
-
Page 143: Kubota Diesel (D902) Engine Throttle Setting
11. Adjust the low idle by first loosening the low idle stop jam nut, then turning the low idle stop screw and measuring the engine speed until it reaches 2050 ±50 rpm. SJ6826RT, SJ6832RT 213560ABA... -
Page 144: Replacing The Air Cleaner Element
2. Remove the old air cleaner element by pulling it straight out. 3. Install a new air cleaner element, pushing firmly to seat it. SJ6826RT, SJ6832RT 213560ABA... -
Page 145: Replacing The Fuel Filter Element (Kubota D902)
4. Open the air vent plug on the top of the fuel injection pump a few turns. Some air bubbles should come out. Filter Element Filter Cup 5. When no more air bubbles are seen, close the air vent plug. Retaining Ring SJ6826RT, SJ6832RT 213560ABA... -
Page 146: Replacing The Oil Filter Cartridge
10 to 15 minutes, then shut it off and allow it to cool. 5. Check for oil leaks around the gasket, and if no leaks are found, check the oil level using the Dipstick Drain plug dipstick. 6. Replenish the oil if needed. SJ6826RT, SJ6832RT 213560ABA... -
Page 147: 10 Checking And Replenishing The Radiator Coolant Level
8. Start the engine and run it for a few minutes, then shut it off. 9. Check the coolant level on the recovery tank Radiator cap once again, and add more coolant to the tank if needed. FULL Drain plugs SJ6826RT, SJ6832RT 213560ABA... -
Page 148: Outriggers
Section 5 – Procedures Outriggers 5.4 Outriggers 5.4-1 Auto-Leveling Outrigger PC Board Layout CN14 CN21 CN20 9CR3 9CR2 61CR 17BCR 65CR ENABLE CN22 SJ6826RT, SJ6832RT 213560ABA... -
Page 149: Outrigger Control Module (Ocm1) Pin Reference Table (Gp-106)
12V Output for Outrigger Right Front Up signal to 4H-72 Solenoid 71 Orange 12V Output for Outrigger Left Front Up signal to 4H-71 Solenoid 35C White/Black 12V Output for Outrigger Enable signal from Enable switch S9A or Relay 9CR3 SJ6826RT, SJ6832RT 213560ABA... -
Page 150: Auto-Leveling Outrigger Settings And Error Codes
Since the outrigger control module only reports one error, only one code can be read from the LED per FAULT: P2-8 ALWAYS OFF instance. If the error is cleared and another error is FAULT: HWFS STALLED! present, it will then be presented. 1436AC SJ6826RT, SJ6832RT 213560ABA... -
Page 151: Auto-Leveling Outrigger Error Code Breakdown
FAULT: P2-6 FAULTY FAULT: P2-8 STUCK ON FAULT: P2-8 ALWAYS ON FAULT: P2-8 ALWAYS OFF These are internal faults. If the fault persists after the power has been reset, the outrigger control module may need to be replaced. 1506AA SJ6826RT, SJ6832RT 213560ABA... -
Page 152: Hand Held (Ezcal) Calibration / Diagnostic Tool Key Functions
Outrigger Settings Model 6826RT 6832RT O.R. Settings 1438AB SYMBOL KEY FUNCTIONS ESC/ENTER BUTTONS To move back and forth between menu and sub-menu LEFT/RIGHT BUTTONS Select menus and setting to be adjusted UP/DOWN BUTTONS Adjust setting values SJ6826RT, SJ6832RT 213560ABA... -
Page 153: Outrigger Control Module (Ocm1) Instructions
Outriggers Displays various status during the auto-level function Tilt Displays vehicle tilt in X and Y orientations measured by integral sensor Tilted Displays whether vehicle is tilted (YES or NO) Battery Displays battery supply voltage (on P2-12) SJ6826RT, SJ6832RT 213560ABA... - Page 154 Displays maximum recorded battery supply voltage OCM1 version Displays part number and software version of GP106 EZcal version Displays software version of EZcal Access Level Menu Options ACCESS LEVEL 3 (allows viewing only) CODE xxxx ACCESS LEVEL 2 (allows setup on OCM1) SJ6826RT, SJ6832RT 213560ABA...
- Page 155 If machine is tilted to 1.0° in the X and Y orientations, the auto-level function will attempt to level the X orientation (0.3+0.5<1.0) but does not attempt to level the Y orientation (0.7+0.5>1.0) RANGE: 0.0° to 1.0°, default 0.3° SJ6826RT, SJ6832RT 213560ABA...
-
Page 156: Outrigger Upper Limit Switch (Ls61, Ls62, Ls63, Ls64) Replacement And Adjustment
1. Turn main power disconnect switch to the ON switch and cable. position, and start the engine. 2. With the outriggers fully retracted, the unit should be drivable. With the outriggers extended more than halfway, the unit should not be drivable. SJ6826RT, SJ6832RT 213560ABA... -
Page 157: Outrigger Lower Limit Switch (Ls65, Ls66, Ls67, Ls68) Replacement And Adjustment
With the outriggers extended weldment, and through the rubber grommet. more than halfway, the unit should not be Retain the rubber grommet. Discard the old limit drivable. switch and cable. SJ6826RT, SJ6832RT 213560ABA... -
Page 158: Outrigger Mechanical Limit Switch Wiring Diagram
O.R. DOWN SWITCH (NC) - BLACK & BLACK / WHITE O.R. DOWN SWITCH (NC) - BLACK & BLACK / WHITE LEFT REAR OUTRIGGER SECTION VIEW RIGHT REAR OUTRIGGER SECTION VIEW (SHOWN IN THE RETRACTED STATE) (SHOWN IN THE RETRACTED STATE) SJ6826RT, SJ6832RT 213560ABA... -
Page 159: Load Sensing System
17. Repeat Steps 6–16 as necessary. If test cannot lowering system and that it is fully functional. be passed after 2 calibration attempts, contact Skyjack Customer Service. 3. Ensure fuel tank has enough fuel to carry out test. 18. Fully lower platform. -
Page 160: Machine Level Calibration Procedure
12. The display will show Defaults, 0 = Custom. By using Up/Down buttons, select the Defaults: Code Setting for your Model (For default code, refer to 5 .5-9 Curved/Group codes chart ) from the menu. 13. Press ENTER and followed by ESCAPE. SJ6826RT, SJ6832RT 213560ABA... -
Page 161: Load Sense Module (Cm1) Pin Reference Table (Gp-102)
Output supply 12V (B+) for AT1 Angle Transducer 900 White 0V GND (-) Negative Reference for PT1 Pressure Transducer 902 White 0V GND (-) Negative Reference for AT1 Angle Transducer 910A Black Output supply 12V (B+) for PT1 Pressure Transducer SJ6826RT, SJ6832RT 213560ABA... -
Page 162: Control Module Initial Set-Up Procedures
▪ By using Left/Right buttons, select the “Tilt Setups” from the menu and press the ENTER button. 16. The display will show “Tilt Setups: Calibrate Level”. ▪ Select the “Tilt Setups: Calibrate Level” from the menu and press the ENTER button. 17. The display will show “Calibrate Level: Yes: Enter, No: ESC”. SJ6826RT, SJ6832RT 213560ABA... - Page 163 30. The display briefly shows TOTAL DATA: 04 to indicate the number of measurements taken. 31. The display shows Calibrate Load: Please Lower. IMPORTANT If the lower switch is released earlier than full- lower position, the calibration must be aborted and repeated from the beginning! SJ6826RT, SJ6832RT 213560ABA...
- Page 164 ▪ If the phase does not need to be repeated, just press ENTER to move on. ▪ If the phase does need to be repeated, press UP or DOWN to change NO to YES then press ENTER. SJ6826RT, SJ6832RT 213560ABA...
-
Page 165: Led Error Codes - Quick Reference Chart
4. A 4 second pause. Repeat Steps 1–4 Since the GP102 only reports one error, only one code can be read from the LED per instance. If the error is cleared and another error is present, it will then be presented. SJ6826RT, SJ6832RT 213560ABA... -
Page 166: Led Error Codes - Code Breakdown Chart
Check that the battery voltage is not too low. Verify battery voltage on P2-12. B+ Supply Too Low Disconnect plug P4 – if the fault clears there is a wiring P4-1 Or P5-1 Short To 0V? fault from P4-1 to the rest of the vehicle. SJ6826RT, SJ6832RT 213560ABA... -
Page 167: Led Error Codes - Code Breakdown Chart (Continued)
– incorrect mounting can cause the bad tilt sensor Fault: Bad Slave Analogs diagnostic to occur. Otherwise there may be an internal problem with the GP102. Fault: Bad Strain Monitors Fault: Bad Slave Micro Fault HWFS Stalled! SJ6826RT, SJ6832RT 213560ABA... -
Page 168: Control Module Load Calibration - Code Messages & Definitions
A reading of 0V or 5V is probably due to a wiring problem. Code F11: Not Up This message occurs at the start of calibration if the operator selects a function other than UP . ▪ Select the UP function only. SJ6826RT, SJ6832RT 213560ABA... - Page 169 ▪ Check DIAGNOSTICS / SENSORS to see the output. A reading of 0V or 5V is probably due to a wiring problem. Code F42: Low Pressure This message indicates that the pressure transducer output (P4-2) is too low (0.5V or less) at the beginning of calibration. ▪ Check DIAGNOSTICS / SENSORS to read output. SJ6826RT, SJ6832RT 213560ABA...
- Page 170 Press ENTER to confirm when the platform is fully lowered. Platform Empty? This message is prompting for confirmation that the platform is completely empty. Press ENTER to confirm if the platform is empty. SJ6826RT, SJ6832RT 213560ABA...
- Page 171 Lower Loaded This message is displayed while the platform is being lowered to the next measurement height, when an EMPTY platform is being calibrated. Lowering This message is displayed while the platform is being lowered, during HEIGHT-only calibration. SJ6826RT, SJ6832RT 213560ABA...
-
Page 172: Curved/Group Codes Chart
00/00/00 is not allowed! Finished This message confirms that calibration is complete and successful. 5.5-9 Curved/Group codes chart Model Number of Extension Decks Curve Code Group Code SJ6832 RT 1 Manual extension deck SJ6826 RT 1 Manual extension deck SJ6826RT, SJ6832RT 213560ABA... -
Page 173: Scissors
6. Follow the cable into the electrical panel, and limit switch plunger. Apply a small amount of Loctite to both set screws, and tighten them. disconnect the limit switch wires from the electrical panel. Discard the limit switch. SJ6826RT, SJ6832RT 213560ABA... -
Page 174: High Speed Cutout Limit Switch Testing
81–87 in (206–221 cm) . 4. Adjust the tension on both hinges until the gate releases and latches from a half open position. 5. Reinstall the safety locking screws into the hinges when tension adjustment is complete. SJ6826RT, SJ6832RT 213560ABA... -
Page 175: Railing Maintenance And Repair
Section 5 – Procedures Platform 5.7-2 Railing Maintenance and Repair Skyjack MEWPs have been designed to ensure compliance with the relevant design standards applicable for that particular unit at the time of manufacture. As such, any repairs made to the... - Page 176 We sell worldwide for the brands: Genie, Terex, JLG, MultiQuip, Mikasa, Essick, Whiteman, Mayco, Toro Stone, Diamond Products, Generac Magnum, Airman, Haulotte, Barreto, Power Blanket, Nifty Lift, Atlas Copco, Chicago Pneumatic, Allmand, Miller Curber, Skyjack, Lull, Skytrak, Tsurumi, Husquvarna Target, Stow, Wacker, Sakai, Mi-T-M, Sullair, Basic, Dynapac, MBW, Weber, Bartell, Bennar Newman, Haulotte, Ditch Runner, Menegotti, Morrison, Contec, Buddy, Crown, Edco, Wyco, Bomag, Laymor, EZ Trench, Bil-Jax, F.S.
Need help?
Do you have a question about the SJ6826RT and is the answer not in the manual?
Questions and answers