Avaya S8500B Manual
Media server
Hide thumbs
Also See for S8500B:
- Manual (1262 pages) ,
- Job aids for field replacements (186 pages) ,
- Replacing (14 pages)
Table of Contents
Advertisement
Quick Links
Job Aid: Replacing the SAMP on the S8500B Media
Server
Introduction
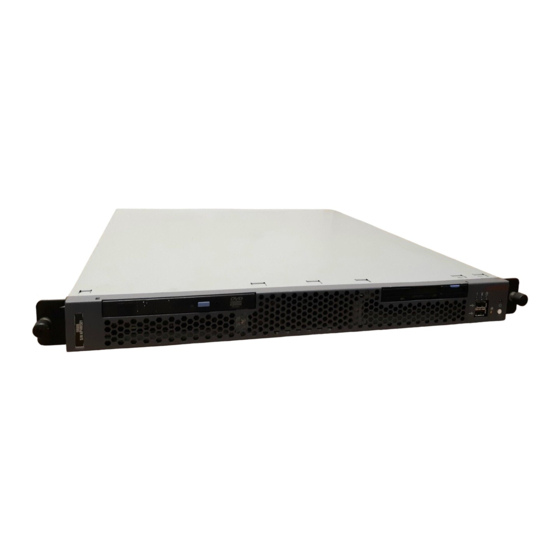
The S8500B Media Server (IBM x306 server) is equipped with the Server Availability
Management Processor™ (SAMP) remote maintenance board.
These topics are covered in this document:
Backing up the media server
Powering down the media server
Removing the media server from the rack
Removing the cover of the media server
Removing and replacing the SAMP card
Replacing the cover of the media server
Reconnecting cables
Powering up the media server
Testing the network connections
Reconfiguring the SAMP card
Media server connections
Services access and logins
Backing up the media server
Note:
This procedure assumes that you are replacing a SAMP card in a media server
Note:
that has been in operation.
To back up the media server before you power it down:
1. Connect the services laptop to the port labeled 2 (LAN 2) on the rear of the media server
using the crossover cable. See
2. Open a browser window on the laptop.
Figure 6: S8500B Media Server, rear view
on page 12.
03-300323 Issue 1 January 2005
1
Advertisement
Table of Contents

Subscribe to Our Youtube Channel
Related Manuals for Avaya S8500B


Summary of Contents for Avaya S8500B
- Page 1 Job Aid: Replacing the SAMP on the S8500B Media Server Introduction The S8500B Media Server (IBM x306 server) is equipped with the Server Availability Management Processor™ (SAMP) remote maintenance board. These topics are covered in this document: Backing up the media server...
- Page 2 Job Aid: Replacing the SAMP on the S8500B Media Server 3. In the Address field of the browser, type the URL for the media server and press Enter. The Welcome window opens. 4. Click Continue. 5. Accept the Avaya certificate by clicking Yes.
- Page 3 Removing the media server from the rack 3. Click on the Shutdown button at the bottom of the page. The Shutdown This Server page displays the shutdown indicators. 4. Wait until the server powers down before proceeding. Removing the media server from the rack To remove the media server: 1.
- Page 4 Job Aid: Replacing the SAMP on the S8500B Media Server Figure 1: Locating the media server cover’s captive screw h3dscapb KLC 093004 Figure notes: Media server cover’s captive screw 2. Slide the media server cover back from the front panel until the cover’s tabs are released from the top slot of the front panel.
- Page 5 Removing and replacing the SAMP card Figure 2: Removing/replacing the SAMP card indssamp KLC 101504 Figure notes: Loosen captive screw on SAMP Remove cable assembly from SAMP Remove riser-card assembly 03-300323 Issue 1 January 2005...
- Page 6 Make sure the SAMP card is completely and correctly seated in the expansion CAUTION: slot before you apply power to the S8500B Media Server. Incomplete insertion might cause damage to the system board or to the SAMP card. 6. Replace the cable assembly from the SAMP to the motherboard (see Step 3) with the replacement cable (shipped with the replacement SAMP).
-
Page 7: Reconnecting Cables
2. If necessary press the Power button located on the front right-hand side. 3. Verify that there is network activity by looking at LEDs on each port of the dual NIC (see Figure Figure 3: S8500B Media Server rear panel dual NIC LEDs h3msble7 KLC 110104 Figure notes:... -
Page 8: Testing The Network Connections
Job Aid: Replacing the SAMP on the S8500B Media Server Testing the network connections Note: The following procedure works only if the S8500B media server is on the Note: customer’s network. To test connectivity to the network: 1. In the Maintenance Web Interface select Diagnostics > Ping. - Page 9 After replacing the SAMP card, you must configure the SAMP before you use it. The SAMP comes loaded from the factory with Avaya defaults. 1. Check the Avaya support Website (http://www.avaya.com/support) for more recent firmware for the SAMP. 2. Download the newer firmware to your laptop.
-
Page 10: Front Panel Connections
8. At the prompt to commit the software and print the software version, respond with Yes. 9. From the server’s command line type convertSampIP (case-sensitive) and press Enter. Note: Detailed information about configuring the SAMP card is in the Avaya Server Note: Availability Management Processor User Guide (03-300322). -
Page 11: Rear Panel Connections
Rear panel connections Figure 6: S8500B Media Server, rear view on page 12 shows the connections that are available on the rear panel of the S8500B media server. 03-300323 Issue 1 January 2005... - Page 12 Dual NIC (optional) RS-232 serial interface Connection to the customer’s network is through port 1 (Eth0) on the rear of the Avaya S8500B Media Server, using a standard CAT5 cable with RJ45 connectors on each end. The other end of the cable connects to an Ethernet switch (router) or hub.
- Page 13 Media server connections Figure 7: CAT5 cables connected to a port on the rear of the Avaya S8500B Media Server h3msbl5a KLC 093004 Figure notes: Eth0 — to customer’s network if Eth2 — to port network if only one port...
-
Page 14: Samp Connections
Job Aid: Replacing the SAMP on the S8500B Media Server Figure 8: S8500B and SAMP connections and network interfaces Services laptop IP address: Reserved INADS server 192.11.13.5 (Services for IP: 10.1.2.2 Type: Static future use) Type: Static IP address: 192.11.13.6... - Page 15 The optional dual network interface card (NIC) is used in a configuration where the customer chooses to implement the control network between the S8500B Media Server and the IPSIs as a private, dedicated network. In other words, the control network is not combined with the “Corporate LAN”...
-
Page 16: Modem Connections
LAN 3 - to customer LAN LAN 4 - not used Modem connections There is one modem on an Avaya S8500B Media Server configuration that connects to the USB port on the SAMP (see Figure 11: Modem connections on the Avaya S8500B Media Server page 17). - Page 17 Media server connections Figure 11: Modem connections on the Avaya S8500B Media Server h3msm85b KLC 093004 Figure notes: Modem Telephone line connecting the modem to the outside line (must be TouchTone, not rotary) USB cable connecting the USB modem to the USB port on the media server.
- Page 18 Job Aid: Replacing the SAMP on the S8500B Media Server Services access and logins Ports and protocols Services laptop access to the SAMP Logging in to the SAMP Logging in to the media server Ports and protocols Table 2 lists all the services access protocols available on the SAMP services laptop port.
- Page 19 The SAMP has a dedicated services laptop access for on-site maintenance and administration purposes (Eth2) as shown in Figure 12: Services laptop computer connected directly to the S8500B Media Server on page 20. The IP address is 192.11.13.6. 03-300323 Issue 1 January 2005...
- Page 20 Job Aid: Replacing the SAMP on the S8500B Media Server Figure 12: Services laptop computer connected directly to the S8500B Media Server cadlsrv5 KLC 110104 Figure notes: Services laptop NIC adapter cable (if necessary) Network interface card (NIC) Black CAT5 cross-connect cable...
- Page 21 Services access and logins Logging directly into the SAMP To log directly in to the SAMP: 1. SSH (TCP Port 10022) or HTTPS (TCP Port 10443) to IP address 192.11.13.6. For SSH, type ssh -p10022 192.11.13.6 and press Enter to get to the SAMP login. For HTTPS, in the web URL, type 192.11.13.6:10443 (the IP address and port of the SAMP Web pages) and press Enter.
- Page 22 Job Aid: Replacing the SAMP on the S8500B Media Server 3. Log in to the system using the craft login. The SAMP home page displays. Logging in to the media server To log in to the media server: 1. Set up a ppp session by dialing into the modem.
Need help?
Do you have a question about the S8500B and is the answer not in the manual?
Questions and answers