
Related Manuals for Marmitek IR Control 10


Summary of Contents for Marmitek IR Control 10
- Page 1 IR Control 10 User manual Gebrauchsanleitung Guide utilisateur Modo de empleo Manuale d’istruzioni Gebruiksaanwijzing...
- Page 2 © MARMITEK...
-
Page 3: Table Of Contents
Extend the cable length of the IR receiver ..........8 Frequently asked questions (FAQs) ............... 9 Technical specifications ..................10 Optional ....................... 11 Notification ......................11 8.1 Declaration of Conformity ..................11 8.2 Recycling ......................12 8.3 Copyrights ......................12 IR Control 10™... -
Page 4: Safety Instructions
Improper use, self-installed modifications or repairs will void any and all warranties. • Marmitek does not accept any product responsibility for incorrect use of the product or use other than for which the product is intended. • Marmitek does not accept liability for any consequential damage other than the legal product responsibility. -
Page 5: Your Product
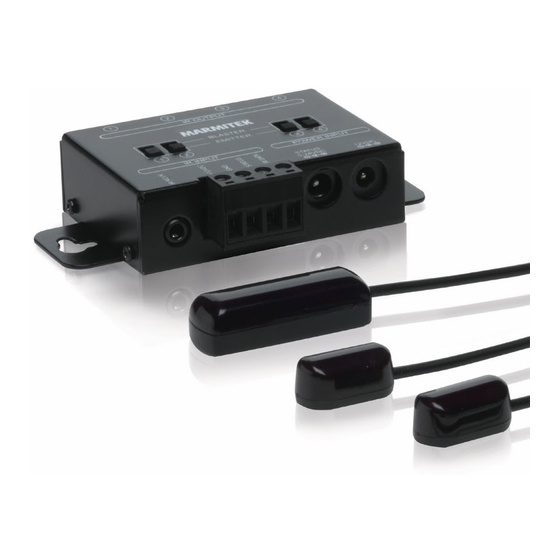
3 Your product 3.1 Introduction Congratulations on your purchase of the IR Control 10™. With it you can extend the IR (infrared) signals of remote controls. The IR Control 10™ makes it possible to operate A/V devices while these are in a closed cupboard or when your A/V equipment is out of sight. -
Page 6: Connections
Use the self-adhesive strip which is supplied to locate the IR receiver just about anywhere you please. Experiment with the location before you stick the IR receiver in its final position. Note! The sticky strip may lead to discolouration or leave glue residues on certain surfaces. © MARMITEK... -
Page 7: Installation Of The Ir Extension Cable With Emitter Leds
LEDs and they can even become defective. Connect the installed IR receiver cable to the ‘IR RCVR’ connector of the IR Module. Connect the power adapter to the ‘12VDC’ connector of the IR Module and connect it to the mains. IR Control 10™... -
Page 8: Perform A Function Test Of The Product
You can now operate your A/V equipment via the IR Control 10 XTRA™ through the closed cabinet doors! If the IR Control 10 XTRA is not reacting in a correct way, try experimenting with the placement of the IR receiver and/or IR extension cables (emitter or blaster). Placing it somewhere else could give a better result. -
Page 9: Frequently Asked Questions (Faqs)
Relocate the IR LED so that less infrared light is received via the IR window. Do you have other questions that have not been resolved by the above information? Please go to www.marmitek.com IR Control 10™... -
Page 10: Technical Specifications
LEDs Dimensions: 95 x 46 x 20mm IR extension cable with 2 emitter LEDs Connection: 3.5mm jack plug (mono) IR LEDs: 2x IR emitter LEDs Cable length: 3 meters Specifications may change without prior notice. © MARMITEK... -
Page 11: Optional
8 Notification 8.1 Declaration of Conformity Hereby, Marmitek BV declares that this IR Control 10™ is in compliance with the essential requirements and other relevant provisions of the following Directives: Directive 2014/30/EU of the European Parliament and of the Council of 26 February... -
Page 12: Recycling
8.3 Copyrights Marmitek is a trademark of Germatron B.V. IR Control 10™ is a trademark of Marmitek B.V. All rights reserved. Every effort has been made to ensure that the information in this manual is accurate. Marmitek is not responsible for printing or clerical errors. -
Page 13: Inhaltsverzeichnis
4.4.2 Kabellänge des IR Empfängers verlängern ........... 18 Häufig gestellte Fragen (FAQs) ................19 Technische daten ....................20 Zusätzlich erhältlich ....................21 Hinweis ........................ 21 8.1 Konformitätserklärung ..................21 8.2 Recycling ......................22 8.3 Urheberrechte ...................... 22 IR Control 10™... -
Page 14: Sicherheitshinweise
• Bei einer zweckwidrigen Verwendung, selbst angebrachten Veränderungen oder selbst ausgeführten Reparaturen verfallen alle Garantiebestimmungen. • Marmitek übernimmt bei einer falschen Verwendung des Produkts oder bei einer anderen Verwendung des Produktes als für den vorgesehenen Zweck keinerlei Produkthaftung. • Marmitek übernimmt für Folgeschäden keine andere Haftung als die gesetzliche Produkthaftung. -
Page 15: Ihr Produkt
3 Ihr Produkt 3.1 Einführung Herzlichen Glückwunsch zum Erwerb des IR Control 10™. Mit diesem Set können Sie IR (Infrarot-) Signale von Fernbedienungen verlängern. Das IR Control 10™ ermöglicht es A/V Geräte zu bedienen, während diese sich in einem geschlossenen Schrank oder außer Sichtweite befinden. -
Page 16: Anschlüsse
Der anliegende, selbstklebende Streifen ermöglicht Anbringung an nahezu allen Stellen. Ermitteln Sie die richtige Stelle, bevor Sie den IR Empfänger definitiv festkleben. Achtung! Der Klebestreifen kann auf bestimmten Oberflächen eine Verfärbung verursachen oder nach Entfernung Klebereste hinterlassen. © MARMITEK... -
Page 17: Installation Des Ir Verlängerungskabels Mit Emitter Leds
Schäden an den IR LEDs und somit einen Defekt verursachen. Schließen Sie das installierte IR Empfängerkabel an den “IR RCVR“ Anschluss des IR Moduls an. Schließen Sie den Netzteil an den "12VDC" Anschluss des IR Moduls an und stecken Sie den Adapter in eine Steckdose. IR Control 10™... -
Page 18: Betriebstest Des Produkts
4.3.5 Betriebstest des Produkts Nach korrektem Anschluss des IR Control 10™ blinkt die Leuchte am IR Empfänger, wenn Sie die Taste der (Infrarot-Fernbedienung) betätigen und Sie dabei auf den IR Empfänger richten. Schließen Sie die Türen Ihres Schranks und verhindern Sie, dass auch die A/V Geräte unmittelbar von der Fernbedienung ein Infrarot-Kommando empfangen... -
Page 19: Häufig Gestellte Fragen (Faqs)
Infrarotstrahlung und werden auf Grund dessen nicht oder nur schlecht funktionieren. Versetzen Sie die IR LED, sodass weniger Infrarotlicht über das IR Fenster einstrahlt. Sie haben noch Fragen, die im Obigen nicht beantwortet wurden? Schauen Sie dann unter www.marmitek.com IR Control 10™... -
Page 20: Technische Daten
Verlängerungskabel mit Emitter und Blaster LED’s Maße: 95 x 46 x 20mm IR Verlängerungskabel mit 2 Emitter LED’s Anschluss: 3,5mm Buchsenstecker (Mono) IR LED’s: 2x IR Emitter LED’s Kabellänge: 3 Meter Angaben können ohne vorherige Mitteilung geändert werden. © MARMITEK... -
Page 21: Zusätzlich Erhältlich
8 Hinweis 8.1 Konformitätserklärung Hiermit erklärt Marmitek BV die Übereinstimmung des Gerätes IR Control 10™ mit den grundlegenden Anforderungen und den anderen relevanten Festlegungen der Richtlinien: Richtlinie 2014/30/EU des Europäischen Parlaments und des Rates vom 26. Februar 2014 zur Harmonisierung der Rechtsvorschriften der Mitgliedstaaten über die elektromagnetische Verträglichkeit (Neufassung). -
Page 22: Recycling
Sie das Produkt erworben haben. 8.3 Urheberrechte Marmitek BV ist ein Warenzeichen von Germatron BV. IR Control 10™ ist ein Warenzeichen von Marmitek BV Alle Rechte vorbehalten. Weitergehende Ansprüche sind ausgeschlossen, insbesondere übernimmt Marmitek BV keine Gewähr für die Richtigkeit des Inhalts dieses Handbuchs. - Page 23 Rallonger le câble du Récepteur IR ............28 Foire aux questions (FAQ) ................... 29 Spécifications techniques ..................30 Disponible en option ..................... 31 Notification ......................31 8.1 Déclaration de conformité ..................31 8.2 Recyclage ......................32 8.3 Droits d'auteur ...................... 32 IR Control 10™...
-
Page 24: Consignes De Sécurité
La garantie n'est plus valable en cas d'usage inapproprié, de modifications ou de réparations effectuées par des personnes non agréées. • Marmitek se dégage de toute responsabilité en cas d'usage inapproprié du produit ou d'utilisation non conforme à l'usage auquel le produit est destiné. •... -
Page 25: Votre Produit
3 Votre produit 3.1 Introduction Merci d’avoir acheté le IR Control 10™. Il vous permet de prolonger les signaux IR (infrarouge) des télécommandes. Le IR Control 10™ permet de commander des appareils A/V lorsqu'ils sont dans un meuble fermé ou lorsque vos appareils A/V sont hors de vue. -
Page 26: Connexions
Faites des essais pour repérer la position exacte avant de coller définitivement le récepteur IR. Attention ! La bande adhésive peut provoquer une décoloration de certaines surfaces ou laisser des résidus de colle lorsqu'on l'enlève. © MARMITEK... -
Page 27: Installation Du Câble D'extension
4.3.5 Testez le fonctionnement du produit Si le IR Control 10™ est correctement connecté, le voyant sur le Récepteur IR clignote lorsque vous appuyez sur une touche de la télécommande (infrarouge) et que vous la dirigez vers le Récepteur IR. -
Page 28: Installation Avancée
Module IR, si nécessaire jusqu'à 300 mètres en utilisant un câble CAT5 (ou l'équivalent). Coupez alors le connecteur 3.5mm standard du câble du Récepteur IR et rallongez le câble selon l'exemple ci-dessous. Récepteur IR Câble CAT5 Module IR Rouge Orange +12VDC Noir Bleu Jaune Vert STATUT Blanc Marron DONNÉES IR © MARMITEK... -
Page 29: Foire Aux Questions (Faq)
Déplacez la LED IR de telle sorte que la fenêtre IR reçoive moins de lumière infrarouge. Les informations ci-dessus n'ont pas répondu à vos questions ? Veuillez consulter le site internet www.marmitek.com IR Control 10™... -
Page 30: Spécifications Techniques
Dimensions 95 x 46 x 20mm Câble d'extension IR avec 2 LEDs émetteur Connexion fiche jack 3,5mm (mono) LEDs IR 2x LEDs émetteur IR Longueur du câble 3 mètres Les spécifications sont sujettes à modification sans préavis. © MARMITEK... -
Page 31: Disponible En Option
8 Notification 8.1 Déclaration de conformité Par la présente Marmitek BV déclare que l'appareil IR Control 10™ est conforme aux exigences essentielles et aux autres dispositions pertinentes des directives: Directive 2014/30/UE du Parlement européen et du Conseil du 26 février 2014 relative à... -
Page 32: Recyclage
Marmitek est une marque déposée de Germatron BV. IR Control 10™ est une marque déposée de Marmitek BV. Tous droits réservés. Tout a été mis en œuvre pour que les informations présentées dans ce manuel soient exactes. Marmitek n’est pas responsable des erreurs de reproduction ou d’impression. -
Page 33: Contenido
Prolongar la longitud del cable del receptor IR ........38 Preguntas frecuentes ................... 39 Especificaciones técnicas ..................40 También a la venta....................41 Notificación ......................41 8.1 Declaración de conformidad ................. 41 8.2 Reciclaje ......................42 8.3 Derechos de propiedad intelectual ............... 42 IR Control 10™... -
Page 34: Instrucciones De Seguridad
En caso de uso indebido o modificaciones y reparaciones montados por su mismo, la garantía se caducará. • En caso de uso indebido o inapropiado, Marmitek no acepta ninguna responsabilidad de producto. • Marmitek no acepta la responsabilidad para daños consecuenciales que difieren de la responsabilidad de producto legal. -
Page 35: El Producto
Felicitaciones por la compra del IR Control 10™. Con este podrá prolongar las señales IR (infrarrojas) de su mando a distancia. Con el IR IR Control 10 ™ se pueden controlar aparatos A/V, aunque se encuentren dentro de un armario cerrado o fuera del alcance de la vista. -
Page 36: Conexiones
La cinta adhesiva facilita una colocación en casi cualquier sitio que usted desee. Ensaya la posición antes de pegar el Receptor IR definitivamente. ¡Atención! La cinta adhesiva puede causar coloraciones en algunas superficies o dejar restos de cola al quitarla. © MARMITEK... -
Page 37: Instalación Del Cable De Extensión Ir Con Emisores Led
LED IR los cuales pueden provocar defectos a este. Conecta el cable IR del receptor instalado en la conexión “IR RCVR” del Módulo Conecta el adaptador de corriente en la conexión “12VDC del Módulo IR y conecta este a una toma de corriente. IR Control 10™... -
Page 38: Prueba El Funcionamiento Del Producto
Ahora puedas accionar tu dispositivo A/V mediante el IR Control 10™, ¡a través de las puertas cerradas del armario! Si el IR Control 10™ no reacciona de una manera adecuada, pruebe entonces con la colocación del Receptor IR y/ o el cable de extensión IR (emisor o blaster). Otra colocación puede dar un mejor resultado final. -
Page 39: Preguntas Frecuentes
Algunas ventanillas IR de set-top boxes o de boxes de satélite son muy sensibles. Estos dispositivos pueden recibir demasiada radiación infrarroja, lo que influye en el funcionamiento. Cambia el lugar del LED IR de manera que entra menos luz infrarroja en la ventanilla IR. ¿Tiene más preguntas? Vistia www.marmitek.com IR Control 10™... -
Page 40: Especificaciones Técnicas
Dimensiones: 95 x 46 x 20mm Cable de extensión IR con 2 emisores LED Conexión: 3,5mm jack plug (mono) LEDS del IR: 2x emisores IR LED Longitud cable: 3 metros Las especificaciones se pueden cambiar sin previo aviso. © MARMITEK... -
Page 41: También A La Venta
8 Notificación 8.1 Declaración de conformidad Marmitek BV declara que este IR Control 10™ cumple con las exigencias esenciales y con las demás reglas relevantes de la directriz: Directiva 2014/30/UE del Parlamento Europeo y del Consejo, de 26 de febrero de 2014, sobre la armonización de las legislaciones de los Estados miembros en materia... -
Page 42: Reciclaje
8.3 Derechos de propiedad intelectual Marmitek es una marca registrada de Germatron BV. IR Control 10™ es una marca registrada de Marmitek BV. Todos los derechos reservados. En la realización de este manual se ha puesto el máximo cuidado para asegurar la exactitud de la información que en él aparece. -
Page 43: Indice
Aumentare la lunghezza del cavo del ricevitore IR ........ 48 Domande frequenti....................49 Specificazioni tecniche ..................50 Opzioni disponibili ....................51 Notifica ......................... 51 8.1 Dichiarazione di conformita ' ................51 8.2 Riciclaggio ......................52 8.3 Diritti d’autore ....................... 52 IR Control 10™... -
Page 44: Precauzioni Di Sicurezza
In caso di utilizzo scorretto, di riparazioni o modifiche apportate personalmente decade qualsiasi garanzia. della responsabilità civile sui prodotti. • Marmitek declina ogni responsabilità per i danni derivanti da un utilizzo non appropriato del prodotto o da utilizzo diverso da quello per cui il prodotto è stato creato. -
Page 45: Il Prodotto
3 Il prodotto 3.1 Introduzione Congratulazioni con il vostro acquisto dell’ IR Control 10™. Con Marmitek IR Control 10™ potete ampliare i segnali infrarossi (IR) dei vostri telecomandi e controllare apparecchi audio/video anche se collocati in un mobile chiuso o fuori vista. -
Page 46: Collegamenti
Quando si usa la striscia autoadesiva fornita in dotazione, si può installarlo in quasi ogni luogo. Prima di incollare in modo definitivo il ricevitore IR, provare il luogo di installazione. Attenzione! La striscia adesiva può causare scolorimenti su determinate superfici o lasciare residui di colla in caso di rimozione. © MARMITEK... -
Page 47: Collocamento Della Prolunga Ir Con I Led Emittenti
ATTENZIONE: una scelta sbagliata tra questi due modi potrebbe causare danni e guasti ai LED IR. Collegare il cavo ricevitore IR installato alla presa “IR RCVR” del modulo IR. Collegare l’adattatore di alimentazione alla presa “12VDC” del modulo IR ed inserirlo in una presa di corrente. IR Control 10™... -
Page 48: Collaudare Il Funzionamento Del Prodotto
Ora si può comandare le apparecchiature A/V tramite l’IR Control 10™ attraverso le ante chiuse! Nel caso che l’IR Control 10™ non reagisca in modo giusto, si deve sperimentare il posizionamento del ricevitore IR e/o dei cavi di prolunga IR (emittente o blaster). Un altro posizionamento può... -
Page 49: Domande Frequenti
Spostare il LED IR in modo tale da ricevere meno luce infrarossa attraverso la finestra IR. Avete ancora domande che non sono state risposte qui sopra? Vi preghiamo di visitare il nostro sito www.marmitek.com IR Control 10™... -
Page 50: Specificazioni Tecniche
Dimensioni: 95 x 46 x 20mm Prolunga IR con 2 LED emittenti Connessione: 3,5mm presa jack (mono) LED IR: 2x LED emittenti IR Lunghezza del cavo: 3 metri Le caratteristiche tecniche possono essere modificate senza preavviso. © MARMITEK... -
Page 51: Opzioni Disponibili
8 Notifica 8.1 Dichiarazione di conformita ' Con ciò, Marmitek BV, dichiara che il IR Control 10™ è conforme ai requisiti essenziali ed alter disposizioni relative alla Direttiva : Direttiva 2014/30/UE del Parlamento europeo e del Consiglio, del 26 febbraio 2014, concernente l’armonizzazione delle legislazioni degli Stati membri relative alla... -
Page 52: Riciclaggio
Marmitek BV. È strettamente proibito ogni uso del Contenuto, incluse senza limitazioni la distribuzione, riproduzione, modifica, pubblicazione o trasmissione senza previa autorizzazione scritta da parte di Marmitek. Tutti i diritti d’autore e altri diritti di proprietà intellettuale su tutte le riproduzioni devono essere conservati. I nomi di altre società e prodotti qui menzionati potrebbero essere marchi delle rispettive società. -
Page 53: Inhoudsopgave
Kabel lengte van de IR Ontvanger verlengen ........58 Veel gestelde vragen ................... 59 Technische gegevens ..................60 Optioneel verkrijgbaar ..................61 Kennisgeving ....................... 61 8.1 Verklaring van overeenstemming ................. 61 8.2 Recycling ......................62 8.3 Auteursrechten ..................... 62 IR Control 10™... -
Page 54: Veiligheidsinstructies
Bij oneigenlijk gebruik, zelf aangebrachte veranderingen of reparaties, komen alle • garantiebepalingen te vervallen. Marmitek aanvaardt geen productaansprakelijkheid bij onjuist gebruik van het • product of door gebruik anders dan waarvoor het product is bestemd. Marmitek aanvaardt geen aansprakelijkheid voor volgschade anders dan de •... -
Page 55: Uw Product
3 Uw product 3.1 Introductie Gefeliciteerd met uw aankoop van de IR Control 10™. Hiermee kunt u de IR (infrarood) signalen van afstandsbedieningen verlengen. De IR Control 10™ maakt het mogelijk om A/V apparaten te bedienen terwijl deze in een gesloten kast staan of wanneer uw A/V apparaten uit het zicht staan. -
Page 56: Aansluitingen
Door de bijgeleverde zelfklevende strip te gebruiken is plaatsing vrijwel overal mogelijk. Experimenteer voor de juiste plaats voordat u de IR ontvanger definitief vastplakt. Let op! De plakstrip kan op bepaalde oppervlakken verkleuring veroorzaken of bij verwijdering lijmresten achterlaten. © MARMITEK... -
Page 57: Installatie Van De Ir Verlengkabel Met Emitter Leds
Sluit de geïnstalleerde IR Ontvangerkabel aan op de “IR RCVR” aansluiting van de IR Module. Sluit de voedingsadapter aan op de “12VDC” aansluiting van de IR Module en plug deze in een stopcontact. IR Control 10™... -
Page 58: Test De Werking Van Het Product
4.3.5 Test de werking van het product Als de IR Control 10™ juist is aangesloten dan knippert het lampje op de IR Ontvanger als u een knop van de (infrarood) afstandsbediening in drukt en deze op de IR Ontvanger richt. -
Page 59: Veel Gestelde Vragen
Deze apparaten ontvangen dan te veel infrarood straling en zullen daardoor niet of slecht werken. Verplaats de IR led zodat er minder infraroodlicht via het IR venster ontvangen wordt. Heeft u vragen die hierboven niet beantwoord worden? Kijk dan op www.marmitek.com. IR Control 10™... -
Page 60: Technische Gegevens
IR verlengkabels met emitter en blaster leds Afmetingen: 95 x 46 x 20mm IR Verlengkabel met 2 emitter leds Aansluiting: 3,5mm jack plug (mono) IR leds: 2x IR emitter leds Kabel lengte: 3 meter Specificaties kunnen wijzigen zonder voorafgaande melding hiervan. © MARMITEK... -
Page 61: Optioneel Verkrijgbaar
8 Kennisgeving 8.1 Verklaring van overeenstemming Bij deze verklaart Marmitek BV, dat deze IR Control 10™ voldoet aan de essentiële eisen en aan de overige relevante bepalingen van Richtlijnen: Richtlijn 2014/30/EU van het Europees Parlement en de Raad van 26 februari 2014 betreffende de harmonisatie van de wetgevingen van de lidstaten inzake elektromagnetische compatibiliteit (herschikking). -
Page 62: Recycling
Auteursrechten en alle andere eigendomsrechten op de inhoud (inclusief maar niet beperkt tot model nummers, software, audio, video, tekst en foto's) berust bij Marmitek BV. Elk gebruik van de inhoud, maar zonder beperking, distributie, reproductie, wijziging, openbaarmaking of verzending zonder de voorafgaande schriftelijke toestemming van Marmitek is strikt verboden. - Page 63 IR Control 10™...
- Page 64 20665/20201203 | IR Control 10™ all rights reserved © MARMITEK stay connected marmitek.com...
Need help?
Do you have a question about the IR Control 10 and is the answer not in the manual?
Questions and answers