
Subscribe to Our Youtube Channel
Related Manuals for ELTRA CS800


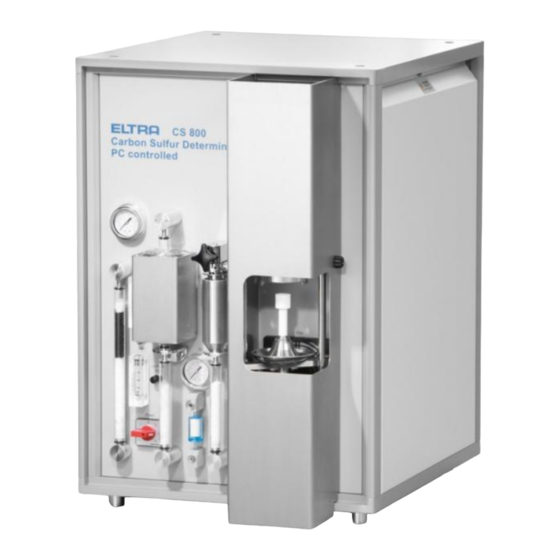
Summary of Contents for ELTRA CS800
- Page 1 Operating Manual Autoloader CS800/CS2000 Original © Eltra GmbH, 42781 Haan, Retsch-Allee 1-5, Germany 17.12.2013 0001...
- Page 2 Copyright © Copyright by Eltra GmbH Haan, Retsch-Allee 1-5 D-42781 Haan Federal Republic of Germany...
-
Page 4: Table Of Contents
Operating the machine .......................... 5 General information ........................... 5 1.1.1 Loader models ..........................5 1.1.2 Space requirements ........................5 1.1.3 Connecting and disconnecting plastic tubes ................. 6 Mechanical connection to the analyzer ..................... 7 Chain motor belt adjustment ......................8 Chain adjustment .......................... -
Page 5: Operating The Machine
Operating the machine 1 Operating the machine 1.1 General information The loader is supplied after testing without being completely dismantled. It is only detached from the analyser and the arm (3) with the fingers (6) (See figure arm installation) are removed for safety reasons. Therefore, an adjustment after installation may not be needed however the adjustments are described below. -
Page 6: Connecting And Disconnecting Plastic Tubes
Operating the machine 1.1.3 Connecting and disconnecting plastic tubes To connect the tube, simply push it into the fitting as far as it would go. Fig. 2: Plastic tube connecting To disconnect the tube, first press the plastic ring of the fitting up to the metal ring, keep it properly pressed and pull the tube. -
Page 7: Mechanical Connection To The Analyzer
Operating the machine 1.2 Mechanical connection to the analyzer F r o n t p a n e l Fig. 4: Autoloader reinstallation (Top view) • Before starting reinstallation take a look at the plastic tubes and bear in mind the way they are supported with the screw (7). -
Page 8: Chain Motor Belt Adjustment
Operating the machine 1.3 Chain motor belt adjustment Fig. 5: Belt tension check The toothed belt of the chain motor is located underneath the left-hand section of the loader’s platform. The mechanical tension of the toothed belt (1) can be checked by applying the force to the belt, as shown on the picture by the red arrow. - Page 9 Operating the machine Fig. 7: Chain tension adjustment (Bottom view) The loader is supplied with the adjusted chain tension. If necessary, check the tension of the chain as follows: • Press and hold several crucible trays (1) of the rear row on the platform so that they cannot move.
-
Page 10: Finger Adjustment
Operating the machine 1.5 Finger adjustment Fig. 9: Finger adjustment The maximum distance inside the fingers (1) should be about 36 mm. For adjusting: • Loose the screw (2). • Move the assembly (E) down to take it off the shaft (9) of the motor resp. off the gear box (10). -
Page 11: Arm Installation
1 4 7 9 5 1 4 7 9 6 Fig. 10: Arm installation 14648-Vertical laser 14795-Finger assembly for Loader CS800/2000 14796 Finger assembly for Loader Helios 14819-Finger motor • Pass the low end of the spring (8) (see figure pneumatic connections), through the hole of the cubic support (13) of the arm (3). -
Page 12: Electrical And Pneumatic Connections
Operating the machine 1.7 Electrical and pneumatic connections F r o n t p a n e l Fig. 11: Electrical connection: Motor arm • Install the 9-pin socket (1) • Fix with the screws (2). • Plug in the 9-pin connector (1) of the finger’s motor into the 9-pin socket; see figure electrical circuit (1). - Page 13 Operating the machine Fig. 13: Electrical circuit (14621-6001)
- Page 14 60352 14016 Front panel Fig. 14: Pneumatic connections 14016-Sensor holder 14618-Loader board 14795-Finger assembly for Loader CS800/2000 14796-Finger assembly for Loader HELIOS 14819-Finger motor 14820-Finger pneumatic cylinder 60234-Pneumatic valve 60352-Sensor • Install the magnetic switch (6) at the low end of the pneumatic cylinder as shown in figure pneumatic connections.
-
Page 15: Up/Down Adjustment Of The Arm
Operating the machine 1.8 Up/Down adjustment of the arm 1 4 8 1 9 1 4 6 4 8 1 4 7 9 5 1 4 7 9 6 Fig. 15: Arm installation • Apply compressed air to the analyzer. The fingers (6) resp. the arm (3) will go to the UP position. -
Page 16: Horizontal Laser
Operating the machine Now the vertical laser (10) for sensing the home position of the arm (3) is continuously ON. This can be seen by looking at the sensor (11) underneath the laser (10), see figure arm installation. If the laser (10) is ON and there is no beeping to hear, it means that the sensor (11) is sensing the laser beam. - Page 17 Operating the machine H o m e p o s i t i o n p i c k P i c k u p p s i t i o n P e d e s t a l P a r k i n g p o s i t i o n D i s p o s a l...
-
Page 18: Single Step Cycles
Operating the machine so that the beam will be in the middle of the sensor (7). In case of proper adjustment the beeper will stop beeping. The adjustment is made by loosing the screws (8) and by turning and moving the laser (6) until the beeping stops. -
Page 19: Crucible Position On The Platform
Operating the machine The arm goes first to the home position and then it turns back to the pick-up position Fingers down. 1.15 Crucible position on the platform Fig. 17: Loader front view Now the position of the crucible has to be adjusted to be coaxial to the fingers. For moving the crucible to the left and to the right, slightly loose the screws (1) and (2) and shift the whole platform (5) accordingly. -
Page 20: Repeating The Single Step Cycle
Operating the machine lowered by the same distance. If the crucible knocks on the pedestal and the arm turns up from the horizontal position, the crucibles platform has to be lifted higher. For moving the platform up and down, loose the screws (1) and (2) see image autoloader front view. -
Page 21: Final Installation After Adjusting
Operating the machine The beam of the horizontal laser cannot be detected. Defective laser or detector, crucibles don´t move due to blockage, defective motor etc. The furnace is not opened for the loader to place a crucible on to the pedestal. -
Page 22: Crucibles Disposal
Operating the machine 1.23 Crucibles disposal C S 8 0 0 C a rb on S ul f ur D e t e r mi na t o r PC co nt r o ll e d µA Fig. 18: collecting receptacle Place the collecting receptacle (1) on the floor, as shown. -
Page 23: Index
2 Index Electrical circuit 13 Electrical connection the 25-pin plug 12 Electrical connection Motor arm 12 Finger adjustment 10 14016 14 Loader front view 19 14618 14 Loader positioning 5 14621-6001 13 14648 11 Loader steps 17 1467 8 Plastic tube connecting 6 14795 11, 14 Plastic tube disconnecting 6 Pneumatic connections 14... - Page 24 Repeating the single step cycle 20 Up/Down adjustment of the arm 15 Single step cycles 18 Vertical laser 15 Single step operation for mechanical adjustments 15 Space requirements 5...
- Page 28 Copyright ® Copyright by Eltra GmbH Haan, Retsch-Allee 1-5 D-42781 Haan Federal Republic of Germany...
Need help?
Do you have a question about the CS800 and is the answer not in the manual?
Questions and answers