
Subscribe to Our Youtube Channel
Related Manuals for ELTRA ELEMENTRAC CS-i


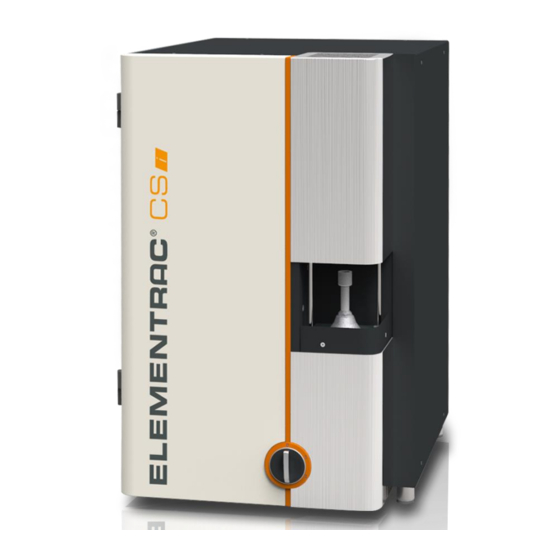
Summary of Contents for ELTRA ELEMENTRAC CS-i
- Page 1 Operating Manual ELEMENTRAC CS-i Translation © Eltra GmbH, 42781 Haan, Retsch-Allee 1-5, Germany | 10.12.2020 Version 0005...
- Page 2 Information about the Manual Urheberrecht © Copyright by Eltra GmbH Retsch-Allee 1-5 42781 Haan Germany...
- Page 3 Information about the Manual...
-
Page 4: Table Of Contents
Information about the Manual Table of contents Information about the Manual ......................6 Explanation of signs and symbols ..................... 6 Disclaimer ............................6 Copyright ............................6 Safety ..............................7 Explanation of the safety instructions ....................8 General safety instructions ........................ 9 Repairs ............................. - Page 5 Information about the Manual 10.1.9.1 Replacing the O-ring at the top of the combustion tube ..........57 10.1.9.2 Replacing the O-rings at the bottom and in the bottom furnace locking device ....58 10.1.9.3 Replacing the O-rings on the furnace seal ..............60 10.1.10 Cleaning the connecting hose between the furnace and metal filter ........
-
Page 6: Information About The Manual
Manual. 1.3 Copyright This Manual or parts of it may not be duplicated, distributed, edited or copied in any form without the prior written consent of Eltra GmbH. Damage claims will be asserted in the event of infringement. -
Page 7: Safety
Target group This covers everybody who operates, cleans or works on the machine. This machine is a modern, efficient, state-of-the-art product from Eltra GmbH. Reliability is guaranteed when it is used correctly and when this Manual is complied with. Persons under the influence of intoxicating substances (medications, drugs, alcohol) or who... -
Page 8: Explanation Of The Safety Instructions
Safety 2.1 Explanation of the safety instructions The following warnings in this Manual alert to potential hazards and damage: DANGER D1.0000 Risk of fatal injuries Source of the danger − Possible consequences of failure to heed the danger. • Instructions and advice on how to avoid the risk. Fatal or serious injuries may ensue if the “Danger”... -
Page 9: General Safety Instructions
Changes to the machine Improper modification − As a result of improper modification, the conformity with European directives as specified by Eltra GmbH will no longer be valid. All warranty claims will be invalidated. • Do not make any modifications to the machine. -
Page 10: Repairs
2.4 Intended use The ELEMENTRAC CS-i has been developed for the analysis of carbon and sulphur in various materials. The induction furnace permits the analysis of typically inorganic materials such as metals, alloys, ceramics and cement. 2.5 Improper use Use is prohibited in the private domain and for purposes other than those set out in the “Intended... -
Page 11: Safety Symbols On The Machine
Safety 2.6 Safety symbols on the machine Safety symbols on the ELEMENTRAC CS-i provide warnings about risks when using the machine. The following safety symbols can be found on the analyzer: Fig. 1: Safety symbols on the analyzer Position Component... -
Page 12: Emergency Stop
Safety 2.7 Emergency stop An emergency stop is initiated using the relevant main switch on the machines. Turn the analyzer off in an emergency as follows: 1. Turn the main switch on the analyzer to Position 0. 2.8 Residual risks DANGER D2.0000 Risk to life caused by an electric shock... - Page 13 Safety WARNING W4.0000 Risk to life caused by an electric shock Uninsulated part of the sample insertion tool − The metal part of the sample insertion tool is not insulated. Contact with the metal part of the sample insertion tool when inserting it into the furnace can result in an electric shock and cause serious or life- threatening injuries.
- Page 14 Safety WARNING W7.0021 Risk of fire / burns Hot parts (crucibles, reagents etc.) can fall down − Hot parts may fall onto benches, floors or other surfaces and catch fire. − Clothing and other materials may catch fire. • Erect the analyzer in a fireproof environment. Pay special attention to the bench, the floor and other surfaces close to the analyzer.
- Page 15 Safety CAUTION C4.0000 Risk of injuries Moving parts − The furnace closes automatically. Hands in the area of the opening can get crushed when the furnace closes. • Never reach into the closing furnace. • Uses crucible tongs when positioning ceramic crucibles. CAUTION C5.0092 Machine falling down...
- Page 16 Safety CAUTION C8.0076 Risk of burns Hot machine parts − Some parts of the machine can get very hot and cause burns when touched without wearing protective gloves. • Wear heat-resistant protective gloves when working with hot machine parts. • Never touch hot parts of the machine without suitable protective gloves.
- Page 17 Safety CAUTION C11.0090 Risk of eye injury Chemicals − When changing the chemicals, minute particles of chemicals may be suspended in the air and cause burns to eyes. • Always wear protective goggles when working with chemicals. • Comply with the safety data sheets for the chemicals used. CAUTION C12.0000 Risk of injury...
-
Page 18: Description
Description Description The ELEMENTRAC CS-i is a combustion analyzer. The machine determines the concentration of carbon and sulphur in inorganic and organic samples through the combustion in the induction furnace or resistance furnace. The gaseous products of combustion CO and SO measured by infrared measurement cells. -
Page 19: Back Of The Analyzer
Description 3.2 Back of the analyzer The following figure shows the back of the analyzer: Fig. 3: Back of the analyzer Position Component Description Fan on the analyzer USB cable (internally already Cable for connecting to the PC connected) CAN connector For connecting to the HTFr USB connector For connecting to the PC... - Page 20 Description Position Component Description Automatic shutting down of the power circuit in the Circuit breaker event of an overload or short circuit Switched power socket to connect a vacuum cleaner Power connection for the vacuum The vacuum cleaner can be switched on cleaner automatically on opening the furnace after every analysis.
-
Page 21: Installation
Installation Installation WARNING W10.0015 Risk to life caused by an electric shock Connection to a socket without protective conductor − Connecting the machine to sockets without protective conductor can lead to life-threatening injuries caused by an electric shock • Only operate the machine on sockets with a protective conductor (PE). -
Page 22: Setting Up
• Ensure that all machine bases are placed securely on the surface. The space required to set up the ELEMENTRAC CS-i with balance and PC is approx. 160 cm × 75 cm (width x depth), without balance and PC approx. 80 cm × 75 cm. -
Page 23: Filling The Reagent Tubes
Installation 4.2 Filling the reagent tubes Proceed as follows to fill the reagent tubes: 1. Fill the reagent tube for the catalyst furnace . 2. Fill the reagent tube for the SO filter. 3. Fill the reagent tube for the gas purification inlet. 4. -
Page 24: Connecting The Machine To The Pc
Installation 4.4 Connecting the machine to the PC Connect the machine to the PC as follows: “Back of the 1. Connect the USB cable on the back of the analyzer (see Pos. (2) in analyzer”) to the corresponding USB interface on the PC. “Back of the 2. -
Page 25: Commissioning
− Improper modifications to the machine can lead to injuries. • Do not make any unauthorised changes to the machine. • Only use spare parts and accessories that have been approved by Eltra GmbH! The following conditions must be met before commissioning the machine: •... -
Page 26: Operation Of The Analyzer
Operation of the analyzer Operation of the analyzer WARNING W15.0017 Risk of injury Dangerous chemicals − Dangerous chemicals can cause fatal poisoning or serious chemical burns to the skin when working on the machine. • Comply with the safety data sheet for the substances used. - Page 27 Operation of the analyzer CAUTION C16.0000 Risk of injuries Moving parts − The furnace closes automatically. Hands in the area of the opening can get crushed when the furnace closes. • Never reach into the closing furnace. • Uses crucible tongs when positioning ceramic crucibles or ceramic dishes.
- Page 28 (see Elements Software “Application”) 3. Prepare a crucible with sample material. Only use crucibles (Part number 90148 or 90149) from Eltra GmbH. 4. Use the automatic transfer of the sample weight from the balance to the PC or enter the sample weight manually.
-
Page 29: Technical Data
Technical data Technical data 7.1 Technical data for the analyzer The following table lists the technical data for the analyzer: Definition Description Data Dimensions Width 52 cm Depth 75 cm Height 84 cm Weight Approx. 150 kg Electrical data Power supply 230 VAC ±10 % Frequency 50/60 Hz... -
Page 30: Type Plate On The Analyzer
Technical data 7.2 Type plate on the analyzer The following diagram shows an example of the type plate on the analyzer: Fig. 4: Type plate on the analyzer Position Component Manufacturer’s address Part number Mains frequency Read the Manual CE mark Type of protection Disposal label Current... -
Page 31: Standards For Inorganic Materials
Technical data 7.3 Standards for inorganic materials The following standards for inorganic materials are met: Standard Elements Materials Equipment EN ISO 9556:2002-04 Steel and iron CS-i CS-d ISO 4935:1989 Steel and iron CS-i EN 24935:1992-07 CS-d ASTM E1019:2018 C, S Steel, iron, CS-i nickel/cobalt alloys... -
Page 32: Troubleshooting On The Analyzer
Troubleshooting on the analyzer Troubleshooting on the analyzer 8.1 Troubleshooting on the analyzer. 1. Using the ELEMENTS software, establish which fault has occurred on the analyzer and rectify it in accordance with the error message in the ELEMENTS software. 2. Please contact Service if you are unable to rectify the fault. To contact Service, see “Repairs”. -
Page 33: Maintenance
Maintenance 10 Maintenance 10.1 Maintenance the analyzer CAUTION C20.0000 Risk of burns Hot machine parts − Parts of the machine can get very hot and cause burns during maintenance work if the waiting time to ensure cooling is not complied with. -
Page 34: Removing The Reagent Tubes
Maintenance Component No. of Maintenance Service See chapter analyses interval instructions “Replacing the Brush the thermal shield 100 Monthly Clean or replace the thermal shield furnace cleaning depending on the brush and thermal sample shield“ “Replacing the Combustion tube 1000 Monthly Check, clean and replace where... - Page 35 Maintenance CAUTION C23.0090 Risk of eye injury Chemicals − When changing the chemicals, minute particles of chemicals may be suspended in the air and cause burns to eyes. • Always wear protective goggles when working with chemicals. • Comply with the safety data sheets for the chemicals used. The reagent tubes of the analyzer must not be removed during operation.
- Page 36 Maintenance Proceed as follows to remove a reagent tube on the front of the analyzer: 1. Turn the main switch on the analyzer to Position 1. 2. On the “Status analyzer” page of the ELEMENTS software, press the “Change reagents” button to release the pressure.
-
Page 37: Filling Reagent Tubes
Maintenance 10.1.3 Filling reagent tubes CAUTION C24.0000 Risk of injury Pressurised system − The machine is pressurised during operation. The removal of the reagent tube during operation results in an explosive escape of chemicals or sample material and can cause injuries. •... -
Page 38: Filling The Reagent Tube On The So
Maintenance WARNING W19.0022 Chemical burns to skin, eyes and mucous membranes Caustic substances − Acids can cause chemical burns to skin, eyes and mucous membranes. • Comply with the safety data sheet for the acids used. • Always wear suitable work clothing including protective gloves and eyewear. -
Page 39: Filling The Reagent Tube On The Inlet Gas Purification
Maintenance 10.1.3.2 Filling the reagent tube on the inlet gas purification Proceed as follows to replace the filling in the inlet gas “Removing the reagent tubes purification (see Pos. (2) in filters”): 1. Turn the main switch on the analyzer to Position 1. 90331 1.5-2cm “Removing the reagent... -
Page 40: Filling The Reagent Tube On The Moisture Filter
Maintenance 10.1.3.3 Filling the reagent tube on the moisture filter Proceed as follows to replace the moisture filter filling (see Pos. (1) in “Removing the reagent tubes on filters“): 1. Turn the main switch on the analyzer to Position 1. 2. -
Page 41: Inserting Reagent Tubes
Maintenance 10.1.4 Inserting reagent tubes The reagent tubes of the analyzer must not be removed during operation. Proceed as follows to insert a reagent tube on the front of the analyzer: 1. Ensure that the main switch of the analyzer is set to Position 1. 2. - Page 42 Maintenance 10. Check that the O-rings all round form a uniform impression of approx. 2 mm on the reagent tube and that there is no leak on the O-ring caused by the glass wool. 11. Confirm the message on the ELEMENTS software so that the pressure can be built up again.
-
Page 43: Replacing The Dust Filter Cartridge On The Analyzer
Maintenance 10.1.5 Replacing the dust filter cartridge on the analyzer The dust filter cartridge on the analyzer must be replaced as soon as the filter material changes colour and after 500 analyses at the latest. The following diagram shows the dust filter cartridge on the front of the analyzer: Fig. -
Page 44: Filling The Reagent Tube On The Catalyst Furnace
Maintenance 10.1.6 Filling the reagent tube on the catalyst furnace CAUTION C27.0094 Risk of burns Hot catalyst furnace − The furnace temperature of the catalyst furnace can be up to 800 °C during operation and cause burns. • Wear heat-resistant protective gloves when working with the catalyst furnace . - Page 45 Maintenance Position Component Hose Clamp Locating key Guide Reagent tube Locating key Lock on the catalyst furnace Catalyst furnace The reagent tube on the catalyst furnace is filled as follows: 1. Ensure that the analyzer is switched off and the catalyst furnace has cooled down.
- Page 46 Maintenance 20. Carefully slide the hose (1) onto the reagent tube (5). The hose must be pushed at least 5 mm over the reagent tube connector. 21. Secure the hose (1) using the clamp (2). The reagent tube on the catalyst furnace has been filled.
-
Page 47: Cleaning The Dust Box
Maintenance 10.1.7 Cleaning the dust box CAUTION C28.0076 Risk of burns Hot machine parts − Some parts of the machine can get very hot and cause burns when touched without wearing protective gloves. • Wear heat-resistant protective gloves when working with hot machine parts. -
Page 48: Quick Cleaning Of The Dust Box
Maintenance 10.1.7.1 Quick cleaning of the dust box The dust box should be quickly cleaned daily or every 100 analyses at the latest: Fig. 11: Quick cleaning of the dust box Position Component Supplied brush Top end of the filter housing Bottom of the filter housing Bottom O-ring at support Grease is only applied to the bottom end of the filter housing (3) and the bottom O-ring (4). -
Page 49: Thorough Cleaning Of The Dust Box
Maintenance 10.1.7.2 Thorough cleaning of the dust box The dust box should be thoroughly cleaned monthly or every 500 analyses at the latest. Proceed as follows to thoroughly clean the dust box: “Cleaning the dust 1. Ensure that the metal filter with the dust box has been removed (see box“). -
Page 50: Maintenance In The Furnace Area
Maintenance “Quick cleaning of the dust 4. Clean the filter housing (4) with the supplied brush (also see box”). 5. Clean the metal filter (5) in the ultrasonic bath (Part No. 71007). 6. Dry the O-ring and grease the O-ring (1) where necessary. 7. - Page 51 Maintenance The furnace of the analyzer is fitted with an automatic furnace cleaning system with thermal shield . Proceed as follows to replace the furnace cleaning brush with thermal shield: 1. Open the furnace. As a result, the springs at the top of the furnace are released and the knurled nuts can be easily unscrewed.
- Page 52 Maintenance The following diagram shows the mounting plate of the furnace cleaning system: Fig. 15: Furnace cleaning system mounting plate 6. Remove the knurled nuts (6) and (13). 7. Unscrew the wing nuts (8) and (12). 8. Unscrew the gas connectors (5) and (9) (also see detailed image) and remove the gas hoses.
- Page 53 Maintenance 9. Pull the furnace cleaning system out from the top by the support (14). Make sure not to bend the rods (7) and (10) and not to damage the combustion tube. 10. Hold the furnace cleaning brush holder (15) firmly and twist the thermal shield (16) off. 11.
-
Page 54: Replacing The Combustion Tube
Maintenance 10.1.8.2 Replacing the combustion tube The combustion tube on the analyzer must be serviced or replaced at least once a month, or: • If the combustion tube is damaged • If there are greatly fluctuating carbon or sulphur levels •... - Page 55 Maintenance The following diagram shows the top of the combustion tube: Fig. 18: Top of the combustion tube 5. Carefully pull the combustion tube (4) with the O-ring (3) up and out of the furnace. 6. If necessary, place a new O-ring (Part No. 70380) onto the new combustion tube (Part No. 14130).
-
Page 56: Removing The Crucible Tray
Maintenance 10.1.8.3 Removing the crucible tray The tray must be removed in order to clean the area beneath the tray. Proceed as follows to remove the tray on the analyzer and to clean the area beneath the tray: 1. Turn the main switch on the analyzer to Position 0 2. -
Page 57: Replacing The O-Rings
Maintenance 10.1.9 Replacing the O-rings CAUTION C29.0076 Risk of burns Hot machine parts − Some parts of the machine can get very hot and cause burns when touched without wearing protective gloves. • Wear heat-resistant protective gloves when working with hot machine parts. -
Page 58: Replacing The O-Rings At The Bottom And In The Bottom Furnace Locking Device
Maintenance The O-ring (1) at the top of the combustion tube is now accessible: Fig. 20: O-ring at the top of the combustion tube 4. Remove the O-ring (1) at the top of the combustion tube. 5. Apply a thin layer of high vacuum silicon grease (Part No. 92610) to the inside of the new O-ring (Part No. - Page 59 Maintenance 4. Unscrew the wing nuts (2) and (3) on the bottom furnace lock (3): Fig. 21: Wing nuts on the bottom furnace lock 5. Pull the bottom furnace lock (1) down and off. The O-ring on the underneath of the furnace is now accessible: Fig.
-
Page 60: Replacing The O-Rings On The Furnace Seal
Maintenance The following diagram shows the O-ring (5) in the bottom furnace lock: Fig. 23: O-ring in the bottom furnace lock 9. Remove the O-ring (5) from the bottom furnace lock. 10. Apply a thin layer high vacuum silicon grease (Part No. 92610) to the outside of the new O- ring (Part No. - Page 61 Maintenance 4. Remove nuts (1) and (12): Fig. 24: O-rings on the furnace cleaning system 5. Remove the washers (2) and (11) and the springs (3) and (10). 6. Pull the support (5) up and off. 7. Remove the retaining rings (4) and (9). 8.
-
Page 62: Cleaning The Connecting Hose Between The Furnace And Metal Filter
Maintenance 10.1.10 Cleaning the connecting hose between the furnace and metal filter Clean the hose connection from the dust filter to the furnace on the analyzer as follows: 1. Open the machine door (see Pos. 11 in “Front”). The following figure shows the hose connection from the dust filter to the furnace of the analyzer: Fig. -
Page 63: Spare Parts
Spare parts 11 Spare parts 11.1 Spare parts for the analyzer 11.1.1 Front of the machine Fig. 26: Diagram of the front when closed Position Designation Part No. Quantity Hinge with eccentric pin 88400-0288... -
Page 64: Front (Interior View)
Spare parts 11.1.2 Front (interior view) Fig. 27: Diagram of the front inside... - Page 65 Spare parts Position Designation Part No. Quantity Filter connection holder, assembled 51100-2013 Reagent tube 88400-0005 Reagent tube holder 28.5 mm 51100-2017 Bottom filter holder 35361 Bottom reagent tube holder, moisture 11045 trap O-ring 9x3 70230 Dust filter cartridge 11170 Top filter holder 35363 Reagent tube 88400-0006...
-
Page 66: Catalyst Furnace
Spare parts 11.1.2.1 Catalyst furnace Fig. 28: Catalyst furnace 20100-2003 Designation Part No. Quantity Position 20100-2004 Bottom reagent tube holder, catalyst furnace 88400-0422 Quartz tube 20100-2005 Top reagent tube holder, catalyst furnace Reagent tube 240x20/16.4 88400-0452 66500-0084 Hose clip/clamp 70230 O-ring 9x3 70200 O-ring 8x3... -
Page 67: Complete Dust Filter Housing With Heating Element
Spare parts 11.1.2.2 Complete dust filter housing with heating element Fig. 29: Complete dust filter housing 51100-2035 Position Quantity Designation Part No. Dust box mechanism 51100-2019 Complete dust filter housing with 51100-2035 heating element Filter connection holder 51100-2013... -
Page 68: Complete Dust Filter
Spare parts 11.1.2.3 Complete dust filter Fig. 30: Dust filter 11107 Position Quantity Designation Part No. Complete dust filter 11107 Metal filter 11105 O-ring 34x3 70370 Filter lock 11093 O-ring 20x5 70320... -
Page 69: Furnace
Spare parts 11.1.3 Furnace Quantity Position Designation Part No. M4-A2 cap nut 08.261.0001 Washer 08.701.0058 Spring 75122 14165 Top knurled nut Roller bearing with flange GFM-1112- 66500-0534 Bottom knurled nut 14161 Wing nut 76003 Glued Bottom end plate of 14025-2001 the furnace Pneumatic cylinder 14009-2001 Cone... - Page 70 Spare parts Quantity Pos. Designation Part No. O-ring 35x5 70380 O-ring 3.4x1.9 70120 M4 spacer sleeve 75150 Brush holder 14051 Cleaning brush 14045 Heat protection, 14072 ceramic Bottom knurled 14161 Disc 08.701.0076 O-ring 35x5 70390 Fig. 32: Furnace, front view 2...
- Page 71 Spare parts Fig. 33: Furnace, front view 3 Position Designation Part No. Quantity Furnace cover 51100-2045 M4x10 08.643.0055 countersunk screw...
-
Page 72: Furnace Cleaning Mechanism
Spare parts 11.1.4 Furnace cleaning mechanism Fig. 34: Furnace cleaning mechanism Part Position Designation Quantity Spring 75122 2 Mounting bar 14080 2 Complete top furnace locking device 14021 1 O-ring 3.4x1.9 70120 2 Spacer sleeve 75150 2 Brush holder 14051 1 Combustion tube cleaning brush 14045 1 Complete ceramic thermal shield for the... -
Page 73: Back Of The Machine
Spare parts 11.1.5 Back of the machine Fig. 35: Back Position Designation Part No. Quantity 2P 16 AC circuit breaker 66400-0385 SCHUKO socket 88400-0413 250V / 16A mains filter 77140 Fan guard 120x120 88400-0155 24V fan 66400-0304 Gas valve 51100-2031 pressure regulator 11492... -
Page 74: Left-Hand Side Of The Machine
Spare parts 11.1.6 Left-hand side of the machine Fig. 36: Left-hand side Position Designation Part No. Quantity Complete compressed air control 27000-2024 system PCB pressure sensor 27000-5004 Valve block 51100-2030 Complete gas valve 51100-2029 CS-i/d gas valve 51100-2041 Complete control valve 51100-2032 Uni 2.x with housing 11001-3003... -
Page 75: Left Side, Dev Gate
Spare parts 11.1.6.1 Left side, Dev Gate Fig. 37: DevGate Designation Part No. Quantity Position Inlet pressure regulator 11492 PCB DevGate 88600-5000... -
Page 76: Valve Block, Compressed Air Control System
Spare parts 11.1.6.2 Valve block, compressed air control system Fig. 38: Valve block compressed air control system 27000-2024 Quantity Designation Part No. 66200-0140 1 5/2 way valve 66200-0139 1 5/3 way valve Pressure regulator 60236 66300-0158 1 Pushbutton switch 66200-0141 1 2/2 way valve... - Page 77 All work on the components described must be performed by appropriately qualified service personnel. The voltage range is 10 kV. A special tool (Part No.: 1101-2005) is required to discharge the oscillating circuit. ELTRA Service must be contacted before opening the right-hand side of the machine to work on this side. DANGER D5.0005...
-
Page 78: Top Mounting Plate
Spare parts 11.1.7 Top mounting plate DANGER D6.0005 Risk to life caused by an electric shock Exposed power contacts – high voltage • An electric shock can cause serious injuries in the form of burns, cardiac arrhythmia, respiratory failure or cardiac arrest. •... - Page 79 Spare parts Position Designation Part No. Quantity 77052 40A solid state relay 27000-3103 PCB guard plate 12045 Transformer 88400-0394 Maxthermo Power Controller Coupling relay 2 changeover 8A. 66400-0450 24VDC 66300-0428 24VDC 4 NO mini contactor 66400-0061 Toroidal transformer catalyst furnace 88400-0395 Power supply unit 66400-0304...
-
Page 80: Gas Purification Furnace, Optional
Spare parts 11.2 Gas purification furnace, optional Fig. 40: Complete gas purification furnace Quantity Part No. Designation 21000-1001 Complete gas purification furnace 1 21120 Quartz tube 70380 O-ring 35x5 88400-0122 Filling for the gas purification furnace (CS) -
Page 81: Fuses
Spare parts 11.3 Fuses Quantity Part No. Designation Safety fuse 6.3A for 27000-5000 DevGate board 66300-0369 and 27000-5001 PCB furnace power control Safety fuse 3.15A 66300-0410 for the top mounting plate 11.4 Consumables Quantity Part No. Designation 90148 1000 Stk. Crucible 90149 90200... -
Page 82: Decommissioning
Decommissioning 12 Decommissioning The machine is decommissioned as follows: 1. If necessary, remove crucibles and boats from the analyzer. 2. Ensure that the machine has been switched off and has cooled down. 3. Unplug the analyzer. 4. Ensure that the gas supply for the carrier gas has been turned off. 5. -
Page 83: Disposal
Disposal 14 Disposal Applicable statutory regulations must be heeded during disposal. Information about the disposal of electrical and electronic machinery in the European Community is set out below. The disposal of electrically operated equipment is governed within the European Community by national regulations based on EU directive 2012/19/EU for waste electrical and electronic equipment (the WEEE Directive). -
Page 84: Index
Index 15 Index Setting up ............22 Instructions ............8 Back of the analyzer ........... 19 Intended use ............10 Back of the machine ........... 73 Left-hand side of the machine ......74 Catalyst furnace order numbers ......66 CE mark .............. 30 Cleaning .............. - Page 85 Index Order numbers, fuses ......... 81 Safety symbols on the machine ..... 11 Overview of Maintenance the analyzer ....33 Safety officer ............7 Safety symbols on the machine ......11 Serial number ............. 30 Part number ............30 Service address ..........10 Power plug ............
- Page 86 Copyright © Copyright by Eltra GmbH Retsch-Allee 1-5 42781 Haan Deutschland...
Need help?
Do you have a question about the ELEMENTRAC CS-i and is the answer not in the manual?
Questions and answers