
Subscribe to Our Youtube Channel
Related Manuals for ELTRA CS-i


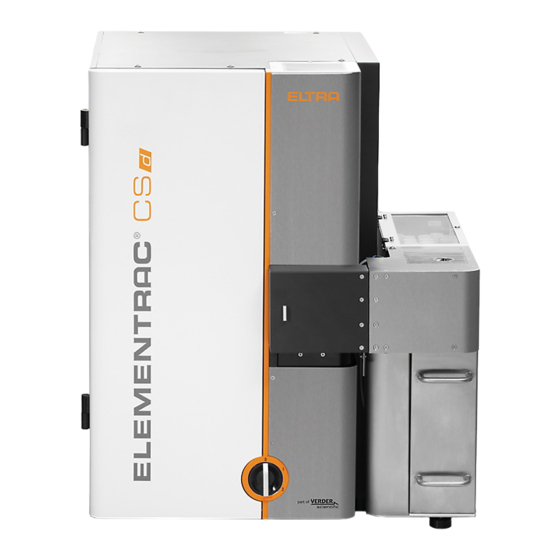
Summary of Contents for ELTRA CS-i
- Page 1 Operating Manual Autoloader CS-i/CS-d Translation © Eltra GmbH, Retsch-Allee 1-5, 42781 Haan, Germany | 13.07.2020 Version 0003...
- Page 2 Copyright © Copyright by Eltra GmbH Retsch-Allee 1-5 42781 Haan Germany...
-
Page 3: Table Of Contents
Table of contents Information about the Manual ......................5 Explanation of signs and symbols ..................... 5 Disclaimer ............................5 Copyright............................5 Safety ..............................6 Explanation of the safety ........................7 General safety instructions ........................ 8 Repairs ............................... 9 Intended use ............................9 Improper use ............................ - Page 4 Information about the Manual...
-
Page 5: Information About The Manual
Manual. 1.3 Copyright This Manual or parts of it may not be duplicated, distributed, edited or copied in any form without the prior written consent of Eltra GmbH. Damage claims will be asserted in the event of infringement. -
Page 6: Safety
Target group This covers everybody who operates, cleans or works on the Autoloader. This Autoloader is a modern, efficient, state-of-the-art product developed by Eltra GmbH. Reliability is guaranteed when the Autoloader is used correctly and when this Manual is complied with. -
Page 7: Explanation Of The Safety
Safety 2.1 Explanation of the safety The following warnings in this Manual alert to potential hazards and damage: DANGER D1.0000 Risk of fatal injuries Source of the danger • Possible consequences of failure to heed the danger. • Instructions and advice on how to avoid the risk. Fatal or serious injuries may ensue if the “Danger”... -
Page 8: General Safety Instructions
Changes to the Autoloader Improper modification − As a result of improper modification, the conformity with European directives as specified by Eltra GmbH will no longer be valid. All warranty claims will be invalidated. • Do not make any modifications to the Autoloader. -
Page 9: Repairs
Deutschland 2.4 Intended use The Autoloader CS-i/CS-d is used for the automatic supply of 36 or 130 crucibles to the CS-i and CS-d analyzers from Eltra GmbH. Use is only permitted in the laboratory by appropriately qualified and briefed personnel. -
Page 10: Safety Circuit Of The
Safety 2.6 Safety circuit of the The safety circuit ensures that the Autoloader can only be commissioned under certain conditions. The safety circuit checks the following conditions: • Pneumatic pressure is present • Furnace cover has been installed and closed •... -
Page 11: Safety Symbols On The Autoloader
Safety 2.7 Safety symbols on the Autoloader Unless explicitly stated, the illustrations apply to both variants of the autoloader CS-i/CS-d. The following safety symbols can be found on the Autoloader CS-i/CS-d: Fig. 2: Safety symbols on the Autoloader CS-i/CS-d Position... -
Page 12: Emergency Stop
Safety 2.8 Emergency stop An emergency stop is initiated using the main switch on the operating side of the Autoloader CS-i/CS-d: Fig. 3: Main switch on the Autoloader CS-i/CS-d Position Component Description Main switch Main switch on the operating side of the Autoloader. -
Page 13: Residual Risks
Safety 2.9 Residual risks DANGER D2.0000 Risk to life caused by an electric shock Exposed power contacts • Contact with exposed power contacts can cause life-threatening injuries or death. • Turn the main switch to Position 0 and pull out the power plug prior to maintenance work on the analyzer. - Page 14 Safety CAUTION C5.0000 Risk of poisoning and suffocation Toxic substances − Hazardous liquids, gases, mist, vapours or dust may be present when working on the Autoloader; these may cause poisoning or suffocation if there is contact with them or they are inhaled. •...
- Page 15 Safety CAUTION C9.0000 Risk of injury Unsteady position of the Autoloader − If not set up correctly, the Autoloader may fall down and cause injuries. • Set up the Autoloader on a stable, level and non-slip surface. • Ensure that all machine bases are placed securely on the surface. CAUTION C10.0000 Risk of crushing...
- Page 16 Safety CAUTION C13.0000 Risk of injury Sharp edges − The sheet metal parts of the Autoloader can have sharp edges and cause injuries if not handled correctly. • Make sure to grip the Autoloader securely when transporting it. • Do not handle directly by the underneath of sheet metal parts. •...
-
Page 17: Description
• for 130 crucibles This Manual applies equally to both Autoloaders. Unless explicitly stated, the illustrations apply to both variants of the Autoloader CS-i/CS-d. 3.1 Operating side The following figure shows the operating side of the Autoloader: Fig. 4: Operating side of Autoloader CS-i/CS-d (figure shows the 36 crucible Autoloader) - Page 18 Description Fig. 5: Operating side of Autoloader CS-i/CS-d (figure shows the 130 crucible Autoloader) Position Component Description Crucible tray For positioning crucibles with samples for analysis Indicates the direction of movement of the crucible Direction indicator carrier. Main switch For switching the Autoloader on and off Adjustable machine bases (3×)
-
Page 19: Back
Description 3.2 Back The following figure shows the back of the Autoloader: Fig. 6: Back of the Autoloader CS-i/CS-d Position Component Description Connection for the compressed air connection from Compressed air connection the analyzer to the Autoloader Electrical connection Connection for the supplied power supply unit... -
Page 20: Gripper Arm
Description 3.3 Gripper arm The following figure shows the possible gripper arm positions of the Autoloader: Fig. 7: Gripper arm positions of the Autoloader CS-i/CS-d Position Component Description Gripper arm position of the chain First step of the motion sequence... - Page 21 Description The positioning disc and light barrier determine the position of the gripper arm: Fig. 8: Position of the light barrier and positioning disc with the front cover removed Position Component Description Positioning disc For the automatic positioning of the gripper arm Light barrier Light barrier to detect the position of the gripper arm...
- Page 22 Description 3.4 Optical Level Sensor The following figures depict the sensor that supervises the filling level of the crucible bin and inhibits operation of the autoloader if the bin is near to full. Fig. 9: Position of Optical Level Sensor (1) with the front cover removed Fig.
-
Page 23: Transport And Packaging
Transport and packaging Transport and packaging WARNING W3.0005 Risk of injury due to the Autoloader falling down Lifting the Autoloader above head height − The Autoloader can fall down and cause serious injuries if lifted above head height. • Transport the Autoloader as close to the floor as possible. In particular avoid lifting the Autoloader above head height. -
Page 24: Transport
N4.0014 Complaints Incomplete delivery or transport damage − The forwarding agent and Eltra GmbH must be informed immediately about transport damage. Under some circumstances it may no longer be possible to take subsequent complaints into consideration. • On delivery, please check that the Autoloader is complete and undamaged. -
Page 25: Installation
Installation Installation 5.1 Setting up CAUTION C18.0000 Risk of posture problems Lifting the Autoloader unaided − The weight of the Autoloader can cause injuries resulting from posture problems due to an unhealthy posture or inattentiveness when lifting. • Ensure you maintain a healthy posture when lifting the Autoloader. CAUTION C19.0000 Risk of burns... - Page 26 Installation When viewed from the front, the Autoloader AutoloaderCS-i/CS-d is set up to the right of the analyzer. Follow the steps set out in the following sections. Fig. 11: Setting up the Autoloader Autoloader CS-i/CS-d Position Component Description Analyzer Position of the analyzer...
-
Page 27: Removing The
Installation 5.2 Removing the front cover The front covers (top and bottom) must be removed before the Autoloader can be attached to the analyzer. The following figure shows the screws on the front covers: Fig. 12: Removing the front cover Position Component Description... -
Page 28: Removing The Side Cover
The side cover of the Autoloader is removed to adjust the alignment of the Autoloader to the front or back or to activate manual operating mode. The following figure shows the operating side of the Autoloader: Fig. 13: Operating side of Autoloader CS-i/CS-d with side cover Position Component Description Side cover screws (4×) -
Page 29: Replacing The Side Wall Of The Analyzer
Side wall screws (2x) For securing the side wall of the analyzer Side wall without cut-outs Side wall supplied with the CS-i/CS-d Side wall with cut-outs Side wall supplied with the Autoloader 1. Remove the screws (1). The side wall continues to be held by two brackets at the bottom. -
Page 30: Installing The Furnace Sensor
Installation 5.5 Installing the furnace sensor The supplied magnetic switch must be attached to the pneumatic cylinder of the furnace so that the autoloader can recognize the state of the furnace (open / closed). Proceed as follows to do this. Fig. -
Page 31: Attaching The Autoloader To The Analyzer
Installation 5.6 Attaching the Autoloader to the analyzer The Autoloader is aligned on the analyzer and initially fastened loosely to the analyzer using the supplied mounting brackets and screws. The following figure shows the position of the mounting brackets: Fig. 16: Bracket for fastening to the analyzer Position Component Description... -
Page 32: Establishing The Compressed Air Supply
Installation The Autoloader is screwed to the analyzer as follows: “Removing the front 1. Ensure that the front cover has been removed, see cover”. 2. Remove the mounting brackets (1) and (6) from the Autoloader and remove the sliding blocks from them. 3. -
Page 33: Activating Manual Operating Mode
The manual mode enables the precise alignment of the gripper arm. The following figure shows the operating side of the Autoloader with the side cover removed: Fig. 17: Operating side of the Autoloader CS-i/CS-d with the side cover removed Position... -
Page 34: Aligning The Autoloader
Installation 5.10 Aligning the Autoloader The Autoloader can be aligned to the front or back when the operating side is open. It is necessary here to check the motion sequences of the Autoloader manually to ascertain the correct position and ensure stable operation. The alignment takes place by adjusting the bases of the machine and by sliding the Autoloader along the side of the analyzer. - Page 35 Installation The following figure shows the open operating side and the screws required for adjustment: Fig. 19: Screws for aligning the Autoloader to the front or back Position Component Description Back screw For aligning the Autoloader Front screw For aligning the Autoloader Fig.
- Page 36 Installation Manually run through the motion sequences as follows: 1. Ensure that the assembly steps 5.1 to 5.7 have been carried out. 2. Ensure that several empty crucibles are ready on the crucible tray. 3. Ensure that the crucible bin has been correctly positioned. 4.
-
Page 37: Assembling The
Installation 5.11 Assembling the front cover The two front covers must be assembled once the Autoloader has been attached to the analyzer. The following figure shows the position of the screws on the front cover: Fig. 21: Mounting the front cover Position Component Description... -
Page 38: Assembling The Side Cover
5.12 Assembling the side cover The side cover of the Autoloader must be assembled prior to commissioning. The following figure shows the operating side of the Autoloader: Fig. 22: Operating side of the Autoloader CS-i/CS-d with side cover Position Component Description Screws on the side cover (4×) -
Page 39: Commissioning
Commissioning Commissioning The following conditions must be met before commissioning: • The Autoloader has been installed, see “Installation”. Commission the Autoloader as follows: “Operating 1. Turn the Autoloader on by the main switch, see Pos. (2) in side”. The Status LED on the main switch of the Autoloader lights up. The Autoloader has been commissioned. -
Page 40: Operation Of The Autoloader
Operation of the Autoloader Operation of the Autoloader CAUTION C21.0000 Risk of poisoning and suffocation Toxic substances − Hazardous liquids, gases, mist, vapours or dust may be present when working on the Autoloader; these may cause poisoning or suffocation if there is contact with them or they are inhaled. - Page 41 Operation of the Autoloader CAUTION C25.0000 Risk of burns Flammable surface − Crucibles can fall onto the surface or onto the floor, e.g. if the compressed air fails or if the crucible bin is missing. A fire may result if there is a flammable surface beneath the Autoloader or on the floor, causing injuries.
-
Page 42: Loading The Crucible Tray
Operation of the Autoloader 7.1 Loading the crucible tray CAUTION C28.0021 Risk of injury External activation There is a risk of the Autoloading starting up inadvertently when it is activated externally by the software. • Only operate the Autoloader using the software when you can see the Autoloader. -
Page 43: Operating The Autoloader
Operation of the Autoloader Load the Autoloader with crucibles as follows: Place the first crucible filled with the relevant sample on the crucible tray in Position (3). 2. Place the second crucible (2) behind the first crucible. 3. Continue placing the crucibles filled with your samples on the crucible tray against the direction of movement (1). -
Page 44: Emptying The Crucible Bin
Operation of the Autoloader 7.3 Emptying the crucible bin CAUTION C31.0000 Risk of burns Hot crucible bin − The crucible bin may be hot and cause burns if touched. • Wait until the crucible bin has cooled down before emptying, or wear gloves. - Page 45 Operation of the Autoloader 4. Place the empty crucible bin onto its designated space (1). The crucible bin has been emptied.
-
Page 46: Technical Data
Technical data Technical data The following table lists the technical data for the Autoloader CS-i/CS-d: Data 130er Autoloader Definition Description 36er Autoloader Dimensions Width 20 cm 85 cm Depth 65 cm 65 cm Height 60 cm 60 cm Weight 18 kg... -
Page 47: Type Plate
Technical data 8.1 Type plate The following diagram shows an example of the type plate on the Autoloader Fig. 25: Type plate on the Autoloader CS-i/CS-d Position Component Position Component Manufacturer’s address Part number Type of protection Read the Manual... -
Page 48: Fault Signals On The Autoloader
Fault signals on the Autoloader Fault signals on the Autoloader The Autoloader detects certain faults, and emits a predefined number of beeps (sounds) for identified faults via an acoustic signalling device. The following table lists the number of beeps and the corresponding faults identified: Number of Description of the fault beeps... -
Page 49: Cleaning
• Only clean the Autoloader with water when the Autoloader has been disconnected from the power supply. The Autoloader CS-i/CS-d must be inspected regularly for spilt sample material. Remove spilt sample material as follows: “Operating 1. -
Page 50: Servicing
Servicing 11 Servicing CAUTION C32.0021 Risk of injury External activation − There is a risk of the Autoloading starting up inadvertently when it is activated externally by the software. • Only operate the Autoloader using the software when you can see the Autoloader. -
Page 51: Starting Non-Stop Operation
Servicing 11.1 Starting non-stop operation The automatic repeating of complete cycles is possible as non-stop operation without combustion. The Autoloader keeps repeating all individual steps until the last crucible has been removed from the crucible tray. If no further crucible is found, the Autoloader continues to turn the chain for a while to look for more crucibles. -
Page 52: Decommissioning
This ensures that the crucibles do not get lost and are available next time the Autoloader is commissioned. The Autoloader has been decommissioned. 13 Storage The following storage conditions apply to storage of the Autoloader CS-i/CS-d: • Indoor area •... -
Page 53: Disposal
Disposal 14 Disposal Applicable statutory regulations must be heeded during disposal. Information about the disposal of electrical and electronic machinery in the European Community is set out below. The disposal of electrically operated equipment is governed within the European Community by national regulations based on EU directive 2012/19/EU for waste electrical and electronic equipment (the WEEE Directive). - Page 54 Copyright © Copyright by Eltra GmbH Retsch-Allee 1-5 42781 Haan Germany...
Need help?
Do you have a question about the CS-i and is the answer not in the manual?
Questions and answers