
Related Manuals for EverFocus EDSR-1600


Summary of Contents for EverFocus EDSR-1600
- Page 1 INSTRUCTION MANUAL EDSR-900 9 Channel Duplex Digital Video Recorder EDSR-1600 16 Channel Duplex Digital Video Recorder V1.09...
-
Page 2: Safety Precautions
CAUTION DO NOT REMOVE COVER. NO USER SERVICEABLE PARTS INSIDE. REFER SERVICING TO QUALIFIED SERVICE PERSONNEL. WARNING TO REDUCE RISK OF FIRE OR ELECTRIC SHOCK, DO NOT EXPOSE THIS APPLIANCE TO RAIN OR MOISTURE Safety Precautions Refer all work related to the installation of this product to qualified service personnel or system installers. - Page 3 Safety Precautions The lightning flash with an arrowhead symbol, within an equilateral triangle, is intended to alert the user to the presence of uninsulated ”dangerous voltage”within the product’ s enclosure that may be of sufficient magnitude to constitute a risk of electric shock to persons The exclamation point within an equilateral triangle is intended to alert the user to presence of important operating and maintenance(servicing)instructions in the...
-
Page 4: Important Safeguards
Important Safeguards Read Instruction---All the safety and operating instructions should be read before the init is operated Retain Instructions---The safety and operating instructions should be retained for future reference. Heed Warnings— All warnings on the unit and in the operating instructions should be adhered to. Follow Instructions—... -
Page 5: Table Of Contents
Product Overview… … … … … … … … … … … … … … .… … … … … … ..… ..… ..Page 1 1.1 Main features… … … … … … … … … … … … … … … … … … … … … … … … … ...… ..… … … 1 1.2 Specifications…... -
Page 6: Product Overview
The EDSR-900 / EDSR1600 Duplex Digital Video Recorder (DVR) a full-featured DVR designed specifically for use in security industry. The DVR incorporates all the benefits of digital video recording, is simple to install, and operates just like a VCR. Highly efficient compression technology and superior resolution of recorded images make the DVR stand out from the competition as the best choice for security surveillance. -
Page 7: Specifications
1 alarm output EDSR-900: Full, 4, 6, 7, 8, 9, PIP and 2x zoom for Live and Playback Video Display modes EDSR-1600: Full, 4, 6, 7, 9, 10, 13, 16, PIP and 2x zoom for Live and Playback Video Loss Detection... -
Page 8: Back Panel Connections
These monitors can only display full screen as regular call monitor. VIDEO IN: BNC-sockets for composite signal video inputs, automatic 75 Ohm termination (EDSR-900: 1 ~ 9, EDSR-1600: 1 ~ 16). VIDEO OUT: Loop through video outputs for each input channel. -
Page 9: Back Panel Connections
RS485 connector : 2 x RJ-45 connectors for RS-485 remote control, high impedance Supported are keyboards KS-KBK, KS-KBJ. Maximum units in RS-485 network are 32. Following EverFocus products are compatible in RS-485 network: - DVR’ s - Keyboards KS-KBJ (with 3 - axis Joystick, DVR and telemetry control) -
Page 10: System Connection
The installations described below should be made by qualified service personnel or system installers. Before Installation Please refer to the following diagram for the system connections. EDSR 900: Camera 1~9 / EDSR-1600: Camera 1 ~ 16 Alarm In/Out Audio Input... -
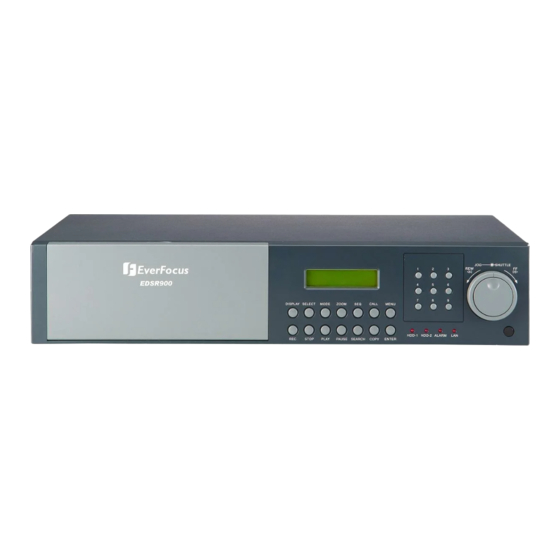
Page 11: Front Panel Keypads
JOG to move from left to right. Press ENTER for changing vertical / horizontal movement. MODE: Switch Full, 4, 6, 7, 8, 9, (10, 13 and 16 for EDSR-1600 only), PIP (picture in picture) multi-screen for Live and Playback. -
Page 12: Front Panel Keypads
In Full screen mode this menu allows color adjustment for each v ideo channel, all channels are separately adjustable. The selected item will show in red color bar. Use JOG to increase or decrease the value. Press ENTER to confirm and move to next item. After finished setting, press SELECT key to discard change or press MENU key to save and exit the dialog. -
Page 13: Operation
5. Operation (1) Insert a HDD (IDE) for Video Storage Insert one or two HDD (3.5” IDE) for Video Storage. The HDD should be set as Cable Select or MASTER. Both HDD need equal setting. (Normally the default setting of HDD is Master) Note: After hard disk case is inserted into the hard disk tray, be sure to turn the tray key in lock position.Otherwise, HDD will not be detected. -
Page 14: Menu Flow
6. MENU FLOW Columns in brackets () only valid for EDSR-1600 CLOCK ( See page 11 ) CLOCK SETTING MENU : 2005/04/15 FRI DATE : 13:01:02 TIME MENU LANGUAGE: ENGLISH VIDEO SYSTEM: NTSC VERSION: 1.09 2005/01/20 Daylight Saving Time ( See page 12 ) - Page 15 Columns in brackets () only valid for EDSR-1600 CONTROL ( See page 24) CONTROL SETTING MENU RS232 BAUD RATE : 9600 BPS STOP BIT : NONE PARITY DATA BIT R485 BAUD RATE : 9600 BPS STOP BIT PARITY : NONE...
-
Page 16: Clock Setting Menu
6.1 CLOCK SETTING MENU CLOCK SETTING MENU : 2005/04/15 FRI DATE : 13:01:02 TIME MENU LANGUAGE VIDEO SYSTEM VERSION: 1.09 In CLOCK/LANGUAGE SETTING MENU , we define: (1) DATE : Current date, format: YYYY/MM/DD Year: 2000 ~ 2099, Month: 01~ 12, Date: 01~31, Week: Sunday~Saturday (2) TIME : Current time, format: HH:MM:SS Hour: 00 ~ 23, Minute : 00 ~ 59, Second: 00 ~ 59 (3) MENU LANGUAGE: ENGLISH... -
Page 17: Daylight Saving Time
6.2 DAYLIGHT SAVING TIME DAYLIGHT SAVING SETTING MENU DAYLIGHT SAVING: YES START TIME: LAST SUN IN MARCH CHANGE FROM 02:00 TO 03:00 STOP TIME: FIRST SUN IN OCTOBER CHANGE FROM 03:00 TO 02:00 This menu provides automatically switching to Daylight Saving Time and back to Normal Time. -
Page 18: Timer Setting Menu
6.3 TIMER SETTING MENU TIMER SETTING MENU WEEK START In TIMER SETTING MENU we define automatic, timer-controlled records. Timer records can be defined for 16 individual start and end times. (1) WEEK: Select the week day for the timer to record on schedule. DLY means daily record. -
Page 19: Sequence Setting Menu
10 to 16 only valid for EDSR-1600 In the SEQUENCE SETTING MENU, we define for MAIN Monitor (1) CH (Channel): Input channels. 1~9 for EDSR-900, 1~16 for EDSR-1600. (2) OP (Operation): ON includes the camera in the sequence, OFF skips the camera in the sequence. -
Page 20: Title Setting Menu
15 CH015_ _ _ _ _ 16 CH016_ _ _ _ _ 10 to 16 only valid for EDSR-1600 In the TITLE SETTING MENU we define: The Title Setting Menu allows you to assign a title to each camera input. -
Page 21: Covert Setting Menu
6.6 COVERT SETTING MENU COVERT SETTING MENU CH OP 10 to 16 only valid for EDSR-1600 In the COVERT SETTING MENU we define: The covert setting menu allows you to hide the requested camera on the display in a blue background. Change setting to “ON” for covering camera. -
Page 22: Alarm Record Setting Menu
6.7 ALARM RECORD SETTING MENU ALARM SETTING MENU CH OP 10 to 16 only valid for EDSR-1600 In ALARM RECORDING MENU, we define (1) CH (Alarm input) : Select alarm input or RST for alarm reset input. (2) OP (OPERATION) : ON : Records when alarm occurs. -
Page 23: Motion Setting Menu
6.8 MOTION SETTING MENU MOTION SETTING MENU CH OP OFF HIGH PRESS 1-16 TO MANUAL EDIT 10 to 16 only valid for EDSR-1600 In the MOTION RECORD SETTING MENU we define: (1) CH (Channel): video input channel (2) OP (Operation): Default: OFF ON: The device will respond recording when motion occurs. - Page 24 (5) HIT 1-9/16 TO MANUAL EDIT: Use the number keys (1~9 for EDSR-900 / 1~16 for EDSR-1600) to select a camera for setting the detection areas. The selected camera appears with a 16 x 12 grid (detection zones): PRESS MODE TO SWITCH ALL ON/OFF...
-
Page 25: Record Setting Menu
6.9 RECORD SETTING MENU RECORD SETTING MENU NORMAL RECORD SPEED QUALITY DISK FULL ALARM RECORD OPERATION SPEED QUALITY PRE-ALARM RECORD OPERATION PREMANENT RECORD OPERATION SPEED In NORMAL RECORDING MENU we define NORMAL RECORD: SPEED : Choose the normal recording speed. Maximum 60 (NTSC) / 50 (PAL). QUALITY: Define the video picture’... - Page 26 PRE-ALARM RECORD: (with Alarm In and Motion) Pre-alarm duration is depending on recording quality (about 8-15 seconds). OP (Operation): Select ON to activate or OFF to deactivate pre-alarm recording. PERMANENT RECORDING: This recording mode is used for continuous recording in the quality of NORMAL RECORD settings.
-
Page 27: Network Setting Menu
6.10 NETWORK SETTING MENU NETWORK SETTING MENU IP ADDRESS NET MASK ADDRESS GATEWAY ADDRESS MAC ADDRESS USER-NAME GUEST--- GUEST--- GENERAL- GENERAL- ADMNI--- ADMNI--- HTTP PORT: 0080 CTRL PORT: 6666 DATA PORT: 1111 2222 3333 4444 In the NETWORK SETTING MENU, we define (1)IP ADDRESS : Assign an fixed IP address for this unit, for example:192.168.010.005 (2)NET MASK ADDRESS: Assign a subnet mask of the network for this unit,... - Page 28 USER-NAME PASSWORD LEVEL The Login name and password are used to establish a network connection to the unit. The PASSWORD setup allows the administrator to set the new Login name and password with access level “SUPER”,”GENERAL” or “GUEST”. The system allows up to four users connected at same time with different access levels. “ADMIN ”...
-
Page 29: Control Setting Menu
(7) RS485 PARITY:Select parity lever: NONE/ODE/EVEN (8) RS485 DATA BIT: Select data bit : 8 or 7 (9) RS232/RS485 ID: RS232/RS485 address.The address range for the DVR: 1~200. NOTE: Settings for remote keyboards KS -KBK and KS-KBJ: RS-485 Baud rate: 9600, 1 Stop bit, Parity NONE, ID (device number) range: 1~32. -
Page 30: Buzzer Setting Menu
6.12 BUZZER SETTING MENU BUZZER SETTING MENU BUZZER RECORD-IN ALARM-IN MOTION-IN DISK FULL VIDEO LOSS TIMER In BUZZER SETTING MENU, we define the buzzer ON/OFF for following event: RECORD-IN, ALARM-IN, MOTION-IN, DISK FULL, VIDEO LOSS AND TIMER. Please select ON or OFF Turn the JOG dial clockwise or counter-clockwise to select the options. -
Page 31: Archive Setting Menu
6.13 ARCHIVE SETTING MENU ARCHIVE SETTING MENU PICTURE SIZE TIME STAMP TIME STAMP POS WATER MARK WATER MARK POS In the ARCHIVE SETTING MENU, we define for picture and movie export to CF-card: (1) PICTURE SIZE : Selects picture size for copying image to CF card: Big size:720x480 / 720x576 for NTSC / PAL. -
Page 32: Matrix Setting Menu
6.14 MATRIX SETTING MENU MATRIX SETTING MENU CALL MONITOR MATRIX-0 MATRIX -1 MATRIX -2 MATRIX -3 MATRIX -4 (Dialog 1) In the MATRIX SETTING MENU, we define the standard sequences for each matrix monitor and event, which override these sequences. Users may set up to 5 call monitors accordingly (Dialog 1). -
Page 33: Disk Menu
6.15 DISK MENU DISK SETTING MENU DISK USAGE SIZE (GB) RECORD POS PLAY POS DISK RENEW In the DISK menu, the Hard Disks’capacity and status are displayed. Additionally, the Hard Disks’indexes can be deleted. SIZE (GB): Display of Hard Disk capacity in GB for HDD1 (upper Slot) and HDD2 (lower slot). -
Page 34: Ptz Setting Menu
RS232 - port (with interface converter) PROTOCOL: Supported protocols: PELCO-D, PELCO-P, EVERFOCUS* und VPROTECT* (* reserved for future us, currently not supported) BAUD RATE: There are 6 telemetry transmission rates, selectable 1200, 2400, 4800, 9600, 19200, 38400 baud rate. - Page 35 Example: Connection ED-2250 Dome to EDSR600/900/1600 Control of EverFocus ED2250 speed dome is possible with setting PELCO - D or PELCO - P protocol. Functionality is limited compared to keyboard control with original protocol, available are PTZ and preset functions (no ED2250 setup menu).
- Page 36 MENU RS-232 - Connection ED2250 Dome...
-
Page 37: System Setting Menu
YES: Download the update S/W into CF card via your PC and insert the CF card into the DVR front panel CF slot. After that press ENTER key to start . Notice: After the system is successfully updated, please reboot the system. -
Page 38: Recording
DISPLAY key to show camera title and date/time. Press STOP key to stop recording. Since the DVR had Duplex feature, STOP key can be activated both in Playing back and STOP Recording. In Duplex mode first STOP will stop playback, second STOP will stop recording. -
Page 39: Permanent Recording
7.3 PERMANENT RECORDING No manual operation is required, the automatic permanent recording is defined and activated in the RECORD menu. 7.4 TIMER RECORDING No manual operation is required, the settings for TIMER recording is defined in the TIMER menu. Recording... -
Page 40: Playback
8.1 NORMAL PLAYBACK (1) Playback Press the PLAY key to start playing back the stored video/audio from the last SEGMENT. PLAY NOTE: In Duplex mode (simultaneous record and playback) the playback speed is limited to 25 IPS. For real-time display of 50 IPS records stop recording before starting playback. -
Page 41: Search Playback
8.2 SEARCH PLAYBACK (1) Segment List search playback Press SEARCH key to enter the SEARCH MENU dialog. SEARCH SEARCH MENU BY SEGMENT LIST BY ALARM LIST BY DATA TIME Turn the JOG dial to select BY SEGMENT LIST and press ENTER key. - Page 42 (2) Alarm List search playback Press SEARCH key to enter the SEARCH MENU dialog. SEARCH SEARCH MENU BY SEGMENT LIST BY ALARM LIST BY DATA TIME Turn the JOG dial to select BY ALARM LIST and press ENTER key. The submenu will display as follows: ALARM SEARCH 00001 00002...
-
Page 43: Search Playback
(3) Date/Time Search Playback Press SEARCH key to enter the SEARCH MENU dialog. SEARCH SEARCH MENU BY SEGMENT LIST BY ALARM LIST BY DATA TIME Turn the JOG dial to select BY DATA TIME and press ENTER key. The submenu and instruction will display as follows: DATE/TIME SEARCH YYYY/MM/DD HH:MM:SS HDD 2003 /01 /01... -
Page 44: Data Export
Press the PAUSE key to pause playback. The Monitor OSD shows “PAUSE ON (1~9 for EDSR-900, 1~16 for PAUSE EDSR-1600)” . The displayed number shows the active channel for the COPY function. Turn the JOG Dial clockwise to choose your desired image. -
Page 45: Copy To Movie File
9.2 COPY TO MOVIE FILE NOTE: COPY function will interrupt the recording for the duration of copy procedure. The MAIN monitor displays the message: "WARNING: RECORD STOPS FOR COPY FUNCTION" Press the PLAY key to start playing back. PLAY Press COPY key and then the copy menu and instruction appears. The main monitor switches to full screen display with following OSD: COPY COPY TO MOVIE FILE... -
Page 46: Export Event Log List
9.3 EXPORT EVENT LOG LIST This function allows to export the event log list to CompactFlash – Card. The generated text file in in *.txt format. Press „DISPLAY“ key and hold the key for over 2 seconds. DISPLAY TYPE MOTION USE JOG TO SWITCH PAGE HIT CALL TO TURN OFF BUZZER HIT COPY TO SAVE EVENT TO CF CARD... -
Page 47: Monitor Views / Operation
MONITOR VIEWS / OPERATION - Full screen and multi screen display: EDSR-900: Full, 4, 6, 7, 8, 9, PIP, and 2x zoom EDSR-1600: Full, 4, 6, 7, 8, 9, 10, 13, 16, PIP, sequence and 2x zoom - Live - and Playback display - OSD for camera title, status messages, date, and time. -
Page 48: Call / Matrix Monitors
10.2. CALL / MATRIX MONITORS Press CALL to change settings for CALL / MATRIX monitors. The Main monitor shows following dialogue: CALL MATRIX NORMAL STATE SETTING MENU PRESS CALL TO SET CALL MONITOR PRESS 1-4 TO SELECT MATRIX Select the monitor by pressing CALL or the numeric keys 1~4. The Main monitor shows following dialogue (example with monitor 1): SETTING MATRIX 1…... -
Page 49: Remote Control
11. REMOTE CONTROL 11.1 RS-485 REMOTE CONTROL The new standard EverFocus EDSR remote control protocol allows sophisticated installations with DVR remote control at different installation sites. EDSR remote control is supported by the keyboards KS KBJ (with 3-axis joystick and 2 additional RS-485 ports for telemetry control with independent telemetry protocols) and KS KBK (no telemetry). - Page 50 Wiring diagram single EDSR control RS485B /yellow RS485A /yellow RS485A /yellow RS485A /white RJ12- RJ12- Patchcable Patchcable Wiring diagram multiple keyboard control RS485B /yellow RS485B /yellow RS485A /white RJ12- Patchcable NOTE: Do not use the RJ12 patch cable (in KS KBK / KS KBJ packaging) for direct connection keyboard - EDSR.
-
Page 51: Ir Remote Control
The remote controller (RC-200, Figure 1) is an accessory to enhance the handy operations of the DVR. You can perform all the settings and operations by the remote controller. The effective distance is up to 10 meters without any obstacle. The keypad functions are same as the front panel key button of the DVR. -
Page 52: View Via Internet/Intranet
Before you start: Please make sure the service ports 0080, 1111, 2222, 3333, 4444, and 6666 all enable in both of two end point and LAN(control PC and been controlled DVR). Please enable the “ActiveX” for java plug-in (Please refer to Microsoft IE manual ). Please set the NetMask 255.255.255.000 for network configuration of your control PC, when both of them in the same... -
Page 53: Main Screen
Main Screen 1 2 3 4 5 6 Above diagram is the main screen display. The icons on the lower corner of the screen are mainly for control and Configuration, those on the right corner are for status indication. If any icon is grayed, it means that the specific function is not accessible in the current mode. The followings are a brief description for each of the icons. - Page 54 View From Internet/Intranet 10. The system allows up to 3 ways playback video, by SEGMENT, ALARM LIST and DATE TIME. (Playback by SEGMENT LIST, click Refresh to show segment list) (Playback by ALARM LIST, click Refresh to show alarm list) (Playback by Date time;...
- Page 55 15. Full screen view. 16. Quad screen view. 17. Nine split screen view. 18. Sixteen split screen view (only for 16 CH DVR). 19. A pop-up menu to select camera to view will be shown by pressing right mouse button.
- Page 56 PTZ-CONTROL WITH WEB BROWSER (from FW 1.09 only) If the checkbox "PTZ CONTROL" is activated in the Web’ s applet of the EDSR600/900/1600, the screen shows the telemetry control functions. Please consider the time delay in video network transmission at manual PTZ control! PTZ network control is not recommended for ISDN or analogue transmission lines due to slow video transmission rate and long video delay.
-
Page 57: Password Protection
13. PASSWORD PROTECTION The EDSR 900/1600 provides 3 levels with different user rights in operating, if password protection is activated in SYSTEM menu. USER RIGHTS: LEVEL 1: Active after start up, user is allowed to switch live views, no access to record, search, playback and menu functions. -
Page 58: Appendix-A: Lan Functional Specification
LAN Functional Specification Specifications: Network Interface: 10Mbits/s Ethernet (10Base T) LAN controller Chip: RealTek 8019 LAN Connector: RJ-45 Protocol: HTTP,TCP/IP.ICMP,ARP Remote Access: Standard browser such as internet Explorer / Netscape with JAVA support Image Compression: JPEG Used Ports: 80, 1111, 2222, 3333, 4444, 6666 Max. -
Page 59: Appendix-B: Time Lapse Recording Time Table
Time Lapse Mode Recording Time Table ? When Recording with 160GB HDD (Estimated with typical image-low noise level) NTSC Unit: Hour Recording Speed LOWER (fps) 49.4 98.8 148.1 197.5 155.9 296.3 233.9 592.6 467.8 2963 2339.2 5925.9 4678.4 9876.5 7797.3 14814.8 11695.9 Unit: Hour... - Page 60 ? When Recording with 320GB HDD (Estimated with typical image-low noise level) NTSC Unit: Hour Recording Speed LOWER (fps) 98.8 197.5 155.9 296.3 233.9 395.1 311.9 592.6 467.8 1185.2 935.7 5925.9 4678.4 11851.9 9356.7 19753.1 15594.5 29629.6 23391.8 Unit: Hour Recording Speed LOWER...
-
Page 61: Appendix-C: Serial Interface Specifications
Serial Interface Specifications 1. RS-232 pin assignment The DVR may be controlled by a computer or a terminal via the standard D-SUB 9-pin RS-232 connector. The pin assignment of the D-SUB 9-pin connector PIN # NAME NOT CONNECTED NOT CONNECTED... -
Page 62: Remote Control Protocol
0x5D Example2 : A packet that send "PAUSE" key to DVR (ID=4999) 0x85 0x27 0x07 0x4B 0x0C 0x0A Example3 : A packet that send "PLAY" key to all DVR (broadcast) 0x85 0x7f 0x7f 0x4B 0x0B 0x59 (length) (Receiver ID high byte) - Page 63 2-1. The format of message packet is as follows: Length Byte (Prefix: 0x86, 0x87, or 0x88 ... ) Receiver ID high byte Receiver ID low byte Opcode Byte Data Byte1 Data Byte2 Data Byte3 Checksum Byte 2-2. Length Byte This Length Byte is also a prefix. Bit7 must be 1. 0x87 ==>...
- Page 64 2-3. Receiver ID 2-3. Receiver ID 1). Individual receiver ID Decimal 14bit binary value 0000000 0000000 0000000 0000001 0000000 0000010 0000000 1111110 0000000 1111111 0000001 0000000 0000001 0000001 0000001 1111111 0000010 0000000 0000011 1111111 16382 1111111 1111110 2). Broadcast ID Decimal 14bit binary value 16383...
- Page 65 2-4. Opcode Byte & Data bytes 2-4-1. OPcode OPcode 0x4B 0x4D 2-4-2. Remote keys (OPcode=0x4B) ---------------------------------------------------------------------------------------------------- Data1 0x00 0x01 0x02 0x03 0x04 MODE 0x05 ZOOM 0x06 0x07 MENU 0x08 0x09 REV.PLAY 0x0A STOP 0x0B PLAY 0x0C PAUSE 0x0D SEARCH 0x0E COPY 0x0F DISPALY...
- Page 66 2-4-3. Matrix command (OPcode=0x4D) Data1 Matrix function 0x00 Matrix monitor0 - ch01 spot 0x01 Matrix monitor0 - ch02 spot 0x02 Matrix monitor0 - ch03 spot 0x03 Matrix monitor0 - ch04 spot 0x04 Matrix monitor0 - ch05 spot 0x05 Matrix monitor0 - ch06 spot 0x06 Matrix monitor0 - ch07 spot 0x07...
-
Page 67: Appendix-D: Alarm I/O Pin Assignment
Alarm Out N.C. ALM-N.O Alarm Out N.C. ALM-COM Alarm OUT COM * ALM10~ALM16 are active only for EDSR-1600 Appendix-D 7 8 9 10 11 12 13 14 28 27 26 25 24 23 22 21 20 19 18 17 16 15 PR16D00400 <Figure 2>... - Page 68 EverFocus Electronics Corp. Head Office: 12F, No.79 Sec. 1 Shin-Tai Wu Road, Hsi-Chih, Taipei, Taiwan www.everfocus.com.tw USA Office: 2445 Huntington Drive, San Marino, CA 91108, U.S.A. www.everfocus.com European Office: Albert-Einstein-Strasse 1 D-46446 Emmerich, German www.everfocus.de China Office: Room 609, Technology Trade Building,...
Need help?
Do you have a question about the EDSR-1600 and is the answer not in the manual?
Questions and answers