
Subscribe to Our Youtube Channel
Related Manuals for ATOMSTACK X7 Pro Series


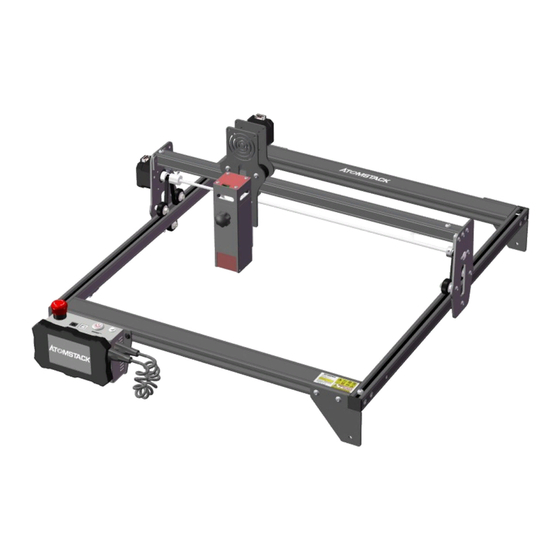
Summary of Contents for ATOMSTACK X7 Pro Series
- Page 1 A T O M S T A C K X 7 P r o s e r i e s L a s e r E n g r a v e r I n s t a l l a t i o n M a n u a l ...
- Page 2 Part 1: Security Statment Before Installation Before Using the laser engraving, please read this safety guide carefully, it mentions situations that require special attention and includes warnings of unsafe practices that can cause damage to your property or even endanger your personal safety. 1.
- Page 3 4. The laser itself has a protective cover, the protective cover is fastened by screws. When the laser is installed on the laser engraver, the protective cover should be checked to be reliably locked, and can not be removed in the energized state. 5.
- Page 4 Part 2:User Security Statement Laser Light can hurt the human eyes and skin. Do not expose the eye or skin to laser light directly. This Laser product has an optical lens and emits a collimated laser beam. The light emitted by the product, whether it is direct or reflected, is very harmful. Because it can propagate a long distance while maintaining high optical density.
- Page 5 2.3 Material safety Do not engrave materials with unknown properties. Materials Recommended:Wood, bamboo, leather, plastic, fabric, paper, opaque acrylic, glass.Materials not recommended:Metal, precious stones, transparent materials, reflective materials etc. 2.4 Use Safety Use the engraver only in horizontal position and ensure that it has been securely fixed to prevent fires caused by accidental shifting or dropping from the workbench during work.It is forbidden to point the laser to people, animals or any combustible object, whether it is in working condition or not.
-
Page 6: Part 3: Disclaimer And Warning
You understand and agree that AtomStack may not be able to provide you with the cause of the damage or accident and provide you with AtomStack's after-sale service unless you provide the original engraving or cutting files, engraving software configuration parameters used, operating system information, video of the engraving or cutting process, and operational steps prior to the occurrence of a problem or failure. - Page 7 P a r t 4 : I n s t a l l a t i o n S t e p s S t e p 2 S t e p 1 Screw: M5*25 The guide rail passes through the middle of the 3 rollers.
- Page 8 S t e p 5 S t e p 6 Use a wrench to turn the eccentric nut to adjust the tightness of the guide wheel and the guide rail TIPS:How to determine the tightness of eccentric nuts? Under the condition of ensuring that the bracket does not shake, you can lift one end of the machine to an angle of 45 degrees with the horizontal plane, and release the X-axis or Y-axis bracket from a high place.
- Page 9 Part 5:Control box description ④ ① ③ ② ⑥ ⑤ 1.Emergency stop switch:In case of emergencies, the machine will immediately stop working when you press it. When you need to unlock it, turn the button clockwise to restart the engraver. 2.Power socket: DC 12V power supply.
- Page 10 Part 6:Instructions for use of the display Press the power LaserGRBL exports nc Click Cavre to button to enter the Insert SD card format, Lightburn exports enter the SD card home page of the gc format file list display Laser fixed focus Select the file to be Click the frame button Click the position...
- Page 11 Instructions for exporting nc and gc format files 1.laserGRBL software 2.Select sd chuck as the save path, click Save to generate 1.Import the picture to be engraved or cutted into laserGRBL, after nc file. setting the engraving speed and energy parameters etc., click File, and select Quick Save 2.lightburn software 1.Import the picture to be engraved or cutted into...
- Page 12 Introduction to the contents of the home page, file list, and engraving preparation page of the display 2、This is the boot interface, which has two major functions. 1.Click the engraving button to enter the engraving file list interface. 1、Before using the engraving machine, please insert the SD card into 2.Click the setting button to enter the setting interface.
- Page 13 Setting of engraving/cutting passes, introduction of page key functions in engraving 2、This is the interface during engraving. This interface can be paused, stopped, and the power and speed can be adjusted. (Note: There is no return button in this interface. You can only stop 1.
- Page 14 Setting of engraving/cutting passes, introduction of page key functions in engraving 9、This is the setting interface. 1.Click the back button to return to the boot interface 10、This is the WiFi setting interface. 2.Click the key tone switch button to turn on/off the key 1.Click the back button to return to the setting interface and startup tone.
- Page 15 Part 7:Web-side instructions Select the WIFI you Click Go to Open the browser Connect the Enter the page want to connect to in ESP3D Interface and enter the IP same WIFI as and import the the WIFI interface in to enter the address shown on the display on index.html file...
- Page 16 The display screen and the computer are connected to the same WIFI, open the browser and enter the IP address 2. The computer needs to be connected to the same Wifi name, otherwise it will cause the computer to fail to communicate with the engraver. 1.
- Page 17 Upload the file, enter the web-side control page and the introduction of the engraving page 6. Click Upload and wait for about 5 seconds to complete the uploading 5. Select the file named "index.html" and click Open ① 1. Menu bar, switch to different interfaces, the current interface is the control interface 2.
- Page 18 Introduction of SD card file page and introduction of uploading files for engraving/cutting 1. SD card file interface 2. Refresh the page Click the contour scan, the window as shown in the figure will pop 3. Upload files, you can upload files in your computer up.
- Page 19 Introduction to configuration parameter page and about page Parameter configuration interface, you can modify some Language selection interface, currently there parameters such as the maximum engraving speed, are two language options, English and Chinese. engraving range, acceleration, etc. 1. About: there is the version number of the interface, you can You can select the latest file to update.
-
Page 20: Part 8:Software Installation And Use
Part 8:Software installation and use 1.Downloading LaerGRBL software 2.Installing LaerGRBL 3.Adding custom buttons 4.Connect laser engraving machine 5.Setting Engraving Parameters 6. Laser focus adjustment 7. Positioning 8. Start, Termination carving or cutting 9. LightBurn Installation Tutorial... - Page 21 In the LaserGRBL software, right-click on the blank space next to the bottom button (as shown in Picture 3) -> Import custom button, then select the custom button zip file downloaded ATOMSTACK to import, keep pressing Yes (Y) until no window pops up.(Picture 4、Picture 5)...
- Page 22 The installed software is shown as the following figure. Picture 4: custom button loading Picture 5: Software button 4. connect laser engraving machine A.Connect the engraver to a computer with LaserGBRL software installed. B. Plug in the power supply of the engraving machine. C.
- Page 23 E.First, install CH340 Driver. In the LaserGRBL software, click "Tools">"install CH340 Driver" to install the driver, and restart the computer after installation to connect. F.Click on the lightning connection logo in the software. When the lightning logo changes to a red X, the connection is success. Connect the engraving machine G.
- Page 24 5. Setting Engraving Parameters 1. Select the engraving file. Open LaserGRBL software, click "File"> "Open File", then select the graphics you want to engrave, LaserGRBL supports NC, BMP, JPG, PNG, DXF and other formats. Open file 2.Picture parameters, engraving mode, engraving quality settings a.LaserGRBL can adjust the sharpness, brightness, contrast, highlight and other attributes of the target picture, when adjusting the parameters of the picture, the factual effect will be shown in the right preview window, there is no standard here, just adjust the effect you want.
- Page 25 3. Engraving speed, engraving energy and engraving size Setting e. After completing the above settings, click next to the the a. recommending the engraving speed for 3000, this is the best settings of carving speed, carving energy and carving size. value for the engraving effect after repeated experiments, of course you can increase or decrease the speed according to your preference, faster speed will save the engraving time, but it may...
- Page 26 To solve this problem, we have abandoned the traditional zoom laser and installed a fixed-focus laser on the Atomstack engraver, with the specific focus point located 2mm from the bottom of the acrylic cover, and a fixed-focus piece is included in the package.
- Page 27 C. Loosen the Torx handle screw in the middle of the laser, and let the laser slide freely until it touches the fixed focus plate (after contact, you can gently lift the laser and take out the fixed focus plate). fixing screws Adjusting the laser distance D.
- Page 28 7. Positioning A.The engraver does not know what position to carve, so there is one important task ATOMSTACK you start carving, that is positioning. We will complete the positioning operation in three steps. B. Select the "Move to Center" button, the laser will move to the center of the pattern, placed the engraving below the laser at that time.
- Page 29 D.Click "Profile Scan" button, the laser will start to scan the outer contour of the pattern on the computer, you can change the position of the engraved object again according to the scanned outer contour position. Besides: You can click on the "wrap-around" button for several times until the outer contour is at the position you want to engrave.
- Page 30 8. Start, Termination carving or cutting 1.Start: 2.Termination After finishing all the above operations, click the green If you want to terminate the job midway, you button as shown in the figure to start engraving. There is a can click the terminate button as shown in the number that can be edited next to the start button.
- Page 31 Picture3: 3.LightBurn Installation Tutorial LightBurn We can download the installation package from the LightBurn website: Software package 4.Double-click on the installation package to install and click "Next" in the Picture 4: pop-up window. Select the (note: LightBurn is a paid software, for better experience we recommend installation path you to buy the original one, here we will demonstrate the installation of the trial version)
- Page 32 If the computer fails to connect to the machine, we can select the To set the origin, we usually set the origin in port of the laser engraver like the following picture. the front left. Method 1: set the Picture 8: origin in the Front left.
- Page 33 Techniques for using machines 1. the closer the laser is to the table, the less stable the structure will be, try to elevate the laser as far away from the table as possible when using the laser. 2. Precise positioning of the pattern and the engraved object. a.Move the laser to the lower left of the frame.
- Page 34 S o f t w a r e I n s t a l l a t i o n ➢1.Atomstack laser engraver currently supports LaserGRBL and To update the driver of macOS, log in to the website http://atomstack3d.com/a5 LightBurn.
- Page 35 P a r t 9 : M a i n t e n a n c e i n s t r u c t i o n s a n d w a r n i n g This product uses a highly integrated design and requires no maintenance. However, if the laser system installed with this product needs to be repaired or adjusted, please: 1.Unplug the power connecter on the laser, so that the laser is in a state of power failure;...
- Page 36 3.Laser module cleaning After a period of utilization for the laser module, there will be some remains stay at the protective cover, heat sink, and the laser head. The remains need to be cleaned in time so that not affect the use of the laser module. The windshield and protective cover must be removed before cleaning.
- Page 37 P a r t 1 0 : P r e c a u t i o n s f o r c o m m o n p r o b l e m s o f e n g r a v i n g m a c h i n e 1.
- Page 38 APP with scanner Ø For Laser Engraver technical support and service,please email: support@atomstack3d.com Manufacturer: Shenzhen Atomstack Technology Co., Ltd. Address: Room 301, Complex Building, New Chabridge Industrial Park, Baolong Street, Longgang District, Shenzhen, Guangdong, China Post code: 518116...
Need help?
Do you have a question about the X7 Pro Series and is the answer not in the manual?
Questions and answers