Table of Contents
Advertisement
Available languages
Available languages
Quick Links
READ INSTRUCTIONS CAREFULLY FOR SAFE
INSTALLATION AND FAN OPERATION.
For customer support, please contact:
Tel: +1 (949) 800 8488
US Patent 8317470, 8807938, 8790085, 9255584, 8851841
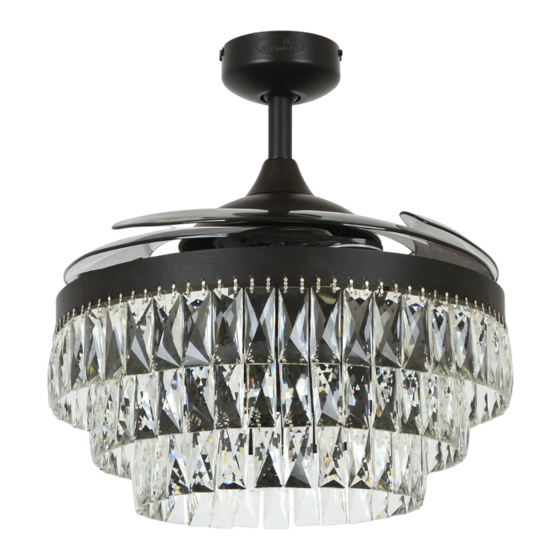
FANAWAY VEIL
CEILING FAN
• INSTALLATION
• OPERATION
• MAINTENANCE
• WARRANTY INFORMATION
CAUTION
Email:
support@beaconlighting.us
www.beaconlighting.us.
V1.0 (06/2021)
Advertisement
Table of Contents

Subscribe to Our Youtube Channel
Related Manuals for Fanaway VEIL


Summary of Contents for Fanaway VEIL
- Page 1 FANAWAY VEIL CEILING FAN • INSTALLATION • OPERATION • MAINTENANCE • WARRANTY INFORMATION CAUTION READ INSTRUCTIONS CAREFULLY FOR SAFE INSTALLATION AND FAN OPERATION. For customer support, please contact: Tel: +1 (949) 800 8488 Email: support@beaconlighting.us www.beaconlighting.us. US Patent 8317470, 8807938, 8790085, 9255584, 8851841...
-
Page 2: Safety Precautions
Fanaway Corbelle Installation Instructions THANK YOU FOR PURCHASING Thank you for purchasing this quality Fanaway product. To ensure correct function and safety, please read and follow all instructions before assembly, installation and use of this ceiling fan. Please keep instructions for future reference. -
Page 3: Parts List
Fanaway Corbelle Installation Instructions PARTS LIST • Unpack your ceiling fan and carefully. Remove all parts and hardware. • Lay out all the components on a smooth surface and make sure there are no components missing before assembling. If parts are missing, return the complete product to the place of purchase for inspection or replacement. -
Page 4: Installing The Mounting Bracket
Fanaway Corbelle Installation Instructions INSTALLING THE MOUNTING BRACKET If there isn’t an existing outlet box, then install one using the following instructions: • Disconnect the power by removing the fuses or turning off the circuit breakers. • Secure the outlet box (A) (not included) directly to the building structure. Use appropriate fasteners and materials (not included). -
Page 5: Installing The Fan
Fanaway Corbelle Installation Instructions INSTALLING THE FAN INSTALLING THE DOWN ROD (Fig. 6) Fig. 6.1 1. Remove the ball joint (2) and dowel pin (3) by loosening the set screws (4) from the down rod (6). Remove the hitch pin (9) by removing the lock clip (10). NOTE: Do not discard keep these parts, they are required to reassemble later. -
Page 6: Fan Installation
Fanaway Corbelle Installation Instructions Fig. 6.5 Fig. 6.6 6. Insert the decorative cover (7) onto the down rod (6) to cover the down rod coupling housing (8).(Fig. 6.5) 7. Insert the canopy (5) over the down rod (6) and install the ball joint (2) and dowel pin (3) back onto the down rod (6) and secure by tightening the set screws (4). -
Page 7: Hanging The Fan
Fanaway Corbelle Installation Instructions 4. Connect the quick connector to the lamp holder part (3). (Fig. 8) 5. Secure the lamp-holder part (3) to the light kit bracket by tightening the 3 screws (4). Do not over-tighten. 6. Install the globes (5) to the lamp holders. Do not exceed the maximum power rating. -
Page 8: Electrical Wiring Diagram
Fanaway Corbelle Installation Instructions ELECTRICAL WIRING DIAGRAM WARNING: To avoid possible electrical shock, be sure you have turned off the power at the main circuit panel. Follow the steps below to connect the fan to your household wiring. Use the wire connecting nuts supplied with your fan. -
Page 9: Finishing The Installation
Fanaway Corbelle Installation Instructions Turn the connecting nuts upward and push the wiring into the outlet box. Carefully insert the Remote Receiver above the hanger ball in the remainder spacing in the mounting bracket. Take care not to damage or loosen any of the wiring. -
Page 10: Installing The Remote Battery
Fanaway Corbelle Installation Instructions INSTALLING THE REMOTE BATTERY 1 x 9V DC (size) battery is required to operate the remote control. Remove the battery cover from the back of the remote and 1 x 9V DC (size) battery. Ensure the polarities are correct as shown on the battery connector. -
Page 11: After Installation
Fanaway Corbelle Installation Instructions REVERSING FUNCTION (Fig. 17) Your ceiling fan can operate in either summer or winter mode. SUMMER Mode: The reverse switch should be in the SUMMER position to rotate the fan in an anticlockwise direction. The airflow will be directed downwards, for cooling in summer. -
Page 12: Care And Cleaning
Fanaway Corbelle Installation Instructions CARE & CLEANING NOTE: Always turn OFF the power at the mains switch before performing any maintenance or attempting to clean your fan. 1) Every 6 months periodic cleaning of your ceiling fan is the only maintenance required. Use a soft brush or lint free cloth to avoid scratching the paint finish. -
Page 13: Medidas De Seguridad
Fanaway Corbelle Installation Instructions GRACIAS POR SU COMPRA Gracias por adquirir este producto Fanaway de calidad. Para garantizar el correcto funcionamiento y la seguridad de este ventilador de techo, antes de armarlo, instalarlo y usarlo lea y siga todas las instrucciones. - Page 14 Fanaway Corbelle Installation Instructions acuerdo con las instrucciones, puede causar interferencia dañina con las comunicaciones de radio. PRECAUCIÓN - Para reducir el riesgo de descarga eléctrica, desconecte el circuito de suministro eléctrico del ventilador antes de instalar el juego de luces.
-
Page 15: Lista De Piezas
Fanaway Corbelle Installation Instructions LISTA DE PIEZAS • Desempaque su ventilador de techo con cuidado. Saque todas las piezas y los tornillos. • Deposite todos los componentes sobre una superficie lisa y verifique que no falta ninguno antes de iniciar el armado. Si falta alguna pieza, regrese el producto completo al lugar donde lo adquirió para que lo examinen o reemplacen. - Page 16 Fanaway Corbelle Installation Instructions INSTALACIÓN DEL SOPORTE DE ARMADO Si no hay ya una caja de salida, instale una siguiendo estas instrucciones: • Desconecte el suministro eléctrico retirando los fusibles o apagando los disyuntores de circuito. • Fije la caja de salida (A) (no incluida) directamente a la estructura del edificio. Use fijaciones y materiales apropiados (no incluidos).
- Page 17 Fanaway Corbelle Installation Instructions INSTALACIÓN DEL VENTILADOR INSTALACIÓN DE LA VARILLA DESCENDENTE (Fig. 6) Fig. 6.1 1. Retire la junta de bola (2) y el pasador cilíndrico (3) aflojando los tornillos de fijación (4) de la varilla descendente (6). Retire el pasador de enganche (9) quitando el clip de bloqueo (10). NOTA: No deseche estas piezas, consérvelas;...
- Page 18 Fanaway Corbelle Installation Instructions Fig. 6.5 Fig. 6.6 6. Inserte la cubierta decorativa (7) en la varilla descendente (6) para cubrir la caja de acoplamiento de la varilla descendente (8).(Fig. 6.5). 7. Inserte el dosel (5) sobre la varilla descendente (6) e instale nuevamente la junta de bola (2) y el pasador cilíndrico (3) en la varilla descendente (6) y asegúrelos ajustando los tornillos de fijación (4).
- Page 19 Fanaway Corbelle Installation Instructions 4. Conecte el conector rápido a la pieza del soporte de la lámpara (3). (Fig. 8) 5. Fije la pieza del soporte de la lámpara (3) al soporte del juego de luces ajustando los 3 tornillos (4).
- Page 20 Fanaway Corbelle Installation Instructions DIAGRAMA DE CABLEADO ELÉCTRICO ADVERTENCIA: Para evitar cualquier posible descarga eléctrica, asegúrese de haber desconectado la alimentación eléctrica en el panel de circuito general. Siga los pasos que aparecen a continuación para conectar el ventilador al cableado de su casa. Use las tuercas de conexión de cable que se suministran con su ventilador.
-
Page 21: Cómo Finalizar La Instalación
Fanaway Corbelle Installation Instructions Después de conectar los cables, sepárelos de modo que los cables verde y blanco estén en un lado de la caja de salida y los cables negro y azul estén en el otro lado. Gire las tuercas de conexión hacia arriba y presione el cableado hacia el interior de la caja de salida. -
Page 22: Funcionamiento Del Control Remoto
Fanaway Corbelle Installation Instructions Cambie de posición los interruptores DIP en el transmisor y receptor remotos. Compruebe que los interruptores DIP del transmisor y receptor remotos se corresponden. Si no se corresponden, el transmisor no funcionará. Fig. 14 INSTALACIÓN DE LA BATERÍA DEL CONTROL REMOTO El control remoto funciona con 1 batería de 9V DC. -
Page 23: Después De La Instalación
Fanaway Corbelle Installation Instructions FUNCIÓN DE INVERSIÓN (Fig.17) Su ventilador de techo posee un modo de verano y un modo de invierno. Modo de VERANO: El interruptor de inversión de giro debe estar en posición de VERANO para que el ventilador gire en sentido antihorario. -
Page 24: Cuidados Y Limpieza
Fanaway Corbelle Installation Instructions CUIDADOS Y LIMPIEZA NOTA: Apague siempre el ventilador del interruptor principal antes de realizarle cualquier operación de mantenimiento o de limpiarlo. 1) El único mantenimiento que necesita el ventilador es una limpieza periódica cada 6 meses. Use un cepillo suave o un paño sin fibras para evitar arañar el acabado de pintura. -
Page 25: Précautions De Sécurité
Fanaway Corbelle Installation Instructions NOUS VOUS REMERCIONS DE VOTRE ACHAT Nous vous remercions d’avoir acheté ce produit Fanaway de qualité. Pour assurer le bon fonctionnement et la sécurité, veuillez lire et suivre toutes les instructions avant l'assemblage, l'installation et l'utilisation de ce ventilateur de plafond. Veuillez conserver les instructions pour toute référence future. - Page 26 Fanaway Corbelle Installation Instructions utilisé conformément aux instructions, il peut causer des interférences nuisibles aux communications radio. ATTENTION - Pour réduire le risque de choc électrique, débranchez le circuit d'alimentation électrique du ventilateur avant d'installer le kit d'éclairage. 10. Le poids de la plaque du kit d’éclairage est de 8,75 kg.
-
Page 27: Liste Des Pièces
Fanaway Corbelle Installation Instructions LISTE DES PIÈCES • Déballez votre ventilateur de plafond et identifiez soigneusement les pièces. Retirez toutes les pièces et le matériel. • Disposez tous les composants sur une surface lisse et assurez-vous qu'aucun composant ne manque avant l'assemblage. S'il manque des pièces, renvoyez le produit complet au lieu d'achat pour le faire inspecter ou remplacer. -
Page 28: Installation Du Support De Montage
Fanaway Corbelle Installation Instructions INSTALLATION DU SUPPORT DE MONTAGE S'il n'y a pas de boîtier de sortie existant, installez-en un en suivant les instructions suivantes : • Déconnectez l'alimentation en retirant les fusibles ou en désactivant les disjoncteurs. • Fixez le boîtier de sortie (A) (non inclus) directement à la structure du bâtiment. Utilisez les fixations et le matériel appropriés (non inclus). -
Page 29: Installation Du Ventilateur
Fanaway Corbelle Installation Instructions INSTALLATION DU VENTILATEUR INSTALLATION DE LA TIGE DE SUSPENSION (Schéma 6) Schéma 6.1 1. Retirez le joint à rotule (2) et la goupille (3) en desserrant les vis de réglage (4) de la tige de suspension (6). - Page 30 Fanaway Corbelle Installation Instructions Schéma 6.5 Schéma 6.6 6. Insérez le couvercle décoratif (7) sur la tige de suspension (6) pour couvrir le boîtier de raccord de la tige de suspension (8). (Fig. 6.5) 7. Insérez le cache (5) sur la tige de suspension (6) et installez le joint de rotule (2) et la goupille (3) sur la tige de suspension (6) puis fixez en serrant les vis de réglage (4).
-
Page 31: Suspension Du Ventilateur
Fanaway Corbelle Installation Instructions 4. Branchez le connecteur rapide sur le support de lampe (3). (Schéma 8) 5. Fixez le support de lampe (3) à la fixation du kit d'éclairage en serrant les 3 vis (4). Ne serrez pas trop. -
Page 32: Schéma De Câblage Électrique
Fanaway Corbelle Installation Instructions SCHÉMA DE CÂBLAGE ÉLECTRIQUE AVERTISSEMENT : Pour éviter tout risque d'électrocution, assurez-vous d'avoir coupé l'alimentation au niveau du panneau de circuit principal. Suivez les étapes ci-dessous pour connecter le ventilateur au câblage de votre domicile. Utilisez les écrous de connexion des fils fournis avec votre ventilateur. -
Page 33: Finition De L'installation
Fanaway Corbelle Installation Instructions Après avoir connecté les fils, écartez-les de manière à ce que les fils vert et blanc soient d'un côté du boîtier de sortie et que les fils noir et bleu se trouvent de l'autre côté. Tournez les écrous de connexion vers le haut et poussez le câblage dans le boîtier de sortie. -
Page 34: Installation Des Piles Dans La Télécommande
Fanaway Corbelle Installation Instructions Modifiez la position des commutateurs DIP dans la télécommande et le récepteur. Assurez-vous que les commutateurs DIP correspondent dans le récepteur et dans la télécommande. S'ils ne correspondent pas, la télécommande ne fonctionnera pas. Schéma 14 INSTALLATION DES PILES DANS LA TÉLÉCOMMANDE... -
Page 35: Après L'installation
Fanaway Corbelle Installation Instructions FONCTION D'INVERSION (schéma 17) Votre ventilateur de plafond peut fonctionner en mode été ou en mode hiver. Mode ÉTÉ : Le commutateur d'inversion doit être en position « abaissée » (ÉTÉ) pour faire tourner le ventilateur dans le sens inverse des aiguilles d'une montre. Le flux d'air sera dirigé vers le bas pour le refroidissement en été. -
Page 36: Entretien Et Nettoyage
Fanaway Corbelle Installation Instructions ENTRETIEN ET NETTOYAGE REMARQUE : Coupez toujours l'alimentation au niveau de l'interrupteur principal avant d'effectuer tout entretien ou de tenter de nettoyer votre ventilateur. 1) Tous les 6 mois, le nettoyage périodique de votre ventilateur de plafond est le seul entretien requis.
Need help?
Do you have a question about the VEIL and is the answer not in the manual?
Questions and answers