Table of Contents

Related Manuals for Fanaway Classic LD-0003 16 01 Series


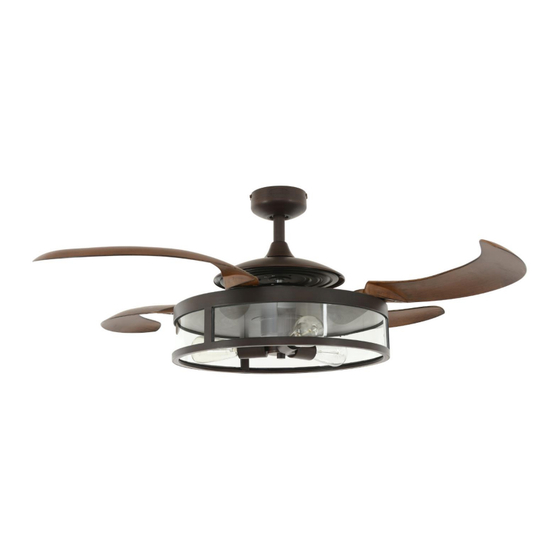
Summary of Contents for Fanaway Classic LD-0003 16 01 Series
- Page 1 FANAWAY CLASSIC CEILING FAN • INSTALLATION • OPERATION • MAINTENANCE • WARRANTY INFORMATION CAUTION READ INSTRUCTIONS CAREFULLY FOR SAFE INSTALLATION AND FAN OPERATION. V1.1 - Published on 04. 2018...
-
Page 2: Safety Precautions
Fanaway Classic Installation Instructions THANK YOU FOR PURCHASING Thank you for purchasing this quality Fanaway product. To ensure correct function and safety, please read and keep all instructions before using the product. SAFETY PRECAUTIONS Read and Save These Instructions This product conforms to UL standard 507. -
Page 3: Parts List
Fanaway Classic Installation Instructions PARTS LIST Unpack your ceiling fan and carefully identify the parts. Please refer to Fig 1. Fig. 1 3 | P a g e L D - 0 0 0 3 - 1 6 / X X X / 0 1... -
Page 4: Installing The Mounting Bracket
Fanaway Classic Installation Instructions Mounting bracket x 1 Bulb x 3 • Canopy x 1 Wood screw x 2 • Down rod with ball joint x 1 Machine screw x 2 • Bolt and pin cover x 1 Flat washer x 2 •... -
Page 5: Installing The Fan
Fanaway Classic Installation Instructions To hang your fan where there is an existing fixture but no ceiling joist, you may need an installation hanger bar (C) as shown in Fig.5. Make sure the hanger bar you purchase has been designed for use with ceiling fans. -
Page 6: Hanging The Fan
Fanaway Classic Installation Instructions HANGING THE FAN Pass the power supply wires (C) from the ceiling outlet box (B) through the center of the ceiling mounting bracket (D). Install the ceiling mounting bracket (D) on the outlet box (B) with the mounting screws (F) provided with the outlet box and washers (E) provided with fan. - Page 7 Fanaway Classic Installation Instructions 4. Connect the plugs (8) together. Fig.10 5. Loosen the screw (5) from the lamp shade (4). Align the two slot screws (6) with the keyhole slots of the light kit (7). 6. Turn the light kit counterclockwise until the slot screws are firmly at the end of the slots.
-
Page 8: Electrical Wiring Diagram
Fanaway Classic Installation Instructions ELECTRICAL WIRING DIAGRAM WARNING: To avoid possible electrical shock, be sure you have turned off the power at the main circuit panel. Follow the steps below to connect the fan to your household wiring. Use the wire connecting nuts supplied with your fan. -
Page 9: Finishing The Installation
Fanaway Classic Installation Instructions FINISHING THE INSTALLATION Slide and align the canopy up to the mounting bracket. Ensure all electrical wiring is tucked inside the canopy and that the wires are not damaged during this step. Secure the canopy to the hanger bracket using the screws provided. - Page 10 Fanaway Classic Installation Instructions INSTALLING THE REMOTE BATTERY 2 x AAA 1.5V (size) batteries are required to operate the remote control. Remove the battery cover from the back of the remote and insert 2 x AAA batteries. Ensure the polarities are correct as shown in the battery compartment.
-
Page 11: After Installation
Fanaway Classic Installation Instructions INSTALLING THE TRANSMITTER HOLDER Install the holder to the wall with two screws provided, hang up the transmitter by the holder. Fig. 17 AFTER INSTALLATION WOBBLE: NOTE: ceiling fans tend to move during operation due to the fact that they are mounted on a rubber grommet. -
Page 12: Technical Information
Fanaway Classic Installation Instructions CARE AND CLEANING 1) Periodic cleaning of your ceiling fan is the only maintenance required. Use a soft brush or lint free cloth to avoid scratching the paint finish. Please turn OFF electricity power when you do so. -
Page 13: Medidas De Seguridad
Fanaway Classic Installation Instructions GRACIAS POR SU COMPRA Gracias por adquirir este producto de calidad Fanaway. Para garantizar un funcionamiento correcto y seguro, lea y respete todas las instrucciones antes de usar el producto. MEDIDAS DE SEGURIDAD Lea y guarde estas instrucciones Este producto cumple con la norma 507 de UL. -
Page 14: Lista De Piezas
Fanaway Classic Installation Instructions LISTA DE PIEZAS Desembale su ventilador de techo e identifique perfectamente sus componentes. Consulte la Fig. 1. Fig. 1 14 | P a g e L D - 0 0 0 3 - 1 6 / X X X / 0 1... -
Page 15: Instalación Del Soporte Mural
Fanaway Classic Installation Instructions Soporte mural x 1 Bombilla x 3 Florón x 1 • Tornillo para madera x 2 • Tija con junta esférica x 1 Tornillo para metal x 2 • Tapa de perno y pasador x 1 Arandela plana x 2 •... - Page 16 Fanaway Classic Installation Instructions 300 mm como mínimo de las paredes y otros objetos. NOTA: Para la instalación en techos inclinados, la abertura del soporte del ventilador (B) debe apuntar hacia el pico del techo. Para colgar su ventilador donde ya haya un elemento de instalación pero sin vigas, puede que necesite instalar una barra para colgar (C) como la mostrada en la imagen 5.
- Page 17 Fanaway Classic Installation Instructions CÓMO COLGAR EL VENTILADOR Pase los cables de corriente (C) de la caja eléctrica del techo (B) por el centro del soporte mural del techo (D). Instale el soporte mural del techo (D) en la caja eléctrica (B) con los tornillos de montaje (F) incluidos con la caja eléctrica y las arandelas (E) incluidas con el ventilador.
- Page 18 Fanaway Classic Installation Instructions 4. Conecte las clavijas (8) juntas. Img. 10 5. Afloje el tornillo (5) de la pantalla de la lámpara (4). Alinee los dos tornillos de ranura (6) con las ranuras del kit de luz (7). 6. Gire el kit de luz en el sentido contrario de las agujas del reloj hasta que los tornillos de ranura estén firmemente fijados en el extremo de las ranuras.
-
Page 19: Diagrama De Conexiones Eléctricas
Fanaway Classic Installation Instructions DIAGRAMA DE CONEXIONES ELÉCTRICAS ADVERTENCIA: Para evitar posibles descargas eléctricas, asegúrese de que la corriente esté cortada en el cuadro de distribución. Siga los pasos siguientes para conectar el ventilador al cableado doméstico. Utilice las tuercas de conexión de alambre suministradas con su ventilador. -
Page 20: Cómo Finalizar La Instalación
Fanaway Classic Installation Instructions CÓMO FINALIZAR LA INSTALACIÓN Deslice hacia arriba y alinee el florón con el soporte mural. Asegúrese de que todo el cableado eléctrico quede insertado dentro del florón y de que los cables no se dañen durante este paso. Fije el florón al soporte del colgador utilizando los tornillos suministrados. - Page 21 Fanaway Classic Installation Instructions OPERACIÓN DEL CONTROL REMOTO: Antes de comenzar a utilizar el control remoto, lea las instrucciones de esta sección para familiarizarse con los botones y la función de cada botón. Indicador LED: El indicador LED rojo en la parte superior del transmisor parpadeará...
-
Page 22: Después De La Instalación
Fanaway Classic Installation Instructions INSTALACIÓN DEL PORTAMANDO Instale el soporte en la pared con los dos tornillos suministrados y cuelgue el transmisor junto al soporte. Img. 17 DESPUÉS DE LA INSTALACIÓN BAMBOLEO: NOTA: Los ventiladores de techo tienden a moverse cuando están funcionando debido a que está n montados sobre una arandela de goma. -
Page 23: Información Técnica
Fanaway Classic Installation Instructions ruido del motor del ventilador. Esto es algo normal. Por favor, permita un perí odo de rodaje de 24 horas, transcurridos los cuales la mayorí a de los ruidos asociados con su nuevo ventilador deberí an desaparecer.
Need help?
Do you have a question about the Classic LD-0003 16 01 Series and is the answer not in the manual?
Questions and answers