Fanaway CORBELLE Installation, Operation, Maintenance & Warranty Information
Hide thumbs
Also See for CORBELLE:
- Installation, operation, maintenance & warranty information (15 pages) ,
- Instructions manual (90 pages)

Subscribe to Our Youtube Channel
Related Manuals for Fanaway CORBELLE


Summary of Contents for Fanaway CORBELLE
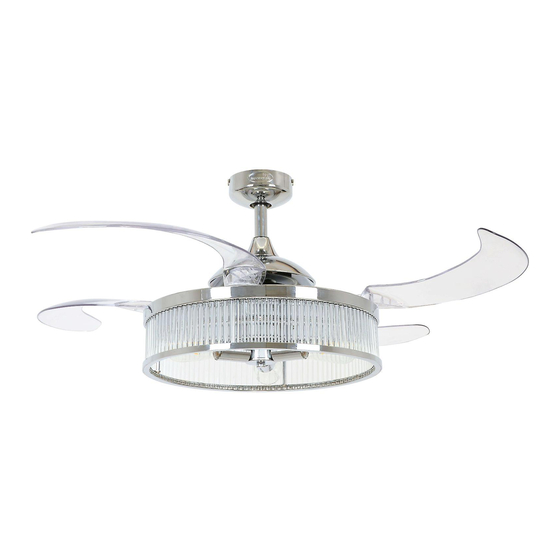
- Page 1 FANAWAY CORBELLE CEILING FAN INSTALLATION OPERATION MAINTENANCE WARRANTY INFORMATION CAUTION READ INSTRUCTIONS CAREFULLY FOR SAFE INSTALLATION AND FAN OPERATION. V1.1 EU (11/2019)
-
Page 2: Safety Precautions
Fanaway Corbelle Installation Instructions THANK YOU FOR PURCHASING Thank you for purchasing this quality Fanaway product. To ensure correct function and safety, please read and follow all instructions carefully before assembly, installation and use of this ceiling fan. Please keep instructions for future reference. - Page 3 Fanaway Corbelle Installation Instructions Example: If a fan is connected to a circuit that can be isolated via an all-pole safety switch at the switchboard, then this is considered to be an all-pole disconnection to the ceiling fan electrical circuit, meeting the requirements of clause 7.12.2 of AS/NZS 60335.1.
-
Page 4: Parts List
Fanaway Corbelle Installation Instructions PARTS LIST Unpack your ceiling fan carefully. Remove all parts and hardware. Lay out all the components on a smooth surface and make sure there are no components missing before assembling. If parts are missing, return the complete product to the place of purchase for inspection or replacement. - Page 5 Fanaway Corbelle Installation Instructions Fig. 1 5 | P a g e V1.1 EU (11/2019)
-
Page 6: Installing The Mounting Bracket
Fanaway Corbelle Installation Instructions INSTALLING THE MOUNTING BRACKET The ceiling fan must be installed in a location so that the blades are spaced 300mm from the tip of the blade to the nearest objects or walls. Install the hanging bracket to the ceiling joist or structure that is capable of carrying a load of at least 50kg, with two long screws provided. -
Page 7: Installing The Fan
Fanaway Corbelle Installation Instructions INSTALLING THE FAN INSTALLING THE DOWN ROD (Fig. 4) Remove the ball joint (2) and dowel pin from the down rod (5) by loosening the set screw (3). Do not discard keep these parts, they are required to reassemble later. -
Page 8: Light Kit Installation
Fanaway Corbelle Installation Instructions LIGHT KIT INSTALLATION LIGHT KIT INSTALLATION (Fig. 6 & 7) 1. Loosen the screw (1) from the fan bracket. Align the two slot screws with the keyhole slots (2) of the light kit bracket. (Fig. 6) 2. - Page 9 Fanaway Corbelle Installation Instructions ELECTRICAL WIRING DIAGRAM THE FAN WARNING: FOR YOUR SAFETY ALL ELECTRICAL CONNECTIONS MUST BE UNDERTAKEN BY A LICENSED ELECTRICIAN. NOTE: AN ADDITIONAL ALL POLE DISCONNECTION SWITCH MUST BE INCLUDED IN THE FIXED WIRING. See Fig. 8 for instructions below to wire up the fan.
-
Page 10: Finishing The Installation
Fanaway Corbelle Installation Instructions Fig. 9 FINISHING THE INSTALLATION After completing the electrical connection at the mounting bracket terminal block, connect the ceiling fan wiring via the quick connector plug. Ensure the earth wiring is secure and correct, by performing an earthing continuity test from the fan’s accessible metal body and lamp base back to the earth terminal at the terminal block on the mounting bracket. -
Page 11: Using Your Ceiling Fan
Fanaway Corbelle Installation Instructions USING YOUR CEILING FAN Your ceiling fan is controlled via the remote control. There are 4 buttons (HI, MED, LOW, OFF) to control the fan speed and one button to control light on/off. Fig. 13 Before operating the remote, the following must be considered. - Page 12 Fanaway Corbelle Installation Instructions OPERATING THE REMOTE: Before you start using the remote, take the time to read through this section and get familiar with the buttons and function of each button. LED Indicator The red LED indicator on the top of the transmitter will flash when the buttons are active.
-
Page 13: After Installation
Fanaway Corbelle Installation Instructions REVERSING FUNCTION (Fig. 15) Your ceiling fan can operate in either summer or winter mode. SUMMER Mode: The reverse switch should be in the SUMMER position to rotate the fan in an anticlockwise direction. The airflow will be directed downwards, for cooling in summer. -
Page 14: Care And Cleaning
Regularly check the product and make sure the battery box lid is correctly secured. If the battery compartment does not close securely, stop using the product and keep it away from children. TECHNICAL INFORMATION 48’’ fan – Fanaway Corbelle Fan Models / SKU# LD-48’’FAN COR / SKU# 212928, 212929... -
Page 15: Warranty Information
Fanaway Corbelle Installation Instructions WARRANTY INFORMATION IN AUSTRALIA / NEW ZEALAND – Please refer to the separated WARRANTY STATEMENT. IN EUROPE – If you are a European customer please contact the retail outlet where the fan was purchased for warranty service.
Need help?
Do you have a question about the CORBELLE and is the answer not in the manual?
Questions and answers