Table of Contents
Advertisement
Quick Links
Advertisement
Table of Contents

Related Manuals for HIKVISION PanoVu iDS-2PT9122IX-DE/S


Summary of Contents for HIKVISION PanoVu iDS-2PT9122IX-DE/S
- Page 1 Configuration & Installation Guidance of PanoVu Seires PT Camera...
-
Page 2: Key Features
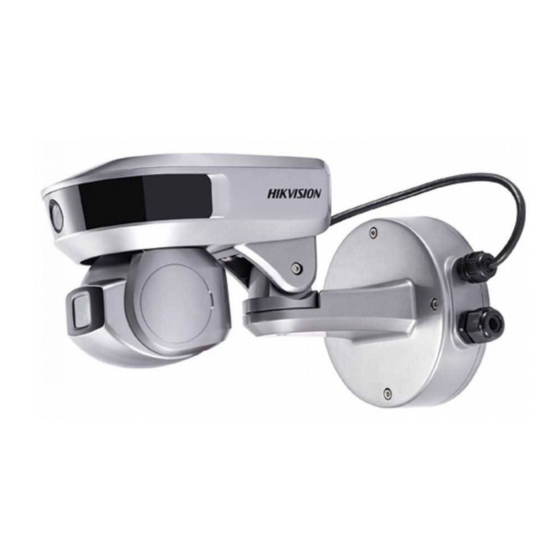
Introduction 1.1 Overview Hikvision iDS-2PT9122IX-DE/S (5-50mm) (4mm) PanoVu Seires PT Camera 2MP + 2MP 10× Network PTZ Camera, with the integration design, is able to capture distant view images as well as close-up images. Base on deep learning algorithm, PanoVu Seires PT Camera can realize accuracy human body capture. -
Page 3: Mounting Applications
1.3 Mount Option DS-2601ZJ Wall Mounting Bracket DS-2664ZJ Pendant Mounting Bracket DS-2665ZJ-P Table mounting Bracket 2. Installation Guidance 2.1 Mounting Applications PanoVu Seires PT Camera support various mounting modes, including wall mounting and pendant mounting. Please use Pole mounting hoop when mount to a pole. 2.2 Steps Drill the screw hole and the cable hole according to the supplied drill template. - Page 4 C. Put the wires into the junction box. And tighten up the waterproof endcap. Hook the bracket to the bracket base with the safety rope Safe rope E. Fix the bracket to the base. Junction box screws Bottom Side screw screw F.
- Page 5 G. Angle Adjusting: After the camera mounted, you can adjust the angle of the camera to get a good image performance. Loosen the lock screws in the above picture to adjust the panning position. Loosen the lock screws in the above picture to adjust the tilting position. Power Supply PanoVu Seires PT Camera use DC12V, 5A power supply.
-
Page 6: Installation Height
2.3 Installation Height Suggestion installation height is 3.5m to 6m. And make sure no obstacle before the camera. 2.4 Monitoring Range The fixed camera can get human body information within 50m, and the PTZ camera can cover 100m. Fixed camera image PTZ camera image 2.5 Dimensions and protection level Dimensions: Φ195.1×280.8mm;... -
Page 7: Product Positioning
Weight: 2.5kg; Protection Level: IP66,TVS 6000V Lightning Protection, Surge Protection and Voltage Transient Protection 3. Product Positioning PanoVu Seires PT Box + PTZ Camera Appearance Features Up to 50m human body Composed of box cameras and capture. With deep learning smart PTZ dome cameras. -
Page 8: Auto Calibration
2. Check the Enable checkbox to enable the Rapid Focus function. 3. Click Add to add a scene, up to 4 scenes can be set. 4. For each scene, drag the red line on the live view image to the calibration position. You can drag the ends of the red line to adjust the length of the line. -
Page 9: Manual Calibration
(2) The pop up auto calibration box like below. The whole process will be automatically. After the process is 100%, click auto calibrating succeeded. (3) Enable tracking and save the settings. 4.2.2 Manual Calibration (1) Select Manual Calibrating from the calibration list. (2) Drag the crosses of the panoramic view “... - Page 10 (5) Select calibration site No. 2 to No. 9, and repeat the step above to add the manual calibration sites. (6) Click Start Calibration to perform the calibration 4.3 VCA settings 1. PanoVu series PT camera support face capture, human body capture, and vehicle capture. You can check 2.
- Page 11 3. Target Capture: The panoramic camera recognizes and captures the vehicle, the human face, and the human body, and the tracking PTZ camera captures the human face through linkage tracking and positioning. The captured pictures are uploaded to the central platform. 3.1 Add a new rule.
- Page 12 regions can be set. et arming schedule. The time of each period cannot be overlapped. Up to 8 3.4 S periods can be configured for each day. 4. Face Capture: The tracking PTZ camera captures the human face that meets the pupil distance demand.
- Page 13 Set arming schedule for each scene. 4.3 Set patrol for scenes.
- Page 14 Perimeter Capture: The panoramic camera detects the perimeter of an area, and the tracking PTZ camera captures the human body or the human face. The captured pictures are uploaded to the central platform. Configuration method is the same with target capture mode.
- Page 15 5. Result Show 5.1 4200 Use the latest version 4200 Install iVMS 4200. Add camera in the device management interface. Go to control panel, add human capture alarm module. Go to human capture alarm interface. It will takes several minutes to show the capture images. 5.2 DEMO Tool Steps: Download latest version SDK, install it to PC.
- Page 16 Add device to client demo. Choose the camera and go to Others→ Guard/Unguard.
- Page 17 The demo will pop up a window. Choose the camera name and click Guard/Unguard. Then demo will store all the captured picture to the PC. The local path can be set at Config → Local Setup.
- Page 18 Go to the local path and find all the pictures.
Need help?
Do you have a question about the PanoVu iDS-2PT9122IX-DE/S and is the answer not in the manual?
Questions and answers