MIMAKI CG-60AR Installation Instructions Manual
Hide thumbs
Also See for CG-60AR:
- Safety precautions (12 pages) ,
- Operation manual (184 pages) ,
- Care and maintenance (16 pages)
Table of Contents
Advertisement
Quick Links
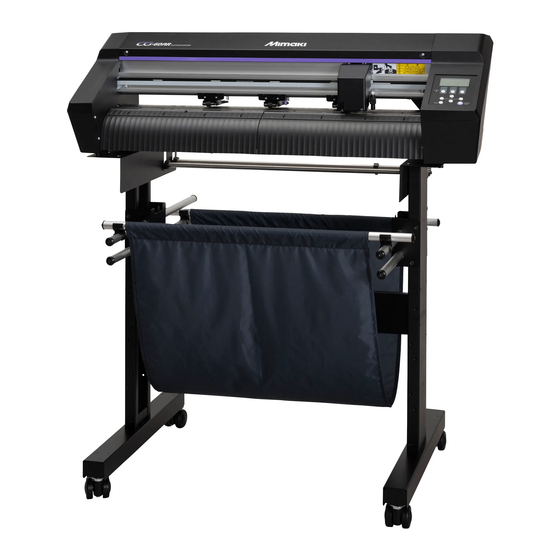
CG-60AR [Option]
Installation instructions for the legs
This manual explains how to assemble the legs with the main unit. Be sure to read this manual before assembling.
Be sure to assemble with two or more people.
Accessories
If there is a shortage of parts or a problem, please contact your local distributor or MIMAKI sales office.
Leg x1
Roll bar x2
(With 2 collar×1)
(With 4 collar×1)
How to tighten the screws
1
Use hex wrench to temporarily tighten the
screws (just tighten lightly).
2
Push the hex wrench into the tightening pipe
and retighten the screw.
© 2021 MIMAKI ENGINEERING CO.,LTD.
Caster holder x2
Hexagonal wrench
Tightening pipe x 1
(4mm)x 1
Leg stay x1
Base plate L x1
Screws (M5x16) x4
- 1 -
Base plate R x1
Screws (M5x15) x 14
Advertisement
Table of Contents

Related Manuals for MIMAKI CG-60AR


Summary of Contents for MIMAKI CG-60AR
- Page 1 This manual explains how to assemble the legs with the main unit. Be sure to read this manual before assembling. Be sure to assemble with two or more people. Accessories If there is a shortage of parts or a problem, please contact your local distributor or MIMAKI sales office. Leg x1 Caster holder x2 Leg stay x1...
- Page 2 Attach the screws (M5x15) with make a gap between. • Assemble the right and left legs. Remove the cushioning material and turn the legs back in their original direction. Pay attention to the installation position - 2 - © 2021 MIMAKI ENGINEERING CO.,LTD.
- Page 3 Rubber Foot Hole Protrusion The unit should be lifted by two or more people. Attach it so that the bearing is on the outside.. - 3 - © 2021 MIMAKI ENGINEERING CO.,LTD.
- Page 4 If it gets stuck or has trouble rotating, loosen the screws that have been tightened, adjust the left and right legs so that they are parallel, and then tighten the screws. - 4 - © 2021 MIMAKI ENGINEERING CO.,LTD.
- Page 5 付属品 数量が足りなかったり、不具合があったりした場合は、販売店または弊社営業所までご連絡ください。 脚 x2 キャスターホルダー x2 脚ステー x1 ベース板左 x1 ベース板右 x1 ロールバー x2 増し締め用パイプ x1 六角レンチ(4mm)x1 ネジ(M5x16)x4 ネジ(M5x15)x14 (カラー 2 個付き ×1) (カラー 4 個付き ×1) ネジの締め方 六角レンチを使って、ネジを仮止め(軽く締める 程度)する。 六角レンチに増し締め用パイプを差し込んで、ネ ジを増し締めする。 - 5 - © 2021 MIMAKI ENGINEERING CO.,LTD.
- Page 6 • 左右 2 脚組み立ててください。 No good No good No good 再度緩衝材(上側)を使って、脚(x2)を自立 させる。 1. 緩衝材を脚奥まで差し込む。 2. 緩衝材を床面に触れるまで差し込む。 脚にキャスターホルダーを固定する。 • ネジ(M5x15)x3 で固定してください。 • 左右 2 脚組み立ててください。 ネジ(M5x15)を隙間を空けて取り付ける。 • 左右 2 脚組み立ててください。 緩衝材を外して、脚の方向を元に戻す。 取り付ける位置に注意してください。 - 6 - © 2021 MIMAKI ENGINEERING CO.,LTD.
- Page 7 カラー4 個付きのロールバーが外側になるように セットしてください。 左右の脚の開口部が内側になるように脚ステー を取り付けてください。 本体を脚に載せる。 キャスターをロックする。 1. 脚の突起部分に、 本体底面の穴(本体側面の▽印が 目安)を合わせて差し込む。 2. 本体底面のゴム足が脚の上にセットされているかど うかを確認する。 3. 反対側も同様にセットする。 ベース板 L/R を取り付ける。 • 矢印の方向に押しながら、ネジ(M5x15)x2 で固定 してください。 ゴム足 穴 突起 本体は、二人以上で持ち上げてください。 ベアリングが外側になるように取り付けてくだ さい。 - 7 - © 2021 MIMAKI ENGINEERING CO.,LTD.
- Page 8 本体を正面側に押して、本体と脚をネジ 緩衝材を外す。 (M5x16)×2 で固定する。 • 脚後方側の突起と本体底面の差し込み穴の隙間がな くなるまで、本体を正面側に押してから固定してく ださい。 • 反対側も同様にセットしてください。 正面 隙間を空けない 脚ステーのネジを本締めする。 ロールバーを手で回して、スムーズに回転する ことを確認してください。引っかかったり回転 に支障がある場合は、固定したネジを緩めて、 左右の脚が平行になるように調整してからネジ を締めてください。 - 8 - © 2021 MIMAKI ENGINEERING CO.,LTD. D203588-12-25082021...
Need help?
Do you have a question about the CG-60AR and is the answer not in the manual?
Questions and answers