V-ZUG Steamer V4000 Operating Instructions Manual
Hide thumbs
Also See for Steamer V4000:
- Operating instructions manual (72 pages) ,
- Operating instructions manual (56 pages) ,
- Operating instructions manual (20 pages)

Related Manuals for V-ZUG Steamer V4000


Summary of Contents for V-ZUG Steamer V4000
- Page 1 V-ZUG-Home Install the app, network your appliances and benefit from a wide range of useful functions. Operating instructions Steamer V4000 Steamer...
- Page 2 Validity These operating instructions apply to: Model designation Type Size system Steamer V4000 45 S4T-23026 60-450 Variations depending on the model are noted in the text. © V-ZUG Ltd, CH-6302 Zug, 2022...
-
Page 3: Table Of Contents
Changing an application ........ 17 Assistance functions .......... 35 Operating time ............. 17 Date and time............ 36 Delayed start / end .......... 18 V-ZUG Home ............ 36 Options .............. 19 7.10 Appliance information .......... 36 Checking and changing the settings .... 20 7.11... - Page 4 Accessories and spare parts 48 10.1 Accessories ............ 48 10.2 Special accessories .......... 48 10.3 Spare parts ............ 48 Technical data 48 11.1 Note for testing institutes ........ 48 11.2 Temperature measurement ....... 49 11.3 Product fiche ............ 49 11.4 EcoStandby............ 49 Tips and tricks 49 12.1 General tips ............ 49 Disposal 50...
-
Page 5: Safety Precautions
Safety precautions Symbols used Cleaning and user mainten- ance shall not be undertaken Denotes important safety precau- tions. by children without supervi- Failure to observe said precautions sion. can result in injury or in damage to ▪ If an appliance is not the appliance or fittings! equipped with a mains cable Information and precautions that... -
Page 6: Instructions For Use
1 Safety precautions to touch the heating ele- ▪ Under no circumstances use ments. Children under 8 a steam cleaner to clean the years of age must be kept appliance. away from the appliance un- ▪ To avoid overheating, the ap- less they are constantly su- pliance must not be installed pervised. - Page 7 1 Safety precautions ▪ Any repairs, modifications or manipula- ▪ Steam and/or hot air may escape from tions to the appliance, especially any the cooking space when the appliance electrically live parts, may only be car- door is opened. ried out by the manufacturer, its Cus- ▪...
- Page 8 1 Safety precautions Caution: Risk to life! ▪ Danger of suffocation! Keep packaging material, e.g. plastic film and poly- styrene, away from children. Packaging material can be dangerous for children. How to avoid damaging the appliance ▪ Close the appliance door carefully. ▪...
-
Page 9: Using For The First Time
Using for the first time Before operating the newly installed appliance for the first time, the following steps should be taken: ▸ Remove packaging and transport materials as well as any protective blue film from out of the cooking space. ▸... -
Page 10: Appliance Description
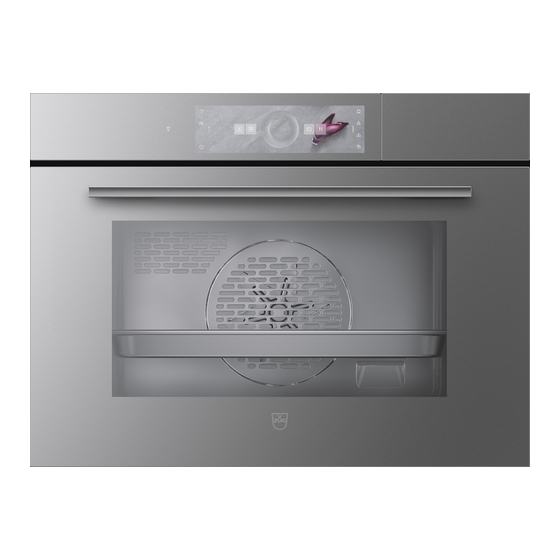
3 Appliance description Appliance description Construction Operating and display elements Ventilation opening Door handle Appliance door Operating and display elements App view List view Favourite for bread Here is where you can make User settings all key settings and customize your appliance. Steam Function bars with function buttons CircleSlider... - Page 11 Right function buttons Step back Timer Start screen Open water compartment flap List view Display lock App view Quiet mode Switch off Clock V-ZUG-Home Ready to start Steam Start 15min 13:21 Application Start operation Main value Setting options Options Operating time...
-
Page 12: Cooking Space
3 Appliance description Cooking space Using protective inserts or aluminium foil can damage the appliance. Do not place any protective insert or aluminium foil on the floor of the cooking space. Appliance door Water tank compartment Door seal Temperature sensor Identification plate Knurled nut Climate sensor... - Page 13 3 Appliance description Perforated cooking tray ▪ Particularly suitable for «Steam» and «Vacuisine». ▪ For cooking fresh or frozen vegetables, meat and fish ▪ For standing ramekins, preserving or bottling jars, etc. ▪ For extracting juice from berries, fruit, etc. ▸...
-
Page 14: Operation
4 Operation Operation Operating the display Switching the appliance on The appliance is operated using the display. The clock is only visible in EcoStandby if enabled in the user settings. ▸ Long touch the display. – The start screen appears. Changing the start screen view The start screen can be displayed in one of two ways: as an app view (see page 10) or as a list view. -
Page 15: Filling The Water Tank
4 Operation Moving an app The apps can be moved and reordered in the app view. ▸ Press and hold the desired app 2 and move it to change the app order. – The apps are spread over several pages; only one app can be moved at a time. ▸... -
Page 16: Selecting And Starting An Application
4 Operation Selecting and starting an application ▸ Long touch the display. – The start screen appears. Selecting an application group Either: ▸ In the app view, touch the desired application group. – The submenu with the associated applications appears in the display. ▸... -
Page 17: Changing An Application
4 Operation Saving values ▸ Permanently save and pin the adjusted main value 1 for the selected application, if re- quired (see page 22). ▸ Touch and create a favourite, if required (see page 21). Starting an application ▸ Press «Start» to start the application. –... -
Page 18: Delayed Start / End
4 Operation Setting range Application/function Minimum Maximum Applications with steam 10 s 10 h Vacuisine 10 s 72 h Keep warm 5 min 1 h 30 min Wellness 5–15 min 15 min–1 h The operating time cannot be changed for applications with a fixed duration. Showing the clock during operation The clock and operating time can be shown during operation. -
Page 19: Options
4 Operation ▸ If necessary, check and change the settings (see page 20). – Any changes to the «Operating time» or «End» options cause the time remaining to the start of operation to be recalculated. If «Operating time» has been set, the end time cannot be set or adjusted during operation. -
Page 20: Checking And Changing The Settings
4 Operation Checking and changing the settings Values and settings can be changed before and during operation. An exception is setting the end time during operation (see page 25). ▸ Touch the field for the desired setting. ▸ To adjust or reset a value, touch the value range and adjust the value using the CircleSlider. -
Page 21: Favourites
4 Operation 4.11 Favourites Creating a favourite Favourites can be created from all applications, with the exception of the cleaning pro- grammes. And all options, with the exception of «End», can be saved. Up to 50 favour- ites in total can be created. ▸... -
Page 22: Pinning
4 Operation Deleting favourites The favourite can only be deleted in the app view. ▸ If required, touch – The start screen appears as an app view. ▸ Press and hold the favourite 1. – Quick information appears above the app. ▸... -
Page 23: Timer
4 Operation 4.13 Timer The timer functions like an egg timer. It can be used independently of other functions and applications. Setting and starting the timer ▸ Touch the «Timer» function button in the right function bar. – The timer is shown in the display. –... -
Page 24: Display Lock
4 Operation 4.14 Display lock This function locks the display to, for example, enable the display to be cleaned or pre- vent accidental changes to the values. The appliance continues to operate and mes- sages are still displayed. Turning on the display lock ▸... -
Page 25: Cancelling / Ending Before Time
4 Operation 4.17 Cancelling / ending before time Applications that are running can be cancelled or ended before time. Cancelling an application ▸ Press and hold «Stop». Steam 80°C Stop 12min 13:21 – The application is cancelled. – A feedback tone is emitted, if enabled. –... -
Page 26: Continuing
4 Operation In EcoStandby as long as the temperature in the cooking space is over 80° C. – In the display appears: «Residual heat in the cooking space». After 3 minutes without interaction. – The display goes dark and the appliance switches off automatically (see page 27). -
Page 27: Switching The Appliance Off
4 Operation Cancelling operation To cancel operation, the following options are available: ▪ Select the function button to access the start screen (see page 16). ▪ Press and hold the function button to switch the appliance off (see page 27). After 3 minutes without interaction. -
Page 28: Appliance Tips
5 Applications 4.22 Appliance tips Appliance tips provides tips on operating the appliance by topic. Topics The following topics can be called up: ▪ Start screen ▪ Favourites ▪ Function bars ▪ Pinning ▪ CircleSlider ▪ EasyCook ▪ App view ▪... -
Page 29: Regeneration
5 Applications Regeneration Temperature range 80–150 °C Recommended value 120 °C Level 1 to 4 The cooking space is heated by steam and hot air. The food is reheated gently without drying it out. Uses ▪ Reheating pre-cooked foods and convenience foods Possible to regenerate on several levels simultaneously. -
Page 30: Keep Warm
5 Applications Selecting and starting Vacuisine ▸ Put the perforated cooking tray into the cooking space and place the vacuum-sealed food in it. Ensure that the bags are adjacent and not overlapping so that the steam can cir- culate and cook the food evenly. The filled water tank must be in position in the water tank compartment. -
Page 31: Hygiene
5 Applications Seed cushions Before starting the application: ▸ Place the cherry stone or grape seed cushions in the perforated cooking tray. Hygiene «Hygiene» can be used for sterilizing containers. The following applications are avail- able: Sterilizing baby bottles Final sterilization of jam jars Sterilizing preserving jars Sterilizing baby bottles This application replaces the need to boil feeding bottles in water. - Page 32 5 Applications Selecting and starting foods A delayed start is only suitable for food that does not need to be refrigerated or to rise. ▸ Long touch the display. – The start screen appears. ▸ Select the «EasyCook» application and confirm with «OK», if required (see page 16).
-
Page 33: Zug-Home
– A 6-digit PIN appears in the display of the household appliance. ▸ Enter the 6-digit PIN in the V-ZUG App and confirm the bluetooth pairing request. – The name of the active WLAN/Wi-Fi appears in the V-ZUG App and then you are prompted to enter the WLAN/Wi-Fi password. -
Page 34: User Settings
7 User settings User settings Adjusting user settings ▸ Long touch the display. – The start screen appears. ▸ Select «User settings» and confirm with «OK», if required (see page 16). ▸ Select the desired user setting. – The main menu for the desired user setting or another submenu with more user settings appears in the display. -
Page 35: Individual Settings
7 User settings Feedback tones The volume of the feedback tones can be adjusted up or down or turned off completely. Certain feedback tones are not muted for legal and safety reasons. A short feedback tone is emitted when the appliance is switched off even if the set- ting is set to «Off»... -
Page 36: Date And Time
If set to «On», a short preheat tone is emitted when it is time to put the food into the cooking space. Date and time Time synchronization The «Internet» setting is set automatically when connecting to V-ZUG-Home. The time, date and time zone are then synchronized directly from the app. Date The date can be called up and changed. -
Page 37: Factory Settings
Resets the start screen to the app view. Favourites remain unchanged. Favourites Entering «OK» clears all existing favourites. V-ZUG-Home Disconnects all connections to mobile devices. Factory settings Resets the settings to the factory default state. All customized data will be lost. -
Page 38: Care And Maintenance
8 Care and maintenance Care and maintenance Risk of burns from hot surfaces! Allow the appliance and the accessories to cool down before cleaning. Incorrect handling can result in damage to the appliance! Use soft cloths only. Do not use any abrasive, alkaline or highly acidic cleaning agents, metal scrapers that are sharp or scratch, steel wool, scouring pads, etc. -
Page 39: Cleaning The Appliance Door
8 Care and maintenance ▸ Long touch the display. – The start screen appears. ▸ Select the «Cleaning» application group and confirm with «OK», if required. ▸ Select «Steam cleaning» and confirm with «OK». – The settings for «Steam cleaning» appear in the display. ▸... - Page 40 8 Care and maintenance ▸ Close the appliance door as far as its airing position (about 30°). ▸ Lift the appliance door out evenly and at an angle. Reinstalling the appliance door ▸ Push the appliance door 3 evenly into both hinges 1 as far as it will go.
-
Page 41: Cleaning The Door Seal
8 Care and maintenance ▸ Remove the intermediate door glass seal 2. ▸ Gently push the middle door glass 3 and raise it slightly up and away from the hinges. ▸ Clean the glass panels and dry well. ▸ Reassemble the glass panels as follows: Insert the middle door glass 3 into the door frame and gently push it back towards the hinges. -
Page 42: Cleaning The Accessories And Shelf Guides
8 Care and maintenance Cleaning the accessories and shelf guides ▪ The stainless steel tray, perforated cooking tray, water tank and shelf guides can be cleaned in the dishwasher. ▪ Limescale deposits in the water tank can be removed using a standard descaler (do not use washing-up liquid or any abrasive agents). - Page 43 8 Care and maintenance Descaler durgol swiss steamer Using the wrong descaler can damage the appliance! Only use «durgol swiss steamer» to descale your appliance. The descaler contains highly effective acid. Immediately rinse away any splashes with water. Follow the manufacturer's instructions.
-
Page 44: Trouble-Shooting
9 Trouble-shooting Discarding the rinsing solution ▸ When the corresponding message appears in the display: remove the water tank, pour the rinsing solution away and fill it with 1 l warm water. ▸ Put the water tank back. – The rinsing phase starts automatically. –... - Page 45 9 Trouble-shooting Message Possible cause Solution ▪ «UX/EXX» ▪ Disruption in the ▸ Acknowledge the error message by power supply. touching «OK». ▸ Switch the power supply off for about 1 minute. ▸ Switch the power supply back on. ▸ If the error appears again, note down the error message in full along with the serial number (SN) of the appli- ance (see page 48).
-
Page 46: Other Possible Problems
9 Trouble-shooting Other possible problems Problem Possible cause Solution ▪ Appliance is ▪ A household fuse or ▸ Change the fuse. not working circuit breaker has ▸ Reset the circuit breaker. tripped. ▪ The fuse or circuit ▸ Contact Customer Services. breaker keeps blow- ing. -
Page 47: After A Power Failure
9 Trouble-shooting Problem Possible cause Solution ▪ The appliance ▪ Appliance can make Such noise is normal. makes noises noises at any time during opera- during operation tion (switching, pumping and fan noises). ▪ Clock is not ▪ Irregular mains fre- ▸... - Page 48 10 Accessories and spare parts Accessories and spare parts The accessories shown below as well as spare parts can be ordered in addition to the scope of delivery of the appliance. Ordering spare parts is subject to charge, except in the event of warranty claims.
- Page 49 Own measurements can be im- precise and are not suitable for checking the accuracy of the temperature. 11.3 Product fiche In accordance with EU Regulation No.: 66/2014 Brand – V-ZUG Ltd Type of appliance – Steam cookers Model designation – Mass of the appliance Number of cavities –...
- Page 50 13 Disposal Disposal 13.1 Packaging Never allow children to play with packaging material due to the danger of injury or suffocation. Store the packaging material in a safe location or dispose of it in an environmentally-friendly way. 13.2 Safety Render the appliance unusable to prevent accidents caused by improper use (e.g. through children playing): ▸...
- Page 51 Index Clock ..............24 Hiding............. 24 Accessories ..........12, 48 Hiding during operation...... 18 Showing............ 24 Moving ............ 15 Showing during operation...... 18 App view ............10 Construction............10 Appliance Continuing ............26 Disposal............ 50 Cancelling operation ........ 27 Switching off .......... 27 Continuing operation........
- Page 52 Options .............. 19 Favourites............ 37 Selecting............ 19 Pinned values .......... 37 Starting............ 19 Start screen........... 37 Other possible problems........ 46 V-ZUG-Home.......... 37 Favourites ............21 Changing............ 21 Perforated cooking tray ........13 Creating ............ 21 Pinning ............... 22 Deleting ............ 22 Main value.............
- Page 53 Values Feedback tones ........... 35 Adjusting............ 16 Quiet mode ........... 34 Sound worlds .......... 34 Saving ............ 17 V-ZUG App ............33 Smartphone V-ZUG-Home............. 33 System requirements ........ 33 Displaying information ........ 36 Spare parts ............48 Mode .............. 36 Special accessories .........
- Page 54 Notes...
- Page 55 V‑ZUG service centre. Technical questions, accessories, warranty extensions V-ZUG is happy to help you with any general administrative or technical queries, to take your orders for accessories and spare parts and to inform you about our progressive service agreements.
- Page 56 Place your finger on the CircleSlider Move app and move it in a circle. Page change Adjustable value Favourite Temperature The temperature can be set using the CircleSlider. 1094248-05 V-ZUG Ltd, Industriestrasse 66, CH-6302 Zug info@vzug.com, www.vzug.com...
Need help?
Do you have a question about the Steamer V4000 and is the answer not in the manual?
Questions and answers