V-ZUG Combi-Steam SL Operating Instructions Manual
Hide thumbs
Also See for Combi-Steam SL:
- Operating instructions manual (92 pages) ,
- Operating instructions manual (88 pages)
Table of Contents
Advertisement
Quick Links
Advertisement
Table of Contents

Related Manuals for V-ZUG Combi-Steam SL


Summary of Contents for V-ZUG Combi-Steam SL
- Page 1 V ZUG LTD Combi Steam Cooker Combi Steam SL Operating instructions...
- Page 2 These operating instructions apply to the following models: Type Model no. Size system CST-SL CST-SL Deviations depending on the model are noted in the text. The model number corresponds to the first three digits on the identification plate. © V-ZUG LTD, CH-6301 Zug, 2005...
-
Page 3: Table Of Contents
Contents Safety precautions Before using for the first time ....5 Correct use ......6 Children in the home . - Page 4 … Contents Tips on settings Steaming ......48 Regenerating ......51 Professional baking .
-
Page 5: Safety Precautions
Safety precautions The appliance corresponds to recognised technology stand ards and the relevant safety regulations. Proper use of the appliance is essential to avoid damage and accidents. Please follow the tips given in these operating instructions. Before using for the first time The appliance must be installed and connected up to the electricity supply in ac- cordance with the separate installation instructions. -
Page 6: Correct Use
… Safety precautions Correct use The appliance is designed for use in the home for preparing food. No liability is assumed for any damage caused by improper or incorrect use. Not to be used as a room heater or humidifier. The appliance should only be installed and operated in a room with an ambient temperature of between 5 °C and 35 °C. -
Page 7: Use
… Safety precautions If the appliance is visibly damaged, do not use it. Contact our Customer Services. If the appliance is not operating property, disconnect it from the electricity supply immediately. Ensure the mains cables of other electrical appliances do not get caught in the door of the appliance, as the electrical cable insulation could get damaged. - Page 8 … Safety precautions Do not leave the appliance unsupervised when drying herbs, bread, mushrooms, etc. If the foodstuff dries out too much, this can pose a fire hazard. If you notice smoke coming from the appliance or from the cooking space, keep the appliance door closed.
-
Page 9: Appliance Description
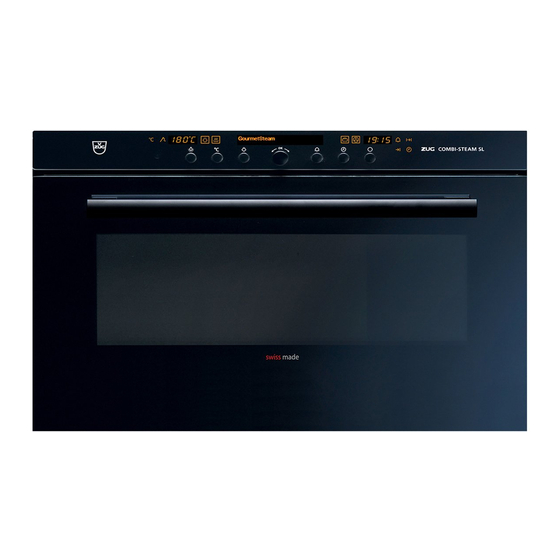
Appliance description Construction Operating and display elements 10 Socket for food probe Cooking space ventilation 11 Shelf guides Illumination 12 Water tank Hot air blower 13 Food probe Door seal 14 Wire shelf (2×) Appliance door 15 Stainless steel tray Steam vent 16 Perforated cooking tray Cooking space temperature sensor... -
Page 10: Operating And Display Elements
… Appliance description Operating and display elements Q K L MN Buttons Illumination Cooking space / food probe temperature Operating mode Adjusting knob Timer Operating time and switch-off time Symbols Cooking space temperature Food probe temperature Operating mode Timer Operating time Switch-off time Time Displays... -
Page 11: Using For The First Time
… Appliance description Using for the first time Before operating the newly installed appliance for the first time the following steps should be taken: Remove all packaging and transport materials from the cooking space. If the display on the right side is flashing , turn the adjusting knob to set the desired time. -
Page 12: General Operating Instructions
… Appliance description General operating instructions Operating using the buttons The operating mode, cooking space temperature and food probe temperature as well as the cooking time and various other functions can be selected by pressing the ap- propriate button once or more. The symbol for the function selected lights up or flashes. - Page 13 … Appliance description Operating using the plain text display When the appliance is switched off, the adjusting knob is used to display plain text, to select the different operating modes and to confirm. Press the adjusting knob to activate the plain text display. Turn the adjusting knob to scroll through the menu.
-
Page 14: User Settings
User settings You can change the appliance settings to suit your own preferences. The procedure is the same for all user settings. Press the adjusting knob to activate the plain text display. Turn the adjusting knob until «User settings» is displayed. Press the adjusting knob to confirm. - Page 15 … User settings The following diagram gives an overview of the possible user settings. Select and press OK Soft roasting Select and press OK Descaling Select and press OK Set time Select and press OK User settings ▪ Text in Deutsch * ▪...
- Page 16 … User settings Childproof lock The childproof lock is to prevent children from accidentally switching the appliance on. If the buttons or the adjusting knob are pressed when the childproof lock is activated: – A double acoustic signal is emitted. –...
- Page 17 … User settings Illumination Select between «automatically with door» «only with key» With the «automatically with door» setting, the illumination automatically comes on when the appliance door is opened and goes off again when it is closed. Press the button to switch the illumination on or off at any time. If the illumination is not switched off by pressing the button, it will go out automatically 30 minutes after use.
-
Page 18: Cooking And Baking
Cooking and baking Operating modes The operating modes available are described below. Steaming Recommended cooking space temperature: 100 °C (corresponding to maximum boiling temperature) Range: 30 °C to 100 °C Press the button 1×. – «Steaming» «Oven temperature» appear in the plain text display. In the steaming mode, steam flows from the boiler into the cooking space. - Page 19 … Cooking and baking Regeneration Recommended cooking space temperature: 120 °C Range: 100 °C to 150 °C Press the button 2×. – «Regeneration» «Oven temperature» appear in the plain text display. In the regenerating mode, the cooking space is heated by steam and hot air, allowing food to be regenerated quickly and evenly without drying it out.
- Page 20 … Cooking and baking Professional baking Recommended cooking space temperature: 210 °C Range: 100 °C to 230 °C Press the button 3×. – «Professional baking» «Oven temperature» appear in the plain text display. In the professional baking mode, the food is placed in the cold, unheated cooking space.
- Page 21 … Cooking and baking Hot air Recommended cooking space temperature: 180 °C Range: 30 °C to 230 °C Press the button 4×. – «Hot air» «Oven temperature» appear in the plain text display. In the hot air mode, a heating element at the back of the appliance heats up the air inside the cooking space.
- Page 22 … Cooking and baking Hot air + steaming Recommended cooking space temperature: 180 °C Range: 30 °C to 230 °C Press the button 6×. – «Hot air + steaming» «Oven temperature» appear in the plain text display. In the hot air + steaming mode, a heating element at the back of the appliance heats up the air inside the cooking space.
-
Page 23: Example Of Settings
… Cooking and baking Example of settings The procedure is explained using baking bread as an example. Tips on settings gives: Professional baking Level Time in mins. Bread 210–220 40–50 Place the formed bread dough on the stainless steel tray and allow to proof briefly. Put the stainless steel tray into the cold cooking space at level 1. -
Page 24: Selecting An Operating Mode
… Cooking and baking Selecting an operating mode Burn hazard due to heat produced during cooking and baking. Please read the «Safety precautions» section first. Press the button to select the desired operating mode – in this example, profes- sional baking –... -
Page 25: Checking / Changing The Cooking Space Temperature
… Cooking and baking Checking / Changing the cooking space temperature The set cooking space temperature can be monitored or changed during operation. Press the button. – The symbol flashes for about 15 seconds. – «Professional baking» «Oven temperature» appear in the plain text display. –... -
Page 26: Switching Off
… Cooking and baking Switching off Press the button. – The symbols go out. – The steam is released at the end of the process for all operating modes (with the exception of the hot air mode). – The steam is gradually released from the cooking space – this takes around a minute –... - Page 27 … Cooking and baking Emptying the water tank The water in the tank may be hot. When the appliance is switched off, the residual water is pumped back into the water tank. – «Hot water» «is pumped off» appear in the plain text display. When finished, remove and empty the water tank.
-
Page 28: Optimal Use
… Cooking and baking Optimal use The recommended baking and roasting temperatures given in older recipe books are likely to be too high and the recommended levels in the cooking space not ideal. The section with tips on settings shows how to get the best use out of the appliance. If in doubt, follow these tips. - Page 29 … Cooking and baking Baking using hot air and professional baking Place a suitable baking form (round tin, spring form tin, cake tin, etc.) on the wire shelf. Push the stainless steel tray to the back of the cooking space for optimum air circulation.
- Page 30 … Cooking and baking Saving energy Avoid opening the appliance door frequently. This can lengthen the cooking time significantly, especially when steaming. Only switch the illumination on if needed. To save energy when baking, for longer cooking times switch the appliance off some 10 to 15 minutes before the end of the cooking time and use the heat that is retained in the cooking space.
-
Page 31: Soft Roasting
Soft roasting General remarks Soft roasting is a patented roasting method, whereby seared meat is cooked in the appliance at a relatively low temperature for between 2½ and 4½ hours. The tem- perature is kept purposely relatively low in order to have the meat softly roasted and ready to eat at the desired time. - Page 32 … Soft roasting Preparing meat Heat some fat in a pan. Sear the meat on all sides (for no more than 5 minutes). Then place the meat in a glass or porcelain dish. Insert the food probe into the thickest part of the meat and ensure that the tip of the food probe is in the thickest part.
- Page 33 … Soft roasting To change the preset food probe temperature: Press the button. Change the food probe temperature by turning the adjusting knob. To change the preset operating time: Press the button. Change the preset operating time by turning the adjusting knob.
- Page 34 … Soft roasting To switch off earlier Press the button 2×. A long, intermittent acoustic signal is emitted for one minute when the meat has finished roasting. Press the adjusting knob to cancel the acoustic signal.
-
Page 35: Food Probe
Food probe Only use the food probe supplied. Do not clean in the dishwasher. When the food has reached the desired food probe tempera- ture, the appliance can be switched off automatically with the help of the food probe. A guide to appropriate food probe tem- peratures can be found in the section on tips on settings. - Page 36 … Food probe Positioning the food probe To steam, put vegetables in the perforated cooking tray and meat on the wire shelf or stainless steel tray. Insert the food probe 1 into the food at a horizontal a position as possible. The tip must be roughly in the thickest part and should be completely covered in order to get a correct food probe temperature...
-
Page 37: Food Probe Temperature
… Food probe Food probe temperature The food probe has to be plugged in order to set the food probe temperature. Setting the food probe temperature Press the button 2×. – The symbol flashes. – «Food probe temperature» appears in the plain text display. –... - Page 38 … Food probe End of cooking – The appliance switches off automatically when the food probe temperature has been reached. – An acoustic signal is emitted for one minute. – The symbol flashes. – «Food probe temperature» «reached» appear in the plain text display. –...
-
Page 39: Clock Functions
Clock functions The appliance features the following clock functions Clock Timer (the timer can be used at any time and independently of all other functions) Operating time (time-controlled shut-off) Delayed start (time-controlled switch-on and shut-off) Setting and changing the time You can set or change the time using either the plain text display or a combination of buttons. - Page 40 … Clock functions Using a combination of buttons Depress the buttons at the same time. – The set time and the symbol flash. Turn the adjusting knob to set the desired time. Press the adjusting knob to confirm. When the appliance is switched off, the brightness of the clock display is reduced between 22:00 and 6:00.
-
Page 41: Timer
… Clock functions Timer The timer functions like an egg timer. It can be used at any time and independently of all other functions. Setting Press the button. – The symbol flashes. – «Timer» appears in the plain text display. –... - Page 42 … Clock functions Checking and changing Press the button. – The symbol flashes. – «Timer» appears in the plain text display. – The countdown to the time remaining flashes. Turn the adjusting knob to change the timer duration. Press the adjusting knob to confirm.
-
Page 43: Operating Time
… Clock functions Operating time The operating time is the length of time that an operating mode is switched on. The operating mode automatically switches off when the operating time is up. Setting Preheat the cooking space if necessary. Place the food in the cooking space. Press the button. - Page 44 … Clock functions Checking and changing Press the button. Turn the adjusting knob to change the operating time. Press the adjusting knob to confirm. Switching off before time Press the button. End of the operating time – The selected operating mode automatically switches off when the operating time is up.
-
Page 45: Delayed Start
… Clock functions Delayed start The delayed start function helps you if you want to have a dish ready for a certain time but you cannot switch the appliance on or off yourself at just the right time. Set the operating time as well as the switch-off time. - Page 46 … Clock functions Turn the adjusting knob to set the desired switch-off time and thus the delayed start. The switch-off time can be extended to 23 hours and 59 minutes at the most. Press the adjusting knob to confirm. – The symbols light up.
- Page 47 … Clock functions Switching off before time Press the button. At switch off time – The appliance automatically switches off when the switch-off time is reached. – A long, intermittent audible signal is emitted for one minute. – The symbol flashes. –...
-
Page 48: Steaming
Tips on settings Below you will find tips on how to prepare some favourite dishes. The cooking times and temperatures given serve only as guide and may vary depend- ing on the consistency and texture of the food. Steaming Place the food into the unheated cooking space. Time in Vegetables (fresh) Accessories... - Page 49 … Tips on settings Time in Accompaniments Accessories mins. Rice + liquid 20–40 Lentils + liquid 20–60 Semolina + liquid 10–15 Time in Meat Accessories mins. Ham (depending on weight) 60–90 Pork loin 45–60 Sausages 30–45 Time in Fish and seafood Accessories mins.
- Page 50 … Tips on settings Time in Sterilising / Preserving Accessories mins. Cherries Pears Peaches Plums Time in Accessories and Extracting juice mins. special accessories Fruit (cherries, grapes, etc.) max. 90 Berries (blackcurrants, brambles, elderberries, etc.) Time in Blanching Accessories mins. Vegetables e.g.
-
Page 51: Regenerating
… Tips on settings Regenerating Place the food in the unheated cooking space. The cooking time and temperature guidelines for are for regenerating on several levels at the same time. Time in Regenerating Accessories mins. Regenerating dishes (1–2 portions) 6–8 Regenerating dishes (3–4 portions) 8–10 See manu-... -
Page 52: Professional Baking
… Tips on settings Professional baking Place the food in the unheated cooking space. The cooking time and temperature guidelines for are for baking on two levels at the same time. Time in Accessories Professional baking Level mins Special accessories Ring cake 190–200 30–40... -
Page 53: Baking With Hot Air
… Tips on settings Baking with hot air The cooking time and temperature guidelines for are for baking on two levels at the same time. Time Accessories Baking with Preheat Level Special hot air mins. accessories Sponge cake base 140–150 30–40 Cake 150–160... -
Page 54: Soft Roasting
… Tips on settings Soft roasting Also see section on «Soft roasting». Recommended Time range temperature and time Level of Level doneness °C Hours Hours rare Fillet of veal medium Loin of veal thick end Loin of veal kidney end Veal shoulder Veal neck rare... -
Page 55: Cleaning The Exterior
Care and maintenance Cleaning the exterior Avoid cleaning the surface of the appliance with abrasive or caustic cleaning agents, stainless steel cleaner, scouring pads, wire wool, etc., which can damage the surface. Remove any dirt or excess cleaning solution as quickly as possible. Using a cloth dampened with water, clean the surface (for metallic surfaces rub in the direction of the original polish lines) and then polish with a soft cloth. -
Page 56: Cleaning The Cooking Space
… Care and maintenance Cleaning the cooking space The cooking space temperature sensor can be easily dam aged. Care must be taken not to bend it during cleaning. Avoid using abrasive cleaners such as scouring pads, steel wool, etc. as they can damage the surface. - Page 57 … Care and maintenance Removing the shelf guides Unscrew the knurled nuts 1 in the front of the shelf guides in an anti-clockwise direction. Pull the shelf guides 2 to the side of the knurled nuts and remove from the front. To put back, insert the shelf guides into the holes in the back wall of the cooking space and position on screw.
-
Page 58: Changing The Water Filter
… Care and maintenance Changing the water filter Over time the water filter can get clogged with fine particles of dirt and limescale, which are found naturally in water. If the water filter is blocked, not enough water is being pumped into the boiler. –... -
Page 59: Descale
… Care and maintenance Descale Whenever steam is produced, irrespective of the hardness of the local water supply (i.e. the limescale content of the water), limescale is deposited in the boiler. The appliance automatically recognises when descaling is necessary. – «Boiler scaled up,» «please descale!» appear in the plain text display. The time interval between descaling depends on the hardness of the water and fre- quency of use. - Page 60 … Care and maintenance Descaling For safety reasons, the descaling process cannot be interrupted. The appliance can be descaled with the appliance door open or closed. The appliance must be switched off. Activate the plain text display by pressing the adjusting knob.
- Page 61 … Care and maintenance When the 1st rinsing phase is over, «Pour out water» «Fill with1.2L water» appear in the plain text display. Remove the water tank, pour away the water and fill the tank again with 1.2 l cold water.
-
Page 62: Door Seal
… Care and maintenance Door seal If the door seal is damaged, it should be replaced as follows: To make it easier, first remove the appliance door. Remove the damaged door seal 1 and then clean the seal frame 2. Press the new seal 1 into the four corners 2. -
Page 63: What To Do If
Trouble shooting What to do if … … the appliance is not working and the displays are not lit up Possible causes Solution Fuse or circuit breaker for Change the fuse. electrical installations in the Reset the circuit breaker. home is defect. Fuse or circuit breaker keeps Call Customer Services. - Page 64 … Trouble-shooting … after finishing cooking, «Hot water» «is pumped off» appear in the plain text display, but even after some time still no water is being pumped off Possible causes Solution For safety reasons, the wa- If there is enough cold water in the water tank, ter in the boiler is not pump- it will be automatically pumped into the boiler to ed off until the temperature...
- Page 65 … Trouble-shooting … «F.. read instructions» appears in the plain text display Possible cause Solution Various situations can lead Cancel error message by pressing the to an «F» error message. button. Switch the electricity supply off for about 1 minute. Switch the electricity supply back on again.
-
Page 66: After A Power Failure
… Trouble-shooting After a power failure After a power failure the right display flashes Setting the time Depress the buttons at the same time. Turn the adjusting knob to set the time. Press the adjusting knob to confirm. The user settings remain unchanged. If there is a power failure during soft roasting, it will be no longer possible to continue running this operating mode. - Page 67 Tips and tricks Steaming When using the steaming mode at 100 °C, a variety of food can be cooked simultaneously. For example, rice or pulses can be prepared at the same time as vegetables with similar cooking times, saving energy and washing up. Grains (e.g.
- Page 68 … Tips and tricks Regenerating Food that is to be regenerated using the operating mode can be portioned up directly on heat-proof plates (e.g. porcelain, suitable glass, but not plastic). With this operating mode, it is not necessary to cover food over. During regenerating steam is added and so the food cannot dry out.
- Page 69 … Tips and tricks Hot air The cooking time can be reduced only slightly by increasing the cooking space tem- perature. If the food is cooked on the outside but still raw or doughy on the inside, lower the temperature of the cooking space slightly and lengthen the cooking time. With , check that the rack levels used correspond to those recommended in the tips on settings.
- Page 70 Accessories and spare parts Accessories Article no. Length × Width × Height [mm] Stainless steel tray K2.3210 354 × 325 × 20 Cake tray, enamelled K2.3211 354 × 325 × 20 Cooking tray, unperforated, stainless steel K2.3214 354 × 325 × 40 Cooking tray, perforated, stainless steel K2.3213 354 ×...
- Page 71 Technical data External measurements 55 cm 60 cm Height: 37.8 cm 37.8 cm Width: 54.8 cm 59.6 cm Depth: 55.1 cm 55.1 cm Weight: 33 kg 33 kg Electrical connection Voltage/frequency: 230 V ~50 Hz or 400 V 2N~ 50 Hz Output: Connected wattage 3500 W Fuse:...
- Page 72 Disposal Packaging All packaging materials (cardboard, plastic film (PE) and polystyrene (EPS)) are marked accordingly and should, if possible, be collected for recycling and dis- posed of in an environmentally friendly way. Disconnection Disconnect the appliance from the mains. With a fixed appliance, this is to be car- ried out by a qualified electrician! Safety To prevent accidents caused by improper use, especially through children playing,...
- Page 73 Index Descaling solutions 59 Accessories 70 Desserts 50 Ordering 75 Disconnection 72 Usage 30 Display elements 10 Accompaniments 49 Displays 10 Adjusting knob 13 Disposal 72 Appliance Door seal 62 Description 9 Switching off 26 Electrical connection 71 Error message 65 Baking 18 External measurements 71 End of 25...
- Page 74 … Index Safety precautions Maintenance 55 Before using for the first time 5 Malfunction 75 Children in the home 6 Meat 49 Correct use 6 Preparing 32 Use 7 Saving energy 30 Seafood 49 Operating elements 10 Service agreements 75 Operating instructions 12 Service centre 75 Operating mode 18...
- Page 75 Open the appliance door. – The identification plate is on the left-side panel. If the appliance is not working properly, contact your nearest V-ZUG LTD service centre using freephone 0800 850 850 and stand in close proximity to the appliance.
- Page 76 Quick instructions Setting the time Depress the buttons at the same time. Turn the adjusting knob to the desired time. Press the adjusting knob to confirm. Selecting the operating mode Press the button until the desired operating mode appears. Turn the adjusting knob to set the cooking space temperature.
Need help?
Do you have a question about the Combi-Steam SL and is the answer not in the manual?
Questions and answers