Advertisement
For PISO-813/PISO-813U
English/ Feb. 2014/ Version 1.2
What's in the shipping package?
The package includes the following items:
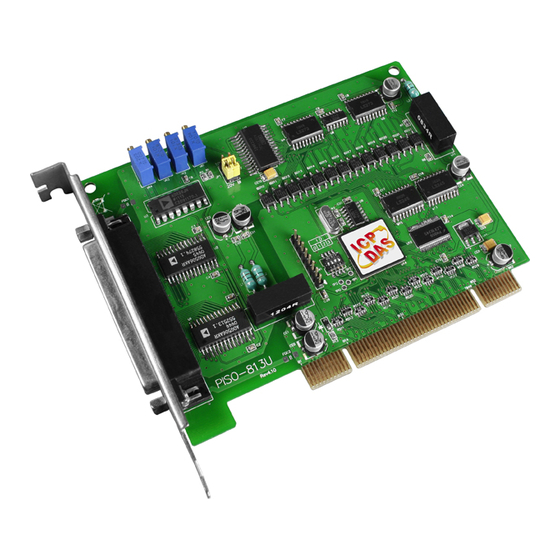
One PISO-813/PISO-813U PCI Board.
One Software Utility CD (V5.2 or later)
One Quick Start Guide (This Document)
One CA-4002 D-Sub connector
PISO-813/PISO-813U Quick Start Guide
1
ICP DAS CO., LED
WebSite: http:// www.icpdas.com.tw
E-Mail: service@icpdas.com , service.icpdas@gmail.com
Advertisement
Table of Contents

Related Manuals for ICP DAS USA PISO-813


Summary of Contents for ICP DAS USA PISO-813
- Page 1 For PISO-813/PISO-813U English/ Feb. 2014/ Version 1.2 What’s in the shipping package? The package includes the following items: One PISO-813/PISO-813U PCI Board. One Software Utility CD (V5.2 or later) One Quick Start Guide (This Document) One CA-4002 D-Sub connector PISO-813/PISO-813U Quick Start Guide ICP DAS CO., LED...
- Page 2 The PISO-813 Series classic driver supports Windows 98/NT/2K and 32-bit XP/ 2003/ Vista/7/8. Recommended to install this driver for have been used PISO-813 series boards of regular user, please refer to : http://ftp.icpdas.com/pub/cd/iocard/pci/napdos/pci/piso-813/manual/quickstar t/classic/ Step 2: Click the “Next>”...
- Page 3 JP1: Analog Input Range Selection Input Range = 10 V Input Range= 20 V (Default) Jumper JP2: Bipolar/Unipolar Selection Unipolar Mode Bipolar Mode (Default) PISO-813/PISO-813U Quick Start Guide ICP DAS CO., LED WebSite: http:// www.icpdas.com.tw E-Mail: service@icpdas.com , service.icpdas@gmail.com...
- Page 4 Step 5: Replace the PC cover. Step 6: Power on the computer. After powering-on the computer, please finish the Plug&Play steps according to the prompted messages. PISO-813/PISO-813U Quick Start Guide ICP DAS CO., LED WebSite: http:// www.icpdas.com.tw E-Mail: service@icpdas.com , service.icpdas@gmail.com...
- Page 5 Pin Assignments CON1 Pin Assignments (Female DB37). PISO-813/PISO-813U Quick Start Guide ICP DAS CO., LED WebSite: http:// www.icpdas.com.tw E-Mail: service@icpdas.com , service.icpdas@gmail.com...
- Page 6 1. Use the DN-37 to connect the CON1 on board. 2. Wire the signal source to channel0, and then keep set the JP1 and JP2 jumper to default (page 3), and wire the signals as follows: PISO-813/PISO-813U Quick Start Guide ICP DAS CO., LED WebSite: http:// www.icpdas.com.tw...
- Page 7 The UniDAQ Utility.exe is located in: C:\ICPDAS\UniDAQ\Driver\ (Default path). Click this button to start test. Double-Click Confirm the PISO-813 series card had successfully installed to PC. It starts from 0. 4. Get A/D function test result. Click “Analog Input” item. Click this button Confirm the hardware setting.
- Page 8 Check analog input on Channel 0 textbox. The other channels value for floating number. PASS Related Information PISO-813/PISO-813U Card Product Page: http://www.icpdas.com/root/product/solutions/pc_based_io_board/pci/piso-813.html DN-37, CA-3710 and DP-665 page (optional): http://www.icpdas.com/products/DAQ/screw_terminal/dn_37.htm http://www.icpdas.com/products/Accessories/cable/cable_selection.htm Documentation and Software: CD:\NAPDOS\PCI\UniDAQ\ http://ftp.icpdas.com/pub/cd/iocard/pci/napdos/pci/unidaq/ PISO-813/PISO-813U Quick Start Guide ICP DAS CO., LED...
Need help?
Do you have a question about the PISO-813 and is the answer not in the manual?
Questions and answers