Table of Contents
Advertisement
Quick Links
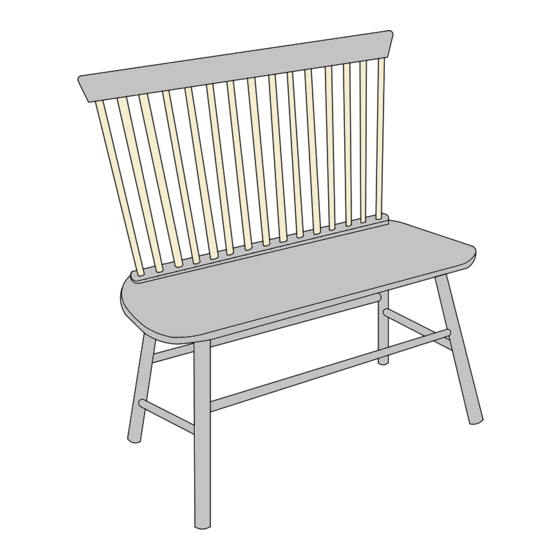
Luna Bench
Assembly Instructions - Please keep for future reference
hygena
Dimensions
Width - 91.5 cm
Length - 55 cm
Height - 92 cm
Important - Please read these instructions fully before starting assembly
If you need help or have damaged or missing parts, call the Customer Helpline :
Argos 0345 640 0800
461 / 8436
issue 1 - 5/11/15
Advertisement
Table of Contents

Related Manuals for hygena Luna 461/8436


Summary of Contents for hygena Luna 461/8436
- Page 1 Luna Bench Assembly Instructions - Please keep for future reference 461 / 8436 hygena Dimensions Width - 91.5 cm Length - 55 cm Height - 92 cm Important - Please read these instructions fully before starting assembly If you need help or have damaged or missing parts, call the Customer Helpline :...
- Page 2 Safety and care Advice Important - Please read these instructions fully before starting assembly Check you have all the Assemble on a soft level Make sure you have enough components and tools listed surface to avoid damaging the space to layout the parts before on pages 2 and page 3.
- Page 3 If you have damaged or missing components Components - Part , call the Customer Helpline : 0345 640 0800 Please check you have all the parts listed below Back Rest x1 Left Leg x1 ( 88.5 x 50 x 2.8cm) (49 x 43.5 x 4.5cm) Right Leg x1 Seat Pad x1...
- Page 4 If you have damaged or missing components Components - Fittings , call the Customer Helpline : 0345 640 0800 Please check you have all the parts listed below Note : The quantites below are the correct amount to complete the assembly. In some cases more fittings may be supplied than are required.
- Page 5 Assembly Instructions Step 1 Assembling Legs With help, carefully locate stretchers in between leg frame Partially secure the assembly using screws , but do not fully tighten. Step 2 Front side arrow sticker Assembling Seat Pad Place seat pad upside down onto a clean flat surface ( i.e edge of table top ) Align the leg frame and secure...
- Page 6 Assembly Instructions Step 3 Assembling Back Rest With help assemble back rest to seat pad using fixings Step 4 With help stand the assembled bench upright. Whilst applying a firm downward pressure onto the seat to ensure a stable position, go round and fully tighten all fixings from the previous steps.
Need help?
Do you have a question about the Luna 461/8436 and is the answer not in the manual?
Questions and answers