Table of Contents
Advertisement
Quick Links
Advertisement
Table of Contents

Subscribe to Our Youtube Channel
Related Manuals for Shini SG-23


Summary of Contents for Shini SG-23
- Page 1 SG-23/30 Sound-proof Central Granulator Date:Sep, 2017 Version:Ver.C (English)
-
Page 3: Table Of Contents
Contents General Description ..................7 1.1 Coding Principle ..................8 1.2 Feature....................8 1.3 Machine Specifications ................. 10 1.4 Safety Regulations ................11 1.4.1 Safety signs and labels............... 11 1.4.2 Transportation and Storage of the Machine........ 13 1.4.3 Rejected parts disposal .............. 14 1.5 Exemption Clause ................. - Page 4 6.3 Cleaning....................38 6.4 Installation of Blade Rest and Bearing ..........39 6.4.1 Installation of Blade Rest Shaft (This lnstallation illustration is only suitable for SG-23)................. 39 6.4.2 Installation of Blade Rest Shaft (This lnstallation illustration is only suitable for SG-30)................. 40 6.4.3 Installation of material fender(This lnstallation illustration is only...
- Page 5 6.9.7 Check Every 3 Years ..............47 Contents Chart 1-1: Machine specifications..............10 Picture index Picture 1-1: Dimensions of SG-23/30 ............... 10 Picture 2-1: Working principle................16 Picture 2-2: Emergency stop switch..............17 Picture 2-3: Safety switch ................. 18 Picture 2-4: Star screw ..................18 Picture 2-5: PCB Circuit board................
- Page 6 Picture 6-5: Cleaning of Machine..............38 Picture 6-6: Installation of blade rest..............39 Picture 6-7: Installation of Bearing and Blade Rest 2........40 Picture 6-8: Installation of Bearing and Blade Rest 3........40 Picture 6-9: Installation of Bearing and Blade Rest 4........40 Picture 6-10:Installation of Bearing and Blade Rest ........
-
Page 7: General Description
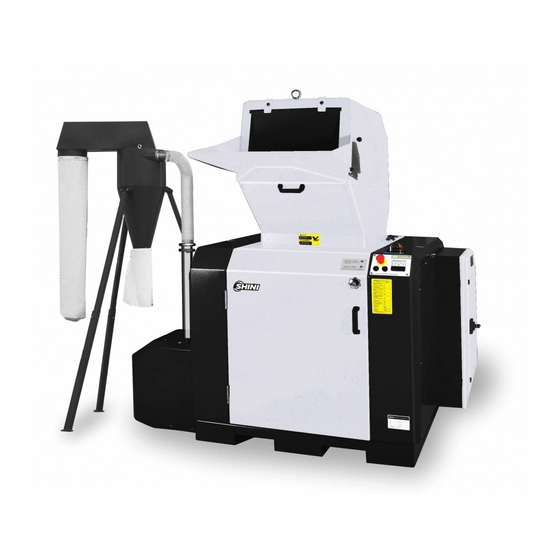
Forbidden to process flammable or toxic material! SG-23/30 series sound-proof central granulator are suitable for granulating all kinds of plastic materials, including rejected parts from injection molding, blow molding or recycling of wastes. The machines feature optimized structure, easy operation, and quick blade replacement. -
Page 8: Coding Principle
1.1 Coding Principle 1.2 Feature ● SG-23 series adopts staggered blades, it can decentralize working load when granulating to increase cutting efficiency, Blade retainer is designed for quick blade replacement without readjustment. ● SG-30 series adopts paddle blades. It allows increased efficiency and reduced energy consumption. - Page 9 Chapter 6 contains service instructions intended for service engineers. Other chapters contain instructions for the daily operator. Any modifications of the machine must be approved by SHINI in order to avoid personal injury and damage to machine. We shall not be liable for any damage caused by unauthorized change of the machine.
-
Page 10: Machine Specifications
1.3 Machine Specifications Picture 1-1: Dimensions of SG-23/30 Chart 1-1: Machine specifications Model SG-2324 SG-2336 SG-2348 SG-3048 SG-3060 Ver. Motor Power (kW, 50/60Hz) 5.5/6.3 7.5/8.6 11/12.6 11/12.6 15/17.3 Rotating Speed (rpm, 50/60Hz) 415/500 415/500 415/500 415/500 415/500 Conveying Blower (kW, 50/60Hz) 0.55/0.66... -
Page 11: Safety Regulations
1.4 Safety Regulations Follow the instructions in this manual to avoid personal injury and damage to machine components. 1.4.1 Safety signs and labels Electrical installation must only be done by a competent electrician! Before the granulator is opened for servicing and maintenance, turn off both the main switch and the control switch on the granulator. - Page 12 2. Whenever belt slip occurs, please tighten up this screw. Air inlet Clean dust. Please add butter lubricant regularly. When operate the granulator, please notice the following signs: Water outlet (not for SG-23) Water inlet (not for SG-23) Motor rotation directio 12(47)
-
Page 13: Transportation And Storage Of The Machine
1.4.2 Transportation and Storage of the Machine Transportation 1) SG-23/30 series of granulator are packed in crates or plywood cases with wooden pallet at the bottom, which is suitable for quick positioning by fork lift. 2) Equipped with castors for ease of movement after being unpacked. -
Page 14: Rejected Parts Disposal
The following statements clarify the responsibilities and regulations born by any buyer or user who purchases products and accessories from Shini (including employees and agents). Shini is exempted from liability for any costs, fees, claims and losses caused by reasons below: 1. - Page 15 3. Any operational actions that are not authorized by Shini upon machine, including adding or replacing accessories, dismantling, delivering or repairing. 4. Employ consumables or oil media that are not appointed by Shini. 15(47)
-
Page 16: Structural Features And Working Principle
2. Structural Features and Working Principle 2.1 General Description SG-23/30 series are suitable for granulating waste plastics for directly recycling use. Before granulating, it’s necessary to clean metal scraps and dirts. Mount magnet at the material inlet to prevent metal scraps from getting into cutting chamber and bringing damage to the blades. -
Page 17: Safety System
The granulated materials are dropped into the storage box (E) via the screen and be conveyed via discharging pipe (F). Use feeding blower to absorb the granulated materials into cyclone dust collector to separate the air and dust. The particles can be reused directly or sent to somewhere for storage after being granulated. -
Page 18: Star Screw
Picture 2-3: Safety switch 2.2.3 Star Screw Star screws on feed box and screen bracket are very important parts of safety operation system of the granulator. When unscrewing those star screws, blades will stop running to avoid personal injury. Picture 2-4: Star screw Caution!... -
Page 19: Electrical Components Instruction
2.3 Electrical Components Instruction 2.3.1 Microprocessor Board (PCB) Function:1) Star-delta starting. 2) Granulating motor overload detection and alarm. 3) Material conveying blower postpones machine stop. 4) phase sequence dection, warning and machine halt. Picture 2-5: PCB Circuit board Scale of Variable Resistor Fine Adjustment I(A):VR1 Rate Current setting(I):... -
Page 20: Electrical Components In Electrical Components Box
2.3.2 Electrical Components in Electrical Components box Picture 2-6: Main electrical components 1. Transformer, which supplies proper voltage for control circuit. 2. PCB which controls the start and stop of the machine. 3. Gate circuit breaker,which can perform the function of circuit isolation and protection. -
Page 21: Optional Accessories
2.4.2 Feed Hopper with Magnet Feed hopper with magnet is used to take out metal craps and impurities in the material. Add "FHM" at the end of the model code. 2.4.3 Special Screens Special screen mesh sizes: Ф4,Ф6,Ф10,Ф12(mm) for SG-23/30 series, Ф8, Ф12, 21(47) -
Page 22: Feeding Hopper For Conveyor
Shini particularly designed the belt conveyor to easily convey the material into the cutting chamber of SG-36 series. Add "BCF" at the end of the model code. -
Page 23: Installation And Debugging
3. Installation and Debugging Read through this chapter before installation. Install as following orders to avoid any accident! Be careful! Not to be cut by the sharp blade. Power connection must be done by the professional electrician to avoid electrical shock. Caution! Blades should be placed stably;... -
Page 24: Machine Location
Machine Location Make at least 1 meter clearance around the machine to facilitate repair and maintenace. Picture 3-1: Installation space Adjust the Granulator with spirit level, and put it on ground floor. Picture 3-2: Installation 1 24(47) -
Page 25: Power Connectors
SG-23/30 is equipped with castors and rabbets for fork lift to convey the machine. Picture 3-3: Installation 2 Power Connectors 1) Make sure voltage and frequency of the power source comply with those indicated on the nameplate, which is attached to the machine by the manufacturer. - Page 26 Clean the granulator from rust protection agent before it is used. Connection 1) Place a separator under cyclone device,the diameter isФ150mm. 2) Connect to conveying pipe,the diameter is 4"。 3) Mount dust collection device including air and dust collection bags. 4) Place a container under the separator to help collecting plastic material after dust removing.
-
Page 27: Operation Guide
3) Push or pull the rotary blade rest and blades to see if there is any loose. If any of the above situations occurs, please contact the local representative or SHINI Company. 4.1 Startup Pretest 1. Unpainted part of the machine has been spread with anti-rust oil. Before use, clear the anti-rust oil carefully. -
Page 28: Startup And Shutdown
4.2 Startup and Shutdown The startup and shutdown of SG-23/30 series are controlled by the start switch and stop switch on control panel. Picture 4-1: Startup and shutdown If there are still materials which have not been granulated in feed box and cutting chamber, the machine should not be shut down. -
Page 29: Open Feed Box
2) Loosen the star screws on feed box. 3) Open the feed box backward. Note! The feed box of SG-23/30 Granulator is supported by a piece of air spring and two pieces of sleeves, which could open the feed box backwards by supporting. -
Page 30: Close Feed Box, Mount Screen Bracket And Storage Box
Note! Hold the screen bracket while loosening the star screws to prevent it from falling off. 4.4 Close Feed Box, Mount Screen Bracket and Storage Box Note! Clean the joint suface first before closing it. Be careful! Do not crush it when closing it! 4.4.1 Mount Screen Bracket and Storage Box 1) Place the screen bracket in specified position and put the screen on it. -
Page 31: Trouble-Shooting
Trouble-shooting 5.1 The Granulator doesn’t Work 1) Check if the emergency stop has been reset or not. If not, rotate the button anti-clockwise to reset it. 2) Check if the safety switch between feed box and storage box is completely closed. -
Page 32: Maintenance And Repair
Maintenance and Repair All maintenance should be done by professional personnel, so as to avoid personal injury and machine damage. 1. Check whether the emergency stop button works normally. Period: Daily. 2. Check whether the start/stop button works normally. Period: Daily. 3. -
Page 33: Repair
10. Check the screws on both the fixed and the rotary blades are loose. Period: Weekly. 11. Check the belt tension. Period: Monthly. 6.1 Repair All the repair work should be done by professionals in order to prevent personal injuries and damage of the machine. 6.1.1 Operation and maintenance Daily Check Air and dust bags: Check if these bags are damaged. -
Page 34: Replacement Of Blade
Caution! The blades are very sharp; wear gloves when holding them. When replacing blade, the fixing screws (inner hexagon screw M10 x 40 for SG-23 while M14 x 50 for M14 x 50; intensity: 12.9) of blade should be replaced with new ones. -
Page 35: Conveying
Note! Do not finish installation of blades with help from others to avoid personal injury. Lock the blade rest shaft with a thick wood block on the cutting chamber. 1) Open the door of granulator to take out the screen and open feed box. 2) Loosen screws of fixed blade press block and take out the fixed blade. -
Page 36: Picture 6-2: Maintenance Of Conveyor Belt
a) For motor of 7.5kW, press the belt which is between the two belt pulleys with force of 205 N. The belt should not be stretched downward over 5mm. b) For motor of 11kW, press the belt which is between the two belt pulleys with force of 297N. -
Page 37: Lubrication
6.1.5 Lubrication 6.1.5.1 Lubricating Oil Specification (The following brands of lubricating oil are options.) Xin Chang Long:FX-00 FX-000 Bp:BP Grease LGEP 2 ESSO:Beacon Ep2, Beacon EP2 Mobil:Mobilux EP2 Shell:Shell Alvania EP2 Texaco:Multifak Ep2, Novotex Grease EP2 6.1.5.2 Please add lubricating oil to the bearing regularly. Open the bearing cover and add lubricating oil. -
Page 38: Monthly Check
Loosen the star screws on feed box and screen bracket and try to start the machine (the machine can not be started if the door and screen bracket are not closed completely or the star knob is not tightened completely). Note!... -
Page 39: Installation Of Blade Rest And Bearing
13) Clean the feeding pipe, feeding blower and cyclone dust collector. 6.4 Installation of Blade Rest and Bearing 6.4.1 Installation of Blade Rest Shaft (This lnstallation illustration is only suitable for SG-23) 1) Put oil seal and bearing orderly into bearing block. Picture 6-6: Installation of blade rest 2) Insert blade shaft vertically into blade rest, let hydraulic machine compress it tightly. -
Page 40: Installation Of Blade Rest Shaft (This Lnstallation Illustration Is Only Suitable For Sg-30)
Picture 6-7: Installation of Bearing and Blade Rest 2 5) Put the installed blade rest into the cutting chamber. Picture 6-8: Installation of Bearing and Blade Rest 3 6) Install the bearing cover and tighten it by screw. Picture 6-9: Installation of Bearing and Blade Rest 4 6.4.2 Installation of Blade Rest Shaft (This lnstallation illustration is only suitable for SG-30) 1) Lock up the left, right, front and back block of cutting chamber by screw, then... -
Page 41: Installation Of Material Fender(This Lnstallation Illustration Is Only Suitable For Sg-23)
Picture 6-10:Installation of Bearing and Blade Rest 6.4.3 Installation of material fender(This lnstallation illustration is only suitable for SG-23) Put the blades stand vertically first as well as lay the shaft sleeve level on the blade rest shaft. Next, put a sleeve which fits the inner hole over the shaft sleeve and then pressing the shaft sleeve in by using the oil press or slightly beating it into by using copper bar. -
Page 42: Installation Of Bearing Block And Bearing
6.4.4 Installation of Bearing Block and Bearing Clean up the internal holes of bearing block. There should not be any scrap iron or sundries. Turn the bearing block over to make its back side upward and then slightly beat the oil seal in and spread lubricating grease onto it. After finishing that, the bearing can be put into the bearing block smoothly by using the oil seal to press it in or using the copper bar to beat it in. -
Page 43: Installation Of Screen, Screen Bracket And Storage Box
block up with screws. 5) Lock the bearing cover well and put bolts into key grooves. 6) Set the big belt pulley on the shaft and install the locing ring. And then tighten the locking ring after using dial gauge to adjust the big belt pulley. 7) Install the motor and position-adjusting plate on motor fixing plate (don’t tighten them up) 8) Use level ruller to adjust the level of large and small pulley and then lock it... -
Page 44: Installation Of Feed Box And Feed Port
6.7 Installation of Feed Box and Feed Port 1) Lift up the feed box to level with the cutting chamber and then fix it with an iron bar. 2) Mount the pneumatic connecting bar at the right side of feed box. 3) Lock the feed box and the cutting chamber with star knobs. -
Page 45: Picture 6-17: Installation Of Rotary Blade And Fixed Plate (4)
Picture 6-17: Installation of rotary blade and fixed plate (4) Note! Srew specifications for rotary blades: inner hexagon M10 x 40 for SG-23 while M14 x 50 for SG-30; intensity: 12.9. Srew specifications for fixed blades: inner hexagon M8 x 30 for SG-23 while M8 x 30 for SG-30;... -
Page 46: Maintenance Schedule
6.9 Maintenance Schedule 6.9.1 About the Machine Model: Manufacturing date: Ф Voltage: Frequency: Total power: 6.9.2 Check after Installation Check if the feed box, screen bracket and storge box are locked tight. Check the clearance between fixed blade and rotary blade (0.2~0.3mm). Check the dynamic balance of belt pulley. -
Page 47: Check Half-Yearly Or Every 1000 Running Hours
Check the delay function of feeding motor. Check the overload protection function of the motor. Check the tightness of the blades. Check whether the belt pulley clamp is tight. Check belt tension. 6.9.6 Check Half-yearly or Every 1000 Running Hours Check the lubrication of bearing, motor and hopper shaft.
Need help?
Do you have a question about the SG-23 and is the answer not in the manual?
Questions and answers