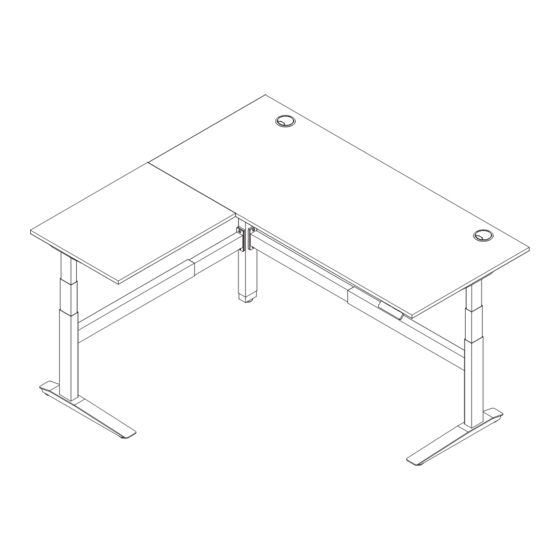
fully Jarvis Assembly Instructions Manual
L-shaped standing desk
Hide thumbs
Also See for Jarvis:
- Installation manual ,
- Assembly instructions manual (29 pages) ,
- Quick start manual (9 pages)
Summary of Contents for fully Jarvis
- Page 1 Jarvis L-shaped standing desk Assembly instructions For assembly assistance, visit fully.com/instructions, contact us at 888-508-3725 or support@fully.com...
- Page 2 Thank you for choosing a Jarvis desk from Fully.
-
Page 3: Custom Settings
Cautions and use Contact Before starting Specs In the box Assembly Initial calibration & reset Custom settings Using your own desktop... - Page 4 Make sure the desktop is not touching any obstacles or walls This Jarvis desk is adjustable so it can be positioned at an and that no obstacles are in the desk’s path. Make sure all optimal ergonomic height.
- Page 5 Before starting On a padded or carpeted area, take all of the items out of your Jarvis frame box and confirm that nothing is missing. Reference the included parts listings on page 6. Using your own desktop If you are using your own desktop, refer to page 16 for instructions before beginning assembly.
- Page 6 Parts Box 1 Right Side Bracket Side Leg x2 Foot x2 Left Side Bracket Memory Handset Control Box Leg Cable x2 Power Cable Box 2 Frame End Frame End with Capture Corner Frame End-A Corner Frame End-B Plate Center Rail x4 Corner Leg Center Rail Support Corner Bracket...
- Page 7 Desktop boxes(2) Large Desktop Small Desktop Desktop Screw x16 (Extra) *Not to scale...
- Page 8 Lay the two pieces of your desktop down on a padded surface (tops down) as shown in the image that matches how you want your desk positioned. Next, decide whether you want the Memory Handset on your right or left. (The Handset placed on your left during assembly will be on the right once the desk is flipped over, and vice versa.) The following instructions show the assembly of a desk as shown in configuration 2 below: the smaller desktop will be on the left, and the Handset will be on the right (mounted to the larger desktop).
- Page 9 4 mm 4 mm...
- Page 10 4 mm 4 mm...
- Page 11 4 mm 4 mm...
- Page 12 4 mm...
- Page 13 Use black screws with bamboo work surfaces. Use silver screws with all other work surfaces. Use wood screws if you have your own desktop.
- Page 14 Use black screws with Use silver screws with Use wood screws if you bamboo work surfaces. all other work surfaces. have your own desktop.
- Page 15 Use black screws with Use silver screws with Use wood screws if you bamboo work surfaces. all other work surfaces. have your own desktop.
- Page 16 Tighten pre-installed screws Skipping this step will result in stability issues. 3 mm 5 mm...
- Page 17 Tighten pre-installed screws Skipping this step will result in stability issues. 3 mm...
- Page 20 4 mm...
- Page 21 Initial calibration & reset Before you start using your Jarvis, you’ll need to get all the parts synced. Don’t worry — it’s easy. Programmable Memory Handset Press and hold the icon until Jarvis reaches its lowest position. Release. ...
- Page 22 Choose from 3 different brightness levels to help you Max height navigate through your presets and menu options. If you want to limit how high your Jarvis can go, set a Max height limit. Simply raise Jarvis to the desired maximum Memory preset mode height and navigate to Max height on the menu, then press ‘1’...
- Page 23 Most L-shaped desktops will consist of 2 pieces: a large “main” top and a smaller “return” top on one side. Large “Main” Top The Jarvis L-shaped frame accommodates a large main top of 27” to 33” deep and 54.25” to 82” wide. Small “Return” Top The dimension limits for the smaller top are a little trickier, since they’ll depend on the size and shape of your larger top.
- Page 24 Laying it out The easiest way to accurately position the Frame on the Top is to use the Frame as a guide: Attach the Side Brackets and Corner Bracket to their 4. Slide the Center Rails into the open Frame End from the appropriate Frame Ends (without the lifting columns).
- Page 26 Everything you need to find your work flow version 40000492V.C...


Need help?
Do you have a question about the Jarvis and is the answer not in the manual?
Questions and answers