fully Jarvis Assembly Instructions Manual
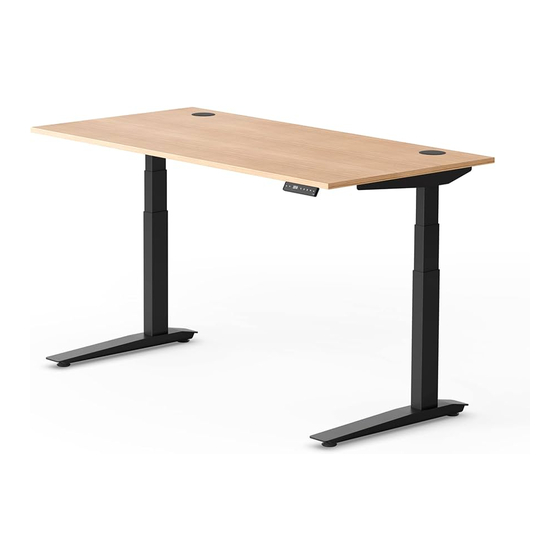
Conference table
Hide thumbs
Also See for Jarvis:
- Assembly instructions manual (29 pages) ,
- Quick start manual (9 pages) ,
- Assembly and use instructions (8 pages)

Related Manuals for fully Jarvis


Summary of Contents for fully Jarvis
- Page 1 Jarvis conference table Assembly instructions For assembly assistance, visit fully.com/howtojarvis or call 888-508-3725 or email support@fully.com...
- Page 2 Thank you for choosing a Jarvis conference table from Fully.
-
Page 3: Table Of Contents
Cautions and use Before starting In the box Assembly Setup Custom settings Troubleshooting Reset procedure Specs Contact... -
Page 4: Before Starting
All rights reserved. Before starting On a padded or carpeted area, take all of the items out of your Jarvis conference table frame boxes, and confirm that nothing is missing. Reference the included parts listings on page 2. Pro tip... - Page 5 In the box frame parts Frame End Center Rail Support Side Bracket Center Rail Foot Rail Support Short Foot Rail Leg Connector Long Foot Rail Foot Rail Corner Left Leg Right Leg electric parts Leg Cables Control Box Memory Handset Power Cable hardware Long Machine Screw...
-
Page 6: Assembly
Assembly step 1 Left Leg Frame End Short Machine Screw Insert a Frame End into a Left Leg. Secure the Frame End to the Leg by threading four (4) Small Machine Screws into the holes, but do not tighten them all the way. - Page 7 step 2 Frame End Right Leg Short Machine Screw Insert a Frame End into a Right Leg. Secure the Frame End to the Leg by threading four (4) Short Machine Screws into the holes as shown, but do not tighten them all the way. Once all four screws are in place, tighten completely.
- Page 8 step 3a Left and Right Leg Assemblies Leg Connector Socket Head Machine Screw x8 Using four (4) Socket Head Machine Screws, use a Leg Connector to join the Left Leg Assemblies. Do not completely tighten the screws yet. Repeat these with the other Leg Connector to join the Right Leg Assemblies.
- Page 9 step 4 Step 3 Assemblies Side Bracket Short Machine Screws Using four (4) Short Machine Screws, attach a Side Bracket to the back of the one of the Leg Assem- blies. Do not completely tighten the screws yet. Repeat this step to connect the other Side Bracket to the other Leg Assembly.
- Page 10 step 5 Long Foot Rail Foot Rail Support Short Machine Screws Slide two (2) Foot Rails into the Foot Rail Support and connect each one with a short machine screw.
- Page 11 step 6 Foot Rail Assembly Short Machine Screws Attach the Foot Rail Assembly to one of the Leg Assemblies using four (4) Short Machine Screws. Once all screws are in place, tighten them com- pletely. This assembly should now be able to stand on its own.
- Page 12 step 7 Center Rail Leg w/ Foot Rail Assembly Center Rail Support Slide two (2) Center Rails into each of the Frame Ends on the Leg and Foot Rail Assembly. Each pair of Center Rail should be oriented so that the cut-out slots face each other, and are closer to the bottom. Slide a Center Rail Support onto each pair of Center Rails.
- Page 13 step 9 Long Foot Rail Short Machine Screws Slide the remaining two (2) Long Foot Rails into the Foot Rail Support. Using six (6) Short Machine Screws, secure the Long Foot Rails to the Foot Rail Support and the Leg Assembly. Once all screws are in place, tighten them completely.
- Page 14 step 10 Foot Rail Corner Short Foot Rail Thick Machine Screw Attach two (2) Foot Rail Corners to both sides of a Short Foot Rail, using four (4) Thick Machine Screws. Repeat to attach the other two (2) Foot Rail Corners to the remaining Short Foot Rail. Do not tighten screws completely yet.
- Page 15 step 12 Short Machine Screw Double check to make sure all four (4) Foot Rails are tightened in place and that the “Middle Mark” on the Center Rails is spaced evenly between the Leg Assemblies. Use eight (8) Short Machine Screws to secure the Center Rail Support to the Center Rails.
- Page 16 13 Double check that all of the screws on the table are fully tightened (except the Center Rail screws from Step 11). step 14 Table Top Wood Scew With a friend (or a few), lift the Table Top and place it on the Table Assembly.
- Page 17 step 16 Control Box Memory Handset Wood Scew Choose a central spot to mount your control box and handset, making sure that your Leg Cables will reach each leg from the Control Box. See the exam- ple on this page and page 15 showing one possible way to orient your electrical components.
- Page 18 step 17 Power Cable Leg Cables Connect the Table Legs to the Control Box with the Leg Cables, using sockets labeled M1, M2, M3 and M4. Connect the Handset to the Control Box using the sock- et labeled HS. Connect the Power Cable to the Control Box using the socket labeled AC.
-
Page 19: Setup
Setup Initial calibration Before you start using your conference table normally, you’ll need to get all the parts synced. Don’t worry, it’s easy. 1. Press and hold the DOWN button until the display reads RST (looks like “ASΓ”). Release. 2. Press and hold the DOWN button again, this time until the table first lowers slightly, then rises slightly, and finally stops. - Page 20 Set custom upper and lower height limits By default, the Jarvis conference table and handset are set to allow the maximum range of motion, from a fully retracted Lifting Column, to a fully extended one. If you would like to set a higher minimum height, or a lower maximum height, you can do that! Before starting, make sure the table is plugged in, and the LED display is showing a number.
- Page 21 A note regarding the anti-collision feature The Jarvis conference table is programmed with an automatic collision detection system: If your table is in mo- tion, and it detects that it has run into a stationary object, it will automatically stop moving, pause briefly, and then move about one inch in the opposite direction before halting completely.
-
Page 22: Troubleshooting
Fully. If there is a difference in height between the legs that exceeds 1.5”, stop the reset procedure and contact Fully. If the Memory Preset Handset displays “HOT”, let the table cool down for 20 minutes. Reset procedure CAUTION: this will override any custom lower limit you might have set! Please ensure proper clearance for the Legs to retract fully. -
Page 23: Specs
1.5” per second Operating noise <50dB w/o top Load capacity 200kg Duty cycle and additional info 10% with max 2 mins on, 18 mins off Soft start/stop Adjustable Leveling Glides 4 Memory Presets Contact Fully Portland, Oregon 97214 888-508-3725 support@fully.com www.fully.com... - Page 24 Desks, chairs & things to keep you moving version 90.014.01.0531v.c...
Need help?
Do you have a question about the Jarvis and is the answer not in the manual?
Questions and answers