
Subscribe to Our Youtube Channel
Related Manuals for Southern States ESD63


Summary of Contents for Southern States ESD63
- Page 1 Type ESD63 Aluminum Grounding Switch 72.5 kV – 245 kV 350 kV – 900 kV BIL INSTALLATION & INSTRUCTION MANUAL...
- Page 2 Page I The Quality Name in High Voltage Switching...
- Page 3 Page II The Quality Name in High Voltage Switching Safety Information...
- Page 4 The purchaser (“Purchaser”) of certain Equipment (the “Equipment”) identified in the Instruction Manual accompanying these Terms of Use sold by Southern States, LLC (“Southern States”), by Purchaser’s acceptance or Use of Equipment in any way, agrees to the Terms of Use set forth below (the word “Use” herein means receipt, testing, inspection, installation, operation, maintenance and...
- Page 5 The Quality Name in High Voltage Switching LIMITED WARRANTY Southern States, LLC (“SSLLC”) warrants only to the Warranty Holder (hereinafter defined as the “End User” or the “Immediate Purchaser”, as applicable, pursuant to the terms and conditions of this Limited Warranty as set forth below), that the Product identified below will, upon shipment, be free of defects in workmanship and material for the applicable Warranty Period.
- Page 6 Page III The Quality Name in High Voltage Switching...
- Page 7 Page IV The Quality Name in High Voltage Switching Type ESD63 Aluminum Maintenance Ground Switch 72.5 kV – 245 kV...
-
Page 8: Table Of Contents
Page V The Quality Name in High Voltage Switching Table of Contents Chapter Page List of Tables and Figures ........................ VI Summary & Introduction ........................1 Important ................................1 Summary ................................1 Introduction ................................ 2 Recommended Tools & Values ......................... 3 Product Description ........................... -
Page 9: List Of Tables And Figures
Table 2: Recommended Installation and Maintenance Table ................15 Figures Page Figure 1: Typical ESD63 Disconnect Switch & Common Terminology ..............4 Figure 2: Ground Support Saddle ......................... 6 Figure 3: Perpendicular to Base ........................... 7 Figure 4: Ground Braids / Hinge ........................... 7 Figure 5: Jaw Contact ............................ -
Page 10: Summary & Introduction
The sales contract contains the entire obligation of Southern States. The Warranty contained in the contract between the parties is the sole warranty of Southern States. Any statements contained herein do not create new warranties or modify the existing warranty. -
Page 11: Introduction
Summary & Introduction Introduction Southern States type ESD63 ground switch is typically shipped mounted and adjusted on line switch whenever line switch is assembled with its insulators. Depending upon shipping constraints, sometimes this will not be the case and some assembly and adjustment will be required. -
Page 12: Recommended Tools & Values
Page 3 of 21 Summary & Introduction Recommended Tools & Values Table 1: Recommended Tools and Torque Values Recommended Tools Recommended Torque Values Type Sizes Bolt/Nut size Torque (Ft-lb) 15/16”, 3/4", Hand Wrenches and/or Sockets 1/2” 5/8”, 9/16” Drill Bit 1/4”... -
Page 13: Product Description
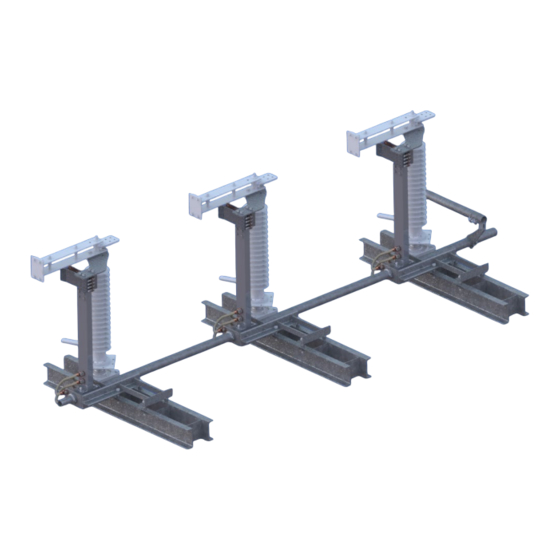
Mounting the switch base to the structure Installing operating components • • Final adjustment or tuning is then completed. A – Jaw D – Hinge Support B – Blade E – Hinge Shunts C – Hinge Figure 1: Typical ESD63 Disconnect Switch & Common Terminology... -
Page 14: Receiving, Handling & Storage
Storage All components of the ESD63 maintenance ground switch are suitable for outdoor use and do not have any special storage requirements. If a motor operator is furnished be sure to connect the heater circuit, using the provided external wiring, while the unit is in storage. -
Page 15: Installation & Adjustment Procedures
Page 6 of 21 Installation & Adjustment Procedures Installation & Adjustment Procedures Assembly 1. Preferred Switch Assembly Method 1.1. If the disconnect is shipped assembled on insulators with ground switch support bracket and jaw installed do not remove the shipping supporting straps or stops and install the switch on the structure. - Page 16 Page 7 of 21 Installation & Adjustment Procedures 1.7. Perpendicular to base installations 1.7.1. Attach the ground support saddle to the base mounting bracket. 1.7.2. Slide the pipe through the support saddle and pipe collars on both sides. 1.8. In the open position install the ground blade with the tapered end of the blade tip toward the jaw. Loosely attach the blade clamps on the pipe.
-
Page 17: Contact Alignment
Page 8 of 21 Installation & Adjustment Procedures Figure 5: Jaw Contact 2. Contact Alignment 2.1. Carefully, lift the blade manually by hand confirming the blade tip is centered in the jaw (Figure 5) and the leading tapered edge is vertically in line with the jaw opening. If correct tighten the blade clamps and any loose hardware on the jaw mounting, proceed to the next phase until all are complete. - Page 18 Page 9 of 21 Installation & Adjustment Procedures Figure 6: Vertical Pipe Rotation 3.1.1.3. If provided, pay close attention to the dimensions shown on the drawings for the initial setup of the lever drive arm shown on the drawings (marked with an “A” in the Figure 11).
-
Page 19: Switch Adjustments (Tuning)
Page 10 of 21 Installation & Adjustment Procedures 4. Switch Adjustments (Tuning) 4.1. The operating mechanism is intended to fully open and fully close the disconnect switch by rotating the vertical operating pipe 180 ± using an operator (manual or electrical). interphase pipe controls the individual operation of each switch pole, using a push/pull control. - Page 20 Page 11 of 21 Installation & Adjustment Procedures 4.2.2. Worm gear operator (SEGO – Safety Enhanced Gear Operator) (Optional) 4.2.2.1. The weight of the vertical operating pipe should be supported by pipe collar by maintaining the 1/4”-3/8” gap. 4.2.2.2. When the switch is properly adjusted the operator handle should hang freely in both the open and closed positions to permit the use of the customer supplied padlock.
- Page 21 Page 12 of 21 Installation & Adjustment Procedures Figure 10: Perpendicular to the Base Figure 11: Parallel to the Base...
-
Page 22: Operating Mechanism Adjustment
Page 13 of 21 Installation & Adjustment Procedures 5. Operating Mechanism Adjustment: 5.1. All grounding switch poles should be open as well as the line switch. 5.2. When adjusting the ground switch, it is best to adjust the driven phase only if possible. 5.2.1. - Page 23 Page 14 of 21 Installation & Adjustment Procedures 5.4. Close switch. The adjustable arm should travel 180° from toggle open to toggle closed position. 5.4.1. If the adjustable arm rotates 180° and is not fully closed, the radius of the adjustable arm is too short or something has slipped.
-
Page 24: Recommended Inspection Maintenance
Recommended Inspection Maintenance Recommended Inspection Maintenance The ESD63 has been designed to operate with minimal maintenance. Periodic inspection is important for satisfactory operation. Frequency of inspection and maintenance depends on the installation site, weather and atmospheric conditions, experience of operating personnel and special operation requirements. -
Page 25: Patrolling Inspection (6 Months)
Page 16 of 21 Recommended Inspection Maintenance Patrolling Inspection (6 Months) The patrolling inspection is a largely visual inspection on an energized unit in service. The frequency of the inspection is determined by the local conditions and policies of the owner of the equipment. Refer to Table 2 for recommended inspection items. - Page 26 30 Georgia Avenue Hampton, Georgia 30228 Phone: 770-946-4562 Fax: 770-946-8106 E-mail: support@southernstatesllc.com http://www.southernstatesllc.com ©2022 Southern States, LLC IB-306-ESD63-R0 01312022 Printed U.S.A.
Need help?
Do you have a question about the ESD63 and is the answer not in the manual?
Questions and answers