Advertisement
Available languages
Available languages
Quick Links
Guangdong Midea Environment Appliances Manufacturing CO.,LTD.
No. 28, East Area, Hesui Industrial Park, Dongfu Rd.,Dongfeng Town,
Zhongshan City, Guangdong, China
Web Site:global.midea.com.cn
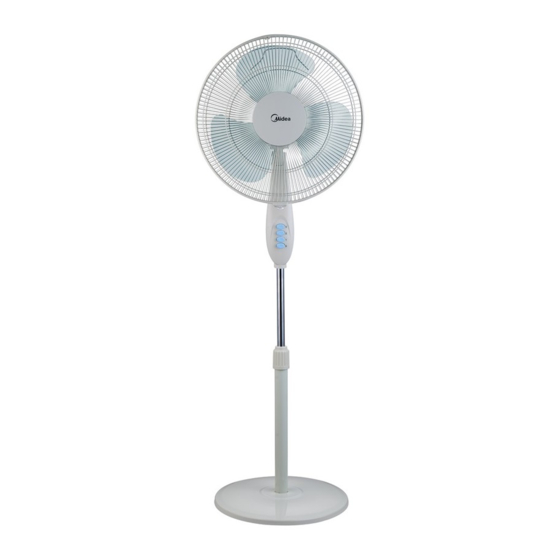
Electric Fan
OWNER'S MANUAL
16" Stand Fan
MODEL: MF-16FS12P
English
Mandarin
中文
READ AND SAVE THESE INSTRUCTIONS
MIDEA.COM | 4008899315
Advertisement

Related Manuals for Midea MF-16FS12P


Summary of Contents for Midea MF-16FS12P
- Page 1 OWNER’S MANUAL 16" Stand Fan MODEL: MF-16FS12P English Mandarin 中文 Guangdong Midea Environment Appliances Manufacturing CO.,LTD. No. 28, East Area, Hesui Industrial Park, Dongfu Rd.,Dongfeng Town, READ AND SAVE THESE INSTRUCTIONS Zhongshan City, Guangdong, China MIDEA.COM | 4008899315 Web Site:global.midea.com.cn...
-
Page 2: Rules For Safe Operation
CAUTION Read Rules for Safe Operation and Instructions Carefully. WARNING 1. If the supply cord is damaged, it must be replaced by manufacturer or its service agent or a similarly qualified person in order to avoid a hazard. 2. To protect against the risk of electrical shock, do not immerse the unit, cord or plug in water or other liquid. - Page 3 PART FIGURE Front grill Circlip Fan blade Rear grill Motor shaft Plastic nut Clutch knob Motor housing Grill Clip Piano switch Thumb screw Tighten Internal Fasten pole Loosen Height adjustment Spinner Extension ring pole Chassis Note: All the pictures in this manual are for explanation purpose only.
-
Page 4: Grill & Fan Blade Assembly
Fig.1 Fig.2 Fig.3 Fig.4 Mounting hole Thumb screw Loose e n Annular groove GRILL & FAN BLADE ASSEMBLY 1. Unscrew the spinner clockwise (or take the spinner out from the bag) and the plastic nut counterclockwise to remove both of them. Fix the rear grill to the motor then tighten the plastic nut again. -
Page 5: Maintenance Instruction
MAINTENANCE INSTRUCTION The fan requires little maintenance. Do not try to fix it by yourself. Refer it to qualified service personnel if service is needed. 1. Before cleaning and assembling, fan must be unplugged. 2. To ensure adequate air circulation to the motor, keep vents at the rear of the motor free of dust. - Page 6 PERHATIAN Sila baca arahan-arahan keselamatan pengendalian dan penggunaan dengan teliti. AMARAN 1. Sekiranya kord kuasa sudah rosak, ia mesti diganti oleh pengilang atau ejen perkhidmatannya atau orang berkelayakan yang seumpamanya bagi mengelakkan sebarang kebahayaan. 2. Untuk menghindari risiko berlakunya kejutan elektrik, jangan rendamkan unit ini, kord atau plagnya di dalam air atau cecair yang lain.
- Page 7 GAMBARAJAH BAHAGIAN Penghadang Lingkaran Penghadang Bilah kipas Aci Motor hadapan penghadang belakang Nat plastik Tombol ayunan Penutup motor Klip penghadang Suis piano Tiang dalaman Pengetat Gegelang ketatkan pelaras ketinggian ketatkan longgarkan Tiang dalaman Tiang penyambung Tapak Nota: semua gambarajah dalam buku panduan ini hanya untuk tujuan penjelasan.
-
Page 8: Arahan Penggunaan
Gambarajah 1 Gambarajah 2 Gambarajah 4 Gambarajah 3 Lubang skru Skru ibu jari Alur Longgarkan PEMASANGAN PENGHADANG DAN BILAH KIPAS 1. Longgarkan pengetat mengikut arah ikut jam (atau keluarkan pengetat dari beg) dan nat plastik mengikut arah lawan jam masing-masing. Pasangkan penghadang belakang pada unit motor dan ketatkan semula nat plastik (Gambarajah 5). - Page 9 3. SELARASKAN KECONDONGAN Arah gerakan angin boleh diselaraskan secara ke atas atau ke bawah dengan melonggarkan tombol pelaras dan digerakkan pada sudut kecondongan yang dikehendaki, lepas itu ketatkan semula tombol dengan teguh. 4. SELARASKAN KETINGGIAN Longgarkan gegelang pelaras ketinggian untuk tinggikan atau turunkan tiang kipas, lepas itu ketatkan gegelang pada ketinggian yang dikehendaki.
- Page 10 注 意 事 项 1、如果电源软线损坏,为了避免危险,必须由制造商、 其维修部或类似部门的专业人员更换。 2、仅室内使用。 3、为避免触电,不要将器具、插头和电源线浸到水里 或其它液体里。 4、器具不能被有行为、感知或智力缺陷,或者缺乏经 验知识的人员(包括小孩)使用,除非他们被看管 或者有负责他们安全的人员给到了器具使用的讲解 说明。 5、器具不在使用时或清洁之前,应切断电源。 6、风扇安装之后,网罩不能再被拆卸。 7、 正确处置产品 该标识表示产品在欧盟地区不能和其他家用 废物一起处置。 为了防止废物管理没有管控而导致 可能的对环境和人体健康的伤害,有责任回收产品 确保物质资源可持续再利用。为了回收使用过的器 具,请使用回收系统或联系经销商,以便产品回收 符合环保要求。...
- Page 11 前网罩 网箍 网罩索母 电机轴 风叶 摇头抽钮 电机 琴键开关 紧 紧固螺钉 网扣 后网罩 松 紧 风叶索母 内外立柱管 外接头 底盘 “7”字螺栓 注:安装时请以实物为准,图解仅供参考。 一、扇体部分 1.从包装纸箱中取出底盘和内外立柱管总成,拧下立柱管底部的七字形螺栓。(如图一所示) 2.将立柱管底部对准底盘中心槽,按图拧紧七字形螺栓并拧紧。(如图二所示) 3.旋松外接头,将内立柱管调整到适当高度(注意,如果没有发现内立柱管,内立柱管应该滑 落到外立柱管里面,可以从外立柱管内拔出来),旋紧外接头。(如图三所示) 4.旋松机身底部紧固螺钉,将机身部分套在内立柱管上,使螺钉对正内立柱管顶部的环形凹槽 ,然后拧紧紧固螺钉。(如图四所示)...
- Page 12 图一 图二 图三 图四 二、网罩和风叶部分装配 1.装后网罩: 从电机轴前端旋下风叶索母和网罩索母,然后装上后网罩,再装回网罩索母并且旋紧。(如图五所 示) 2.装风叶: 先将风叶后面的凹槽卡在电机轴的限位销上,然后逆时针旋紧风叶索母。(如图六所示) 3.装前网罩: 装前网罩时,先把网箍上的螺钉拧下,把前网罩的装饰环摆正,让前后网罩对齐,再将后网罩 的外环扣在网箍内槽中,扣上网扣,最后拧紧螺钉即可。(装前网罩方式如图七所示;网箍结 构如图八所示) 网扣 螺钉 图五 图六 图七 图八...
- Page 13 一、风扇运转 按动琴键开关,可以开停风扇和选择风速。(如图九所示) 图九 0--停止 1--低速 2--中速 3--高速 二、左右摇头 需要风扇摇头送风时,应把摇头抽钮向下按。如果需要定向送风,只要把摇头抽钮向上提起即 可。 三、高度调节 旋松外接头,将内立柱管调整到适当高度,旋紧外接头。(如图三所示) 四、俯仰送风 调节风扇向上或向下送风时,可轻提或轻按机头或网罩部分进行调整。...
- Page 14 注 意 事 项 保 养 方 法...
Need help?
Do you have a question about the MF-16FS12P and is the answer not in the manual?
Questions and answers