Table of Contents
Advertisement
Available languages
Available languages
Quick Links
STAND FAN
USER MANUAL
MFS400R0APH
MFS400R0APW
Warning notices: Before using this product, please read this manual carefully and keep it for future reference.
The design and specifications are subject to change without prior notice for product improvement.
Consult with your dealer or manufacturer for details.
The diagram above is just for reference. Please take the appearance of the actual product as the standard.
Advertisement
Chapters
Table of Contents

Related Manuals for Midea MFS400R0APH


Summary of Contents for Midea MFS400R0APH
- Page 1 STAND FAN USER MANUAL MFS400R0APH MFS400R0APW Warning notices: Before using this product, please read this manual carefully and keep it for future reference. The design and specifications are subject to change without prior notice for product improvement. Consult with your dealer or manufacturer for details.
- Page 3 English German LANGUAGES Italian France...
-
Page 4: Table Of Contents
THANK YOU LETTER Thank you for choosing Midea! Before using your new Midea product, please read this manual thoroughly to ensure that you know how to operate the features and functions that your new appliance offers in a safe way. -
Page 5: Safety Instructions
SAFETY INSTRUCTIONS Intended Use The following safety guidelines are intended to prevent unforeseen risks or damage from unsafe or incorrect operation of the appliance. Please check the packaging and appliance on arrival to make sure everything is intact to ensure safe operation. If you find any damage, please contact the retailer or dealer. - Page 6 Caution Read rules for safe operation and instructions carefully. ● This appliance can be used by children aged from 8 ● years and above and persons with reduced physical, sensory or mental capabilities or lack of experience and knowledge if they have been given supervision or instruction concerning use of the appliance in a safe way and understand the hazards involved.
- Page 7 Warning If the supply cord is damaged, it must be replaced by ● manufacturer or its service agent or a similarly qualified person in order to avoid a hazard. To protect against the risk of electrical shock, do not ● immerse the unit, cord or plug in water or other liquid.
-
Page 8: Specifications
56,55 level Maximum air meters/sec 2,94 velocity Seasonal electricity kWh/a 13,24 consumption Measurement standard EN IEC 60879:2019 for service value Contact details for Midea Italia S.rl. a socio unico Viale Luigi Bodio 29/37 20158 obtaining more Milano Italia midea.com/it information... -
Page 9: Product Overview
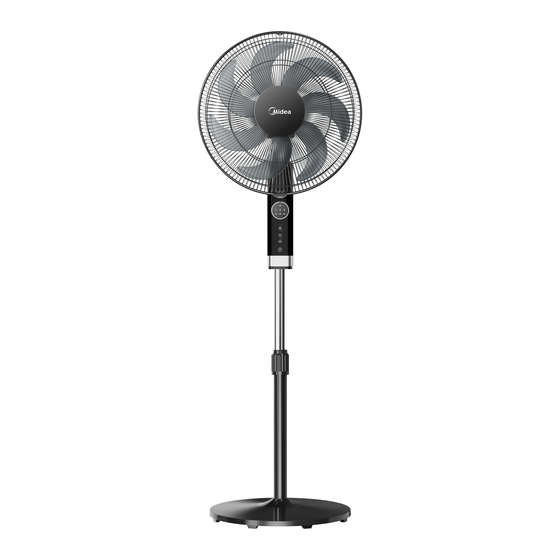
PRODUCT OVERVIEW Component Name Motor Rear Grill Plastic Nut Tighten Knob Spinner Pole Blade Chassis Front Grill 7-shaped screw NOTE All the pictures in this manual are for explanation purpose only. Any discrepancy between the real object and the illustration in the drawing shall be subject to the real subject. Remove parts from the component before performing installation. -
Page 10: Product Installation
PRODUCT INSTALLATION Installation Procedures NOTE Before installation, first remove 7-shape screws from the pole, remove the Spinner and Plastic nut from the motor shaft, and then install. 1 Chassis installation Align the lower pole and the chassis, and then fasten securely with chassis screws. Clockwise 2 Pole installation 2.1 Pull out and fix the internal pole (column) after adjusting the height by way of... - Page 11 4 Installation of Plastic Nut Screw clockwise the plastic nut tightly to fasten the rear grill. Clockwise 5 Blade installation After the installation of blade, rotate the blade with your finger to make sure the blade works normally. Clockwise 6 Spinner installation Screw counterclockwise the spinner tightly, and then install the front grill.
- Page 12 7 Installation of Front Grill 7.1 From top to bottom align the clips of the front grill with the uppermost mesh of the rear grill. After the alignment is correct, look from back to front according to the diagram. Mesh Clip Mesh Clip...
-
Page 13: Operation Instructions
OPERATION INSTRUCTIONS Operating Instructions Of The Machine Body Natural wind indicator Wind speed indicator Timing display lamp Wind speed Swing Timer ON/OFF Button Function description The key is for switching on the fan. The fan will be started ● ON/OFF KEY at low speed. - Page 14 Remote Controller • The remote control should be normally used within 5 meters of the front of the product and 30 degrees of the deviation angle. • The battery contains many heavy metals, acids and bases, etc., which may threaten human’s health;...
- Page 15 Batteries Installation Battery not included in the packaging 1 Slide the battery compartment cover. Fig 1 2 Insert the batteries, and make sure that the batteries are placed as shown in the Fig 2. Fig 2 3 Slide back the battery cover. Fig 3 NOTE •...
-
Page 16: Cleaning And Maintenance
CLEANING AND MAINTENANCE The fan requires minimal maintenance. Do not try to fix it by yourself. Refer it to qualified service personnel if service is needed. Before cleaning and assembling, unplug the fan power. To ensure adequate air circulation to the motor, keep vents at the rear of the motor free of dust. -
Page 17: Troubleshooting 1
TROUBLESHOOTING Operation of your appliance can lead to errors and malfunctions. The following tables contain possible causes and notes for resolving an error message or malfunction. It is recommended to read the table below carefully in order to save your time and money that may cost for calling to the service center. -
Page 18: Trademarks, Copyrights And Legal Statement
Midea may constitute trademark infringement or unfair competition in violation of relevant laws. This manual is created by Midea and Midea reserves all copyrights thereof. No entity or individual may use, duplicate, modify, distribute in whole or in part this manual, or bundle or sell with other products without the prior written consent of Midea. -
Page 19: Disposal And Recycling
DISPOSAL AND RECYCLING Important instructions for environment Compliance with the WEEE Directive and Disposing of the Waster Product: This product complies with EU WEEE Directive (2012/19/EU). This product bears a classification symbol for waster electrical and electronic equipment (WEEE). This symbol indicates that this product shall not be disposed with other household wastes at the end of its service life. -
Page 20: Data Protection Notice 1
European Economic Area. Further information are provided on request. You can contact our Data Protection Officer via MideaDPO@midea.com. To exercise your rights such as right to object your personal date being processed for direct marketing purposes, please contact us via... -
Page 21: Warranty / Service
Midea branded products (hereinafter referred to as the "Products") marketed by Midea itself in the territory of the Italian Republic (with the exclusion of the territory of the city of Venice and the smaller islands), in the territory of the Republic of San Marino and in the territory of the Vatican City, when installed and used in the same states and territories (hereinafter referred to as the "Territory") and when accompanied by the present Conventional Warranty Certificate (hereinafter referred to as the "CWC"). - Page 22 Warranty certificate Midea would like to thank you for purchasing one of its products. Please keep this document with your proof of purchase. The warranty has a duration of �� months from the date shown on the purchase document. Our Customer Service is at your disposal for product reports and requests for information. To contact customer service and possible: �...
- Page 23 VIELEN DANK Danke, dass Sie sich für Midea entschieden haben! Bitte lesen Sie die Bedienungsanleitung vor der Nutzung Ihres neuen Midea-Produkts sorgfältig durch, um sich mit dem ordnungsgemäßen und sicheren Gebrauch des Geräts vertraut zu machen. INHALTSVERZEICHNIS VIELEN DANK SICHERHEITSHINWEISE TECHNISCHE DATEN PRODUKTÜBERSICHT...
-
Page 24: Sicherheitshinweise
SICHERHEITSHINWEISE Bestimmungsgemäßer Gebrauch Die nachfolgenden Sicherheitsinformationen dienen dazu, unvorhersehbare Risiken oder Schäden aufgrund einer unsicheren oder inkorrekten Anwendung des Geräts zu vermeiden. Bitte überprüfen Sie nach dem Erhalt die Verpackung und das Gerät, um sich davon zu überzeugen, dass das Gerät in einwandfreiem Zustand ist und so ein sicherer Betrieb gewährleistet werden kann. - Page 25 Vorsicht • Lesen Sie die Sicherheitshinweise und Anleitungen sorgfältig durch. • Dieses Gerät ist geeignet für den Gebrauch durch Kinder ab 8 Jahren sowie durch Personen mit eingeschränkten körperlichen, sensorischen oder geistigen Fähigkeiten oder ohne Erfahrung und Kenntnisse, sofern sie beaufsichtigt oder hinsichtlich der sicheren Nutzung des Geräts angeleitet werden und die damit einhergehenden Gefahren verstehen.
- Page 26 Warnung • Ein beschädigtes Netzkabel muss vom Hersteller, dessen Kundendienst oder einer ähnlich qualifizierten Fachkraft ersetzt werden, um Gefahrensituationen zu vermeiden. • Um Gefahren durch Stromschläge zu vermeiden, dürfen das Gerät, dessen Kabel und der Stecker nicht in Wasser oder andere Flüssigkeiten getaucht werden. •...
-
Page 27: Technische Daten
Standby Energieverbrauch im ausgeschalteten Zustand 56,55 dB(A) Schallleistungspegel Maximale 2,94 Meter/Sek. Luftgeschwindigkeit Saisonaler 13,24 kWh/a Energieverbrauch Messnorm für EN IEC 60879:2019 Servicewert Kontaktdaten Midea Italia S.rl. a socio unico Viale Luigi Bodio 29/37 20158 für weitere Milano Italia midea.com/it Informationen... -
Page 28: Produktübersicht
PRODUKTÜBERSICHT Teilebezeichnung Motor Hinteres Schutzgitter Kunststoff- Feststell- mutter schraube Drehmutter Stange Flügel- blätter Sockel Vorderes Schutzgitter L-förmige Schraube HINWEIS Die Abbildungen in dieser Anleitung dienen nur der Veranschaulichung und können vom tatsächlichen Produkt abweichen. Entfernen Sie vor der Installation die entsprechenden Komponenten. -
Page 29: Installation
INSTALLATION Installationsschritte HINWEIS Entfernen Sie zunächst die L-förmigen Schrauben von der Stange sowie die Drehmutter und die Kunststoffmutter, bevor Sie mit der Installation beginnen. 1 Sockel installieren Richten Sie die untere Stange und den Sockel miteinander aus und verbinden Sie beide Teile mit den Schrauben des Sockels. - Page 30 4 Kunststoffmutter installieren Drehen Sie die Kunststoffmutter im Uhrzeigersinn fest, um das hintere Schutzgitter zu sichern. Im Uhrzeigersinn 5 Flügelblätter installieren Befestigen Sie die Flügelblätter und drehen Sie diese dann mit Ihrem Finger, um sich über deren ordnungsgemäßen Gebrauch zu vergewissern. Im Uhrzeigersinn 6 Drehmutter installieren Drehen Sie die Drehmutter entgegen dem Uhrzeigersinn fest und installieren Sie dann...
- Page 31 7 Vorderes Schutzgitter installieren 7.1 Richten Sie die Clips des vorderen Gitters von oben nach unten beginnend mit der obersten Strebe des hinteren Gitters aus. Verriegeln Sie die Clips nach der korrekten Ausrichtung von hinten nach vorn; siehe Abbildung. Strebe Clip Strebe Clip...
-
Page 32: Gebrauch 1
GEBRAUCH Tasten und Funktionen Anzeige Natürlicher Wind Anzeige Windgeschwind- Timer-Anzeige igkeit Windgeschwindigkeit Oszillation Timer EIN/AUS Taste Funktion • Mit dieser Taste schalten Sie das Gerät ein. Das Gerät startet EIN/AUS mit niedriger Geschwindigkeit. Durch erneutes Drücken schalten Sie das Gerät wieder aus. •... - Page 33 Fernbedienung • Die Fernbedienung hat eine Reichweite von 5 Metern zur Vorderseite des Geräts sowie einen Winkelbereich von 30 Grad. • Die Batterie enthält Schwermetalle, Säuren, Basen, usw., die gesundheitsschädlich sind. Die Batterie muss daher getrennt vom Hausmüll entsorgt werden. 3A Batterien, 1,5V Batterie Taste...
- Page 34 Batterien einlegen Batterie nicht im Lieferumfang enthalten 1 Öffnen Sie das Batteriefach durch Verschieben der Abdeckung. Abb. 1 Legen Sie die Batterien gemäß Abbildung 2 ein. Abb. 2 Installieren Sie dann wieder die Batteriefachabdeckung. Abb. 3. HINWEIS • Verwenden Sie Mangan- oder Alkalibatterien des Typs „AAA“. Warnhinweise für Batterien •...
-
Page 35: Reinigung Und Wartung 1
REINIGUNG UND WARTUNG Das Gerät muss nur geringfügig gewartet werden. Versuchen Sie nicht, es selbständig zu reparieren. Lassen Sie Reparaturen nur von qualifizierten Fachkräften durchführen. 1. Trennen Sie vor der Reinigung und Demontage das Gerät vom Netzstrom. 2. Um eine adäquate Luftzirkulation um den Motor herum zu gewährleisten, müssen die Belüftungsöffnungen an der Rückseite des Motors immer sauber sein. -
Page 36: Störbehebung 1
STÖRBEHEBUNG Während des Betriebs können Fehler oder Fehlfunktionen auftreten. In der nachfolgenden Übersicht finden Sie Informationen zu potenziellen Fehlfunktionen und darüber, wie diese verursacht und behoben werden können. Bitte lesen Sie diese Übersicht sorgfältig durch, um Zeit und Kosten für den Anruf des Kundendiensts zu sparen. Problem Ursache Solution... -
Page 37: Markenzeichen, Uhrheberrechte Und Rechtliche Hinweise
Midea Marken, Urheberrechte und andere geistige Eigentumsrechte besitzt, sowie sämtliche Vermögenswerte, die sich aus der Verwendung eines Teils einer Midea-Marke ergeben. Die Verwendung der Marke Midea für kommerzielle Zwecke ohne die vorherige schriftliche Zustimmung von Midea stellt eine Markenverletzung bzw. einen unlauteren Wettbewerb dar, der gegen die einschlägigen Gesetze verstößt. -
Page 38: Entsorgung Und Recycling
ENTSORGUNG UND RECYCLING Wichtige Hinweise Konformität mit der WEEE-Richtlinie zur Entsorgung von Altgeräten: Dieses Gerät entspricht der EU WEEE-Richtlinie (2012/19/EU). Auf dem Gerät befindet sich eine Kennzeichnung, die das Gerät als elektrisches bzw. elektronisches Gerät (WEEE) klassifiziert. Dieses Symbol weist darauf hin, dass das Produkt am Ende seiner Nutzungsdauer nicht über den normalen Haushaltsmüll entsorgt warden darf. -
Page 39: Datenschutzhinweise 1
Europäischen Wirtschaftsraums übermittelt werden. Für weitere Informationen wenden Sie sich bitte an unsern Datenschutzbeauftragten via MideaDPO@midea.com. Um Ihre Rechte auszuüben, wie z. B. das Recht, der Verarbeitung Ihrer personenbezogenen Daten für Direktmarketingzwecke zu widersprechen, kontaktieren Sie uns bitte via MideaDPO@midea.com. Weitere... - Page 40 Wir gratulieren Ihnen zu Ihrem neuen Gerät und sind überzeugt, dass Sie mit diesem modernen Gerät zufrieden sein werden und Ihre Freude daran haben. Wenn Sie jedoch einen Grund für eine Reklamation erkennen, nehmen Sie bitte Kontakt mit uns auf: Midea Europe GmbH Telefon: +49 6196-90 20 - 0 Kundendienst: Ludwig-Erhard-Str.
- Page 41 Schadenersatzansprüche, auch für Folgeschäden, sind ausgeschlossen, es sei denn, sie beruhen auf Vorsatz oder grober Fahrlässigkeit. Der Garantieanspruch besteht nur bei Vorlage des Produkts und des Kaufbelegs. Diese Garantie ist innerhalb Deutschlands gültig. Importiert durch: Midea Europe GmbH Ludwig-Erhard-Str. 14 65760 Eschborn Germany...
- Page 42 LETTERA DI RINGRAZIAMENTO Grazie per aver scelto Midea! Prima di utilizzare il nuovo prodotto Midea, leggere attentamente questo manuale per assicurarsi di sapere come utilizzare le caratteristiche e le funzioni offerte dal nuovo apparecchio in modo sicuro. INDICE LETTERA DI RINGRAZIAMENTO...
-
Page 43: Istruzioni Di Sicurezza
ISTRUZIONI DI SICUREZZA Destinazione d'uso Le seguenti linee guida sulla sicurezza hanno lo scopo di prevenire rischi imprevisti o danni derivanti da un funzionamento non sicuro o non corretto dell'apparecchio. Si prega di controllare l'imballaggio e l'apparecchio all'arrivo per assicurarsi che tutto sia intatto per garantire un funzionamento sicuro. - Page 44 Attenzione • Leggere attentamente le regole per un funzionamento sicuro e le istruzioni. • Questo apparecchio può essere utilizzato da bambini dagli 8 anni in su e da persone con ridotte capacità fisiche, sensoriali o mentali o con scarsa esperienza e conoscenza, a condizione che siano sorvegliati o istruiti sull'uso dell'apparecchio in modo sicuro e che ne comprendano i pericoli.
- Page 45 Avvertenze • Se il cavo di alimentazione è danneggiato, deve essere sostituito dal produttore o dal suo agente di assistenza o da una persona altrettanto qualificata per evitare un pericolo. • Per proteggersi dal rischio di scosse elettriche, non immergere l'unità, il cavo o la spina in acqua o altro liquido.
-
Page 46: Specifiche
Velocità massima meters/sec 2,94 dell'aria Consumo stagionale di kWh/a 13,24 elettricità Standard di misurazione del valore EN IEC 60879:2019 del servizio Contatti per ottenere Midea Italia S.rl. a socio unico Viale Luigi Bodio 29/37 20158 maggiori informazioni Milano Italia midea.com/it... -
Page 47: Panoramica Del Prodotto
PANORAMICA DEL PRODOTTO Nome dei Componenti Motore Griglia posteriore Dado di Serrare la plastica Manopola Girante Asta Pale Telaio Griglia anteriore Vite a 7 NOTA Tutte le immagini in questo manuale sono solo a scopo esplicativo. Qualsiasi discrepanza tra l'oggetto reale e l'illustrazione nel disegno è soggetta al soggetto reale. Rimuovere le parti dal componente prima di eseguire l'installazione. -
Page 48: Installazione Del Prodotto
INSTALLAZIONE DEL PRODOTTO Procedure per l’Installazione NOTA Prima dell'installazione, rimuovere prima le viti a di 7 dall’asta, rimuovere il Girante e il Dado di Plastica dall'albero motore, quindi installare. 1 Installazione del Telaio Allineare l’asta inferiore e il telaio, quindi fissarli saldamente con le viti del telaio. In senso orario 2 Installazione dell’Asta 2.1 Estrarre e fissare l’asta interna (colonna) dopo aver regolato l'altezza serrando o... - Page 49 4 Installazione del Dado di Plastica Avvitare saldamente in senso orario il dado di plastica per fissare la griglia posteriore. In senso orario 5 Installazione della Pala Dopo l'installazione della pala, ruotare la pala con il dito per assicurarsi che la pala funzioni normalmente.
- Page 50 7 Installazione della Griglia Anteriore 7.1 Allineare dall'alto verso il basso le clip della griglia anteriore con la maglia più alta della griglia posteriore. Dopo che l'allineamento è corretto, guarda da dietro in avanti secondo il diagramma. Maglia Clip Maglia Clip 7.2 Premere le griglie in ordine con entrambe le mani.
-
Page 51: Istruzioni Per L'uso
ISTRUZIONI PER L’USO Istruzioni per l'Uso del Corpo Macchina Indicatore di ventilazione naturale Indicatore della velocità Spia di visualizazzione della ventilazione del tempo Velocità della ventilazione Oscillazione Timer ON/OFF Tasti Description des Fonctions • Il tasto è per accendere il ventilatore. La ventola verrà TASTO avviata a bassa velocità. - Page 52 Telecomando • Il telecomando dovrebbe essere usato normalmente entro 5 metri dalla parte anteriore del prodotto e a 30 gradi dell'angolo di deviazione. • La batteria contiene molti metalli pesanti, acidi e sostanze basiche, ecc. che possono compromettere la salute dell'uomo. Le batterie usate devono essere riciclate separata- mente.
- Page 53 Installazione delle Batterie Batterie non inclusa nella confezione 1 Far scorrere il coperchio del vano batteria. Fig 1 2 Inserire le batterie e assicurarsi che siano posizionate come mostrato nella Fig 2. Fig 2 3 Far scorrere indietro il coperchio della batteria. Fig 3 NOTA •...
-
Page 54: Pulizia E Manutenzione
PULIZIA E MANUTENZIONE Il ventilatore richiede scarsa manutenzione. Non cercare di ripararlo da solo. Rivolgersi a personale di assistenza qualificato se è necessario un intervento di manutenzione. 1. Prima della pulizia e del montaggio, il ventilatore deve essere scollegato. 2. Per garantire un'adeguata circolazione dell'aria al motore, mantenere le bocchette di ventilazione nella parte posteriore del motore libere da polvere. -
Page 55: Risoluzione Dei Problemi
RISOLUZIONE DEI PROBLEMI Se il prodotto non funziona o non funziona correttamente, controllare quanto riportato nel seguente elenco. Se il motivo per cui il prodotto non funziona o non funziona correttamente non è incluso nell'elenco seguente, il prodotto potrebbe essere guasto. Si consiglia di inviare il prodotto al rivenditore per il trattamento. -
Page 56: Marchi, Diritti D'autore E
DICHIARAZIONE LEGALE logo, marchi denominativi, nome commerciale, immagine commerciale e tutte le loro versioni sono beni di valore di Midea Group e/o delle sue affiliate ("Midea"), a cui Midea possiede marchi, diritti d'autore e altri diritti di proprietà intellettuale, e tutto l'avviamento derivante dall'utilizzo di qualsiasi parte di un marchio Midea. -
Page 57: Smaltimento E Riciclo
SMALTIMENTO E RICICLO Istruzioni importanti per l'ambiente Conformità alla direttiva RAEE e smaltimento del prodotto Waster: Questo prodotto è conforme alla direttiva EU 2012/19/EU. Questo prodotto reca un simbolo di classificazione per apparecchiature elettriche ed elettroniche di scarto (RAEE). Questo simbolo indica che il prodotto non deve essere smaltito con altri rifiuti domestici alla fine della sua vita utile. -
Page 58: Trattamento Dei Dati
Spazio economico europeo. Ulteriori informazioni sono disponibili su richiesta. Puoi contattare il nostro Responsabile della protezione dei dati all'indirizzo MideaDPO@midea.com. Per esercitare i tuoi diritti, come il diritto di opporti al trattamento dei tuoi dati personali per scopi di marketing diretto, ti preghiamo di contattarci tramite MideaDPO@midea.com. -
Page 61: Garantie/Service
LETTRE DE REMERCIEMENTS Merci d'avoir choisi Midea ! Avant d'utiliser votre nouveau produit Midea, merci de lire attentivement ce manuel afin de vous assurer d’être à même d’utiliser les caractéristiques et fonctions de votre nouvel appareil en toute sécurité. SOMMAIRE... -
Page 62: Consignes De Securite
CONSIGNES DE SECURITE Usage prévu Les consignes de sécurité qui suivent ont pour but de prévenir les risques ou les dommages imprévus résultant d'une utilisation dangereuse ou incorrecte de l'appareil. Merci de vérifier l'emballage et l'appareil à réception afin de vous assurer que tout est intact, cela afin de garantir un fonctionnement sûr. - Page 63 Attention • Lisez attentivement les règles et les instructions pour une utilisation en toute sécurité. • Cet appareil peut être utilisé par des enfants âgés d'au moins 8 ans et par des personnes dont les capacités physiques, sensorielles ou mentales sont réduites ou qui manquent d'expérience et de connaissances, si elles sont surveillées ou ont reçu des instructions concernant l’utilisation de l’appareil...
- Page 64 Avertissement • Afin d'éviter tout danger lorsque le cordon d’alimentation est endommagé, celui-ci doit être remplacé par le fabricant, son représentant ou toute personne de même qualification. • Pour éviter tout risque de court-circuit, ne plongez pas l'appareil, le cordon, la fiche dans l’eau ou tout autre liquide.
-
Page 65: Specifications
Débit maximal meters/sec 2,94 de l'air Consommation kWh/a 13,24 électrique saisonnière Norme de mesure de la EN IEC 60879:2019 valeur de service Coordonnées pour Midea Italia S.rl. a socio unico Viale Luigi Bodio 29/37 20158 obtenir plus Milano Italia midea.com/it d'informations... -
Page 66: Vue D'ensemble Du Produit
VUE D’ENSEMBLE DU PRODUIT Noms des Composants Moteur Grille Arrière Ecrou en Molette Plastique Fixation Turbine Poteau Pale Châssis Grille Avant Vis en forme de 7 REMARQUE Toutes les images de ce manuel sont fournies à titre d'explication uniquement. Toute divergence entre l'objet réel et l'illustration du dessin sera soumise au sujet réel. -
Page 67: Installation Du Produit
INSTALLATION DU PRODUIT Procédures d’Installation REMARQUE Avant de procéder à l'installation, il faut d'abord retirer la vis en forme de 7 du poteau, retirer la turbine et l'écrou en plastique de l'arbre du moteur, puis procéder à l'installation. 1 Installation du Châssis Aligner le poteau inférieur et le châssis, puis fixer solidement à... - Page 68 4 Installation de l’Ecrou Plastique Visser fermement l'écrou en plastique dans le sens des aiguilles d'une montre pour fixer la grille arrière. Dans le sens des aiguilles d’une montre 5 Installation des Pales Après l'installation des pales, faire tourner les pales avec votre doigt afin de vous assurer qu'elle fonctionne normalement.
- Page 69 7 Installation de la Grille Avant 7.1 De haut en bas, aligner les attaches de la grille avant avec la maille la plus haute de la grille arrière. Une fois l'alignement correct, regarder de l'arrière vers l'avant comme indiqué sur le schéma. Maille Attach Maille...
-
Page 70: Instructions Sur Le Fonctionnement
INSTRUCTIONS SUR LE FONCTIONNEMENT Mode d'Emploi sur l’Unité Principale de la Machine Indicateur ventilation naturelle Indicateur du Débit de Témoin d'affichage de la Ventilation minuterie Débit de Ventilation Oscillation Minuterie ON/OFF Touche Description des Fonctions • La touche permet d'allumer le ventilateur. Le ventilateur TOUCHE démarre à... - Page 71 Télécommande • La télécommande doit normalement être utilisée à moins de 5 mètres de l'avant du produit et à 30 degrés de l'angle de déviation. • La pile contient de nombreux métaux lourds, des acides et des bases, etc., qui peuvent s’avérer néfaste pour la santé...
- Page 72 Installation des Piles Piles non incluses dans l'emballage 1 Faire glisser le couvercle du compartiment à piles. Ill 1 2 Insérer les piles et vérifier qu'elles sont placées comme indiqué sur l’Illustration 2. Ill 2 3 Faire glisser le couvercle de la batterie. Ill 3 REMARQUE •...
-
Page 73: Nettoyage Et Entretien
NETTOYAGE ET ENTRETIEN Le ventilateur nécessite peu d'entretien. N'essayez pas de le réparer vous-même. Référez-le à un technicien qualifié si une réparation est nécessaire. 1. Avant le nettoyage et l'assemblage, le ventilateur doit êtredébranché. 2. Pour assurer une circulation d'air adéquate vers le moteur, gardez les évents à l'arrière du moteur exempts de poussière. -
Page 74: Dépannage
DÉPANNAGE L'utilisation de votre appareil peut entraîner des erreurs et des dysfonctionnements. Les tableaux suivants contiennent les causes possibles et des conseils pour résoudre un message d'erreur ou un dysfonctionnement. Il est recommandé de lire attentivement le tableau ci-dessous afin d'économiser votre temps et l'argent que pourrait vous coûter un appel au centre de service. -
Page 75: Marques, Droits D'auteur Et Mentions Legales 1
Le logo , les marques verbales, le nom commercial, l'habillage commercial et toutes les versions de ces éléments sont des actifs précieux de Midea Group et/ou de ses filiales ("Midea"), auxquels Midea appartient en tant que marques commerciales, droits d'auteur et autres droits de propriété intellectuelle, ainsi que l’intégralité du fonds de commerce dérivé... -
Page 76: Elimination Et Recyclage
ELIMINATION ET RECYCLAGE Consignes importantes pour l'environnement Conformité avec la Directive DEEE et Elimination des Produits Usagés : Ce produit est conforme à la directive européenne DEEE (2012/19/EU). Ce produit porte un symbole de classification pour les déchets d'équipements électriques et électroniques (DEEE). -
Page 77: Avis Sur La Protection Des Donnees
Economique Européen. De plus amples informations sont fournies sur demande. Vous pouvez contacter notre Délégué à la Protection des Données à l'adresse MideaDPO@midea.com. Pour exercer vos droits, tels que le droit d'opposition au traitement de vos données personnelles à... - Page 78 à compter de la date d'achat sur tous les produits de marque Midea (ci-après dénommés "Produits") commercialisés par Midea elle-même sur le territoire de la République italienne (à l'exclusion du territoire de la ville de Venise et des îles mineures), sur le territoire de la République de Saint-Marin et sur le territoire de la Cité...
- Page 79 Certificat de garantie Midea vous remercie d'avoir acheté l'un de ses produits. Merci de conserver ce document avec votre preuve d'achat. La garantie a une durée de �� mois à compter de la date indiquée sur le document d'achat. Notre service clientèle est à votre disposition pour les signalements de produits et les demandes d'information. Pour contacter le service clientèle :...
Need help?
Do you have a question about the MFS400R0APH and is the answer not in the manual?
Questions and answers