Advertisement
Available languages
Available languages
Quick Links
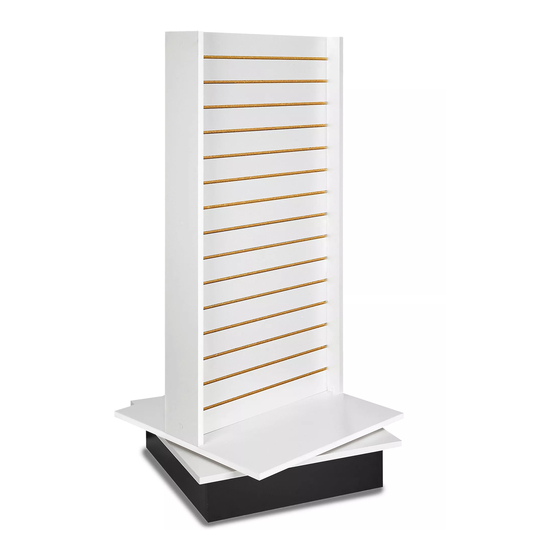
H-4440
I-UNIT SLATWALL TOWER
TOOLS NEEDED
Phillips Screwdriver
Rubber Mallet (Optional)
Confirmat Screw x 6
Wing Panel x 2
Camlock x 16
KICK BASE ASSEMBLY
1.
Install camlock pins into the predrilled holes in kick
base boards using screwdriver. (See Figure 1)
2. Install camlocks into large holes in kick base boards
by tapping them into position with rubber mallet.
(See Figure 2)
NOTE: Ensure the hole in the side of the
camlock always faces outward.
3. Arrange kick base boards to form a square, so that
each corner has camlock pins set into the camlocks
of the adjacent board. (See Figure 3)
4. Connect camlocks and pins by inserting screwdriver
into the top hole of the camlock and turning
clockwise. (See Figure 4)
NOTE: Tilt screwdriver at an angle while twisting
to better lock the camlocks.
PAGE 1 OF 6
1-800-295-5510
uline.com
PARTS
Camlock Pin x 12
Pan Head Screw x 16
Screw Cap x 6
ASSEMBLY
Pour le français, consulter les pages 5-6.
Spinner Base Top x 1
Caster x 4
Kick Base Board x 4
Figure 1
Camlock Pin
Figure 2
Camlock
Figure 3
Para Español, vea páginas 3-4.
Center Panel x 1
Figure 4
0521 IH-4440
Advertisement

Related Manuals for U-Line H-4440


Summary of Contents for U-Line H-4440
- Page 1 Para Español, vea páginas 3-4. Pour le français, consulter les pages 5-6. H-4440 1-800-295-5510 uline.com I-UNIT SLATWALL TOWER TOOLS NEEDED Phillips Screwdriver Rubber Mallet (Optional) PARTS Confirmat Screw x 6 Camlock Pin x 12 Pan Head Screw x 16 Spinner Base Top x 1...
- Page 2 ASSEMBLY CONTINUED SPINNER BASE ASSEMBLY Figure 5 Set spinner base top with underside facing up on a protected surface. 2. Install camlock pins into predrilled holes of the spinner base using screwdriver. (See Figure 1) 3. Set the kick base onto the spinner base so the camlocks and camlock pins match up, and tighten camlocks.
-
Page 3: Herramientas Necesarias
H-4440 800-295-5510 uline.mx TORRE DE PANEL RANURADO - UNIDAD I HERRAMIENTAS NECESARIAS Desarmador de Cruz Mazo de Hule (opcional) PARTES 6 Tornillos Confirmat 12 Clavijas de 16 Tornillos de Cabeza Tuerca Alomada 1 Parte Superior de la Base Giratoria 2 Paneles Laterales... - Page 4 CONTINUACIÓN DE ENSAMBLE ENSAMBLE DE LA BASE GIRATORIA 5. Coloque el panel central y el ensamble de los paneles laterales sobre la base encima de las clavijas 1. Coloque la base giratoria con la parte inferior hacia de tuerca y apriete las tuercas. (Vea Diagrama 8) arriba sobre una superficie protegida.
-
Page 5: Outils Requis
H-4440 1-800-295-5510 uline.ca TOUR EN PANNEAUX RAINURÉS À I UNITÉ OUTILS REQUIS Tournevis cruciforme Maillet en caoutchouc (optionnel) PIÈCES Vis Confirmat x 6 Vis excentrique x 12 Vis à tête cylindrique bombée x 16 Haut de la base rotative x 1 Cylindre à Panneau x 2 Cache-vis x 6... - Page 6 MONTAGE SUITE ASSEMBLAGE DE LA BASE ROTATIVE 5. Placez le panneau central et ses côtés sur la base au dessus des cylindres à excentrique et les vis Placez le dessus de la base de roue à l'envers excentriques. (Voir Figure 8) (dessous vers le haut) sur une face protégée.
Need help?
Do you have a question about the H-4440 and is the answer not in the manual?
Questions and answers