Table of Contents
Advertisement
Available languages
Available languages
Kaffeevollautomat
Esperto Pro
Esperto Pro
Coffee Machine
Plně automatický
kávovar Esperto Pro
Original-Betriebsanleitung und Garantie
de
Original instructions for use and warranty
en
Originální návod k použití a záruka
cs
Tchibo GmbH D-22290 Hamburg · 106466HB55XXI · 2021-06 · V1
106466 de Esperto_Pro_v5.indd 1
de
en
cs
15.06.21 12:28
Advertisement
Chapters
Table of Contents

Related Manuals for Tchibo Esperto Pro


Summary of Contents for Tchibo Esperto Pro
- Page 1 Esperto Pro Coffee Machine Plně automatický kávovar Esperto Pro Original-Betriebsanleitung und Garantie Original instructions for use and warranty Originální návod k použití a záruka Tchibo GmbH D-22290 Hamburg · 106466HB55XXI · 2021-06 · V1 106466 de Esperto_Pro_v5.indd 1 15.06.21 12:28...
- Page 2 Liebe Kundin, lieber Kunde! Mit dem Tchibo Kaffeevollautomaten genießen Sie perfekten Espresso, Caffè Crema und leckere Kaffee-/Milchspezialitäten wie Cappuccino und Latte Macchiato. Kein Problem mit dem Kaffeevollautomaten vom Kaffee-Experten: Die Maschine ist perfekt voreingestellt für unsere Tchibo Kaffees. Auf www.tchibo.de/kaffeeguide finden Sie Ihren Lieblingskaffee und erhalten praktische Tipps zur Zubereitung mit dem Kaffeevollautomaten.
-
Page 3: Table Of Contents
Inhalt Zu dieser Anleitung 22 Mahlgrad feiner einstellen Sicherheitshinweise 23 Erweiterung für den Kaffeebohnenbehälter Verpackungsmaterial 24 Automatischen Spülvorgang anpassen Schutzfolien und Verpackungsmaterial entfernen 24 Standby-Modus (Ruhemodus) Auf einen Blick (Lieferumfang) 25 Reinigen 25 Gehäuse reinigen Bedientasten (weiß) 25 Wassertank reinigen 10 Inbetriebnahme - vor dem ersten Gebrauch 26 Restwasserschale, Kaffeesatzbehälter und Abtropfschale/-gitter reinigen... -
Page 4: Zu Dieser Anleitung
Zu dieser Anleitung • Sie ist dazu bestimmt, im Haushalt und haushalts ähn lichen Bereichen verwendet zu werden, wie beispielsweise Der Artikel ist mit Sicherheitsvorrichtungen ausgestattet. Lesen Sie in Läden, Büros oder ähnlichen Arbeitsumgebungen, trotzdem aufmerksam die Sicherheitshinweise und benutzen Sie den in landwirtschaftlichen Anwesen, Artikel nur wie in dieser Anleitung beschrieben, damit es nicht versehent- von Gästen in Hotels, Motels, Frühstückspensionen und anderen... - Page 5 verschluckt oder eingeatmet wurden, suchen Sie sofort einen Arzt auf. • Ziehen Sie den Netzstecker aus der Steckdose, ... Die Verbindung von Magneten im menschlichen Körper kann zu ernst- ... wenn eine Störung auftritt, haften Verletzungen führen..wenn Sie die Maschine längere Zeit nicht benutzen, ...
- Page 6 WARNUNG vor Verbrühungen/ Verbrennungen • Zum Gebrauch stellen Sie die Maschine auf eine stabile, waagerechte, ebene Fläche, die gut ausgeleuchtet und gegen Feuchtigkeit und Wärme • Fassen Sie während sowie unmittelbar nach dem Gebrauch nicht an die unempfindlich ist. Kaffee- oder Milchaustrittsöffnung. Vermeiden Sie den Kontakt mit dem herauslaufenden Getränk.
-
Page 7: Verpackungsmaterial
Verpackungsmaterial 4. Entfernen Sie den Transport- schutz, der sich unter dem Das Verpackungsmaterial schützt die Maschine beim Transport. Wassertank befindet. 5. Reinigen Sie den Wasser tank Bewahren Sie die Verpackung für den Fall auf, dass Sie die Maschine unter Zusatz eines Geschirr- transportieren oder jemals zurückgeben müssen. -
Page 8: Auf Einen Blick (Lieferumfang)
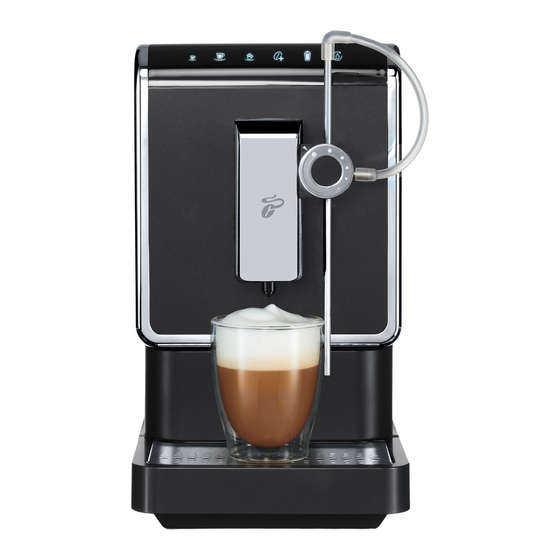
Öffnung für den Auf einen Blick (Lieferumfang) Wassertank Mahlgradregler Wassertank Kaffeebohnenbehälter (160 g) Hinweisanzeigen Bedientasten Milchschaum-Drehregler Abdeckung (abnehmbar) Edelstahllanze Abdeckklappe (Brüheinheit) Partikelfilter Kaffeesatzbehälter Brüheinheit Ein-/Aus-Taste Höhenverstellbarer Abtropfgitter Kaffee-/Milchauslauf Kaffeeaustrittsöffnung Abtropfschale Milchaustrittsöffnung Restwasserschale 106466 de Esperto_Pro_v5.indd 8 15.06.21 12:28... -
Page 9: Bedientasten (Weiß)
Bedientasten (weiß) Die Bedientasten sind nur bei eingeschalteter Maschine sichtbar. Abdeckung für den Kaffeebohnenbehälter Espresso Caffè Crema Cappuccino zubereiten zubereiten zubereiten Erweiterung für den Kaffeebohnenbehälter (300 g) Intense Milchschaum EasyClean Funktion zubereiten Spülfunktion Hinweisanzeigen (orange) Die Hinweisanzeigen leuchten nur, wenn bei der Maschine Anschlusskabel Handlungsbedarf auftritt. -
Page 10: Inbetriebnahme - Vor Dem Ersten Gebrauch
Inbetriebnahme - vor dem ersten Gebrauch 2. Schieben Sie die Abtropf- schale mit Abtropfgitter 1. Stellen Sie die Maschine ... wie abgebildet ganz an die Maschine heran..auf eine ebene, gegen Feuchtigkeit unempfindliche Oberfläche Die Abtropfschale wird von bzw. Arbeitsplatte. Magneten in Position gehalten. - Page 11 7. Füllen Sie den Wassertank 10. Füllen Sie etwa so viele Kaffeebohnen ein, wie Sie an bis zur MAX-Markierung mit einem Tag verbrauchen. frischem, kaltem Leitungs- In den Kaffeebohnenbehälter bzw. Trinkwasser. passen ca. 160 g. Füllen Sie niemals Wasser Der Kaffeebohnenbehälter direkt in den Wassertank, lässt sich auf eine Füllmenge wenn er noch in der...
-
Page 12: Maschine Einschalten
Maschine einschalten 14. Drücken Sie die Ein-/Aus- Taste, um die Maschine ein zuschalten. Voraussetzungen: • Der Netzstecker steckt in der Steckdose. • Die Maschine ist ausgeschaltet. Die EasyClean-Taste blinkt und • Der Wassertank ist gefüllt. der Aufheizvorgang startet. • Der Kaffeebohnenbehälter ist gefüllt. Um die Maschine einzuschalten, gehen Sie wie folgt vor: WARNUNG Drücken Sie die Ein-/Aus-... -
Page 13: 13 Höhe Des Kaffee-/Milchauslaufs Einstellen
Höhe des Kaffee-/Milchauslaufs einstellen Getränke ohne Milch zubereiten Sie können den Kaffee-/Milchauslauf stufenlos auf verschiedene Wenn Sie einen Kaffee ohne Milch zubereiten möchten, Tassengrößen anpassen. können Sie den Milchschaum- Drehregler optional abnehmen: Ziehen Sie den Milchschaum- Drehregler zur Seite ab. Verschließen Sie die Abdeck- kappe am Kaffee-/Milchaus- lauf, um den Anschluss vor... -
Page 14: Getränke Mit Milch Zubereiten
Tipp: Sie können die jeweilige Getränkemenge verändern. Wie Sie dazu 3. Drücken Sie die gewünschte Getränke-Taste: vorgehen, finden Sie im Kapitel „Getränkemenge verändern“. Voreinstellung beim Kauf der Maschine: Espresso oder Espresso ca. 40 ml – Caffè Crema ca. 125 ml Getränke mit Milch zubereiten Caffè... -
Page 15: Milchschaumkonsistenz Einstellen
Milchschaumkonsistenz einstellen 3. Drücken Sie 1x kurz auf die Cappuccino-Taste. Für viel Milchschaum mit einer grobporigeren Konsistenz drehen Sie den Die Cappuccino-Taste leuchtet Milchschaum-Drehregler im und der Aufheizvorgang für Uhrzeigersinn auf einen das Milchaufschäumen startet. größeren Punkt Der Aufschäum- und Brüh- Je grobporiger der Milch- vorgang startet und stoppt schaum, umso stärker wurde... - Page 16 3. Drücken Sie 1x kurz auf die WARNUNG Aufschäum-Taste. vor Verbrühungen/ Verbrennungen Heißes Wasser, heißer Kaffee oder heißer Milchschaum aus dem Die Aufschäum-Taste leuchtet Kaffee-/Milchauslauf kann Verbrühungen verursachen. und der Aufheizvorgang für • Fassen Sie während sowie unmittelbar nach dem Gebrauch nicht an das Milchaufschäumen startet.
-
Page 17: Milchsystem Spülen
2. Stecken Sie die Edelstahllanze Voreinstellung beim Kauf der Maschine: in das Wasser. Milchschaum ca. 130 ml (abhängig von der Drehregler-Position) 3. Stellen Sie ein leeres Gefäß Wir empfehlen das Milchsystem immer direkt nach der unter den Kaffee-/Milchaus- Zubereitung von Milchgetränken zu spülen. Siehe Abschnitt lauf. -
Page 18: Kaffeesatzbehälter, Restwasser- Und Abtropfschale Leeren
Kaffeesystem spülen 4. Gießen Sie das Wasser weg. 5. Wiederholen Sie die Schritte Wenn Sie die Maschine länger als 2 Tage nicht genutzt haben, spülen Sie 3 und 4. Danach ist die die Maschine durch, indem Sie 2 Tassen Wasser durchlaufen lassen. Maschine wieder einsatzbereit. -
Page 19: Stärke Des Kaffees Anpassen - Intense
Stärke des Kaffees anpassen - Intense -Technologie 2. Leeren Sie den Kaffeesatz- behälter, die Restwasser- und bei Bedarf die Abtropfschale. Die Intense -Funktion kann nur zusammen mit der Espresso-, der Caffè Crema- oder der Cappuccino-Taste verwendet werden. Voraussetzungen: • Die Maschine ist eingeschaltet und einsatzbereit. •... -
Page 20: Getränkemenge Verändern
Getränkemenge verändern Espresso und Caffè Crema 1. Drücken Sie die gewünschte Sie können die werkseitig eingestellten Getränke- oder Milchschaum- Getränke-Taste (z.B. Caffè mengen dauerhaft verändern. Pro Getränke-Taste ist jeweils eine Crema), um den Mahl- und individuelle Einstellung möglich: Je eine für Espresso, Caffè Crema, Brühvorgang zu starten. - Page 21 3. Wenn die gewünschte Milch- 3. Wenn die gewünschte Milch- schaummenge in die Tasse schaummenge in die Tasse gelaufen ist, lassen Sie die gelaufen ist, lassen Sie die Taste los. Taste los. Die Einstellung ist gespeichert; zur Bestätigung ertönen 2 Signaltöne. Die Einstellung ist gespeichert;...
-
Page 22: Mahlgrad Einstellen
Mahlgrad einstellen Mahlgrad gröber einstellen Stellen Sie den Mahlgrad gröber ein, wenn der Kaffee schneller fließen soll, z.B. weil der Kaffee Ihnen zu stark schmeckt. VORSICHT – Sachschäden 4. Drücken Sie eine der beiden • Die Einstellung des Mahlgrades darf nur bei laufendem Mahlwerk Getränke-Tasten (Espresso vorgenommen werden. -
Page 23: Erweiterung Für Den Kaffeebohnenbehälter
Erweiterung für den Kaffeebohnenbehälter 4. Füllen Sie Kaffeebohnen ein. Sie können die Füllmenge des Kaffeebohnenbehälters von 160 g auf 300 g erweitern. Gehen Sie dazu wie folgt vor: 1. Nehmen Sie die Abdeckung vom Kaffeebohnenbehälter ab. 2. Setzen Sie die Erweiterung wie abgebildet auf die Öffnung des Kaffeebohnen behälters. -
Page 24: Automatischen Spülvorgang Anpassen
Automatischen Spülvorgang anpassen Standby-Modus (Ruhemodus) Die Maschine ist werkseitig so eingestellt, dass der automatische Spül- Schalten Sie die Maschine nach Gebrauch stets mit der Ein-/Aus-Taste in den Standby-Modus. Die Maschine verbraucht dann nur noch geringfügig Strom. vorgang nur bei einer kalten Maschine startet. War die Maschine kurz vor Wenn etwa 10 Minuten lang keine Taste gedrückt wird, schaltet die Maschine dem Einschalten schon in Betrieb und ist entsprechend noch warm, spült automatisch in den Standby-Modus. -
Page 25: Reinigen
2. Drücken Sie auf die Taste mit Täglich Wöchentlich Bei Bedarf der gewünschten Ausschaltzeit (es ertönen 2 Signaltöne) oder Maschinen gehäuse warten Sie ca. 10 Sekunden, Wassertank reinigen um die angezeigte Ausschaltzeit Wassertank ausspülen beizubehalten. Filter im Wassertank Kaffeesatzbehälter, Reinigen Restwasserschale, Abtropfschale GEFAHR –... -
Page 26: Restwasserschale, Kaffeesatzbehälter Und Abtropfschale/-Gitter Reinigen
4. Waschen Sie alle Einzelteile 1. Ziehen Sie den Filter nach unter Zusatz eines Geschirr- oben ab. spülmittels ab. Trocknen Sie 2. Spülen Sie ihn unter die Teile gut ab. Diese Teile fließendem Wasser aus. sind nicht spülmaschinen- geeignet. 5. Setzen Sie den Kaffeesatz- behälter wieder in die Restwasserschale und 3. -
Page 27: Brüheinheit Reinigen
Brüheinheit reinigen 3. Halten Sie die beiden orange- farbenen Tasten fest gedrückt WARNUNG vor Verbrennungen und ziehen Sie die Brüheinheit gerade aus der Maschine her- Die Brüheinheit wird während des Gebrauchs heiß. aus. • Reinigen Sie die Brüheinheit nicht direkt nach dem Gebrauch der Maschine. -
Page 28: Milchsystem Reinigen
8. Setzen Sie die Abdeckklappe 2. Ziehen Sie den Silikonschlauch vom Milchschaum-Drehregler wieder vor die Brüheinheit in die Maschine ein. Sie wird von Magneten in Position gehalten. 3. Ziehen Sie die Edelstahllanze vom Schlauch ab. 4. Ziehen Sie das Drehrad vom Milchsystem reinigen Milchschaum-Drehregler ab. - Page 29 Zeit in warmem Wasser unter Zusatz des 9. Öffnen Sie wie abgebildet die durgol ® Milchsystem-Reiniger ® - erhältlich in jeder Tchibo Filiale Silikonummantelung und ... und im Fachhandel - einzuweichen. Milchsystem zusammensetzen 1. Stecken Sie den Adapter ganz gerade bis zum Anschlag in 10.
- Page 30 5. Setzen Sie den Milchauslauf 10. Öffnen Sie die Abdeckkappe am Kaffee-/Milchauslauf. wieder ein. 11. Stecken Sie den Milchschaum- 6. Setzen Sie die Abdeckung auf Drehregler wie abgebildet den Kaffee-/Milchauslauf. ganz gerade bis zum Anschlag Sie wird von Magneten in in den Anschluss.
-
Page 31: Entkalken
Entkalken 1. Ziehen Sie den Wassertank nach oben aus der Maschine heraus. VORSICHT — Geräteschäden durch Verkalkung Kalkbildung kann die Maschine beschädigen. • Entkalken Sie die Maschine, sobald dies angezeigt wird. Das erhöht die Lebensdauer Ihrer Maschine und spart Energie. 2. - Page 32 5. Halten Sie die Ein-/Aus-Taste Nach Abschluss leuchtet und die Espresso-Taste das Symbol „Entkalken“ gedrückt (ca. 5 Sekunden), und das Symbol „Wasser bis 2 Signaltöne ertönen. auffüllen“ und ... 6. Lassen Sie die Tasten los..die Espresso-Taste blinken. Das Symbol „Entkalken“ und ...
-
Page 33: Bei Längerem Nichtgebrauch
13. Setzen Sie den Wassertank 1. Stellen Sie einen leeren wieder in die Maschine ein Behälter (mind. 250 ml und drücken Sie ihn bis zum Fassungsvermögen) unter die Anschlag herunter. Kaffeeaustrittsöffnung. Entfernen Sie dazu ggf. die Abtropfschale. Das Symbol „Wasser auf- füllen“... -
Page 34: Störung / Abhilfe
Die Maschine schaltet sich anschließend automatisch in den Standby- Ist die Restwasserschale mit dem Kaffeesatzbehälter nicht Modus. bzw. nicht korrekt in die Maschine eingesetzt? Setzen Sie sie wieder in die Maschine ein (siehe Schritt 7 im Wenn Sie die Maschine später wieder in Betrieb nehmen möchten, gehen Kapitel „Kaffeesatzbehälter, Restwasser- und Abtropfschale Sie vor, wie im Kapitel „Inbetriebnahme - vor dem ersten Gebrauch“... -
Page 35: Technische Daten
10 Portionen gesteckt sind (siehe Kapitel „Reinigen“, Abschnitt „Milchsystem Umgebungstemperatur: +10 bis +40 °C reinigen“). Made exclusively for: Tchibo GmbH, Überseering 18, Drehen Sie den Milchschaum-Drehregler im oder gegen den 22297 Hamburg, Germany Uhrzeigersinn, um die Milchschaumkonsistenz zu verändern www.tchibo.de (siehe Kapitel „Getränke mit Milch zubereiten“, Abschnitt „Milch-... -
Page 36: Entsorgen
Konformitätserklärung Entsorgen Hiermit erklärt die Tchibo GmbH, dass dieses Produkt zum Zeitpunkt des Der Artikel und seine Verpackung wurden aus wertvollen Materialien Inverkehrbringens den grundlegenden Anforderungen und den übrigen hergestellt, die wiederverwertet werden können. Dies verringert den ein schlägigen Bestimmungen folgender Richtlinien entspricht: Abfall und schont die Umwelt. -
Page 37: Garantie
Herstellfehler. Voraussetzung für die Gewährung der Garantie ist die Vorlage • eine Telefonnummer (tagsüber) und/oder eine E-Mail-Adresse, eines Kauf belegs von Tchibo oder eines von Tchibo autorisierten Vertriebs- partners. Diese Garantie gilt innerhalb der EU, der Schweiz und in der Türkei. -
Page 38: Kundenservice
(kostenfrei) Montag – Sonntag Haben Sie ein Onlinekonto? Dann loggen Sie sich vor Eingabe der Artike l- von 7.00 bis 22.00 Uhr num mer unter „Mein Tchibo“ ein. Das Versand etikett und der Reklamations- E-Mail: service@tchibo.at beileger befüllen sich dann automatisch mit Ihren im Onlinekonto hinterlegten Daten. - Page 39 Dear Customer The fully automatic coffee machine by Tchibo allows you to enjoy the perfect espresso, caffè crema and delicious coffee/milk specialities such as cappuccino and latte macchiato. This fully automatic coffee machine designed by coffee experts is easy to use and is perfectly suited for use with our Tchibo coffees.
- Page 40 Contents 41 About these instructions 59 Adjusting the grind setting 59 Increasing the coarseness of the grind 41 Safety warnings 59 Increasing the fineness of the grind 44 Packaging materials 60 Extension for the coffee bean compartment 44 Removing protective films and packaging materials 61 Adjusting the automatic flushing process 45 At a glance (delivery contents) 61 Standby mode...
-
Page 41: About These Instructions
About these instructions • It has been designed for use in households or for similar applications such as This product is equipped with safety features. Nevertheless, read in shops, offices or similar work spaces, the safety warnings carefully and only use the product as described in agricultural buildings, in these instructions to avoid accidental injury or damage. - Page 42 • The magnets in the drip tray and brewing unit cover make them easy • If the connection cable of this machine becomes damaged, it must to fit into the machine. If one of these built-in magnets should come be replaced by the manufacturer, its customer service or a similarly loose, keep it away from children.
- Page 43 WARNING - risk of scalds/burns • Route the connection cable in such a way that it is not a tripping hazard. Do not let the connection cable hang down over the edge of a table or • Do not touch the coffee or milk spout during or immediately after use. counter top so as to ensure that the machine cannot be pulled down by Avoid coming into contact with the beverage coming out of the spout.
-
Page 44: Packaging Materials
Packaging materials 4. Remove the transport protection piece underneath The packaging materials protect the machine during transport. the water tank. 5. Clean the water tank in water Keep the packaging in case you need to transport or return the machine. with a little washing-up liquid. -
Page 45: At A Glance (Delivery Contents)
Opening for At a glance (delivery contents) the water tank Grind adjuster Water tank Coffee bean compartment (160 g) Warning lights Control buttons Milk froth rotary control Cover (removable) Stainless steel wand Cover cap (brewing unit) Container for coffee grounds Particle filter Brewing unit On/Off button... -
Page 46: Control Buttons (White)
Control buttons (white) Cover for the The control buttons are only visible when the machine is switched on. coffee bean compartment Make Make Make Espresso Caffè Crema Cappuccino Extension for the coffee bean compartment (300 g) Intense Froth milk EasyClean function rinse function Warning lights (orange) -
Page 47: Initial Operation - Prior To First Use
Initial operation – prior to first use 2. Push the drip tray and drip grid all the way into the machine as illustrated. 1. Set up the machine... The drip tray is held in ... on a level worktop or surface that is not sensitive to moisture. place by magnets. - Page 48 7. Fill the water tank with fresh, 10. Pour as many coffee beans into the coffee bean compart- cold tap water or drinking ment as you will need for one water up to the MAX mark. day. The coffee bean compart- Never fill water directly ment holds approx.
-
Page 49: Switching The Machine On
Switching the machine on 14. Press the On/Off button to switch on the machine. Requirements: • The mains plug is plugged into the socket. • The machine is switched off. The EasyClean button flashes • The water tank is full. and the heating up process •... -
Page 50: Adjusting The Height Of The Coffee/Milk Spout
Adjusting the height of the coffee/milk spout Preparing beverages without milk The coffee/milk spout is continuously adjustable to suit different cup sizes. If you want to prepare a coffee without milk, you have the option to remove the milk froth rotary control: Remove the milk froth rotary control by sliding it to the side. -
Page 51: Preparing Beverages With Milk
Tip: You can change the amount of the beverage being brewed. 3. Press the button for the type of beverage you would like: Learn more about how to do this in the chapter titled “Adjusting the amount of the beverage”. Espresso or Default settings upon purchasing the machine: Espresso approx. -
Page 52: Adjusting The Milk Froth Consistency
Adjusting the milk froth consistency 3. Press the Cappuccino button briefly once. For a lot of milk froth made up of large bubbles, turn the The Cappuccino button lights milk froth rotary control in a up and the heating up process clockwise direction to a larger for the milk frothing starts. - Page 53 WARNING 3. Press the Froth button briefly risk of scalds/burns once. Hot water, hot coffee or hot milk froth from the coffee/milk spout can cause burns. The Froth button lights up and the heating up process • Do not touch the spout during or immediately after use. for the milk frothing starts.
-
Page 54: Rinsing The Milk System
2. Insert the stainless steel Default settings upon purchasing the machine: wand into the water. Milk froth approx. 130 ml (depending on the position of the rotary control) 3. Place an empty container We recommend that you always rinse the milk system immediately underneath the milk/coffee after preparing beverages with milk. -
Page 55: Rinsing The Coffee System
Rinsing the coffee system 4. Pour the water away. 5. Repeat steps 3 and 4. If you have not used the machine for longer than two days, rinse the The machine is then ready machine by allowing two cups of water to flow through it. for use again. -
Page 56: Adjusting The Strength Of The Coffee
Adjusting the strength of the coffee – 2. Empty the container for the coffee grounds, the leftover Intense technology water tray and the drip tray, if necessary. The Intense function can only be used together with the Espresso, the Caffè Crema or the Cappuccino button. Requirements: •... -
Page 57: Adjusting The Amount Of Beverage
Adjusting the amount of beverage Espresso and Caffè Crema 1. Press the beverage button You can permanently change the factory settings for the amount of your choice (e.g. Caffè of beverage and the amount of milk froth. You can customise the setting Crema) to start the grinding for each beverage button, i.e. - Page 58 3. Release the button as soon 3. Release the button as soon as the desired quantity as the desired quantity of milk froth has been of milk froth has been dispensed into the cup. dispensed into the cup. The setting has been saved; two beeps sound in confirmation. The setting has been saved;...
-
Page 59: Adjusting The Grind Setting
Adjusting the grind setting Increasing the coarseness of the grind Increase the coarseness of the grind when you want the coffee to flow more quickly, for example if the coffee is too strong for your taste. CAUTION – material damage 4. -
Page 60: Extension For The Coffee Bean Compartment
Extension for the coffee bean compartment 4. Pour in coffee beans. You can increase the capacity of the coffee bean compartment from 160 g to 300 g. Proceed as follows: 1. Remove the cover from the coffee bean compartment. 2. Insert the extension into the opening of the coffee bean compartment as illustrated. -
Page 61: Adjusting The Automatic Flushing Process
Adjusting the automatic flushing process Standby mode The factory settings for the machine mean that automatic flushing only Always switch the machine to standby mode after use by pressing the On/ Off button. The machine will then consume very little energy. If no button starts when the machine is cold. -
Page 62: Cleaning
2. Press the button with the Daily Weekly As required required switch-off time (2 beeps will sound) Machine casing or wait approx. 10 seconds Cleaning the water to keep the displayed tank switch-off time. Rinsing the water tank Filter in the water tank Cleaning Container for coffee... -
Page 63: Cleaning The Leftover Water Tray, The Container For The Coffee Grounds And The Drip Tray/Grid
4. Wash all parts with water 1. Pull the filter upwards and off. and washing-up liquid. 2. Rinse it off under running Dry all parts thoroughly. water. These parts are not dishwasher-safe. 5. Place the container for the coffee grounds back into the leftover water tray and push both parts into the 3. -
Page 64: Cleaning The Brewing Unit
Cleaning the brewing unit 3. Firmly press and hold the two orange tabs and pull WARNING – risk of burns the brewing unit horizontally out of the machine. The brewing unit becomes hot during use. • Do not clean the brewing unit immediately after using the machine. Allow the machine to cool down before removing the brewing unit for cleaning. -
Page 65: Cleaning The Milk System
8. Place the cover cap back 2. Remove the silicone tube from the milk froth rotary control. into the machine in front of the brewing unit. It is held 3. Remove the stainless steel in place by magnets. wand from the tube. Cleaning the milk system 4. - Page 66 (with the exception of the rotary 8. Rotate the adapter so that dial of the milk froth control). This product is available from the cover cap is pointing most Tchibo retailers. to the left. Assembling the milk system 9. Open the silicone sleeve 1.
- Page 67 5. Put the milk spout back on. 10. Open the cover cap on the coffee/milk spout. 6. Place the cover back on the coffee/milk spout. It is held 11. Insert the milk froth rotary in place by magnets. control into the connection port as shown, pushing it in as far as it will go and making sure to keep it completely...
-
Page 68: Descaling
Descaling 1. Pull the water tank up and out of the machine. CAUTION — damage to the machine due to limescale deposits Limescale can damage the machine. • Descale the machine as soon as the machine indicates that this is necessary. 2. - Page 69 5. Press and hold the On/Off Once the process is comm - button and the Espresso plete, the “Descale” sym- button (for approx. 5 seconds) bol and the “Refill water” until you hear 2 beeps. symbol will appear and... 6. Release the buttons..
-
Page 70: For A Long Period Of Non-Use
13. Reinsert the water tank 1. Place an empty container into the machine and push (with a capacity of at least it down as far as it will go. 250 ml) under the coffee spout. Remove the drip tray if necessary. The “Refill water”... -
Page 71: Problems / Solutions
Afterwards, the machine will automatically switch into standby mode. Is the leftover water tray with the container for the coffee grounds correctly inserted in the machine? When you wish to use the machine again, proceed as described If not, put it back into the machine (see step 7 in the section in the chapter titled “Initial operation –... -
Page 72: Technical Specifications
+10 to +40 °C Turn the milk froth rotary control clockwise or anti-clockwise Made exclusively for: Tchibo GmbH, Überseering 18, to change the milk froth consistency (see chapter “Preparing 22297 Hamburg, Germany beverages with milk”, section “Adjusting the milk froth In the course of product improvement, we reserve the right consistency”). -
Page 73: Declaration Of Conformity
Declaration of Conformity Disposal Tchibo GmbH hereby declares that this product is in compliance with The product and its packaging have been manufactured from valuable the essential requirements and other relevant provisions of the following materials that can be recycled. Recycling reduces the amount of refuse directives at the time of its being placed on the market. -
Page 74: Warranty
In order for the warranty to be granted, all warranty If you have any questions relating to product information, ordering claims must be ac companied by proof of purchase from Tchibo or from accessories or servicing, please contact our customer care service. - Page 75 Vážení zákazníci, s tímto novým, plně automatickým kávovarem od společnosti Tchibo si můžete vychutnávat perfektní espreso, caffè crema a vynikající kávové/ mléčné speciality jako jsou kapučíno a latte macchiato. S tímto plně automatickým kávovarem od expertů na kávu to nebude žádný problém: Kávovar je perfektně...
- Page 76 Obsah 77 K tomuto návodu 95 Nastavení stupně mletí 95 Nastavení hrubšího stupně mletí 77 Bezpečnostní pokyny 95 Nastavení jemnějšího stupně mletí 80 Obalový materiál 96 Nástavec na zásobník na zrnkovou kávu 80 Odstranění ochranných fólií a obalového materiálu 97 Přizpůsobení automatického procesu proplachování 81 Přehled (rozsah dodávky) 97 Pohotovostní...
- Page 77 K tomuto návodu • Kávovar je určen k používání v domácnosti a pro podobné způsoby použití, jako například: Výrobek je vybaven bezpečnostními prvky. Přesto si pozorně přečtěte v obchodech, kancelářích nebo na podobných pracovištích, bezpečnostní pokyny a používejte tento výrobek pouze tak, jak je popsáno v zemědělských podnicích, v tomto návodu, aby nedopatřením nedošlo k zranění...
- Page 78 • Odkapávací misku a kryt spařovací jednotky je možno díky magnetům • Vytáhněte síťovou zástrčku ze zásuvky, ... snadno vkládat do kávovaru. Pokud by se některý ze vsazených magnetů ... pokud dojde k poruše, uvolnil, uchovávejte jej mimo dosah dětí. Pokud by došlo k spolknutí nebo ...
- Page 79 VÝSTRAHA před opařením/popálením • Nestavte kávovar na plotýnky sporáku, do bezprostřední blízkosti horké trouby nebo kamen, topných těles apod., aby se plášť kávovaru neroztavil. • Během používání kávovaru ani krátce po něm nesahejte na výpust kávy nebo mléka. Dávejte si pozor, abyste nepřišli do kontaktu s vytékajícím •...
- Page 80 Obalový materiál 4. Odstraňte přepravní pojistku, která se nachází pod nádržkou Obalový materiál chrání kávovar během přepravy. na vodu. 5. Nádržku na vodu umyjte vodou Obal si uschovejte pro případ, že budete kávovar muset přepravovat nebo a prostředkem na mytí nádobí. jej budete chtít vrátit.
- Page 81 Přehled (rozsah dodávky) otvor na nádržku na vodu regulátor stupně mletí nádržka na vodu zásobník na zrnkovou kávu (160 g) kontrolky ovládací tlačítka otočný regulátor mléčné pěny kryt (odnímatelný) trubička z ušlechtilé oceli kryt (spařovací jednotky) nádobka na kávovou sedlinu spařovací...
- Page 82 Ovládací tlačítka (bílá) Ovládací tlačítka jsou viditelná pouze tehdy, když je kávovar kryt zásobníku zapnutý. na zrnkovou kávu příprava příprava příprava espresa caffè crema kapučína nástavec na zásobník na zrnkovou kávu (300 g) tlačítko pro příprava EasyClean sílu kávy mléčné pěny funkce pro- Intense plachování...
- Page 83 Uvedení do provozu - před prvním použitím 2. Odkapávací misku s odkapá- vací mřížkou posuňte až úplně 1. Kávovar postavte ... ke kávovaru tak, jak vidíte na obrázku..na rovný povrch nebo pracovní desku, odolnou vůči vlhkosti. Odkapávací miska drží na ...
- Page 84 7. Nádržku na vodu naplňte až 10. Nasypte do zásobníku zhruba tolik zrnkové kávy, kolik po značku MAX čerstvou spotřebujete za jeden den. studenou vodou z vodovodu, Do zásobníku na zrnkovou příp. jinou pitnou vodou. kávu se vejde cca 160 g. Nikdy nenalévejte vodu Zásobník na zrnkovou kávu přímo do nádržky na vodu,...
- Page 85 Zapnutí kávovaru 14. Zapněte kávovar stisknutím vypínače. Předpoklady: • Síťová zástrčka je zasunutá v zásuvce. • Kávovar je vypnutý. Tlačítko EasyClean bliká a spustí • Nádržka na vodu je plná. se proces zahřívání. • Zásobník na zrnkovou kávu je plný. K zapnutí...
- Page 86 Nastavení výšky výpusti kávy/mléka Příprava nápojů bez mléka Výpust kávy/mléka můžete přizpůsobit různým velikostem šálků na kávu. Když budete chtít připravovat kávu bez mléka, můžete otočný regulátor mléčné pěny odejmout: Stáhněte otočný regulátor mléčné pěny stranou. Zavřete kryt na výpusti kávy/ mléka, abyste přípojku chránili před prachem.
- Page 87 Tip: Dané množství nápoje můžete změnit. Postup při změně množství 3. Stiskněte požadované tlačítko pro volbu druhu nápoje: najdete v kapitole „Změna množství nápoje“. Přednastavení při koupi kávovaru jsou následující: Espreso nebo espreso cca 40 ml – caffè crema cca 125 ml Příprava nápojů...
- Page 88 Nastavení tuhosti pěny 3. Stiskněte 1x krátce tlačítko Kapučíno. Pro výrobu velkého množství mléčné pěny s hrubými póry otáčejte regulátorem mléčné Tlačítko Kapučíno svítí a spustí pěny ve směru hodinových se proces zahřívání k napěňo- ručiček na větší puntík vání mléka. Má-li pěna hrubší...
- Page 89 VÝSTRAHA 3. Stiskněte 1x krátce tlačítko před popálením/opařením Napěňování. Horká voda, horká káva nebo horká mléčná pěna z výpusti kávy/mléka může způsobit opaření. Tlačítko Napěňování svítí a spustí se proces zahřívání • Během používání kávovaru ani krátce po něm nesahejte na výpust. pro přípravu mléčné...
- Page 90 2. Zasuňte trubičku z ušlechtilé Přednastavení při koupi kávovaru jsou následující: oceli do vody. mléčná pěna cca 130 ml (v závislosti na poloze otočného regulátoru) 3. Pod výpust kávy/mléka postavte prázdnou nádobu. Doporučujeme systém trubic a hadiček na mléko propláchnout ihned po každé...
- Page 91 Proplachování systému na přípravu kávy 4. Vylijte vodu. 5. Zopakujte kroky 3 a 4. Potom Když jste kávovar déle než 2 dny nepoužívali, propláchněte jej tak, že jím bude kávovar opět připraven necháte protéct 2 šálky vody. k použití. Předpoklady: •...
- Page 92 Úprava síly kávy - technologie pro sílu kávy Intense 2. Vyprázdněte nádobku na kávovou sedlinu, misku na zbytkovou vodu a dle potřeby Funkci Intense lze používat pouze společně s tlačítkem pro přípravu i odkapávací misku. kávy espreso, caffè crema nebo kapučíno. Předpoklady: •...
- Page 93 Změna množství kávy Espreso a caffè crema 1. Spusťte proces mletí a spařo- Z výroby nastavená množství nápojů nebo mléčné pěny můžete trvale vání kávy tak, že stisknete změnit. Pro každé tlačítko pro volbu druhu nápoje je možné zvolit požadované tlačítko pro volbu individuální...
- Page 94 3. Jakmile do šálku nateče 3. Jakmile do šálku nateče požadované množství mléčné požadované množství mléčné pěny, tlačítko pusťte. pěny, tlačítko pusťte. Nastavení je uloženo do paměti. Jako potvrzení zazní 2 signální tóny. Nastavení je uloženo do paměti. Jako potvrzení zazní 2 signální tóny. Nyní...
- Page 95 Nastavení stupně mletí Nastavení hrubšího stupně mletí Pokud chcete, aby káva protékala rychleji, např. protože má káva pro Vás příliš silnou chuť, nastavte hrubší stupeň mletí. POZOR na věcné škody 4. Stiskněte jedno ze dvou • Nastavení stupně mletí se smí provádět, pouze když je mlýnek v pro- tlačítek pro volbu druhu vozu.
- Page 96 Nástavec na zásobník na zrnkovou kávu 4. Nasypte zrnkovou kávu. Objem zásobníku na zrnkovou kávu můžete zvětšit ze 160 g na 300 g. Přitom postupujte následovně: 1. Sejměte kryt ze zásobníku na zrnkovou kávu. 2. Na otvor zásobníku na zrnko- vou kávu nasaďte nástavec tak, jak vidíte na obrázku.
- Page 97 Přizpůsobení automatického procesu proplachování energie. Na výběr máte ze čtyř časových úseků, po kterých se kávovar má automaticky vypnout: 10 minut, 20 minut, 30 minut nebo 120 minut. Rozdílné doby vypnutí můžete nastavit podle následujícího popisu: Kávovar je z výroby nastaven tak, aby se automatický proces proplachování spustil pouze tehdy, když...
- Page 98 Čištění denně týdně dle potřeby plášť přístroje NEBEZPEČÍ ohrožení života úderem elektrickým proudem umývání nádržky na vodu Úder elektrickým proudem může způsobit těžké zranění a/nebo smrt. vyplachování nádržky • Než začnete přístroj čistit, vytáhněte síťovou zástrčku ze zásuvky. na vodu •...
- Page 99 4. Jednotlivé díly umyjte vodou 1. Vytáhněte filtr směrem a prostředkem na mytí nádobí. nahoru. Potom všechny díly dobře 2. Vypláchněte jej pod tekoucí utřete. Tyto díly nejsou vodou. vhodné do myčky. 5. Vložte nádobku na kávovou sedlinu opět domisky na zbytkovou vodu a zasuňte oba dva díly do kávovaru.
- Page 100 Čištění spařovací jednotky 3. Stiskněte obě dvě oranžová tlačítka, držte je pevně VÝSTRAHA stisknutá a vytáhněte před popálením spařovací jednotku rovně Spařovací jednotka se během používání silně zahřívá. ven z kávo varu. • Nečistěte spařovací jednotku hned po použití kávovaru. Než spařovací jednotku vyjmete za účelem vyčištění, nechte kávovar vychladnout.
- Page 101 8. Kryt opět nasaďte před spařo- 2. Stáhněte silikonovou hadičku z otočného regulátoru mléčné vací jednotku do kávovaru. pěny. Kryt drží na svém místě díky magnetům. 3. Stáhněte trubičku z ušlechtilé oceli z hadičky. Čištění systému trubic a hadiček na mléko 4.
- Page 102 Milchsystem-Reiniger - k dostání ve ® ® ukazoval směrem doleva. většině prodejen Tchibo. 9. Otevřete silikonové opláštění Složení systému trubic a hadiček na mléko tak, jak vidíte na obrázku a ... 1. Zastrčte adaptér úplně rovně do silikonového opláštění až...
- Page 103 5. Opět nasaďte výpust mléka. 10. Otevřete kryt na výpusti kávy/ mléka. 6. Kryt opět nasaďte na výpust kávy/mléka. Kryt drží na svém 11. Zastrčte otočný regulátor místě díky magnetům. mléčné pěny úplně rovně až na doraz do přípojky tak, jak vidíte na obrázku.
- Page 104 Odvápňování 1. Vytáhněte z kávovaru nádržku na vodu směrem nahoru. POZOR na poškození přístroje v důsledku zavápnění Tvorba vápenných usazenin může kávovar poškodit. • Kávovar odvápněte, jakmile začne signalizovat nutnost odvápnění. Odvápňování prodlužuje životnost kávovaru a šetří energii. 2. Do prázdné nádržky na vodu •...
- Page 105 5. Stiskněte vypínač a tlačítko Po dokončení procesu Espreso a držte je stisknuté svítí symbol „Odvápnit“ (po dobu cca 5 sekund), a symbol „Dolít vodu“ ... dokud nezazní 2 signální tóny. 6. Tlačítka pusťte..a tlačítko Espreso bliká. Začne blikat symbol „Odvápnit“...
- Page 106 13. Nádržku na vodu opět vložte 1. Pod výpust kávy postavte do kávovaru a zatlačte ji dolů práz dnou nádobku (s objemem až na doraz. minimálně 250 ml). Pokud bude třeba, odstraňte odkapávací misku. Symbol „Dolít vodu“ zhasne a za několik 2.
- Page 107 Následně se kávovar automaticky přepne do pohotovostního režimu. Je možné, že miska na zbytkovou vodu s nádobkou na kávovou sedlinu nejsou vložené v kávovaru nebo že nejsou vložené Když budete chtít kávovar později opět uvést do provozu, postupujte správně? Vložte je opět do kávovaru (viz krok 7 v kapitole podle popisu v kapitole „Uvedení...
- Page 108 Okolní teplota: +10 až +40 °C Ke změně konzistence mléčné pěny otočte regulátor mléčné Made exclusively for: Tchibo GmbH, Überseering 18, pěny ve směru nebo proti směru chodu hodinových ručiček 22297 Hamburg, Germany (viz kapitola „Příprava nápojů s mlékem“, oddíl „Nastavení...
- Page 109 Prohlášení o shodě Likvidace Společnost Tchibo GmbH tímto prohlašuje, že tento výrobek splňuje Výrobek a jeho obal byly vyrobeny z cenných recyklovatelných materiálů. v době uvedení na trh základní požadavky a všechna příslušná opatření Recyklace snižuje množství odpadu a chrání životní prostředí.
- Page 110 Tchibo nebo jednoho z prodejních partnerů autorizovaných společností • pokud možno co nejpřesnější popis závady. Tchibo. Tato záruka platí v rámci EU, ve Švýcarsku a v Turecku. Výrobek dobře zabalte, aby se mu při přepravě nemohlo nic stát. Po dohodě...
- Page 111 106466 cs Esperto_Pro_v5.indd 111 14.06.21 10:47...
- Page 112 Artikelnummer | Product number | Číslo výrobku : 393 500 Made exclusively for: Tchibo GmbH, Überseering 18, 22297 Hamburg, Germany www.tchibo.de • www.tchibo.cz 106466 cs Esperto_Pro_v5.indd 112 14.06.21 10:47...
Need help?
Do you have a question about the Esperto Pro and is the answer not in the manual?
Questions and answers