
Subscribe to Our Youtube Channel
Related Manuals for Keithley 2303


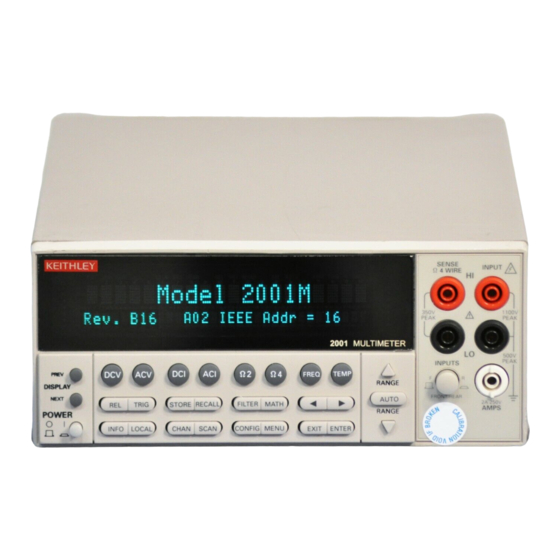
Summary of Contents for Keithley 2303
- Page 1 Model 2303/2303B/2303-PJ High Speed Power Supply Service Manual Contains Servicing Information...
- Page 2 AGES SHALL INCLUDE, BUT ARE NOT LIMITED TO: COSTS OF REMOVAL AND INSTALLATION, LOSSES SUSTAINED AS THE RESULT OF INJURY TO ANY PERSON, OR DAMAGE TO PROPERTY. Keithley Instruments, Inc. • 28775 Aurora Road • Cleveland, OH 44139 • 440-248-0400 • Fax: 440-248-6168 • http://www.keithley.com BELGIUM: Keithley Instruments B.V.
- Page 3 Model 2303/2303B/2303-PJ High Speed Power Supply Service Manual ©1998, Keithley Instruments, Inc. All rights reserved. Cleveland, Ohio, U.S.A. Third Printing, November 1999 Document Number: 2303-902-01 Rev. C...
- Page 4 Revision B (Document Number 2303-902-01) ..............June 1998 Revision C (Document Number 2303-902-01) ............November 1999 All Keithley product names are trademarks or registered trademarks of Keithley Instruments, Inc. Other brand names are trademarks or registered trademarks of their respective holders.
- Page 5 As described in the International Electrotechnical Commission (IEC) Standard IEC 664, digital multi- meter measuring circuits (e.g., Keithley Models 175A, 199, 2000, 2001, 2002, and 2010) are Installation Category II. All other instruments’ signal terminals are Installation Category I and must not be connect- ed to mains.
- Page 6 To maintain protection from electric shock and fire, replacement components in mains circuits, including the power transformer, test leads, and input jacks, must be purchased from Keithley Instruments. Standard fuses, with applicable national safety approvals, may be used if the rating and type are the same. Other components that are not safety related may be purchased from other suppliers as long as they are equivalent to the original component.
-
Page 7: Table Of Contents
Voltage readback accuracy..............1-7 Compliance current accuracy..............1-7 Current readback accuracy..............1-9 5A range readback accuracy ............1-9 Models 2303 and 2303B 5mA range readback accuracy....1-10 Model 2303-PJ 500mA range readback accuracy ......1-11 Digital voltmeter input accuracy............1-13 Calibration Introduction..................... - Page 8 Instrument re-assembly ................3-5 Replaceable Parts Introduction .....................4-2 Ordering information................4-2 Factory service ..................4-2 Parts lists and component layouts ............4-2 Models 2303 and 2303-PJ parts lists..........4-3 Model 2303B parts lists..............4-14 Specifications Specifications ..................A-2 Accuracy calculations................A-6 Output and compliance accuracy ............A-6 Readback accuracy ................A-6 Digital voltmeter input accuracy .............A-6...
- Page 9 Introduction.................... C-2 Computer hardware requirements............C-2 Software requirements ................C-2 Calibration equipment................C-2 General program instructions..............C-3 Program C-1 Model 2303/2303B calibration program....C-4 Program C-2 Model 2303-PJ calibration program......C-6 Instrument Control Introduction.................... D-2 Front panel control................. D-2 Setting the display mode..............D-2 Selecting the current range..............
- Page 10 Connections for output current and 5A range current verification tests..1-8 Connections for Model 2303 and 2303B 5mA current verification tests ............1-10 Connections for Model 2303-PJ 500mA current verification tests 1-12 Connections for DVM accuracy verification........1-13 Calibration Test resistor connections ..............2-4 Connections for voltage calibration ..........2-6...
- Page 11 Voltage readback accuracy limits............1-7 Compliance current accuracy limits............1-9 5A range current readback accuracy limits........... 1-10 Model 2303 and 2303B 5mA range current readback accuracy limits. 1-11 Model 2303-PJ 500mA range current readback accuracy limits ..1-13 Digital voltmeter input accuracy limits..........1-14 Calibration Recommended calibration equipment.............
-
Page 12: Performance Verification
Performance Verification... -
Page 13: Introduction
A relative humidity of less than 70% unless otherwise noted. Warm-up period Allow the Model 2303 to warm up for at least one hour before conducting the verification procedures. If the unit has been subjected to temperature extremes (those outside the ranges stated above), allow additional time for the instrument’s internal temperature to stabilize. -
Page 14: Line Power
Performance Verification Line power The Model 2303 requires a line voltage of 100 to 240V and a line frequency of 50 to 60Hz. Verification tests must be performed within this range. Recommended test equipment Table 1-1 summarizes recommended verification equipment. You can use alternate equip- ment as long as that equipment has specifications at least four times better than corresponding Model 2303, 2303B, or 2303-PJ specifications. -
Page 15: Resistor Considerations
∆R is the change in resistance caused by heating.) Verification limits The verification limits stated in this section have been calculated using only the Model 2303 accuracy specifications, and they do not include test equipment uncertainty. If a particular mea- surement falls outside the allowable range, recalculate new limits based both on Model 2303 specifications and corresponding test equipment specifications. -
Page 16: Performing The Verification Test Procedures
When performing the verification procedures: • Make sure that the test equipment is properly warmed up and connected to the correct Model 2303 terminals on the rear panel. Also be sure the test equipment is set up for the proper function and range. •... -
Page 17: Output Voltage Accuracy Limits
Verify output voltage accuracy for each of the voltages listed in Table 1-2. For each test point: • Set the Model 2303 output voltage to the indicated value. When setting the voltage, set the compliance current to 3A. • Allow the reading to settle. -
Page 18: Voltage Readback Accuracy
When setting the voltage, set the compliance current to 3A. • Allow the reading to settle. • Verify that the actual Model 2303 voltage reading is within the limits given in the table. Table 1-3 Voltage readback accuracy limits... - Page 19 Verify compliance current accuracy for the currents listed in Table 1-4. For each test point: • Set the Model 2303 output voltage to 9V, and set the compliance current to the value being tested. • Note and record the digital multimeter voltage reading.
-
Page 20: Current Readback Accuracy
• Note that it may not be possible to set the output current to the exact value. In that case, set the current to the closest possible value, and modify reading limits accordingly. • Allow the reading to settle. • Verify that the actual Model 2303 current reading is within the limits given in the table. -
Page 21: Models 2303 And 2303B 5Ma Range Readback Accuracy
With the power off, connect the digital multimeter and characterized 3kΩ resistor to the Model 2303 or 2303B OUTPUT SOURCE terminals, as shown in Figure 1-4. Be sure to observe proper polarity and connections (3kΩ resistor between SOURCE + and DMM INPUT HI;... -
Page 22: Model 2303-Pj 500Ma Range Readback Accuracy
• Allow the reading to settle. • Verify that the actual Model 2303 current reading is within the limits given in the table. Table 1-6 Model 2303 and 2303B 5mA range current readback accuracy limits... - Page 23 Verify 500mA range current readback accuracy for the currents listed in Table 1-7. For each test point: • Set the Model 2303-PJ output current to the correct value, as determined from the dig- ital multimeter voltage reading and 30Ω resistance value. Note that it may not be pos- sible to set the output current to the exact value.
-
Page 24: Digital Voltmeter Input Accuracy
488.98 to 491.02mA Digital voltmeter input accuracy Follow the steps below to verify that Model 2303, 2303B, and 2303-PJ digital voltmeter input accuracy is within specified limits. The test involves setting the voltage applied to the DVM input to accurate values and then verifying that the Model 2303 digital voltmeter input readings are within required limits. -
Page 25: Digital Voltmeter Input Accuracy Limits
• Set the voltage to the indicated value as measured by the digital multimeter. • Set compliance to 3A. • Allow the reading to settle. • Verify that the Model 2303 voltage reading is within the limits given in the table. Table 1-8 Digital voltmeter input accuracy limits... -
Page 26: Calibration
Calibration... -
Page 27: Introduction
Also, allow the test equipment to warm up for the minimum time specified by the manufacturer. Line power The Model 2303 requires a line voltage of 100 to 240V at line frequency of 50 to 60Hz. The instrument must be calibrated while operating from a line voltage within this range. Calibration considerations When performing the calibration procedures: •... -
Page 28: Calibration Cycle
2. Characterize resistor using 4-wire ohms function and 20 Ω range of DMM before use. 3. Required only for Model 2303-PJ. Characterize resistor using 4-wire ohms function and 200 Ω range of DMM before use. See Resistor considerations for temperature coefficient. -
Page 29: Resistor Considerations
Front panel calibration Model 2303 and Model 2303-PJ front panel calibration are covered separately below. Model 2303 front panel calibration Use the following procedure to calibrate the Model 2303 from the front panel. Table 2-2 sum- marizes calibration steps. NOTE Calibration must be performed in the following sequence, or an error will occur. - Page 30 Calibration Step 1: Prepare the Model 2303 for calibration Turn on the Model 2303 and the digital multimeter, and allow them to warm up for at least one hour before performing calibration. Press the MENU key, then choose CALIBRATE UNIT, and press ENTER. The instru-...
-
Page 31: Connections For Voltage Calibration
FULL SCALE VOLTS READ1 14.0000 V Using the edit keys, adjust the Model 2303 voltage display to agree with the DMM volt- age reading, then press ENTER. The unit will then prompt for another DMM reading, which will be used to calibrate the full-scale measurement function: FULL SCALE VOLTS READ2 14.0000 V... -
Page 32: Connections For 5A Current Calibration
READ1 1.90000 A Note the DMM voltage reading, then calculate the current from that reading and the actual 4 Ω resistance value: I = V/R. Adjust the Model 2303 current display value to agree with the calculated current value, and press ENTER. -
Page 33: Connections For 5Ma Range Calibration
Calibration The Model 2303 will then prompt for another DMM reading, which is used for 5A mea- surement calibration: SOURCE 5 AMPS READ2 1.90000 A Again, calculate the current from the new DMM reading and 4 Ω resistor value. Adjust the 2303 current display reading to agree with the new current, then press ENTER. -
Page 34: Calibration
Calibration Note the DMM voltage reading, then calculate the current from that voltage reading and actual 3k Ω resistance value. Adjust the Model 2303 current display value to agree with that value, and press ENTER. Table 2-2 Model 2303 front panel calibration summary... -
Page 35: Model 2303-Pj Front Panel Calibration
MENU key. Step 1: Prepare the Model 2303-PJ for calibration Turn on the Model 2303 and the digital multimeter, and allow them to warm up for at least one hour before performing calibration. Press the MENU key, then choose CALIBRATE UNIT, and press ENTER. The instru-... - Page 36 Calibration 2-11 At this point, the Model 2303 will prompt you to set the full-scale output voltage: FULL SCALE VOLTS SET 14.0000 V Use the edit keys to set the voltage to 14.0000V, then press ENTER. NOTE At this point, the source output is turned on and will remain on until calibration is complete or aborted with the MENU key.
-
Page 37: Connections For 500Ma Range Calibration
DMM reading: SOURCE 500 mA READ1 450.000 mA Note the DMM voltage reading, then calculate the current from that voltage reading and actual 30Ω resistance value. Adjust the Model 2303-PJ current display value to agree with that value, and press ENTER. -
Page 38: Calibration
Calibration 2-13 Table 2-3 Model 2303-PJ front panel calibration summary Step* Description Nominal calibration signal** Test connections Output 14V Figure 2-2 Full-scale output voltage Figure 2-2 Full-scale measure Figure 2-2 Full-scale DVM Figure 2-2 5A range output current 1.9A Figure 2-3 5A current limit 1.9A... -
Page 39: Remote Calibration
2-14 Calibration Remote calibration Follow the procedure outlined below to perform Model 2303, 2303B, and 2303-PJ remote calibration by sending SCPI commands over the IEEE-488 bus. The remote commands and appropriate parameters are separately summarized for each step. Remote calibration commands Table 2-4 summarizes remote calibration commands. -
Page 40: Remote Calibration Display
Connect the Model 2303 to the controller IEEE-488 interface using a shielded interface cable. Turn on the Model 2303 and the test equipment, and allow them to warm up for at least one hour before performing calibration. Make sure the IEEE-488 primary address of the Model 2303 is the same as the address specified in the program you will be using to send commands. - Page 41 Send the following command for DVM full-scale calibration: :CAL:PROT:STEP3 Connect the Model 2303 OUTPUT SOURCE terminals to the DMM volts input and characterized 4Ω resistor, as shown in Figure 2-3. Be sure to observe proper polarity (SOURCE + to INPUT HI; SOURCE - to INPUT LO).
-
Page 42: Models 2303 And 2303B Remote Calibration Summary
Calibration 2-17 Table 2-5 Models 2303 and 2303B remote calibration summary Test Step* Command Description connections :CAL:PROT:CODE ‘KI002303’ Unlock calibration. None :CAL:PROT:INIT Initiate calibration. None :CAL:PROT:STEP0 14 Full-scale (14V) output Figure 2-2 :CAL:PROT:STEP1 <DMM_Reading> Full-scale output cal. Figure 2-2 :CAL:PROT:STEP2 <DMM_Reading> Full-scale measure cal. -
Page 43: Model 2303-Pj Remote Calibration Procedure
Connect the Model 2303-PJ to the controller IEEE-488 interface using a shielded inter- face cable. Turn on the Model 2303-PJ and the test equipment, and allow them to warm up for at least one hour before performing calibration. Make sure the IEEE-488 primary address of the Model 2303-PJ is the same as the address specified in the program you will be using to send commands. - Page 44 Send the following command for DVM full-scale calibration: :CAL:PROT:STEP3 Connect the Model 2303-PJ OUTPUT SOURCE terminals to the DMM volts input and characterized 4Ω resistor, as shown in Figure 2-3. Be sure to observe proper polarity (SOURCE + to INPUT HI; SOURCE - to INPUT LO).
-
Page 45: Model 2303-Pj Remote Calibration Summary
2-20 Calibration Table 2-6 Model 2303-PJ remote calibration summary Test Step* Command Description connections :CAL:PROT:CODE ‘KI002303’ Unlock calibration. None :CAL:PROT:INIT Initiate calibration. None :CAL:PROT:STEP0 14 Full-scale (14V) output Figure 2-2 :CAL:PROT:STEP1 <DMM_Reading> Full-scale output cal. Figure 2-2 :CAL:PROT:STEP2 <DMM_Reading> Full-scale measure cal. -
Page 46: Changing The Calibration Code
(Models 2303, 2303B, and 2303-PJ) as discussed below. Changing the code from the front panel Follow the steps below to change the Model 2303 of 2303-PJ code from the front panel: Press the MENU key, then choose CALIBRATE UNIT, and press ENTER. The instru-... -
Page 47: Resetting The Calibration Code
Viewing calibration date and count Viewing date and count from the front panel Follow the steps below to view the Model 2303 or 2303-PJ calibration date and count from the front panel: Press the MENU key, then choose CALIBRATE UNIT, and press ENTER. The instru-... -
Page 48: Disassembly
Disassembly... -
Page 49: Introduction
Disassembly Introduction This section explains how to handle, clean, and disassemble the Models 2303, 2303B, and 2303-PJ. Disassembly drawings are located at the end of this section. WARNING The procedures in this section are intended only for qualified service per- sonnel. -
Page 50: Assembly Drawings
Use the assembly drawings located at the end of this section to assist you as you disassemble and re-assemble the Model 2303. Also, refer to these drawings for information about the Keithley part numbers of most mechanical parts in the unit. -
Page 51: Analog Board Removal
Front panel disassembly Follow the steps below to disassemble the front panel (Models 2303 and 2303-PJ only). The procedure assumes that the front panel has already been removed from the chassis as described above. -
Page 52: Removing Mechanical Components
Disassembly 3-5 Remove the display board from the front panel. Removing mechanical components The following procedures to remove the fan and line filter require that the case cover, front panel, and digital and analog circuit boards have been removed, as previously explained. Fan removal Perform the following steps to remove the fan: Remove the four screws that secure the fan to the rear panel. - Page 53 Disassembly...
-
Page 54: Replaceable Parts
Parts lists and component layouts The parts lists for the Models 2303, 2303B, and 2303-PJ are listed separately in tables on the following pages. For part numbers to the various mechanical parts and assemblies, use the as- sembly drawings provided at the end of Section 3 . Component layout drawings are provided at the end of this section: •... -
Page 55: Models 2303 And 2303-Pj Parts Lists
Replaceable Parts 4-3 Models 2303 and 2303-PJ parts lists Table 4-1 Models 2303 and 2303-PJ digital board parts list Circuit designation Description Keithley part no. C100,111,117,122,124,128,151-153,213 CAP, .1UF, 20%, 50V, CERAMIC C-418-.1 C101,C102,C105,C115 CAP, .1UF, 10%, 25V, CERAMIC C-495-.1 C106,C150,C265... - Page 56 Replaceable Parts Table 4-1 (continued) Models 2303 and 2303-PJ digital board parts list Circuit designation Description Keithley part no. C252,253,255-257,259-263,271,169,270 CAP, .1UF, 20%, 50V, CERAMIC C-418-.1 C254 CAP, 100PF, 5%, 100V, CERAMIC C-465-100P C280,281,172,174-177,180,182,186,187 CAP, .1UF, 10%, 25V, CERAMIC C-495-.1 C285 CAP, .15UF, 20%,50V, CERAMIC...
- Page 57 Replaceable Parts 4-5 Table 4-1 (continued) Models 2303 and 2303-PJ digital board parts list Circuit designation Description Keithley part no. R113,R156 RES, 24.3, 1%, 100MW, THICK FILM R-418-24.3 R114 RES, 332K,1%, 100MW, THICK FILM R-418-332K R116,R167 RES, 2K, 1%, 100MW, THICK FILM...
- Page 58 Replaceable Parts Table 4-1 (continued) Models 2303 and 2303-PJ digital board parts list Circuit designation Description Keithley part no. R245 RES, 34K, 1%, 100MW, THICK FILM R-418-34K R246,R270,R272 RES, 475, 1%, 100MW, THICK FILM R-418-475 R248 RES, 470, 5%, 125MW, METAL FILM...
- Page 59 Replaceable Parts 4-7 Table 4-1 (continued) Models 2303 and 2303-PJ digital board parts list Circuit designation Description Keithley part no. U117 IC, QUAD D FLIP FLOP W/CLK, RESET IC-923 74HC175 U118 IC, NCHAN LAT DMOS QUADFET, IC-893 SD5400CY U119,U125 IC, QUAD 2 IN NOR, 74HCT02...
-
Page 60: Models 2303 And 2303-Pj Analog Board Parts List
Replaceable Parts Table 4-2 Models 2303 and 2303-PJ analog board parts list Circuit designation Description Keithley part no. C301,308,310,312,313,320,325,329,333,337 CAP, .1UF, 10%, 25V, CERAMIC C-495-.1 C302,C489,C506 CAP, 1UF, 20%, 50V, TANTALUM C-431-1 C303,C309 CAP, 7.5P, 10%, 100V, CERAMIC C-452-7.5P C304,488,307,315,317,321,328,338,339,346 CAP, .1UF, 20%,50V, CERAMIC C-418-.1... - Page 61 Replaceable Parts 4-9 Table 4-2 (continued) Models 2303 and 2303-PJ analog board parts list Circuit designation Description Keithley part no. CR303-306,308,309,311,312,319,327-329 DIODE, MBRS140T3 RF-110 CR307,CR310 SCHOTTKY BARRIER DIODE RF-108 CR313 ULTRA FAST BRIDGE RECTIFIER RF-123 CR314 DIODE, BRIDGE PE05 RF-48...
- Page 62 4-10 Replaceable Parts Table 4-2 (continued) Models 2303 and 2303-PJ analog board parts list Circuit designation Description Keithley part no. R315,372,314,492,415,441,458-460 RES, 10K, 1%, 100MW, THICK FILM R-418-10K R320,R444 RES, 100K, 1%, 100MW, THICK FILM R-418-100K R321,R503 RES, 1M, 1%, 100MW, THICK FILM...
- Page 63 Replaceable Parts 4-11 Table 4-2 (continued) Models 2303 and 2303-PJ analog board parts list Circuit designation Description Keithley part no. R462-464,467,468 RES, 10K, 1%, 100MW, THICK FILM R-418-10K R465,R494 RES, 11K, 1%, 100MW, THICK FILM R-418-11K R469 RES, 49.9K, 1%, 100MW, THICK FILM R-418-49.9K...
-
Page 64: Models 2303 And 2303-Pj Display Board Parts
4-12 Replaceable Parts Table 4-3 Models 2303 and 2303-PJ display board parts Circuit designation Description Keithley part no. C601,C602 CAP, 33PF, 10%, 100V, CERAMIC C-451-33P C603 CAP, .1UF, 10%, 25V, CERAMIC C-495-.1 C609 CAP, .1UF, 10%, 25V, CERAMIC C-495-.1 C611... -
Page 65: Models 2303 And 2303-Pj Mechanical Parts List
Replaceable Parts 4-13 Table 4-4 Models 2303 and 2303-PJ mechanical parts list Keithley Qty. Description part no. BEZEL, REAR 428-303D CHASSIS 2304-301 COVER 2000-307C FN-34-1 FOOT 428-319A FOOT, EXTRUDED FE-22A FOOT, RUBBER FE-6 FUSE, 2A, 250V, TIME LAG (5X20MM) F100... -
Page 66: Model 2303B Parts Lists
4-14 Replaceable Parts Model 2303B parts lists Table 4-5 Model 2303B digital board lists Circuit designation Description Keithley part no. C100,111,117,122,124,128,151-153,213 CAP, .1UF, 20%, 50V, CERAMIC C-418-.1 C101,C102,C105,C115 CAP, .1UF, 10%, 25V, CERAMIC C-495-.1 C106,C150,C265 CAP, 1000PF, 10%, 50V, MONO CERAMIC C-452-1000P... - Page 67 Replaceable Parts 4-15 Table 4-5 (continued) Model 2303B digital board lists Circuit designation Description Keithley part no. C250,C251 CAP, .01UF, 10%, 50V, CERAMIC C-491-.01 C252,253,255-257,259-263,271,169,270 CAP, .1UF, 20%, 50V, CERAMIC C-418-.1 C254 CAP,100PF, 5%, 100V, CERAMIC C-465-100P C280,281,172,174-177,180,182,186,187 CAP, .1UF, 10%, 25V, CERAMIC C-495-.1...
- Page 68 4-16 Replaceable Parts Table 4-5 (continued) Model 2303B digital board lists Circuit designation Description Keithley part no. R111,R165 RES, 4.02K, 1%, 100MW, THICK FILM R-418-4.02K R113,R156 RES, 24.3, 1%, 100MW, THICK FILM R-418-24.3 R114 RES, 332K,1%, 100MW, THICK FILM R-418-332K...
- Page 69 Replaceable Parts 4-17 Table 4-5 (continued) Model 2303B digital board lists Circuit designation Description Keithley part no. R244 RES, 82.5, 1%, 100MW, THICK FILM R-418-82.5 R245 RES, 34K, 1%, 100MW, THICK FILM R-418-34K R246,R270,R272 RES, 475, 1%, 100MW, THICK FILM...
- Page 70 4-18 Replaceable Parts Table 4-5 (continued) Model 2303B digital board lists Circuit designation Description Keithley part no. U116 IC, OPTOCOUPLER, 2601 IC-239 U117 IC, QUAD D FLIP FLOP W/CLK, RESET IC-923 74HC175 U118 IC, NCHAN LAT DMOS QUADFET, IC-893 SD5400CY...
-
Page 71: Model 2303B Analog Board Parts List
Replaceable Parts 4-19 Table 4-6 Model 2303B analog board parts list Circuit designation Description Keithley part no. C301,308,310,312,313,320,325,329,333,337 CAP, .1UF, 10%, 25V, CERAMIC C-495-.1 C302,C489,C506 CAP, 1UF, 20%, 50V, TANTALUM C-431-1 C303,C309 CAP, 7.5P, 10%, 100V, CERAMIC C-452-7.5P C304,488,307,315,317,321,328,338,339,346 CAP, .1UF, 20%, 50V, CERAMIC C-418-.1... - Page 72 4-20 Replaceable Parts Table 4-6 (continued) Model 2303B analog board parts list Circuit designation Description Keithley part no. CR303-306,308,309,311,312,319,327-329 DIODE, MBRS140T3 RF-110 CR307,CR310 SCHOTTKY BARRIER DIODE RF-108 CR313 ULTRA FAST BRIDGE RECTIFIER RF-123 CR314 DIODE, BRIDGE PE05 RF-48 CR315 DIODE, SILICON, 53A4...
- Page 73 Replaceable Parts 4-21 Table 4-6 (continued) Model 2303B analog board parts list Circuit designation Description Keithley part no. R321,R503 RES, 1M, 1%, 100MW, THICK FILM R-418-1M R322,R489 RES, 8.06K, 1%, .1W, THICK FILM R-418-8.06K R325 RES, 10, 10%, 100MW, THICK FILM...
- Page 74 4-22 Replaceable Parts Table 4-6 (continued) Model 2303B analog board parts list Circuit designation Description Keithley part no. R479 RES, 20K, .1%, .125W, THIN FILM R-456-20K R481,R482 RES, 4.99K, .1%, .125W, THIN FILM R-456-4.99K R493 RES, 45.3K, 1%, 100MW, THICK FILM R-418-45.3K...
-
Page 75: Model 2303B Mechanical Parts List
Replaceable Parts 4-23 Table 4-7 Model 2303B mechanical parts list Keithley Qty. Description part no. BEZEL, REAR 428-303D COVER 2000-307C FN-34-1 FOOT 428-319A FOOT, EXTRUDED FE-22A FOOT, RUBBER FE-6 FUSE, 2A, 250V, TIME LAG (5X20MM) F100 FU-81 HANDLE 428-329F LINE CORD... -
Page 76: Specifications
Specifications... - Page 77 Specifications Specifications The following pages contain the condensed specifications for the 2303. Every effort has been made to make these specifications complete by characterizing its performance under the variety of conditions often encountered in production, engineering, and research. Absolute accuracy All DC specifications are given as relative accuracies.
- Page 78 Specifications DC VOLTAGE OUTPUT (2 YEARS, 23°C ± 5°C) OUTPUT VOLTAGE: 0 to +15VDC. OUTPUT ACCURACY: ±(0.05% + 10mV). PROGRAMMING RESOLUTION: 5mV. READBACK ACCURACY : ±(0.05% + 3mV). READBACK RESOLUTION: 1mV. OUTPUT VOLTAGE SETTLING TIME: 5ms to within stated accuracy. LOAD REGULATION: 0.01% + 2mV.
- Page 79 ACCESSORIES AVAILABLE: Model 2304-DISP: Remote Display/Keypad (4.6 in × 2.7 in × 1.5 in). Includes 2.7m (9 ft) cable and rack mount kit. Model 2303B: 2303 with blank front panel (only AC power indicator LED). PLC = 1.00. Following 15 minute warm-up, the change in output over 8 hours under ambient temperature, constant load, and line operating conditions.
-
Page 80: Accuracy Calculations
Output and compliance accuracy are calculated as follows: Accuracy = ±(% of output + offset) As an example of how to calculate the actual output limits, assume the Model 2303, 2303B, or 2303-PJ is sourcing 10V. Compute the output range from output voltage accuracy specifica-... - Page 81 Specifications...
-
Page 82: B Calibration Reference Introduction
Calibration Reference... -
Page 83: Command Summary
Calibration Reference Introduction This appendix contains detailed information on the various Model 2303, 2303B, and 2303-PJ remote calibration commands, calibration error messages, and methods to detect the end of each calibration step. Section 2 of this manual covers detailed calibration procedures. -
Page 84: Miscellaneous Commands
The code parameter must be enclosed in single quotes. Example :CAL:PROT:CODE 'KI002303' Send default code of KI002303. :COUNT? (:CALibration:PROTected:COUNt?) Purpose To request the number of times the Model 2303 has been calibrated. Format :cal:prot:count? Response Number of times calibrated. Description The :COUNT? query may be used to determine the total number of times the Model 2303 has been calibrated. - Page 85 Calibration Reference Parameters <yyyy> = 1998 to 2097 <mm> = 1 to 12 <dd> = 1 to 31 Query :cal:prot:date? Response <yyyy> , <mm> , <dd> Description The :DATE command allows you to store the calibration date in instrument EEROM for future reference. You can read back the date from the instrument by using the :DATE? query.
-
Page 86: Calibration Step Summary
Output current (1.9A) for 5A full-scale cal. :STEP5 <nrf> Calibrate output current limit using calculated current. :STEP6 <nrf> Calibrate 5A measurement range using calculated current. :STEP7 Output 5mA (500mA, Model 2303-PJ) nominal current. :STEP8 <nrf> Calibrate 5mA (500mA, Model 2303-PJ) measurement range using calculated current. -
Page 87: Detecting Calibration Errors
Several methods to detect calibration errors are discussed below. Reading the error queue As with other Model 2303 errors, any calibration errors will be reported in the error queue. Use the :SYST:ERR? query to read the error queue. -
Page 88: Generating An Srq On Error
Calibration Reference B-7 Generating an SRQ on error To program the instrument to generate an IEEE-488 bus SRQ (Service Request) when an error occurs, send the following command: *SRE 4. This command will enable SRQ when the EAV bit is set. You can then read the status byte and error queue as outlined above to check for errors and to determine the exact nature of the error. -
Page 89: Generating An Srq On Calibration Complete
An IEEE-488 bus SRQ (service request) can be used to detect operation complete instead of repeatedly polling the Model 2303. To use this method, send both *ESE 1 and *SRE 32 to the instrument, then include the *OPC command at the end of each calibration command line, as covered above. -
Page 90: C Calibration Programs
Calibration Programs... -
Page 91: Introduction
Introduction This appendix includes calibration programs written in BASIC to help you in calibrating the Models 2303/2303B or Model 2303-PJ. Refer to Section 2 for more details on calibration procedures, equipment, and connections. Appendix B covers calibration commands in detail. -
Page 92: General Program Instructions
Calibration Programs C-3 General program instructions With the power off, connect the Model 2303 and the digital multimeter to the IEEE-488 interface of the computer. Be sure to use shielded IEEE-488 cables for bus connections. Turn on the computer, the Model 2303, and the digital multimeter. Allow the Model 2303 and the multimeter to warm up for at least one hour before performing calibration. - Page 93 Model 2303/2303B calibration program ' Model 2303/2303B calibration program using Keithley Model 2001 DMM. ' Rev. 1.1, 1/15/98 ' 2303 primary address = 16. 2001 primary address = 17. OPEN "IEEE" FOR OUTPUT AS #1 ' Open IEEE-488 output path.
- Page 94 Calibration Programs C-5 GOSUB ErrCheck PRINT "Calibration completed." PRINT #1, "LOCAL 16 17" CLOSE KeyCheck: ' Check for key press routine. WHILE INKEY$ <> "": WEND ' Flush keyboard buffer. PRINT : PRINT "Press any key to continue (ESC to abort program)." DO: I$ = INKEY$: LOOP WHILE I$ = ""...
- Page 95 Model 2303-PJ calibration program ' Model 2303-PJ calibration program using Keithley Model 2001 DMM. ' Rev. 1.0, 1/15/98 ' 2303-PJ primary address = 16. 2001 primary address = 17. OPEN "IEEE" FOR OUTPUT AS #1 ' Open IEEE-488 output path.
- Page 96 Calibration Programs C-7 GOSUB ErrCheck PRINT "Calibration completed." PRINT #1, "LOCAL 16 17" CLOSE KeyCheck: ' Check for key press routine. WHILE INKEY$ <> "": WEND ' Flush keyboard buffer. PRINT : PRINT "Press any key to continue (ESC to abort program)." DO: I$ = INKEY$: LOOP WHILE I$ = ""...
-
Page 97: Instrument Control
Instrument Control... -
Page 98: Introduction
Introduction This appendix contains basic information on controlling the Model 2303 and 2303-PJ from the front panel, or programming the Model 2303, 2303B, or 2303-PJ over the bus. Refer to the user’s manual for more detailed information. Front panel control... -
Page 99: Setting The Reading Mode
Instrument Control D-3 IEEE-488 bus control Table D-1 summarizes commands necessary to control the Models 2303, 2303B, and 2303-PJ for tests in this manual. Table D-1 Basic remote commands Command Description :SOUR:VOLT <voltage> Set output voltage (0-15). :SOUR:CURR:LIM <current> Set current limit (0-5). -
Page 100: Turning On The Output
“Q” to exit the program. See Appendix C for information on com- puter hardware and software requirements. Program D-1 Basic control programming ' Program to send basic commands to 2303. Primary address =16. OPEN "IEEE" FOR OUTPUT AS #1 ' Open IEEE-488 output path. OPEN "IEEE" FOR INPUT AS #2 ' Open IEEE-488 input path. - Page 101 Calibration programs C-1 Calibration reference B-2 Miscellaneous commands B-3 Case cover removal 3-3 Models 2303 and 2303B 5mA range readback Change the code by remote 2-21 accuracy 1-10 Changing the code from the front panel 2-21 Model 2303-PJ 500mA range readback...
- Page 102 Readback accuracy A-6 Temperature and relative humidity 2-2 Reading the error queue B-6 Test considerations 1-5 Recommended calibration equipment 2-3 Test summary 1-5 Recommended test equipment 1-3 Turning on the output D-2, D-4 Remote calibration 2-10 Remote calibration commands 2-10 Using the *OPC command B-7 Remote calibration display 2-11 Using the *OPC? query B-7...
- Page 103 Service Form Model No. ___________________________ Serial No. _____________ Date __________ Name and Telephone No. ________________________________________________________ Company ______________________________________________________________________ List all control settings, describe problem and check boxes that apply to problem. _________________________ __________________________________________________________________________________________ __________________________________________________________________________________________ Intermittent Analog output follows display Particular range or function bad; specify _______________________________ IEEE failure Obvious problem on power-up...
- Page 104 Keithley Instruments, Inc. 28775 Aurora Road Cleveland, Ohio 44139 Printed in the U.S.A.
Need help?
Do you have a question about the 2303 and is the answer not in the manual?
Questions and answers