Table of Contents
Advertisement
Quick Links
Advertisement
Table of Contents

Related Manuals for Bosch D7024


Summary of Contents for Bosch D7024
- Page 1 D7024 Operation and Installation Guide Fire Alarm Control Panel...
-
Page 2: Table Of Contents
D7024 | Operation and Installation Guide | Contents Contents 5.4.5 Answer for Remote Programming ....26 5.4.6 Manually Activate Outputs ......27 Notices ..............5 5.4.7 Read Zone Input Levels ........27 FCC Compliance ..........5 5.4.8 Addressable Point Test (MUX Test) ....27 FCC Telephone Connection to Users .... - Page 3 D7024 | Operation and Installation Guide | Contents 7.6.5 Communication Tries ........52 Figures 7.6.6 Machine Bypass ..........52 Figure 1: D7024 Control Board ........6 PROG Formats ..........52 Figure 2: Supplemental Reporting......9 7.7.1 4/2 Zone Report ..........52 Figure 3: Installing the Enclosure ......
- Page 4 D7024 | Operation and Installation Guide | Contents Table 18: Programming the Points Using the Alphanumeric Keys........31 Table 19: PIN Authority Levels ......... 37 Table 20: Configure Options........43 Table 21: NAC Patterns..........46 Table 22: Pre-Assigned Zone Quick Reference ..46 Table 23: Remote NAC Configuration .....
-
Page 5: 1.0 Notices
D7024 | Operation and Installation Guide | 1.0 Notices 1.0 Notices telephone company might change its facilities, equipment, operations, or procedures affecting your equipment’s function. If this occurs, you will be notified 1. 1 FCC Compliance in advance to give you an opportunity to maintain uninterrupted telephone service. -
Page 6: 2.0 Overview
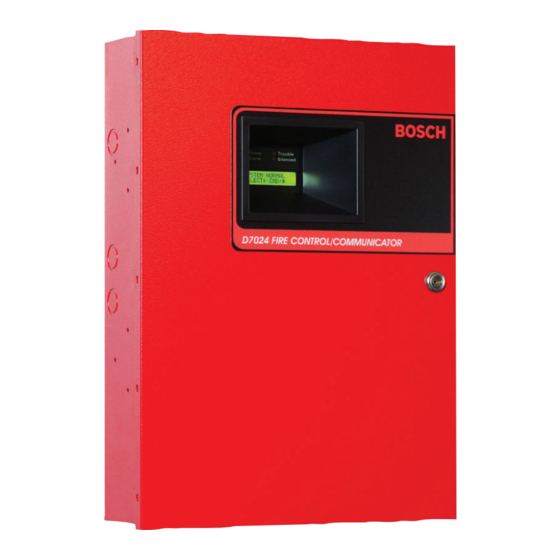
D7024 Control Board 2. 1 System Overview The D7024 Fire Alarm Control Panel (FACP) is a fully integrated hardwire fire alarm system. It can support four input points and expand to 255 using the D7039 Multiplex Expansion Module and the D7034 Four-Point Expander. -
Page 7: On-Board Conventional Points
Either fast (500 ms) or programmable (from 1 to 89 sec) Dirty Detector Monitoring Implements Bosch Security Systems Chamber Check™ and CleanMe™ protocol to monitor conventional loops for dirty detectors. CleanMe™ is a Trademark of SLC Technologies Inc. On-board Conventional Points... -
Page 8: Communicator
D7024 | Operation and Installation Guide | 2.0 Overview annunciator and Zones 9 to 16 on the D7032 Eight LED lines and two telephone numbers for reporting. Reports Annunciator Expander requires D7030X for operation, can be directed to one or both of two telephone connecting to the annunciator. -
Page 9: Users
Metal oxide varistors (MOVs) and spark gaps provide protection from lightning surges and static discharges. 2. 1 0 Backup Battery Calculation Table 3 is used to calculate the standby battery capacity required by NFPA when using the D7024. Table 3: Standby Battery Capacity Calculations... -
Page 10: Standby Current Load
The 24 VDC current requirements for the D7030, D7033 and D7035 are shown at 75% of the 12 VDC level shown on the specification sheets for these models. The D7024 regulates 24 VDC power from the battery to 12 VDC for these accessories. -
Page 11: Compatible Devices
D7024 | Operation and Installation Guide | 2.0 Overview Table 5: Standby Load Battery Size in Ah Standby Load Battery Size Chart Capacity Capacity Capacity Capacity Capacity Required for Required for Required for Required for Required for 24 H 48 H... - Page 12 Refer to the D7035 Installation Guide (P/N: 37280) for the required enclosure modification. The D7035B is pre-installed on a mounting skirt. D7036 Fire Annunciator A four-wire LCD annunciator keypad used with the D7024 to establish the location of a fire alarm. Keypad D7038 Remote NAC Adds four NFPA 72 Class “B”, Style Y NACs through the option bus, and is supervised by the con-...
-
Page 13: D7042 Address Restrictions
D7024 | Operation and Installation Guide | 2.0 Overview Table 7 summarizes address restrictions for the D7042, D7052, and D7053 Modules. Table 7: D7042 Address Restrictions 105* 113* 121* 129* 137* 145* 153* 161* 169* 177* 185* 193* 201* 209*... -
Page 14: 3.0 Installation And Setup
D7024 | Operation and Installation Guide | 3.0 Installation and Setup 3.0 Installation and Setup Installing the Control Panel The shipping box includes: The D7024 Control Board is static sensitive. • One D7024 FACP in a static-resistant bag Touch ground before handling the control board to discharge any static electricity in •... -
Page 15: Installing Optional Equipment
D7024 | Operation and Installation Guide | 3.0 Installation and Setup Installing Optional Equipment When the D7039 is first installed, or any time the control panel is powered up with a D7039 that has no The two expansion options, the D7034 Four Point... -
Page 16: Control Panel Terminal Connections
D7024 | Operation and Installation Guide | 4.0 Control Panel Terminal Connections 4.0 Control Panel Terminal Figure 6: Typical Fire Wiring Connections Refer to Figure 5 through Figure 10 when connecting the control panel terminal. Incorrect connections can cause damage to the equipment and personal injury. -
Page 17: Relay Wiring
D7024 | Operation and Installation Guide | 4.0 Control Panel Terminal Connections Figure 7: Relay Wiring Figure 8: Transformer (Supervised) 1 – Relay 2. Contacts rated at 5 A, 24 V (unsupervised) 1 – Red wire 2 – Relay 1. Contacts rated at 5 A, 24 V 2 –... -
Page 18: Option Bus (Supervised, Style 4)
D7024 | Operation and Installation Guide | 4.0 Control Panel Terminal Connections Figure 9: Option Bus (Supervised, Style 4) Silence Reset Drill Disable Test Prog Clear History 1 – Option power (A + B) 500 mA, maximum 2 – Option Bus A 3 –... -
Page 19: Power Supply Connections
BAT - and BAT +: Requires two 12 V batteries in series for a combined voltage of 24 V. Charge current equals 1. 1 A maximum. Note: Only use indicating devices listed in the D7024 NAC Compatibility List (P/N: 34950). -
Page 20: Option Bus Cable Length Versus Current Draw
D7024 | Operation and Installation Guide | 4.0 Control Panel Terminal Connections Avoid shielded or twisted pair wire, except for special applications where a reduced length of wiring (approximately 50%) is acceptable for an unusually harsh electrical environment to be tolerated. -
Page 21: 5.0 System Operation
D7024 | Operation and Installation Guide | 5.0 System Operation 5.0 System Operation 5. 1 .2 Trouble When a trouble condition occurs (such as wiring for a 5. 1 Operating Modes point is cut, AC power fails, and so on), the sounder activates with a beep every 10 sec. -
Page 22: Normal
D7024 | Operation and Installation Guide | 5.0 System Operation When one of these messages appears on the Refer to Section 6.0 Programming on page 30 for the items top line, the second line shows rotating mes- that appear in the following format: sages with detailed information for all off-nor- mal conditions currently detected. -
Page 23: Selecting A Main Menu Item
D7024 | Operation and Installation Guide | 5.0 System Operation 5.2.3 Selecting a Main Menu Item After pressing [HISTORY], the most recent system event appears on the top line of the LCD with the time When a Main Menu item is selected, the keypad might and date below it (Figure 13). -
Page 24: History Event Abbreviations
D7024 | Operation and Installation Guide | 5.0 System Operation Table 11 identifies the History Event abbreviations. Table 11: History Event Abbreviations Abbreviation Meaning Abbreviation Meaning ALRM Alarm OFFNORM Off Normal at Test ARST Alarm Restore Phone Line 1 AUTOTST... -
Page 25: Keypads
D7024 | Operation and Installation Guide | 5.0 System Operation Keypads Table 12 describes the LEDs and keys on the built-in keypad. 5.3. 1 Built-in Keypad Table 12: LEDs and Keys The keypad built into the control panel is an alphanumeric LCD keypad. -
Page 26: D7033 Keypad
D7024 | Operation and Installation Guide | 5.0 System Operation 5.3.2 D7033 Keypad remaining alarmed when exiting Walk Test causes an immediate alarm. The D7033 Keypad is an alphanumeric LCD keypad. Up to four of keypads can be mounted apart from the 5.4.2... -
Page 27: Manually Activate Outputs
D7024 | Operation and Installation Guide | 5.0 System Operation 5.4.6 Manually Activate Outputs In the format XxLxRxDxMxTxFxAx that appears in the display, “x” is either 0 or 1 depending on whether the Allows a selected output to be manually turned on and condition is false or true. -
Page 28: Personal Identification Numbers
D7024 | Operation and Installation Guide | 5.0 System Operation For Zone Drive Inputs, up to four zones can drive each output. When any of the zones driving an output is Table 14: Pre-Assigned Zones active, the output is active. -
Page 29: Communicator Operation
D7024 | Operation and Installation Guide | 5.0 System Operation User number 00 is designated as a Master Code. It can Priority reporting can send a Restoral Report after be used to silence alarms, reset, disable, and program several Alarm Reports in a situation where a point sends the D7024. -
Page 30: 6.0 Programming
D7024 | Operation and Installation Guide | 6.0 Programming 6.0 Programming After any programming change, and especially after remote programming changes, a complete functional checkout of the control panel’s operation is required. Hazards to life and property can occur if the system is not tested to detect possible improper programming. -
Page 31: Alpha Programming
D7024 | Operation and Installation Guide | 6.0 Programming Use Table 17 to map input points to functions. Table 17: Mapping Input Points to Functions Function Points 1.Pull Station 2.Smoke Detector 2, 9 to 100 3. Reset Keyswitch 4. Silence Keyswitch 5. -
Page 32: Format Programming
D7024 | Operation and Installation Guide | 6.0 Programming Additionally, each of the 18 system events can be programmed with a unique two-digit code. Events Figure 17: Essential Alpha Programming Keys programmed this way include System Silence, Fire Drill, Phone 1 Trouble, and Phone 2 Restoral. To program, access 7- PROG FORMATS >... -
Page 33: Programming Menu Tree
D7024 | Operation and Installation Guide | 6.0 Programming Programming Menu Tree Figure 18: Programming Menu Tree Level 1 Level 2 Level 3 Level 4 Level 5 (Main Menu) CMND/# 1- TEST TIME 1- SYSTEM 1- PROG TIME 2- TEST FREQ... - Page 34 D7024 | Operation and Installation Guide | 6.0 Programming Figure 18: Programming Menu Tree Level 1 Level 2 Level 3 Level 4 Level 5 (Main Menu) NAC # 1 1- AUTO SILENCE? 2 - CONFIGURATION (Same options as NAC # 2...
-
Page 35: Understanding Shortcuts
D7024 | Operation and Installation Guide | 6.0 Programming Understanding Shortcuts Figure 19: Programming Shortcut Use the shortcuts in this section to reduce repetition and provide speedy instructions to control panel programming. Main Menu is the first level in the system. For all system Shortcut = 012 programming, <PROG/0>... -
Page 36: Control Panel Programming
D7024 | Operation and Installation Guide | 7.0 Control Panel Programming Control Panel Programming 7. 1 .2 Automatic Test Test Time Main Menu: Shortcut: SYSTEM NORMAL -PROG > 1-PROG TIME > 2-AUTO TEST SELECT:PROG/0 This test allows you to program the time of day the SELECT:CMD/# Automatic Test occurs using a 24-h clock. -
Page 37: Daylight Savings
D7024 | Operation and Installation Guide | 7.0 Control Panel Programming 7. 1 .3 Daylight Savings Program User PINs Shortcut: Shortcut: 0-PROG > 2-SECURITY > 1-PINS 0-PROG > 1-PROG TIME > 3-DAYLIGHT SAV Up to 15 additional user codes, or up to 99 additional... -
Page 38: Prog System
D7024 | Operation and Installation Guide | 7.0 Control Panel Programming The following window appears: The display scrolls through the TIMERS options. Press [1] for SMOKE RESET to access: AUTHORITY USER (01-15) SMOKE RESET (_ _) (1-16 SEDS): _ _ Enter the user for whom you want to program authority and press [#]. -
Page 39: Ac Line Synch
D7024 | Operation and Installation Guide | 7.0 Control Panel Programming Auto Silence 2. Enter the desired value and press [#]. The current setting appears in parentheses on the Shortcut: first line. 0-PROG > 3-PROG SYSTEM > 2-TIMERS 3. After programming the display rate, the preceding window appears. -
Page 40: Pin Required
D7024 | Operation and Installation Guide | 7.0 Control Panel Programming The following window appears: Press [1] to require a PIN at the local keypad and access: OPTION BUS (M/M) REMOTE KEYPD PIN? 1- UDPATE BUS 2- SETUP KEYPDS _ _ _ _:YES(1)NO(2) Press [1] to program system to update bus. -
Page 41: Prog Inputs
D7024 | Operation and Installation Guide | 7.0 Control Panel Programming 2. Press the number key corresponding to your selection. REMOTE PGM 3. Press [DRILL] to access the next point. For 0- DISABLE 1- ENABLE example, if you program Point 2 and press [DRILL] you access the setting for Point 3. - Page 42 D7024 | Operation and Installation Guide | 7.0 Control Panel Programming Enter the point number you want to program and Enter the point number you want to verify and press [#]. press [#]. The display scrolls through the PROG INPUT 2.
-
Page 43: Point Function
D7024 | Operation and Installation Guide | 7.0 Control Panel Programming Point Description Table 20: Configure Options Shortcut: 0-PROG > 4-PROG INPUTS > 1-POINT NUMBER Option When activated: For this feature, the numeric keys are used to enter Fire Point shows FIRE ALARM on the control... - Page 44 D7024 | Operation and Installation Guide | 7.0 Control Panel Programming Local Only 2. Press [4] to select LOOP RESPONSE and access: Shortcut: RESPNS TIME (_ _ _) 0-PROG > 4-PROG INPUTS > 2-POINT 1- FAST (.5 sec) FUNCTION 2- PRGRMMD Enabling this feature means the input point gives local 3.
-
Page 45: Point Copy
D7024 | Operation and Installation Guide | 7.0 Control Panel Programming 7.4.3 Point Copy The main panel includes two local NACs, NAC 1 and NAC 2. The D7024 can also support up to two D7038 Shortcut: Remote NAC Power Supplies offering a total of eight remote NACs, for NACs for each RNAC. - Page 46 D7024 | Operation and Installation Guide | 7.0 Control Panel Programming This option allows you to choose the control pattern for the selected NAC (Table 21). Table 22: Pre-Assigned Zone Quick Reference Table 21: NAC Patterns Zone Pre-Assigned Condition General Fire Alarm (non-silencing)
-
Page 47: Programming Relays
D7024 | Operation and Installation Guide | 7.0 Control Panel Programming 2. Enter the number corresponding with the relay you want programmed and press [#]. Table 23: Remote NAC Configuration The display prompts you to enter four zones to activate this output:... -
Page 48: Prog Accounts
D7024 | Operation and Installation Guide | 7.0 Control Panel Programming 2. Enter the relay you want to assign and press [#]. To determine the output number of a multiplex relay, note that multiplex relays are the second The display reads: point of an I/O module. - Page 49 D7024 | Operation and Installation Guide | 7.0 Control Panel Programming The following window appears: Table 27 identifies keys that assist when entering telephone numbers. Press the number key corresponding to the PHONE NUMBER Table 27: Telephone Number Assistance Keys...
-
Page 50: Phone Control
D7024 | Operation and Installation Guide | 7.0 Control Panel Programming Account Numbers 7.6.2 Phone Control Shortcut: Shortcut: 0-PROG > 6-PROG ACC'NTS > 1-PHONE NUMS 0-PROG > 6-PROG ACC'NTS > 2-PHONE CONTROL The account numbers identify the control panel when it reports to the central station. -
Page 51: Report Steering
D7024 | Operation and Installation Guide | 7.0 Control Panel Programming Dialing Type REPORT STEERING Shortcut: 1- NONSUP ALRM 0-PROG, 6-PROG ACC'NTS, 2-PHONE CONTROL 2- SUPVSRY ALRM 3- NONSUP RSTR This feature determines the format the control panel 4- SUPVSRY RSTR 5- TROUBLE uses for dialing on each telephone line. -
Page 52: Communication Tries
D7024 | Operation and Installation Guide | 7.0 Control Panel Programming 7.6.5 Communication Tries • [D] = Drill • [E] = Silence Shortcut: • [F] = Reset 0-PROG > 6-PROG ACC'NTS > 5-COMM. TRIES 7.7. 1 4/2 Zone Report The system always makes ten attempts to communicate an event. -
Page 53: 4/2 Report Codes
D7024 | Operation and Installation Guide | 7.0 Control Panel Programming 4. Press the number key corresponding to your selection. 4/2 RPT CODS A window allowing you to enter hexadecimal digits 0- SYSTM IN TST appears. The heading depends on the item you... -
Page 54: Bfsk Report Codes
D7024 | Operation and Installation Guide | 7.0 Control Panel Programming 7.7.3 BFSK Report Codes Press [1] to select the left byte, enter the digits, and press [#]. When BFSK reporting is used, most reporting codes are fixed and do not require programming. The control... -
Page 55: Alternate 4/2 Codes
D7024 | Operation and Installation Guide | 7.0 Control Panel Programming All programming, including zone configura- Unprogrammed devices on the bus do not tions and option installations, are lost when operate or are not supervised. this operation is performed. You must turn off... -
Page 56: Mux Program
D7024 | Operation and Installation Guide | 7.0 Control Panel Programming Press the number corresponding to the device you are adding, or press [0] if you are removing a Figure 20: D7039 Mounting Location device. When the device type is selected, the following... -
Page 57: Auto Program
D7024 | Operation and Installation Guide | 7.0 Control Panel Programming 7.9.4 Auto Program Table 30: Missing Point Options Shortcut: 0-PROG > 9-PROGRAM MUX >4- MUX BUS TYPE Option When selected DELETE The missing point and any addresses it By scanning the buses for missing or new multiplex... - Page 58 D7024 | Operation and Installation Guide | 7.0 Control Panel Programming Verify that only the expected number of points was As new devices are added, the D7024 performs some removed from the system. Points removed from the basic error checks. The following errors can appear...
-
Page 59: Removing Mux Devices
D7024 | Operation and Installation Guide | 7.0 Control Panel Programming When the point-add operation is complete, it shows the 2. Press [0] for NO DEVICE and enter the address for total number of points on the system (“xxx” is the total the point you want to delete. -
Page 60: Installation Guide For Ul Listed Systems
D7024 | Operation and Installation Guide | 8.0 Installation Guide for UL Listed Systems 8.0 Installation Guide for UL • At least one D432A Horn and Strobe or D443 Bell. Provide 85 dB for UL985 and NFPA 72 Listed Systems requirements. -
Page 61: Wiring The D132B
D7024 | Operation and Installation Guide | 8.0 Installation Guide for UL Listed Systems Figure 21: Wiring the D132B COM2 COM1 Power Trouble Alarm Silenced SMK+ SMK- AUX+ AUX- Drill Silence 4 5 6 Disable 7 8 9 Test Reset... - Page 62 D7024 | Operation and Installation Guide | 8.0 Installation Guide for UL Listed Systems D184A Local Energy Kit The D185 can signal alarm, trouble, and supervisory conditions (refer to the D185 Installation Manual (P/N: The D184A is a UL Listed module that connects local 32906) for details).
-
Page 63: 9.0 Fire Safety
D7024 | Operation and Installation Guide | 9.0 Fire Safety 9.0 Fire Safety 9. 1 .2 Family Residence Installations Providing a Fire Warning System Do not consider any fire detection device or Most fire deaths occur in the home, mostly during system 100% foolproof. -
Page 64: Escape Plan
D7024 | Operation and Installation Guide | 9.0 Fire Safety Escape Plan A fire warning is wasted unless people planned in advance for a rapid and safe exit from the building. • Draw a floor plan of the entire building showing two exits from each sleeping area and two from the building. -
Page 65: Display Abbreviations
D7024 | Operation and Installation Guide | 10.0 Appendix A: D7024 Control Panel Display Abbreviations 10.0 Appendix A: D7024 Control Panel Display Abbreviations Table 32: D7024 Control Panel Display Abbreviations Abbreviation Definition Abbreviation Definition 3/1 Tone Burst KPAD, KYPAD, KYPD... -
Page 66: Table 33
D7024 | Operation and Installation Guide | 11.0 Appendix B: D7024 Control Panel Display Messages 11.0 Appendix B: D7024 Control Panel Display Messages Table 33: D7024 Control Panel Display Messages Message Description FIRE DIRTY PT XX ® A smoke detector with the Chamber Check feature indicates a dirty chamber. -
Page 67: Table 34
D7024 | Operation and Installation Guide | 12.0 Appendix C: Fire Communicator Reporting Summary 12.0 Appendix C: Fire Communicator Reporting Summary Table 34: Fire Communicator Reporting Summary Report Index Default Values Alternate Default BFSK Contact ID Modem IIIa Digit 1... - Page 68 D7024 | Operation and Installation Guide | 12.0 Appendix C: Fire Communicator Reporting Summary Table 34: Fire Communicator Reporting Summary POINT FIRE 1 571 00 zzz Refer to DISABLE Table 35 page 71. POINT Refer Refer Refer 1 571 00 zzz...
- Page 69 D7024 | Operation and Installation Guide | 12.0 Appendix C: Fire Communicator Reporting Summary Table 34: Fire Communicator Reporting Summary POINT Refer Refer Refer 3 385 00 zzz Refer to SUPERVISORY to #20. to #20. to #20. Table 35 DIRTY RESTORE page 71.
- Page 70 D7024 | Operation and Installation Guide | 12.0 Appendix C: Fire Communicator Reporting Summary Table 34: Fire Communicator Reporting Summary AC FAIL 1 301 00 000 Refer to Table 35 page 71. AC FAIL 3 301 00 000 Refer to...
- Page 71 * = Shaded items not programmable; *** = Codes not programmable When the Modem IIIa reporting format is used with a Bosch receiver, the receiver output is as shown in Table 35. Table 35: Receiver Output...
- Page 72 D7024 | Operation and Installation Guide | 12.0 Appendix C: Fire Communicator Reporting Summary Table 35: Receiver Output POINT MONITOR DISABLE dd/dd tt:tt ql ACCT aaaa COMMAND BYPASS +++ ACCT aaaa AREA=1 ID=uuu POINT=zzz POINT FIRE ALARM RESTORE dd/dd tt:tt ql ACCT aaaa FIRE ALM RESTOR...
- Page 73 D7024 | Operation and Installation Guide | 12.0 Appendix C: Fire Communicator Reporting Summary Table 35: Receiver Output PHONE 1 TROUBLE dd/dd tt:tt ql ACCT aaaa PHONE LINE FAIL +++ ACCT aaaa PHONE LINE=1 PHONE 1 RESTORE dd/dd tt:tt ql ACCT aaaa PHONE RESTORAL...
- Page 74 D7024 | Operation and Installation Guide | 12.0 Appendix C: Fire Communicator Reporting Summary Table 36: Numeric Identifiers Option bus device at Address 12 failed. Remote NAC module 1, output 2 wiring fault. Option bus device at Address 13 failed Remote NAC module 1, output 3 wiring fault.
-
Page 75: Appendix D: Programming Defaults List
D7024 | Operation and Installation Guide | 13.0 Appendix D: Programming Defaults List 13.0 Appendix D: Programming Point Zone 4 = 4 Point Zone 5 = 5 Defaults List Point Zone 6 = 6 Point Zone 7 = 7 PROG TIME... - Page 76 D7024 | Operation and Installation Guide | 13.0 Appendix D: Programming Defaults List RNAC 2 PROG FORMATS Outputs 1, 2, 3, 4 4/2 ZONE REPORT Configuration: Steady FIRE ALRM D1 Zone Assignment: Zone A: 53 FIRE RSTR D1 Zone B: 0...
- Page 77 D7024 | Operation and Installation Guide | 13.0 Appendix D: Programming Defaults List BFSK RPT CDS OFF NORM TST : 33 PHONE 1 TRBL : 31 OFF NRM TST PN 1 TRB RST : 35 OPEN/RESET PHONE 2 TRBL : 32...
-
Page 78: Troubleshooting
D7024 | Operation and Installation Guide | 14.0 Appendix E: Telephone Monitor Troubleshooting 14.0 Appendix E: Telephone 3. Check for intermittent faults in the telephone line. • Make a test call and verify the line is free of Monitor Troubleshooting distortion and noise. -
Page 79: Specifications
D7035 Remote Relay Module: An Octal Relay Module that provides eight Form “C” relay outputs. It connects to the D7024 through the option bus. The outputs are fully programmable, like the local relays. Each output operates independently of the other seven to provide complete flexibility. Com- munication with the D7035 is supervised. -
Page 80: Index
D7024 | Operation and Installation Guide | 16.0 Index 16.0 Index Enclosure Housing Entering Data Escape Plan AC Fail Delay AC Line Synch Fire Safety Alarm and Trouble Status Format Programming Alpha Programming Alternate 4/2 Codes Appendix A D7024 Control Panel Display Abbrevia-... - Page 81 D7024 | Operation and Installation Guide | 16.0 Index Loop Response Users Point Assigning Point Functions Manually Activate Outputs Configure Menu Local Only Backtracking through a Menu Off-board Addressable Points (with D7039 Multi- Main Menu plex Expansion Module) Programming Menu...
- Page 82 D7024 | Operation and Installation Guide | 16.0 Index Smoke Reset Storage and Operating Temperature System Operating Modes System Operation System Overview Using the System SYSTEM TROUBLE Telephone Account Numbers Communication Tries Dialing Type Format Machine Bypass Monitor Line Number...
- Page 83 D7024 | Operation and Installation Guide | 16.0 Index Notes Bosch | 7/05 | 31499J...
- Page 84 Bosch 130 Perinton Parkway Fairport, NY 14450-9199 Customer Service: (800) 289-0096 Bosch Technical Support: (888) 886-6189 130 Perinton Parkway Fairport, NY 14450-9199 Customer Service: (800) 289-0096 Technical Support: (888) 886-6189 © 2005 Bosch 31499J...
Need help?
Do you have a question about the D7024 and is the answer not in the manual?
Questions and answers