Wyrestorm NetworkHD 100 Series Quick Start Manual
Hide thumbs
Also See for NetworkHD 100 Series:
- Installation manual (41 pages) ,
- Reference manual (13 pages) ,
- Quick start manual (4 pages)
Table of Contents
Advertisement
Quick Links
Quickstart Guide
NetworkHD 100 / 200 Series and Controller
HD-over-IP Solution
NHD-100-TX, NHD-100-RX, NHD-200-TX, NHD-200-RX,
NHD-210-RX, NHD-000-CTL
Before Installation
!
NetworkHD requires a Layer 2 managed switch with support
for Multicast & IGMP snooping enabled. Do not connect any
transmitters to the switch until this has been configured.
!
For recommended switches and PDF configuration guides
please see the 'downloads' section of any NetworkHD
device at wyrestorm.com.
It is not necessary to change the IP addresses of the TX and
!
RX units – AutoIP is used to configure correct IP addresses.
DHCP or Static IP addresses are not recommended
unless absolutely required. Failure to note or errors in
the IP settings of a unit may result in a complicated reset
procedure.
Due to the way H.264 compression encodes the video,
!
Interlaced video sources are not recommended. Please use
progressive scan sources for best quality - even at lower
resolutions.
!
For installations including multiple rack-mounted
transmitters, we recommend using an NHD-000-RACK
enclosure to secure all NetworkHD devices within the rack.
!
Please check wyrestorm.com for the latest firmware updates
– the NetworkHD Maintain Tool can be used to easily
install firmware updates to multiple devices, available from
wyrestorm.com
Setup and Operation
1
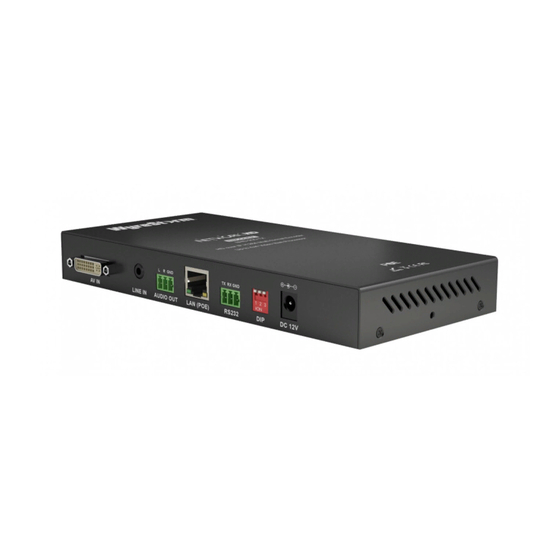
Connect sources to HDMI or DVI of transmitters using quality HDMI
cables, ensuring firm port connection – we recommend WyreStorm
Express HDMI cables.
NOTE: For NHD-200-TX, please ensure DIP switches are set
correctly for the cable input.
2
Connect HDMI (and RS232 if required) from all receivers to all
displays used.
Connect good quality, well-terminated Cat5e/6 cables of no more
3
than 100m/328ft between the switch, transmitters (TX), receivers
(RX) and Controller (CTL) if used.
NHD-000-CTL Configuration:
!
It is essential that the AV port of the CTL is connected to the
same switch/VLAN as the RX & TX units whilst the control
port must connect to the same switch/VLAN as the control
system.
1.
Connect the included 12V DC power supplies to the CTL, TX and
RX units. This is not required if using POE.
• The default IP address of the NHD-000-CTL is 192.168.11.243 for
the Control port. Ensure a PC is connected to one of the switches/
VLANs and in the same subnet/IP range as the CTL Control port.
!
If you do not see the log in page you may need to change
your IP on a PC:
Click Start menu, go to Control Panel > Network and Sharing
center > Change Adapter Settings > Local Area Connection.
Right click and choose Properties.
Highlight Internet Protocol Version 4 (TCP/IPv4) then click
Properties.
Use the following IP address, for the IP address enter 192.168.11.x
(if unsure use 192.168.11.105) Enter subnet mask number
255.255.0.0 Click OK, then click OK again to close the windows
and commit you changes.
Return to your browser and try entering the default IP
192.168.11.243 again.
2.
The table of devices will appear with TX units across the top and
the RX down the left hand side. Press the box that links each TX
and RX to test switching of the video to each RX.
3.
Upon entering the NHD-IP-CTL web UI, a user name and
password must be entered to login, with default settings.
User: admin
Password: admin
4.
In the TX/RX settings page - use the Alias box to name each RX
and TX. Use the table in this guide to record all Mac addresses,
device names and alias's as this will help when programming your
control system.
NOTE: If using Enado templates, the TX must be named
Input1, Input2... and the RX named Output1, Output2...
5.
Encoding values of each TX should be set to individual
requirements - for more information see the full guide at
wyrestorm.com.
Recommended encoding settings for TX units to
provide highest quality video and instant switching:
Rate Control:
Avg bitrate:
Profile:
GOP:
FPS:
Transport Type:
NOTE: Higher values will result in higher quality but may
adversely affect switching speed and latency.
CBR
40960
H.264 High Profile
60
60
RAW
Advertisement
Table of Contents

Related Manuals for Wyrestorm NetworkHD 100 Series


Summary of Contents for Wyrestorm NetworkHD 100 Series
- Page 1 Connect sources to HDMI or DVI of transmitters using quality HDMI Recommended encoding settings for TX units to cables, ensuring firm port connection – we recommend WyreStorm provide highest quality video and instant switching: Express HDMI cables. NOTE: For NHD-200-TX, please ensure DIP switches are set Rate Control: correctly for the cable input.
- Page 2 PDF included with the software download. NetworkHD Console is available from the ‘download’ section of any NetworkHD component at wyrestorm.com. The TX and RX are configured by default to IP addresses in the range of 169.254.xxx.xxx, commonly referred to as Auto IP addresses.
- Page 3 Encoders TX Decoders RX Input MAC Address Name Output MAC Address Name For technical support, please call: US: 518-289-1294 ROW: +44 (0) 1793 230 343 Email: support@wyrestorm.com...
- Page 4 – IP settings can then be changed Drivers for major control systems are available in the download section at wyrestorm.com. Enado video wall templates and control codes are available in the online libraries built into the Enado configuration Safety Recommendations: interface.
Need help?
Do you have a question about the NetworkHD 100 Series and is the answer not in the manual?
Questions and answers