Table of Contents
Advertisement
Quick Links
R350 Access Point
Quick Setup Guide
This Quick Setup Guide provides step-by-step instructions on how
to set up your Ruckus R350 access point. After completing the
steps in this guide, you will be able to place the access point (AP)
at your site and provide network access to wireless clients.
NOTE: Please read these operation instructions carefully before
start of operation.
NOTE: The minimum software revision for the R350 is
ZoneDirector (ZD) 10.5 native or later, SmartZone (SZ) 6.0 new
AP model or later, or ALTO EAP.
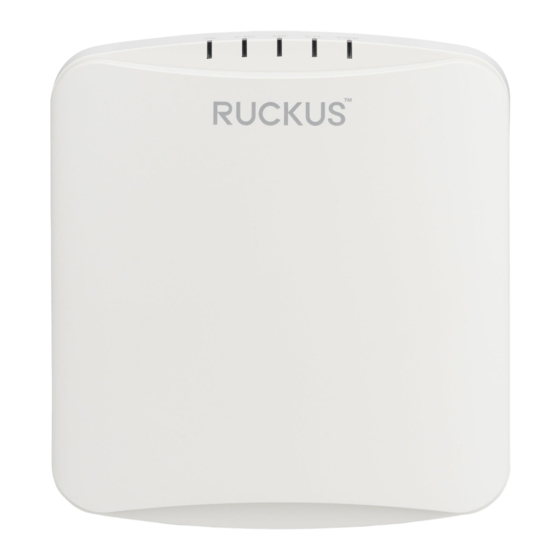
FIGURE 1 R350 Top
Before You Begin
Before deploying Ruckus products, please check for the latest
software and the release documentation.
• Release Notes and other user documentation are available at
http://support.ruckuswireless.com/documents.
• Software upgrades are available at
http://
support.ruckuswireless.com/software.
This Guide in Other Languages
• 请从以下网站获得该指南的简体中文版
https://
support.ruckuswireless.com.
Copyright
©
2021 CommScope, Inc. All rights reserved.
Published June 2021, Part Number 800-72737-001 Rev A
• Vous trouverez la version française de ce guide à l'adresse
suivante https://support.ruckuswireless.com.
• このガイドの日本語版は
https://support.ruckuswireless.com
ご覧ください。
• 이 가이드의 한국어 버전은 웹 사이트
(https://
support.ruckuswireless.com) 에서 확인하시기 바랍니다.
• Veja a versão em português (Brasil) deste guia em
support.ruckuswireless.com.
• Puede ver la versión en español (América Latina) de esta guía
en
https://support.ruckuswireless.com.
Package Contents
A complete R350 installation package includes all of the items
listed below:
• R350 Access Point
• One external T-bar bracket (two unassembled parts)
• One unit removal pin
• Service Level Agreement/Limited Warranty Statement
• Declaration of Conformity
• Regulatory Statement
• Ruckus AP Getting Started Guide
• AP Cloud Management Insert
• This Quick Setup Guide
CONFIGURING THE AP
Step 1: Collecting the AP MAC Address
• Write down the MAC address (12 alphanumeric digits) from the
outside of the AP.
NOTE: If the AP is to be managed by a Ruckus controller, then
follow the controller user documents to connect the AP to
your local network and configure it for initial operation. In that
case, you may not need to complete the following steps.
Step 2: Collecting Setup Requirements,
Hardware, and Tools
• A computer with Ethernet adapter running Windows 7 or
equivalent, with Firefox or equivalent web browser.
• One Cat 5e (or better) Ethernet cable.
• An AC-to-12VDC power adapter (sold separately)
--OR--
an 802.3af-compliant Power over Ethernet (PoE) switch or PoE
injector.
Step 3: Connecting Your Computer to the AP
1. After removing the AP from its package, place it next to your
computer.
2. Using an Ethernet cable, connect your computer's network
port to the POE IN port on the AP.
3. Connect the AC power adapter (sold separately) to the 12V
DC AP port, and plug the AC power adapter into a
convenient and protected AC power source.
Alternatively, connect the POE IN port to a PoE injector or
PoE switch for both power and network connectivity.
FIGURE 2 AP Rear Panel
で
https://
4. After bootup, verify that the PWR LED on the AP is a steady
green.
Step 4: Preparing Your Computer for AP Setup
NOTE: The following procedures assume that Windows 7 is the
operating system. Procedures for other operating systems are
similar.
1. On your Windows 7 computer, configure your network
adapter from the Local Area Connection settings as follows:
• Start > Control Panel > Network and Sharing Center >
Change Adapter Settings
2. Edit the TCP/IPv4 address settings as follows:
• Local Area Connection > Properties > Internet Protocol
Version 4 (TCP/IPv4) > Properties
The Internet Protocol Version 4 (TCP/IPv4) Properties dialog
box appears.
NOTE: Write down all of the currently active settings so
you can restore your computer to its current
configuration when this procedure is completed.
3. Select Use the following IP address (if it is not already
selected) and then make the following entries:
• IP address: 192.168.0.22 (or any available address in the
192.168.0.x network, except 192.168.0.1, which is the
default used by the R350 AP)
• Subnet mask: 255.255.255.0
• Leave the DNS server and Default gateway fields empty.
4. Click OK to save your changes. Your changes are put into
effect immediately.
Step 5: Logging Into the AP Web Interface
As specified in
Step 4: Preparing Your Computer for AP Setup
page 1, the computer should be connected to your AP through
the Ethernet port and powered on, ready for setup.
1. On your computer, open a Web browser window.
on
Page 1 of 4
Advertisement
Table of Contents

Related Manuals for Ruckus Wireless R350


Summary of Contents for Ruckus Wireless R350
- Page 1 This Quick Setup Guide provides step-by-step instructions on how listed below: to set up your Ruckus R350 access point. After completing the steps in this guide, you will be able to place the access point (AP) • R350 Access Point at your site and provide network access to wireless clients.
- Page 2 1. Position the studs on the bottom of the T-bar bracket (A in 3. Verify that the POE IN port LED is lit. 4. When the Ruckus Wireless Admin login page appears, enter the below figure) to the keyholes on the AP enclosure.
- Page 3 FIGURE 5 Attaching the AP and T-bar bracket with the locking tab When you are done, the AP is mounted. Troubleshooting CAUTION! If required, you can reset the AP to its factory default settings by using a straightened paper clip to press and hold the reset button located between the POE IN and 12VDC ports, for six or more seconds.
- Page 4 Copyright © 2021 CommScope, Inc. All rights reserved. Page 4 of 4 Published June 2021, Part Number 800-72737-001 Rev A...
- Page 5 Federal Communication Commission Interference Statement This equipment has been tested and found to comply with the limits for a Class B digital device, pursuant to Part 15 of the FCC Rules. These limits are designed to provide reasonable protection against harmful interference in a residential installation. This equipment generates, uses and can radiate radio frequency energy and, if not installed and used in accordance with the instructions, may cause harmful interference to radio communications.
- Page 6 This equipment complies with FCC radiation exposure limits set forth for an uncontrolled environment. This equipment should be installed and operated with minimum distance 20cm between the radiator & your body. This device contains licence-exempt transmitter(s)/receiver(s) that comply with Innovation, Science and Economic Development Canada’s licence-exempt RSS(s).
- Page 7 be installed and operated with minimum distance 20cm between the radiator & your body. Cet équipement est conforme aux limites d'exposition aux rayonnements IC établies pour un environnement non contrôlé. Cet équipement doit être installé et utilisé avec un minimum de 20 cm de distance entre la source de rayonnement et votre corps. This equipment complies with EU radiation exposure limits set forth for an uncontrolled environment.
Need help?
Do you have a question about the R350 and is the answer not in the manual?
Questions and answers