Table of Contents
Advertisement
ZoneFlex R310 Access Point
Quick Setup Guide
This Quick Setup Guide provides step-by-step instructions on how to set up
your Ruckus Wireless ZoneFlex R310 access point. After completing the
steps in this guide, you will be able to place the access point at your site
and provide network access to wireless clients. The rest of this document
refers to the ZoneFlex R310 access point as an AP.
Note:
The minimum software revision for the AP is base image 100.x or
later, SmartZone 3.2 or later, or ZoneFlex 10.0 or later.
The rest of this document collectively refers to the SCG SZ, vSZ, ZD,
and other controllers as Ruckus Wireless controllers.
B
Y
B
EFORE
OU
EGIN
Before deploying your Ruckus Wireless device, please check the Ruckus
Wireless Web site for the latest software and release documentation.
•
Release Notes and User Documents are available at
http://support.ruckuswireless.com/documents
•
Software Upgrades are available at
http://support.ruckuswireless.com/software
•
Open Source information is available at
http://support.ruckuswireless.com/open_source
T
G
O
L
HIS
UIDE IN
THER
ANGUAGES
请从以下网站获得该指南的简体中文版
•
https://support.ruckuswireless.com
•
Vous trouverez la version française de ce guide à l'adresse suivante
https://support.ruckuswireless.com
こ の ガ イ ド の日本語版は
•
https://support.ruckuswireless.com
で ご 覧 く だ さ い
이 가이드의 한국어 버전은 웹 사이트
•
(https://support.ruckuswireless.com) 에서 확인하시기 바랍니
다
•
Veja a versão em português (Brasil) deste guia em
https://support.ruckuswireless.com
•
Puede ver la versión en español (América Latina) de esta guía en
https://support.ruckuswireless.com
Copyright © 2015 Ruckus Wireless, Inc.
Published 24 July 2015, Part Number 800-70972-001 Rev A
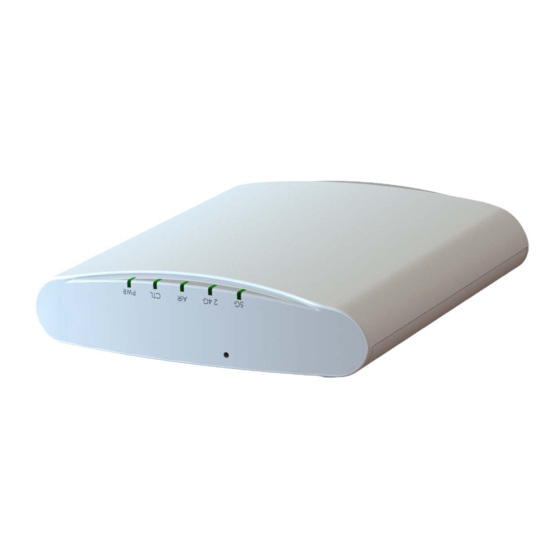
Figure 1. ZoneFlex R310 AP
P
C
ACKAGE
ONTENTS
•
One ZoneFlex R310 access point
•
Two mounting screws and plastic wall anchors
•
One T8 5mm M2.5 Torx locking security screw
•
One unit removal pin
•
Regulatory flyer
•
Product warranty statement
•
Declaration of conformity, if required
•
Ruckus Wireless AP Getting Started Guide
•
This Quick Setup Guide
C
AP
ONFIGURING THE
•
Step 1: Collecting the AP MAC Address
•
Step 2: Collecting Setup Requirements, Hardware, and Tools
•
Step 3: Connecting Your Computer to the AP
•
Step 4: Preparing Your Computer for AP Setup
•
Step 5: Logging Into the AP Web Interface
•
Step 6: Customizing the Wireless Settings
•
Step 7: Placing the AP at the Site
•
Step 8: Verifying the Installation
Step 1: Collecting the AP MAC Address
•
Write down the MAC address (12 alphanumeric digits) from the
outside of the AP.
Important!
If the AP is to be managed by a Ruckus Wireless controller, then
follow the controller user documents to connect the AP to your local
network and configure it for initial operation. In that case, you may not
need to complete the following steps.
Step 2: Collecting Setup Requirements, Hardware,
and Tools
•
A computer with Ethernet adapter running Windows 7 or equivalent,
with Firefox or equivalent web browser.
•
One Cat 5e (or better) Ethernet cable.
•
T8 Torx screwdriver.
•
An AC-to-12VDC power adapter (sold separately)
--OR--
an 802.3af-compliant Power over Ethernet (PoE) switch or PoE
injector.
Step 3: Connecting Your Computer to the AP
A After removing the AP from its package, place it next to your
computer.
B Using an Ethernet cable, connect your computer's network port to the
POE IN port on the AP.
C Connect the AC power adapter (sold separately) to the 12VDC AP
port, and plug the AC power adapter into a convenient and protected
AC power source.
Alternatively, connect the POE IN port to a PoE injector or PoE switch
for both power and network connectivity.
Figure 2. AP rear panel
D After bootup, verify that the PWR LED on the AP is a steady green.
Step 4: Preparing Your Computer for AP Setup
Note:
The following procedures assume that Windows 7 is the operating
system. Procedures for other operating systems are similar.
A On your Windows 7 computer, configure your network adapter from
the Local Area Connection settings as follows:
•
Start > Control Panel > Network and Sharing
Center > Change Adapter Settings
Page 1 of 4
Advertisement
Table of Contents

Related Manuals for Ruckus Wireless ZONEFLEX R310


Summary of Contents for Ruckus Wireless ZONEFLEX R310
-
Page 1: Quick Setup Guide
Step 4: Preparing Your Computer for AP Setup で ご 覧 く だ さ い If the AP is to be managed by a Ruckus Wireless controller, then 이 가이드의 한국어 버전은 웹 사이트 follow the controller user documents to connect the AP to your local •... - Page 2 OK/Yes to proceed. B Use a Cat 5e (or better) Ethernet cable to connect your network (or PoE D When the Ruckus Wireless Admin login page appears, enter the injector or switch) to the POE IN port on the AP.
- Page 3 5, then rotate the AP until the third T-bar clip A To remove the AP from the factory-supplied mounting screws, gently The customer-ordered Ruckus Wireless secure mounting bracket kit catches the T-bar and the latch locks the T-bar in place...
- Page 4 192.168.0.2 through 192.168.0.254, with subnet mask 255.255.255.0. The username is super, and the password is sp-admin. Refer to the Ruckus Wireless Indoor AP User Guide for information on configuring and operating the AP. This document is available at https://support.ruckuswireless.com...
- Page 5 (2) this device must accept any interference received, including interference that may cause undesired operation. Caution: Changes or modifications to this equipment that have not been approved by Ruckus Wireless may void the user's authority to operate this equipment.
- Page 6 For additional applicable power supplies/options, see user instructions and product datasheet. Medical Statement Ruckus Wireless Access Points shall only be used in ME systems where the intended EM ENVIRONMENT does NOT rely on the WLAN radio link for BASIC SAFETY or ESSENTIAL PERFORMANCE of the ME SYSTEM.
- Page 7 Hereby, Ruckus Wireless declares that this Radio LAN is in compliance with the essential requirements and other relevant provisions of Directive 1999/5/EC. Español Por medio de la presente Ruckus Wireless declara que el Radio LAN cumple con los requisitos esenciales y cualesquiera [Spanish] otras disposiciones aplicables o exigibles de la Directiva 1999/5/CE.
- Page 8 Härmed intygar Ruckus Wireless att denna Radio LAN står I överensstämmelse med de väsentliga egenskapskrav och [Swedish] övriga relevanta bestämmelser som framgår av direktiv 1999/5/EG. Íslenska Hér með lýsir Ruckus Wireless yfir því að Radio LAN er í samræmi við grunnkröfur og aðrar kröfur, sem gerðar eru í [Icelandic] tilskipun 1999/5/EC. Norsk Ruckus Wireless erklærer herved at utstyret Radio LAN er i samsvar med de grunnleggende krav og øvrige relevante...
Need help?
Do you have a question about the ZONEFLEX R310 and is the answer not in the manual?
Questions and answers