
Related Manuals for Teledyne Quasar Gen III CP-6302-30-R


Summary of Contents for Teledyne Quasar Gen III CP-6302-30-R
- Page 1 Quasar™ Gen III Installation Manual CP-6302-30-R CP-6302-31-P CP-6302-31-I Quasar CP-6302 Range Installation Manual - Ver. 5 - December 24, 2021 This document does not contain any export-controlled information.
- Page 2 © 2022 Teledyne FLIR LLC All rights reserved worldwide. No parts of this manual, in whole or in part, may be copied, photocopied, translated, or transmitted to any electronic medium or machine readable form without the prior written permission of Teledyne FLIR LLC.
- Page 3 Product Registration and Warranty Information Register your Product with Teledyne FLIR at https://customer.flir.com. For warranty information, see https://www.flir.com/support-center/warranty/security/flir-security-product- warranties/. Quasar CP-6302 Range Installation Manual - Ver. 5 - December 24, 2021 This document does not contain any export-controlled information.
-
Page 4: Table Of Contents
Table of Contents 1. Document Scope and Purpose ....................1 2. Accessing Product Information from the Teledyne FLIR Website ........4 3. Overview ............................6 Features ..........................7 Package Contents ....................... 8 Camera Dimensions ......................9 System Requirements ....................... 10 4. -
Page 5: Document Scope And Purpose
DIsclaimer Avis de non-responsabilité Users of Teledyne FLIR products accept full Il incombe aux utilisateurs des produits Teledyne FLIR de vérifier que ces produits sont adaptés et d'étudier le responsibility for ensuring the suitability and rôle des capacités et limites de détection du produit... - Page 6 A Tip is information and best practices that are useful or provide some benefit for installation and use of Teledyne FLIR products. Un Conseil correspond à une information et aux bonnes pratiques utiles ou apportant un avantage supplémentaire pour l'installation et l'utilisation des produits Teledyne FLIR. General Cautions and Warnings Précautions et avertissements d'ordre général...
- Page 7 Document Scope and Purpose Caution: · The unit’s cover is an essential part of the product. Do not open or remove it. · Never operate the unit without the cover in place. Operating the unit without the cover poses a risk of fire and shock hazards ·...
-
Page 8: Accessing Product Information From The Teledyne Flir Website
Accessing Product Information from the Teledyne FLIR Website Up-to-date resources for the camera, including the camera’s specifications, the Teledyne FLIR Discovery Network Assistant (DNA) software tool, and this guide, are available from the camera’s product details and support pages on the Teledyne FLIR website. - Page 9 Accessing Product Information from the Teledyne FLIR Website 3. Click Go to Product Support. The camera’s support page appears. 4. Download product documentation from the Documents tab. Product Support Page Documents Tab (Example) 5. Download the DNA tool from the Downloads tab.
-
Page 10: Overview
The camera can increase frame rate and level of detail when events are triggered. In addition, Teledyne FLIR's adaptive streaming algorithms provide the highest image quality with the lowest bandwidth and storage requirements. -
Page 11: Features
Overview Features · · · 10x digital zoom and 1/2.8” Sony Progressive Four encoder streams 30x optical zoom scan CMOS sensor · · · Low-lux mode True day/night (ICR) PTZ tracking · · · Infrared LED illuminator IR coverage up to 200m IR illumination adjusted by (see Note 1) (see Note 1) -
Page 12: Package Contents
Overview Package Contents Before proceeding, check that the box contains the items listed here. If any item is missing or has defects, do not install or operate the product. Contact your dealer for assistance. Note: Package Contents vary slightly between models. Hard Ceiling Mount M4 Screw with Camera Body*... -
Page 13: Camera Dimensions
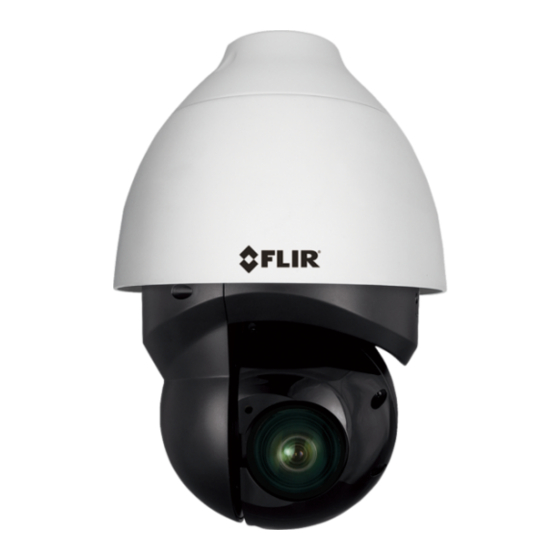
Overview Camera Dimensions Following are the camera’s dimensions. CP-6302-30-R CP-6302-30-P CP-6302-31-I Notes: The P and R models are supplied with a clear dome. 30R Recessed model has different top cover. Quasar CP-6302 Range Installation Manual - Ver. 5 - December 24, 2021 This document does not contain any export-controlled information. -
Page 14: System Requirements
Overview System Requirements To access the camera via a web browser, ensure that your PC has the proper network connection and meets system requirements as described below. Item Minimum System Requirement Personal Computer Minimum: Intel® CoreTM i5-2430M, 2.4 GHz; 2GB RAM or more Recommended: Intel®... -
Page 15: Installation
Installation Installation The CP-6302-31-P PTZ and CP-6302-31-I IR PTZ cameras are designed for outdoor installation. For outdoor installation, Teledyne FLIR recommends: · Always use weatherproof equipment, such as boxes, receptacles, connectors, etc. · For electrical wiring, use the properly rated sheathed cables for conditions to which the cable will be exposed (for example, moisture, heat, UV, physical requirements, etc.). -
Page 16: Camera Connectors - All Models
Installation Camera Connectors - All models Following are an illustration and explanation of the connectors located on the PTZ camera’s connector panel. Connector Locations (CP-6302-31-I model shown; other models are similar) Callout Description/Label Comments RJ45 connector for 10/100 Mbps Network and PoE++/UPOE (IEEE 802.3bt) connections. -
Page 17: Connecting Power To The Camera
If using PoE++ or UPOE, make sure that a Power Sourcing Equipment (PSE) device is used in the network. · If connecting to a UPoE-capable network switch, use Teledyne FLIR-recommended unit otherwise check with support. Make sure the camera’s power cable is properly connected. All electrical work must be performed in accordance with local regulatory requirements. - Page 18 Installation 6. If the camera is connected to a 24VAC, 50-60Hz power supply, the power rating is 0.67A. Attention: 1. Si la caméra est connectée à un réseau PoE, notez que la puissance nominale de l'alimentation PoE est 55VDC, 0.39A. 2.
-
Page 19: Connecting The Unit To The Network
Installation Warning: 1. This product contains a battery that is soldered to the PCB. There is a risk of explosion if the battery is replaced by an incorrect type. Do not replace the battery. The battery should be disposed of in accordance with manufacturer’s instructions, local codes, or WEEE standards. Replacement of the battery by the customer will void the product warranty. -
Page 20: Using Dna To Access The Camera
Installation Connecting a Wire to a Terminal Block Using DNA to Access the Camera To view and configure the camera via a LAN, you must attach the camera via the network switch or router to the same subnet (network segment or VLAN) as the computer that manages the unit. If the PC is on a different subnet than the camera, you will not be able to access the camera via a web browser. -
Page 21: Initial Camera Configuration
DNA, see Using DNA to Access the Camera Accessing Product Information from the Teledyne FLIR Website. If the Windows Firewall is enabled, a security alert window pops up. To continue, click Allow Access. Latitude users should consult the Latitude installation instructions on disabling the Windows Firewall. - Page 22 Installation Windows Firewall Screen 6. In the DNA Discovery List, discovered IP devices appear. If a DHCP server exists on the network, it automatically assigns the camera its initial IP address. Otherwise, the camera's default IP address appears. Discovered IP Devices Tip: Record the camera’s MAC address for future reference.
-
Page 23: Waterproofing The Camera
Installation i. Select Use DHCP. Caution! Do NOT use this setting on Latitude. ii. Click Update and wait for status. b. For Static IP (recommended for Latitude users): i. Make sure Use DHCP is not selected. ii. Enter the camera's IP Address, Gateway, and Netmask. If you are not sure of this network information, contact your network's administrator. -
Page 24: Mounting The Camera
Installation 3. While running cables, slightly bend the cables in a U- shaped curve to create a low point. This prevents water from entering the camera along the cables from above. U-Shaped Cable Installation Mounting the Camera The following accessories and adapters are available for mounting the camera: ·... -
Page 25: Wall Mount Bracket Cx-Armx-G3
Installation Pendant Cap Screw Pendant Cap Screw Holes on Camera 7. Securely tighten the pendant cap screw into the camera. The screw prevents the camera from rotating. 8. Try to rotate the camera and make sure it is not possible to rotate the camera. Warning: If the camera can be rotated, it could become loose and fall. - Page 26 Installation Step 1 Step 2 Step 3 Place the smaller, green sponge inside the bracket and route the Place the larger, black sponge Route the cables through the cables through the center of it, inside the bracket, as shown. bracket. as shown.
-
Page 27: Wall Mount Bracket With Power Box Cx-Elbx-G3
Installation CX-ARMX-G3 dimensions 4.6.3 Wall Mount Bracket with Power Box CX-ELBX-G3 What's in the Box Item Details Wall mount bracket with power CX-ELBX-G3 Parts package NO. 3 Allen Key NO. 5 Allen Key Sponge Hex Head Cap screw M6 x 20 (stainless steel) Cable gland Quick Install Guide (this document) - Page 28 Installation Step 1 Step 2 Step 3 Place the sponge inside the Route the cables through the Follow camera instructions to bracket and route the cables bracket. assemble the pendant cap. through the center of it, as Use the Allen key and a hex shown.
-
Page 29: Gooseneck Mount With Power Box Cx-Gsnk-G3
Installation 4.6.4 Gooseneck Mount with Power Box CX-GSNK-G3 Gooseneck mount (1.5 inch threaded) with IP68 power box. Item Details Gooseneck bracket and CX-GSNK-G3 box 1 power box CX-GSNK-G3 gooseneck pipe Accessory box No. 2 Allen key No. 3 Allen key No. -
Page 30: Mount Adapters
Installation CX-GSNK-G3 dimensions 4.6.5 Mount Adapters The following mount adapters are available for the camera: · Corner Adapter CX-CRNR-G3 · Pole Adapter CX-POLE-G3 4.6.5.1 Corner Adapter CX-CRNR-G3 90-degree exterior angle corner adapter for CX-xxxx-G3 mounts. Item Details Corner mount adapter CX-CRNR-G3 Accessory bag Stainless steel truss head screw... - Page 31 Installation Step 1 Step 2 Step 3 Join parts 1 and 2 together. Tighten hex head cap screws Fix assembled corner adapter to (clockwise). the wall. Step 4 · When using a wall mount bracket (pictured), affix the wall mount bracket onto the corner adapter with washers in the front and screw nuts at the back.
-
Page 32: Pole Adapter Cx-Pole-G3
Installation 4.6.5.2 Pole Adapter CX-POLE-G3 Pole adapter for CX-xxxx-G3 mounts, including 2.5-8.5 inch straps. Item Details Pole mount adapter CX-POLE-G3 8.5" ring Accessory bag Stainless streel truss head screw M8*20 Stainless steel truss head screw M8*30 M8 washer M8 screw nut M8 spring washer Quick install guide Summarized below 1... - Page 33 Installation Tools Needed: · Circle Cutter · Crosshead Screw Driver (Thread size: M4) Follow the steps to install CP-6302-30-R Network PTZ Camera Step 1: Make a 192mm cut in the ceiling. Step 2: Remove the dome cover by turning the dome cover counter-clockwise. Step 3: Put the Ethernet cable through the ceiling opening.
-
Page 34: Configure The Camera
Installation When tightening the three screws, the ceiling clamps will close towards the ceiling board. Please make sure the clamp is completely flush with the ceiling board. Step 5: Put back and tighten the dome cover back clockwise to complete the installation. Configure the Camera After the camera is connected to the network and running, it is necessary to frame-up the scene and adjust the camera settings to optimize the picture for the individual scenes. - Page 35 Americas 27700 SW Parkway Ave. Wilsonville, OR 97070 6769 Hollister Ave Goleta, CA 93117 Support: https://support.flir.com/ Document: Quasar Gen III CP-6302 Range Installation Manual Version: Ver. 5 Date: December 24, 2021 This document does not contain any export-controlled information.
Need help?
Do you have a question about the Quasar Gen III CP-6302-30-R and is the answer not in the manual?
Questions and answers