
Subscribe to Our Youtube Channel
Related Manuals for Teledyne Genie Nano Series


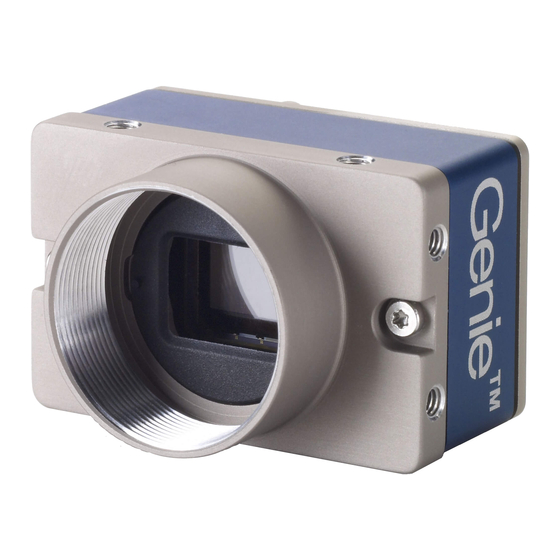
Summary of Contents for Teledyne Genie Nano Series
- Page 1 ™ Genie Nano Series Camera User’s Manual Monochrome & Color GigE Vision Area Scan sensors | cameras | frame grabbers | processors | software | vision solutions October 6, 2015 Rev: 0005 P/N: G3-G00M-USR00 www.teledynedalsa.com...
- Page 2 All information provided in this manual is believed to be accurate and reliable. No responsibility is assumed by Teledyne DALSA for its use. Teledyne DALSA reserves the right to make changes to this information without notice. Reproduction of this manual in whole or in part, by any means, is prohibited without prior permission having been obtained from Teledyne DALSA.
-
Page 3: Table Of Contents
Contents GENIE NANO SERIES OVERVIEW ESCRIPTION GigE with TurboDrive Genie Nano Overview GigE Firmware UMBERS AND OFTWARE EQUIREMENTS Monochrome Cameras Color Cameras Accessories Teledyne DALSA Development Software Third Party GigE Vision Development About GigE Vision ENIE OMMON PECIFICATIONS EMI, Shock and Vibration Certifications Mean Time Between Failure (MTBF) : M/C1940 &... - Page 4 OPERATIONAL REFERENCE SING XPERT WITH ENIE AMERAS CamExpert Panes CamExpert View Parameters Option AMERA NFORMATION ATEGORY Camera Information Feature Descriptions Temperature Management Power-up Configuration Dialog Camera Power-up Configuration Load / Save Configuration ENSOR ONTROL ATEGORY Sensor Control Feature Descriptions Offset/Gain Control Details Bayer Mosaic Pattern Native Sensor Exposure Timing External Trigger Characteristics: Models M/C1940 &...
- Page 5 AYER ONTROL ATEGORY GigE Vision Transport Layer Feature Descriptions Defaults for devicePacketResendBufferSize ISION ONTROL ATEGORY Teledyne DALSA TurboDrive CCESS ONTROL ATEGORY File Access Control Feature Descriptions Updating Firmware via File Access in CamExpert SAPERA TOOLS FOR NETWORKING IP C ONFIGURATION...
- Page 6 RJ45 E UGGEDIZED THERNET ABLES Components Express Cable Assemblies TROUBLESHOOTING VERVIEW Problem Type Summary Verifying Network Parameters Before Contacting Technical Support EVICE VAILABLE WITH PERATIONAL SSUES Firmware Updates Power Failure During a Firmware Update–Now What? Cabling and Communication Issues Acquisition Error without Timeout Messages Grab has Random Bad Data or Noise No camera exposure when expected Camera is functional but frame rate is lower than expected...
-
Page 7: Genie Nano Series Overview
Genie Nano Series Overview Description The Genie Nano series, a member of the Genie camera family, provides a new series of affordable easy to use digital cameras specifically engineered for industrial imaging applications requiring improved network integration. Genie Nano cameras use the industries’ latest leading sensors such as the Sony Pregius series of global shutter active pixel-type CMOS image sensors. -
Page 8: Genie Nano Overview
• details GigE Firmware Firmware updates for Genie Nano are available for download from the Teledyne DALSA web site www.teledynedalsa.com/imaging/support/downloads. Choose Genie Nano Firmware from the available download sections, then choose the zip file download specific to your camera model. -
Page 9: Part Numbers And Software Requirements
This manual covers the Genie Nano monochrome and color models summarized below. This table groups models by color mode, resolution, and other physical parameters. New models area added to this manual as they are released by Teledyne DALSA. See Genie Nano Common Specifications for details of each Genie Nano model. -
Page 10: Accessories
(2 meter Screw Retention to Euroblock connector) Power and Cable Evaluation Kit G3-ACBL-EVALKIT • Includes a Power Supply (12V), • an Ethernet Cable (RJ-45, 2 meter), • and a 2 meter I/O Breakout Cable (Euroblock) 8 • Genie Nano Series Overview Nano Series GigE Vision Camera... -
Page 11: Teledyne Dalsa Development Software
GenApi module of the GenICam™ specification. For more information see www.genicam.org. The Teledyne DALSA GigE Vision Module provides a license free development platform for Teledyne DALSA GigE hardware or Sapera vision applications. Additionally supported are Sapera GigE Vision applications for third party hardware with the purchase of a GigE Vision Module license, or the Sapera processing SDK with a valid license. -
Page 12: Genie Nano Common Specifications
GigE Vision 1.2 compliant Environmental Conditions Operating Temperature -20°C to +60°C (Housing Temperature) Operating Relative Humidity 10% to 70% non-condensing Storage -40°C to +80°C temperature at 20% to 80% non-condensing relative humidity 10 • Genie Nano Series Overview Nano Series GigE Vision Camera... -
Page 13: Emi, Shock And Vibration Certifications
Number: 3 shocks (+) and 3 shocks (-) Level 3: 40 g / 60 ms Directions: ±X, ±Y, and ±Z axes Additional information concerning test conditions and methodologies is available on request. Genie Nano Series Overview • 11 Nano Series GigE Vision Camera... -
Page 14: Mean Time Between Failure (Mtbf)
The analysis was carried out for operating temperatures varying from 0 to 80ºC, with the product steady state temperature determined as 20ºC. The following table presents the predicted MTBF and failure rate values. 12 • Genie Nano Series Overview Nano Series GigE Vision Camera... -
Page 15: Model Specifications: M/C1940 & M/C1920
75.5 dB (12-bit), 68.3 dB (10-bit) Output Dynamic Range † ‡ Signal to Noise ratio †† ‡ 43.9 dB typical DN Variation 50% saturation: < +/- 0.5% Responsivity graphic: Genie Nano Series Overview • 13 Nano Series GigE Vision Camera... -
Page 16: Sensor Cosmetic Specifications
Horizontal grouping of more than 10 contiguous pixel defects along a single row. ††† Test conditions Nominal light = illumination at 50% of saturation • Temperature of camera is 45°C • 14 • Genie Nano Series Overview Nano Series GigE Vision Camera... -
Page 17: Spectral Response
Monochrome Models M194x & M192x, (Sony IMX174 & IMX249) Measured Fill-Factor x Quantum Efficiency (FF x QE) Color Models C194x & C192x, (Sony IMX174 & IMX249) Measured Fill-Factor x Quantum Efficiency (FF x QE) Genie Nano Series Overview • 15 Nano Series GigE Vision Camera... -
Page 18: Nano Quick Start
If you are familiar with GigE Vision cameras follow these steps to quickly install and acquire images with Genie Nano and Sapera LT in a Windows OS system. If you are not familiar with Teledyne DALSA GigE Vision cameras go to Connecting the Genie Nano Camera. -
Page 19: Connecting The Genie Nano Camera
DALSA Network Imaging manual. Connect the Genie Nano Camera Connecting a Genie Nano to a network system is similar whether using the Teledyne DALSA Sapera LT package or a third party GigE Vision development package. Power supplies must meet the requirements defined in section Input Signals Electrical . Apply •... -
Page 20: Connectors
A 10 pin I/O connector for camera power, plus trigger, strobe and general I/O signals. The • connector supports a retention latch, while the Nano case supports thumbscrews. Teledyne DALSA provides optional cables (see Accessories). See 10-pin I/O Connector Details for connector pin out specifications. -
Page 21: Led Indicators
LED Indicators The Genie Nano has one multicolor LED to provide a simple visible indication of camera state, as described below. The Nano Ethernet connector does not have indicator LEDs; the user should use the LED status on the Ethernet switch or computer NIC for networking status. Camera Status LED Indicator The camera is equipped with one LED to display its operational status. -
Page 22: Genie Nano Ip Configuration Sequence
Preferably, a DHCP server is present on the network, where the Genie Nano issues a DHCP request for an IP address. The DHCP server then provides the Nano an IP address. The Teledyne DALSA Network Configuration tool, installed with the Sapera Teledyne DALSA Network Imaging Package, provides a DHCP server which is easily enabled on the NIC used with the Genie Nano (refer to the Teledyne DALSA Network Imaging user's manual). -
Page 23: Preventing Operational Faults Due To Esd
0 volt return line is not necessarily connected to earth ground. Teledyne DALSA has performed ESD testing on Nano cameras using an 8 kilovolt ESD generator without any indication of operational faults. The two following methods, either individually or together will prevent ESD problems. -
Page 24: Using Nano With Sapera Api
Nano also can connect through a Gigabit Ethernet switch. When using VLAN groups, the • Nano and controlling computer must be in the same group (refer to the Teledyne DALSA Network Imaging Package user's manual). If Genie Nano is to be used in a Sapera development environment, Sapera LT 8.10 needs to •... -
Page 25: Procedure
Download and install Sapera 8.01 which automatically provides GigE Vision support with Teledyne DALSA TurboDrive™ technology. Optional: If the Teledyne DALSA Sapera LT SDK package is not used, click to install the Genie • Nano firmware and user manuals only. Follow the on screen prompts. -
Page 26: Gige Server Verification
GigE Server Verification After a successful Genie Nano Framework package installation, the GigE Server icon is visible in the desktop taskbar tray area (note that in Windows 7 the icon remains hidden until a camera is connected). After connecting a camera (see following section), allow a few seconds for the GigE Server status to update. -
Page 27: Optimizing The Network Adapter Used With Nano
CamExpert. The single “moving” test image is a shifting diagonal ramp pattern, which is useful for testing network/computer bandwidth issues (see following image). Refer to the Teledyne DALSA Network Imaging package manual if error messages are shown in •... - Page 28 26 • Using Nano with Sapera API Nano Series GigE Vision Camera...
-
Page 29: About The Device User Id
When using CamExpert, multiple Genie Nano cameras on the network are seen as different "Nano-xxxxx" devices as an example. Non Teledyne DALSA cameras are labeled as “GigEVision Device”. Click on a device user name to select it for control by CamExpert. -
Page 30: Operational Reference
Operational Reference Using CamExpert with Genie Nano Cameras The Sapera CamExpert tool is the interfacing tool for GigE Vision cameras, and is supported by the Sapera library and hardware. CamExpert allows a user to test camera functions. Additionally CamExpert saves the Nano user settings configuration to the camera or saves multiple configurations as individual camera parameter files on the host system (*.ccf). -
Page 31: Camexpert View Parameters Option
Device pane: View and select from any installed GigE Vision or Sapera acquisition device. After • a device is selected CamExpert will only present parameters applicable to that device. Parameters pane: Allows viewing or changing all acquisition parameters supported by the •... -
Page 32: Camera Information Category
GigE Vision applications retrieve this information to identify the camera along with its characteristics. Features listed in the description table but tagged as Invisible are usually for Teledyne DALSA or third party software usage—not typically needed by end user applications. - Page 33 Display Name Feature & Values Description Device Version & View Manufacturer Name DeviceVendorName Displays the device vendor name. 1.00 Beginner Family Name DeviceFamilyName Displays the device family name. 1.00 Beginner Model Name DeviceModelName Displays the device model name. 1.00 Beginner Device Version DeviceVersion Displays the device version.
- Page 34 UserSet 2 UserSet2 Select the User Defined Configuration space UserSet1 to save to or load from features settings previously saved by the user. Load Configuration UserSetLoad Loads the camera configuration set specified by the User Set Selector feature, to the camera and makes it active.
-
Page 35: Temperature Management
Invisible LoadMemoryError Not enough memory to load set LoadFileError Internal file I/O error LoadInvalidSetError At least one register could not be restored properly LoadResourceManagerError An internal error happened related to the resource manager SaveGenericError Unknown error SaveBusyError The camera is busy and cannot perform the action SaveMemoryError Camera ran out of memory while saving set SaveFileError... -
Page 36: Power-Up Configuration Dialog
Power-up Configuration Dialog CamExpert provides a dialog box which combines the features to select the camera power-up state and for the user to save or load a Nano camera state. Camera Power-up Configuration The first drop list selects the camera configuration state to load on power-up (see feature UserSetDefaultSelector). -
Page 37: Sensor Control Category
Parameters in black are user set in CamExpert or programmable via an imaging application. Features listed in the description table that are tagged as Invisible are usually for Teledyne DALSA or third party software usage—not typically needed by end user applications. Also important, features shown by CamExpert may change with different Genie Nano models implementing different sensors, image resolutions, and color versions. -
Page 38: Sensor Control Feature Descriptions
Sensor Control Feature Descriptions The following table describes these features along with their view attribute and device framework version. For each feature the device version may differ for each camera sensor available. Such differences are indicated for any applicable feature. When a Device Version number is indicated, this represents the camera software functional group, not a firmware revision number. - Page 39 Exposure Alignment exposureAlignment Exposure Alignment specifies how the exposure is executed in relationship to the sensor capabilities and current frame trigger. < DFNC Beginner > Synchronous Synchronous Exposure is synchronous to the internal timing of the sensor. The readout is concurrent to the exposure for the fastest possible frame rate.
-
Page 40: Offset/Gain Control Details
Offset/Gain Control Details Applies to Nano models using Sony IMX174/249 sensors (Monochrome or Color) The Gain and Black level functions are applied at the sensor and/or on the digital image values output by the sensor, as described below. Gain Selector = Sensor: The gain function controls the sensor hardware. Sensor gain is •... -
Page 41: Bayer Mosaic Pattern
Genie Nano Color cameras (using Sony IMX174/249 sensors) output raw Bayer image data using the mosaic pattern shown below. Teledyne DALSA Sapera CamExpert tool interprets the raw Bayer output when the user enables the Pre-Processing Software Bayer Decoder. CamExpert also provides an automatic white balance tool to aid RGB gain adjustments. -
Page 42: Exposure Controls Detail
Exposure Controls Detail Exposure Control modes define the method and timing of controlling the sensor integration period. The integration period is the amount of time the sensor is exposed to incoming light before the video frame data is transmitted to the controlling computer. Exposure control is defined as the start of exposure and exposure duration. -
Page 43: Internal Programmable Exposure (Exposuremode = Timed)
Internal Programmable Exposure (ExposureMode = Timed) The Genie Nano in Internal Programmable Timed Exposure mode has the following features: • Programmable internal trigger, where the maximum and minimum sensor frame rate limits are defined by the ExposureTime feature. Exposure synchronization timing is Synchronous Mode where the exposure is aligned with the •... -
Page 44: External Trigger: Trigger Width Exposure
External Trigger: Trigger Width Exposure • The following graphic shows an exposure started by an external active high trigger and duration controlled by the signal width. External Trigger input on Line 1 or Line 2. • ExposureMode = TriggerWidth (signal High example) External Trigger Input Signal ExposureEnd Event Exposure... -
Page 45: I/O Control Category
Parameters in black are user set in CamExpert or programmable via an imaging application. Features listed in the description table but tagged as Invisible are usually for Teledyne DALSA or third party software usage—not typically needed by end user applications. Also important, Genie Nano cameras are available in a number of models implementing different sensors which may support different features within this category. -
Page 46: I/O Control Feature Descriptions
I/O Control Feature Descriptions The following table describes these features along with their view attribute and minimum camera firmware version required. Additionally the Device Version column will indicate which parameter is a member of the DALSA Features Naming Convention (indicated by DFNC), versus the GenICam Standard Features Naming Convention (SFNC tag is not shown). - Page 47 Any Edge AnyEdge The trigger is considered valid on any edge of the line source signal (after any processing by the line inverter module). Level High LevelHigh The trigger is considered valid on the high level of the line source signal. Level Low LevelLow The trigger is considered valid on the low level of...
- Page 48 1.00 Input Line Detection Level lineDetectionLevel Specifies the voltage threshold required to Beginner recognize a signal transition on an input line. DFNC Threshold for TTL Threshold_for_TTL A signal below 0.8V will be detected as a Logical LOW and a signal greater than 2.4V will be detected as a Logical HIGH on the selected input line.
-
Page 49: I/O Module Block Diagram
Active Active Sets the Output circuit to close Inactive Inactive Sets the Output circuit to open 1.00 Output Line Software Latch outputLineSoftwareLatchControl When Off, the selected output line is set with the Guru Control value in Output Line Value. DFNC Output pin state set by outputLineValue. -
Page 50: Trigger Mode Details
Trigger Mode Details Genie Nano image exposures are initiated by an event. The trigger event is either the camera's programmable internal clock used in free running mode, an external input used for synchronizing exposures to external triggers, or a programmed function call message by the controlling computer. -
Page 51: Trigger Overlap: Feature Details
Trigger Overlap: Feature Details The Trigger Overlap feature defines how the Nano handles triggers that might occur more frequently than the Frame Active period (an exposure plus readout period). if TriggerOverlap=OFF, then triggers received before the end of the Frame Active period are ignored. - Page 52 TriggerOverlap=ReadOut • Trigger is accepted at the beginning of the frame Readout. The “End of Exposure to Start of • Readout” time is sensor dependent. Diagram Conditions: • TriggerMode=On TriggerActivation=RisingEdge • TriggerDelay=0 • TriggerSelector=FrameStart • ExposureAlignment=Synchronous • TriggerOverlap=Readout Trigger Exclusion Period Trigger Exclusion Period Trigger Input Exposure 1...
- Page 53 TriggerOverlap= EndOfExposure or Readout • This special condition describes the case of a short exposure relative to the readout period. A • trigger received before the end of the frame readout is latched and delayed until such time that the following short exposure will end with the end of the previous frame readout. The second readout period will then start immediately.
-
Page 54: Output Line Details
Output Line Details The general purpose output line signals are connected to I/O lines 3 and 4, which have the following features for control or status indication. Feature set: LineInverter (RW), outputLineSource (RW), outputLinePulseDelay (RW), • outputLinePulseDuration (RW), outputLineValue (RW), outputLineSoftwareCmd (RW), LineSelector (RW), LineName (RO), linePinAssociation (RO), LineFormat (RO), LineMode (RO), LineStatus (RO). -
Page 55: Counter And Timer Control Category
Parameters in black are user set in CamExpert or programmable via an imaging application. Features listed in the description table but tagged as Invisible are usually for Teledyne DALSA or third party software usage—not typically needed by end user applications. Also important, Genie Nano cameras are available in a number of models implementing different sensors and image resolutions which may not support the full feature set defined in this category. - Page 56 Display Name Feature & Values Description Device Version & View 1.00 Counter Selector counterSelector Selects the counter to configure. Expert Counter 1 Counter1 Select counter 1 DFNC 1.00 Counter mode counterMode Selects the counter mode. The selected Counter is Expert either Active or Disabled.
- Page 57 Any Edge AnyEdge Starts counting on the falling or rising edge of the selected Line. 1.00 Counter Incremental counterIncrementalSource Select the event source which increments the Expert Source counter. The Event Control section provides details DFNC and timing diagrams for the supported events. Counter is stopped.
- Page 58 MultiFrame End Trigger FrameBurstEnd Reset on reception of the Frame Burst end. Line 1 Line1 Reset counter on the specified transition on line 1. See Input Signals Electrical Specifications. Line 2 Line2 Reset counter on the specified transition on line 2. Output 1 Line3 Counts the number of transitions of Output 1 (based...
-
Page 59: Counter And Timer Group Block Diagram
Line 1 Line1 Start Timer on a transition of I/O Line 1 event. See Input Signals Electrical Specifications. Line 2 Line2 Start Timer on a transition of I/O Line 2 event. Timer 1 End Timer1End Start Timer on Timer End event. Counter 1 End Counter1End Start Timer on Counter 1 End event. -
Page 60: Example: Counter Start Source = Off
Example: Counter Start Source = OFF CounterStartSource=OFF Countermode=Active Countermode=OFF CounterEnd Event Generated Counter Counter is CounterWait Counter is Counter Overflow IDLE Trigger Active Completed Counter is incrementing CounterStartSource=OFF CounterResetSource=OFF Counter Reset CMD CounterResetSource=Event CounterResetSource=CounterEnd The counter starts on the counterReset Cmd. •... -
Page 61: Example: Counterstartsource = Event And Signal (Edge Base)
Example: CounterStartSource = EVENT and Signal (Edge Base) CounterStartSource= EVENT and Signal (Edge Base ) Countermode=Active Countermode=OFF CounterEnd Event Generated Counter Counter is CounterWait Counter is Counter Overflow IDLE Trigger Active Completed Counter is incrementing CounterResetSource=OFF CounterStartSource= EVENT or Signal (Edge Base ) Counter Reset CMD CounterResetSource=Event (Itself) CounterResetSource=Event... -
Page 62: Image Format Control Category
Parameters in black are user set in CamExpert or programmable via an imaging application. Features listed in the description table but tagged as Invisible are usually for Teledyne DALSA or third party software usage—not typically needed by end user applications. Also important, Genie Nano cameras are available in a number of models implementing different sensors and image resolutions which may not support the full feature set defined in this category. -
Page 63: Image Format Control Feature Description
Image Format Control Feature Description The following table describes these features along with their view attribute and device framework version. For each feature the device version may differ for each camera sensor available. Such differences will be clearly indicated for any applicable feature. When a Device Version number is indicated, this represents the camera software functional group, not a firmware revision number. - Page 64 Vertical Offset OffsetY Vertical offset from the Sensor Origin to the Area Of Interest (in Lines). < Beginner > Width Width Width of the Image provided by the device (in pixels). < Beginner > Height Height Height of the Image provided by the device (in lines). <...
- Page 65 ROI Width multipleROIWidth Width of the selected ROI (Region of Interest) provided by the device (in pixels). < Expert, DFNC > ROI Height multipleROIHeight Height of the selected ROI (Region of Interest) provided by the device (in pixels). < Expert, DFNC > Test Image Selector TestImageSelector Selects the type of test image generated by the camera.
-
Page 66: Width And Height Features For Partial Scan Control
Width and Height Features for Partial Scan Control Width and Height controls along with their respective offsets, allow the Genie Nano to grab a region of interest (ROI) within the full image frame. Besides eliminating post acquisition image cropping done by software in the host computer, a windowed ROI grab reduces the bandwidth required on the Gigabit Ethernet link since less pixels are transmitted. -
Page 67: Maximum Frame Rate (Fps) Examples
Maximum Frame Rate (fps) Examples Vertical Lines Free Running Acquisition Free Running Acquisition Acquired M/C1920 Models (minimum exposure) M/C1940 Models (minimum exposure) 1216 38 fps 1080 43 fps 51 fps 75 fps 98 fps 141 fps 249 fps 409 fps 632 fps 1366 799 fps... -
Page 68: Using The Multiple Roi Mode
Using the Multiple ROI Mode Genie Nano monochrome cameras implement the Multiple ROI mode (region of interest) features, which allow having 2 to 16 smaller image ROI areas versus the single ROI area possible with vertical and horizontal crop functions. These multiple areas are combined as one output image, reducing transfer bandwidth requirements, plus with the added benefit that any reduction of the number of vertical lines output will result in a greater possible camera frame rate. -
Page 69: Example: Four Roi Areas (2X2)
Example: Four ROI Areas (2x2) ROI (x1,y1) ROI (x2,y1) ROI (x1,y1) ROI (x2,y1) ROI (x1,y2) ROI (x2,y2) ROI (x1,y2) ROI (x2,y2) Camera Outputs only the 4 ROI Areas 4 ROI Areas Defined • Note that ROI(x1,y1) defines the height of any ROI in that row. ROI(x2,y1) can have a different width. - Page 70 With the ROI areas defined, the camera outputs an image consisting only of data within those ROI areas, as shown below. Such data reduction improves transfer bandwidth and also reduces image processing time for the host system imaging application. 68 • Operational Reference Nano Series GigE Vision Camera...
-
Page 71: Internal Test Pattern Generator
Internal Test Pattern Generator The Genie Nano camera includes a number of internal test patterns which easily confirm camera installations, without the need for a camera lens or proper lighting. Use CamExpert to easily enable and select the any of the Nano test patterns from the drop menu while the camera is not in acquisition mode. -
Page 72: Acquisition And Transfer Control Category
Parameters in black are user set in CamExpert or programmable via an imaging application. Features listed in the description table but tagged as Invisible are usually for Teledyne DALSA or third party software usage—not typically needed by end user applications. Also important, Genie Nano cameras are available in a number of models implementing different sensors and image resolutions which may not support the full feature set defined in this category. - Page 73 Single Frame SingleFrame One frame is captured for each AcquisitionStart Command. An AcquisitionStop occurs at the end of the Active Frame. Multi-Frame MultiFrame A sequence of frames is captured for each AcquisitionStart Command. The number of frames is specified by AcquisitionFrameCount feature. An AcquisitionStop occurs at the end of the Active Frame(s) Continuous...
-
Page 74: Acquisition Buffering
Acquisition Buffering All acquisitions are internally buffered and transferred as fast as possible to the host system. This internal buffer allows uninterrupted acquisitions no matter of any transfer delays that might occur (such as acquisition frame rates faster that the Gigabit Ethernet link or the IEEE Pause frame). -
Page 75: Event Control Category
Parameters in black are user set in CamExpert or programmable via an imaging application. Features listed in the description table but tagged as Invisible are usually for Teledyne DALSA or third party software usage—not typically needed by end user applications. Also important, Genie Nano cameras are available in a number of models implementing different sensors and image resolutions which may not support the full feature set defined in this category. -
Page 76: Event Control Feature Descriptions
Event Control Feature Descriptions The following table describes these parameters along with their view attribute and minimum camera firmware version required. Additionally the Device Version column will indicate which parameter is a member of the DALSA Features Naming Convention (denoted by DFNC), versus the GenICam Standard Features Naming Convention (SFNC tag is not shown). - Page 77 The selected event is disabled. The selected event will generate a software event. GigEVisionEvent GigEVisionEvent The selected event will generate a software event. This entry is deprecated. Using "On" is recommended. Event Statistic Selector eventStatisticSelector Selects which Event statistic to display. 1.00 Expert Image Lost...
-
Page 78: Basic Exposure Events Overview
1.00 Events Overflow Event EventeventsOverflowTimestamp Timestamp of the EventeventsOverflow event. Guru Timestamp 1.00 Gev Timestamp Latch GevtimestampControlLatch Latch the current timestamp internal counter value Invisible in the timestampValue feature. 1.00 Gev Timestamp Value GevtimestampValue Returns the 64-bit value of the timestamp counter. Invisible 1.00 Gev Timestamp Tick... -
Page 79: Events Associated With Triggered Synchronous Exposures
Events Associated with Triggered Synchronous Exposures The following timing graphic shows the primary events and acquisition timing associated with a synchronous exposure of two individually triggered frames. FrameActive (exposureAlignment=Synchronous ) ValidFrameTrigger ValidFrameTrigger Event (1) Event (2) Invalid Frame Trigger Period Invalid Frame Trigger Period FrameTrigger Inactive FrameTrigger Active... -
Page 80: Gige Vision Transport Layer Control Category
Parameters in black are user set in CamExpert or programmable via an imaging application. Features listed in the description table but tagged as Invisible are usually for Teledyne DALSA or third party software usage—not typically needed by end user applications. Also important, Genie Nano cameras are available in a number of models implementing different sensors and image resolutions which may not support the full feature set defined in this category. - Page 81 Display Name Feature & Values Description Device Version & View Stream Channel Selector GevStreamChannelSelector Selects the stream channel to control. 1.00 Expert 1.00 Device Link Speed GevLinkSpeed Indicates the transmission speed Expert negotiated by the given network interface. 1.00 PacketSize GevSCPSPacketSize Specifies the stream packet size in bytes Expert...
- Page 82 1.00 Current Heartbeat Timeout GevHeartbeatTimeout Indicates the current heartbeat timeout in Guru milliseconds. 1.00 GVCP Heartbeat Disable GevGVCPHeartbeatDisable Disables the GVCP (GigE Vision Control Expert Protocol) heartbeat monitor. This allows control switchover to an application on another device. 1.00 Communication Timeout GevMCTT Provides the transmission timeout value in Guru...
- Page 83 IPConfigurationLLA IPConfigurationDHCP IPConfigurationPersistentIP StreamChannelSourceSocket MessageChannelSourceSocket CommandsConcatenation WriteMem PacketResend Event EventData PendingAck Action PrimaryApplicationSwitchover ExtendedStatusCodes DiscoveryAckDelay DiscoveryAckDelayWritable TestData ManifestTable CCPApplicationSocket LinkSpeed HeartbeatDisable SerialNumber UserDefinedName StreamChannel0BigAndLittleEndian StreamChannel0IPReassembly StreamChannel0UnconditionalStreaming StreamChannel0ExtendedChunkData 1.00 Gev Supported Option GevSupportedOption Returns TRUE if the selected GEV option is Invisible supported.
- Page 84 1.00 GVCP Pending Timeout GevGVCPPendingTimeout Indicates the longest GVCP command Invisible execution time before a device returns a PENDING_ACK. 1.00 Gev MCP HostPort GevMCPHostPort Indicates the port to which the device Invisible must send messages. (RO) 1.00 Gev MCDA GevMCDA Indicates the destination IP address for Invisible the message channel.
-
Page 85: Defaults For Devicepacketresendbuffersize
NIC, the data rate of each camera and the trigger modes used. Information on these features is found in the Teledyne DALSA Network Imaging Module User manual. -
Page 86: File Access Control Category
Genie Nano. The supported data files are for firmware updates, etc. Features listed in the description table but tagged as Invisible are usually for Teledyne DALSA or third party software usage—not typically needed by end user applications. Also important, Genie Nano cameras are available in a number of models implementing different sensors and image resolutions which may not support the full feature set defined in this category. - Page 87 Guru Read Read Select READ only open mode Write Write Select WRITE only open mode 1.00 File Access Buffer FileAccessBuffer Defines the intermediate access buffer that allows the Guru exchange of data between the device file storage and the application. 1.00 File Access Offset FileAccessOffset...
-
Page 88: Updating Firmware Via File Access In Camexpert
Updating Firmware via File Access in CamExpert Click on the “Setting…” button to show the file selection menu. • From the File Type drop menu, select the file Type that will be uploaded to the Genie Nano. • This CamExpert tool allows quick firmware changes or updates, when available for your Genie Nano model. -
Page 89: Sapera Tools For Networking
In general automatic IP configuration assignment (LLA/DHCP) is sufficient for most Nano installations. Please refer to the Teledyne DALSA Network Imaging Package manual for information on the Teledyne DALSA Network Configuration tool and network optimization for GigE Vision cameras and devices. -
Page 90: Technical Specifications
Technical Specifications Mechanical Specifications: Note: Genie Nano with C or CS Mount 88 • Technical Specifications Nano Series GigE Vision Camera... -
Page 91: Specification
Additional Notes on Genie Nano Identification and Mechanical Identification Label Genie Nano cameras have an identification label applied to the bottom side, with the following information: Model Part Number Serial number MAC ID 2D Barcode CE and FCC logo Additional Mechanical Notes Nano supports a screw lock Ethernet cable as described in Ruggedized RJ45 Ethernet Cables. -
Page 92: Connectors
DC power source. Nano supports connecting cables with retention latches or screw locks. The following figure shows pin number assignment. 10-pin I/O Connector Details Teledyne DALSA makes available optional I/O cables as described in Accessories. Contact Sales for availability and pricing. Pin Number... -
Page 93: I/O Mating Connector Sources
I/O Mating Connector Sources For users wishing to build their own custom I/O cabling, the following product information is provided to expedite your cable solutions. Part # Description Data Sheet Samtec SFSD-05-[WG]-G-[AL]-DR-[E2O] Discrete Cable www.samtec.com/technical- Assembly specifications/Default.aspx?SeriesMaster=SFSD WG : Wire Gauge AL : Assembled Length E2O : End 2 Option Samtec... -
Page 94: Input Signals Electrical Specifications
Input Signals Electrical Specifications External Inputs Block Diagram User Side Camera Side Current INPUT Port X Protection Limiter INPUT-Common External Input Details Opto-coupled with internal current limit. • Single input trigger threshold level • (TTL standard: <0.8V=Logical LOW, >2.4V=Logical HIGH. See lineDetectionLevel feature). -
Page 95: Output Signals Electrical Specifications
Output Signals Electrical Specifications External Outputs Block Diagram User side Camera side Output Common Power Protection Output Port X External Output Details Programmable output mode such as strobe, event notification, etc • (see outputLineSource feature) • Outputs are open on power-up with the default factory settings A software reset will not reset the outputs to the open state if the outputs are closed •... -
Page 96: Computer Requirements For Nano Cameras
Older laptop computers with built in GigE network adapters may still not be able to stream • full frame rates from Nano. Thorough testing is required with any laptop computer to determine the maximum frame rate possible (refer to the Teledyne DALSA Network Imaging Package user's manual). Ethernet Switch Requirements When there is more than one device on the same network or a camera-to-PC separation greater than 100 meters, an Ethernet switch is required. -
Page 97: Ieee 802.3X Pause Frame Flow Control
Nano cameras support the IEEE 802.3x pause frame flow control protocol automatically so that images from many cameras can be transmitted through the switch to the NIC efficiently, without data loss. As a working example, one such switch tested at Teledyne DALSA is the NETGEAR GS716T. -
Page 98: Ec & Fcc Declarations Of Conformity
EC & FCC Declarations of Conformity Models: M1920/C1920/M1940/C1940 96 • Technical Specifications Nano Series GigE Vision Camera... -
Page 99: Additional Reference Information
Additional Reference Information Lens Selection Overview This section provides a general overview to selecting a lens for the various models of Genie Nano. Brief information on other lens parameters to consider follows those sections. Lens Options for Models ‘M/C194x’ & ‘M/C192x’ •... -
Page 100: Additional Lens Parameters (Application Specific)
Factors include the nature, speed, and spectral characteristics of objects being imaged, exposure times, light source characteristics, environmental and acquisition system specifics, and more. The Teledyne DALSA Web site, http://mv.dalsa.com/, provides an introduction to this potentially complicated issue. Click on Knowledge Center and then select Application Notes and Technology Primers. -
Page 101: Light Sources
Light Sources Keep these guidelines in mind when selecting and setting up light source: LED light sources are relatively inexpensive, provide a uniform field, and longer life span • compared to other light sources. However, they also require a camera with excellent sensitivity. Halogen light sources generally provide very little blue relative to infrared light (IR). - Page 102 The graphic below shows a sample response of a color camera with an overlay of the cut-off filter suppressing wavelengths above 650nm from reaching the camera sensor. 100 • Additional Reference Information Nano Series GigE Vision Camera...
-
Page 103: Lens Modeling
Lens Modeling Any lens surrounded by air can be modeled for camera purposes using three primary points: the first and second principal points and the second focal point. The primary points for a lens should be available from the lens data sheet or from the lens manufacturer. Primed quantities denote characteristics of the image side of the lens. -
Page 104: Sensor Handling Instructions
Sensor Handling Instructions This section reviews proper procedures for handling, cleaning, or storing the Genie Nano camera. Specifically the Genie Nano sensor needs to be kept clean and away from static discharge to maintain design performance. Electrostatic Discharge and the Sensor Cameras sensors containing integrated electronics are susceptible to damage from electrostatic discharge (ESD). -
Page 105: Cleaning The Sensor Window
Wipe the window carefully and slowly when using these products. Ruggedized Cable Accessories Teledyne DALSA provides optional I/O cable assemblies for Genie Nano. Users wishing to build their I/O cabling by starting from available cable packages should consider these popular assemblies described below. -
Page 106: Cable Assembly G3-Aioc-Blunt2M
Cable Assembly G3-AIOC-BLUNT2M 104 • Additional Reference Information Nano Series GigE Vision Camera... - Page 107 Additional Reference Information • 105 Nano Series GigE Vision Camera...
-
Page 108: Cable Assembly G3-Aioc-Brkout2M
Cable Assembly G3-AIOC-BRKOUT2M 106 • Additional Reference Information Nano Series GigE Vision Camera... - Page 109 Additional Reference Information • 107 Nano Series GigE Vision Camera...
-
Page 110: Ruggedized Rj45 Ethernet Cables
Ruggedized RJ45 Ethernet Cables Components Express Inc. has available industrial RJ45 CAT6 cables that on one end have a molded shroud assembly with top/bottom thumbscrews, while the other end is a standard RJ45 (one example shown below). These cables are recommended when Nano is installed in a high vibration environment. -
Page 111: Troubleshooting
In multiple NIC systems where the NIC for the Nano is using LLA mode, ensure that no • other NIC is in or switches to LLA mode. It is preferable that the Teledyne DALSA DHCP Troubleshooting • 109 Nano Series GigE Vision Camera... - Page 112 When using multiple cameras connected to an VLAN Ethernet switch, confirm that all • cameras are on the same subnet setup on that switch. See the Teledyne DALSA Network Imaging package manual for more information. . If a Nano camera installed with other GigE Vision cameras cannot connect properly with the •...
-
Page 113: Verifying Network Parameters
Teledyne DALSA provides the Network Configuration tool to verify and configure network devices and the Nano network parameters. See section Network Configuration Tool of the Teledyne DALSA Network Imaging manual, if there were any problems with the automatic Nano software installation. -
Page 114: Power Failure During A Firmware Update-Now What
Streaming video problems range from total loss of image data to occasional loss of random video data packets. The following section describes conditions identified by Teledyne DALSA engineering while working with Nano in various computers and setups. See the Teledyne DALSA Network Imaging manual for information on network optimizations. -
Page 115: Grab Has Random Bad Data Or Noise
Other marginal NIC boards or ports can cause problems with packet transfers. Try alternative • NIC adapters. Review other reasons for such acquisition errors as described in the Teledyne DALSA Network Imaging Module for Sapera LT manual. No camera exposure when expected Verify by using the camera in free-running mode. -
Page 116: Camera Is Functional But Frame Rate Is Lower Than Expected
Verify Ethernet link speed. If the LAN connection is limited to 100 Mbps, the Genie Nano • frame rate maximum will be limited once the internal buffers are filled. See the Teledyne DALSA Network Imaging manual for information on network optimizations. -
Page 117: Other Problems Or Issues
Other Problems or Issues This section describes problems that do not fit any of the categories above. Typically these are issues found in the field under specific or unusual conditions. Random Invalid Trigger Events • Do not change the exposure time while grabbing, else an Invalid Trigger Event may be generated. -
Page 118: Revision History
Revision History Revision Date Major Change Description R:0001 September 15, 2015 Initial release R:0002 September 17, 2015 Additional I/O technical specifications, etc. R:0003 September 18, 2015 Additional information on optional accessories, etc. R:0004 September 23, 2015 Added “EC & FCC Declaration of Conformity” (models M/C1920 & M/C1940), etc. R:0005 October 6, 2015 Correction to S/N spec. -
Page 119: Contact Informations
Sales Information Visit our web site: www.teledynedalsa.com/mv Email: mailto:info@teledynedalsa.com Canadian Sales Teledyne DALSA — Head office Teledyne DALSA — Montreal office 605 McMurray Road 880 Rue McCaffrey Waterloo, Ontario, Canada, N2V 2E9 Saint-Laurent, Quebec, Canada, H4T 2C7 Tel: 519 886 6000... -
Page 120: Index
Index fast frame rate, 64 fastest frame rates, 41 fiber-optic light sources, 99 firewall exceptions, 22 firmware update, 22 flow control protocol, 95 focal point, 101 format controls, 60 10-pin connector, 90 frame rate limits, 95 Frame Trigger modes, 48 free running mode, 41 AC Timing Characteristics, 92, 93 administrator, 23... - Page 121 LED light sources, 99 Sapera LT User’s manual, 23 LED states, 19 Sapera version, 9 lens parameters, 98 screw locks, 90 lens selection, 97 secure Ethernet cable, 108 light source aging, 99 secured Ethernet cable, 112 line signals, 48 sensor cleaning, 103 Link-Local Address, 20 sensor controls, 35, 83 Log Viewer tool, 112...
Need help?
Do you have a question about the Genie Nano Series and is the answer not in the manual?
Questions and answers