Table of Contents
Advertisement
Quick Links
Advertisement
Table of Contents

Related Manuals for FMS Eazy RC 540mm PA-18 Super Cub


Summary of Contents for FMS Eazy RC 540mm PA-18 Super Cub
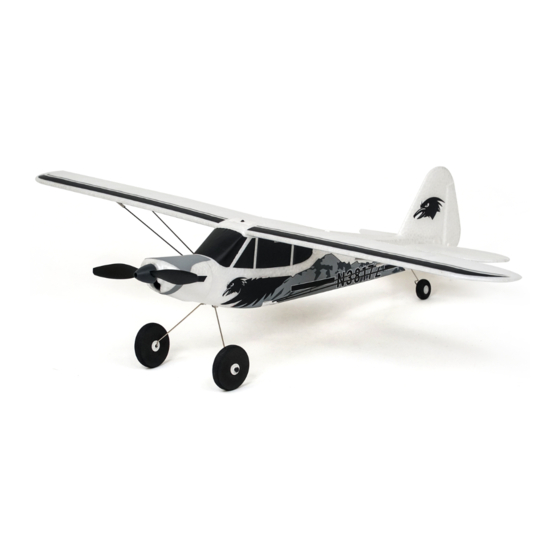
- Page 1 540mm PA-18 Super Cub...
- Page 3 warning warning WARNING: Read the ENTIRE instruction manual to become familiar with the features of the product before operating. Failure to operate the product correctly can result in damage to the product,personal proper- ty and cause serious injury. This is a sophisticated hobby product and NOT a toy. It must be operated with caution and common sense and failure to do so could result in injury or damage to the product or other property.
-
Page 4: Table Of Contents
FMS has always been committed to urging as many players as possible to discover the magnifi- cence of RC model. Keep it in mind, FMS launched Eazy RC, a quasi-model brand specially for novices, at the beginning of the year 2021. Eazy RC covers both car models and aircraft models. -
Page 5: Kit Contents
Kit contents Before assembly, please inspect the contents of the kit. The photo below details the contents of the kit with labels. If any parts are missing or defective, please identify the name or part number (refer to the spare parts list near the end of the manual) then contact your local shop or email us: support@fmsmodel.com. - Page 6 Main wing assembly 1.Install the linkage rods to control arms as shown. 2.Install the main wing into the fuselage slot. 3.Apply power to airplane, switch it to Manual/Gyro Off mode. With the servos centered, adjust the clevis as shown until the aileron control surface is neu- tral when no input is given.
-
Page 7: Propeller Protector Instruction
Front landing gear assembly 1.Insert the front landing gear into the slots as shown. Rear landing gear assembly 1.Insert the rear landing gear into the slot as shown. Battery installation 1.Remove the battery cover at the bottom of fuselage. Connect the full charged battery to the receiver,... -
Page 8: Transmitter Instruction
Transmitter Instruction Power status LED Gyro Switch One-key Aerobatics Button One-key U-turn Elevator trim Activation Throttle Elevator Rudder Aileron Aileron trim Rudder trim Power switch One-key U-turn Switch Gyro Switch Soft Gyro Assit(MIDD) Soft Gyro Assit(MIDD) Three modes available: Strong Gyro Assit Strong Gyro Assit Manual/Gyro Off... -
Page 9: One-Key Rollover Instruction
One-key Rollover Instruction The one-key Rollover feature allows beginner pilot to perform aerobatic actions by simply pressing the button on transmitter. One-key Rollover During flight, under gyro control mode, press the one- key Rollover button, the transmitter will beep several times. During the beeping, simply move the aileron stick to either direction for auto-roll, or move the elevator stick to either direction for auto-flip. -
Page 10: Before Flying The Model
Before flying the model Find a suitable flying site Find a flying site clear of buildings, trees, power lines and other obstructions. Until you know how much area will be required and have mastered flying your plane in confined spaces, choose a site which is at least the size of two to three football fields - a flying field specifically for R/C planes is best. -
Page 11: Trouble Shooting
Trouble shooting Problem Possible Cause Solution Aircraft will not -Lower throttle stick and throttle trim to -ESC is not armed. respond to the lowest settings. throttlebut responds -Throttle channel is reversed. -Reverse throttle channel on transmitter. to other controls. -Damaged spinner, propeller,motor or motor -Replace damaged parts. -
Page 12: Spare Parts List Content
Spare parts list content Fuselage Rear landing gear set EPAA101 EPAA109 Main Wing Decal set EPAA102 EPAA110 Horizontal Stabilizer Propeller EPAA103 EPPROP010 Battery Cover Motor-EZP01 EPAA104 EPMotor01 Mainwing supporting bar set Receiver ( 4-in-1 integrated) EPAA105 EPRX01 Steel set Transmitter EPAA106 EPTX01 Spinner... - Page 13 警告 警告 警告: 在组装、 调整及飞行前请务必认真阅读产品说明书以熟知产品的特性。 请严 格按照说明书提示进行飞机的组装、 调整及飞行。 如操作不当会造成产品本身损坏 及其它财产损失, 甚至造成严重的人身伤害。 声明: 模型不是玩具, 具有一定的危险性, 操作者需要具备一定的飞行经验, 初学者 请在专业人士指导下操作。 禁止十四岁以下儿童操作、 飞行。 安全须知 本产品飞行由无线电遥控器控制, 在飞行过程中可能会受到外界强信号源干扰而 导致失控, 甚至坠机。 因此, 在飞行过程中务必始终与飞机保持一定的安全距离, 避 免意外碰撞、 受伤。 ⸺请勿在发射器电池低电量的情况下操纵模型飞机。 ⸺请勿在公路、 人群、 高压线密集区、 机场附近及其它法律法规明确禁止飞行的场 合飞行。 ⸺请勿在雷雨、 大风、 大雪或者其它恶劣气象环境下飞行。 ⸺请严格遵照产品指导说明及安全警告操作本产品及其相关配置 (例如充电器、 电池等)...
- Page 14 产品特点 FMS一直致力于促使尽可能多的玩家发现模型世界的瑰丽, 在颇具挑战性的2021年, FMS 全力推出特供新手的准模型品牌Eazy RC。 Eazy Rc同时涵盖车模和航模, 其产品是数十位 工程师在特征、 工艺、 品质和成本中多轮取舍达到的最优平衡, 是新手踏进模型世界的优 选。 特征: •大厂贴牌高速空心杯马达, 转速高、 能耗 •尼龙材质螺旋桨, 柔韧不易折断, 动平衡 低, 动力澎湃; 系统增稳, 合理空气动力 表现优良, 采用撞地脱落式设计, 大大降 布局, 便利初学者稳定飞行 低撞击给桨叶带来的损耗 •自带可靠的飞行辅助系统, 自稳、 半自稳 •采用EPP泡沫材料, 易飞耐摔, 耐腐蚀, 和手动三种模式, 满足不同级别玩家需 可喷漆。 全重只有70g 求。...
- Page 15 包装清单 在组装产品之前, 请仔细检查以下配件, 如有缺失或者损坏, 请及时联系当地店面或者邮件 至厂家 (support@fmsmodel.com), 告知缺失或损坏的配件名称及编码 (请在本说明书尾 页查看相应的配件编码) 。 请注意, 不同配置, 包装盒内部物品不同。 A: 螺旋桨 C: 主翼 E: 连接钢丝 G: 尾轮 B: 机身 D: 支撑杆 F:前轮 充电说明 1. 拔掉飞机上的电池插头。 2. 将充电器插至电脑的 USB 接口或 USB 适配器。 3. 连接电池到充电器上。 4. 充电耗时约为 3.5 个小时。 安全起见,请 勿持续充电超过...
- Page 16 主翼安装 1.如图所示, 将连接钢丝安装至摇臂。 2.将主翼安装在机身凹槽位置。 3. 如图所示, 将飞机通电, 切换到手动模式, 保证舵机为回中状态,调节夹头长度将副 翼舵面对齐。 4. 将支撑杆安装至机体的位置。 5. 将支撑杆安装至主翼的位置。...
- Page 17 前轮安装 1. 如图所示, 将前轮钢丝卡入槽位。 后轮安装 1. 如图所示, 将后轮钢丝卡入槽位。 机身电池安装 1. 打开飞机底部的电池舱盖,连接电池与 接收机引线,将电池装入机舱并妥善固定, 盖上电池舱盖。 螺旋桨保护器说明 1. 螺旋桨保护器可在飞机遭遇非常规着陆 时自动弹出螺旋桨,有效保护飞机的电子 组件,以防其过载。 如需将螺旋桨装回底 座,将保护器上部对准插入电机轴,听到 “咔嚓” 一声, 即表示安装到位。 注:将螺旋桨对准电机轴, 按入听到 “咔嚓” 一声, 即为安装完成。...
- Page 18 遥控器说明 LED指示灯 飞控拨档 一键特技按键 一键返航激活键 升降舵微调键 ↑↓油门摇杆 升降舵摇杆↑↓ ←→方向舵摇杆 副翼舵摇杆←→ 副翼舵微调键 方向舵微调键 电源开关 一键返航触发键 陀螺仪开关 半自稳模式 半自稳模式 自稳模式 自稳模式 手动模式 手动模式 如图所示:有自稳模式、半自稳平模式和 手动模式可以选择。 接收机和遥控器对频说明 对频是指接收机识别一个特定遥控器GUID (唯一识别码) 的过程。 接收机与遥控器绑定后, 接收机只响应这一遥控器的操作。 对频步骤如下: 1.确定遥控器是关闭状态, 且油门推杆在最低位置。 2.接通飞机电池, 并在5秒内打开遥控器开关。 3.接收机指示灯将闪烁3-8秒, 自动绑定遥控器。 4.接收机指示灯停止闪烁后, 绑定完成。 注意: 1.对频时请保持陀螺仪开关在1档或2档。 2....
- Page 19 一键翻滚飞行说明 只需简单按下遥控器所示开关,初学者也 能轻易做出诸如横滚、翻滚的特技飞行动 作。 一键翻滚飞行 操作步骤如下: 在飞行过程中,开启陀螺仪控制模式 (1 档 或 2 档) ,轻按 “一键翻滚” 按键,此时遥控 器会发出几声 “哔” 响,表示一键翻滚功能 已准备就绪。 此时,只需随意方向拨动副翼 操纵杆,飞机会自动做出一个横滚动作; 只需随意方向拨动升降舵操纵杆,飞机会 自动做出一个翻滚动作。 一键返航说明 一键返航功能会帮助飞机在飞行过程中按照设定的方向自动回飞。 根据以下操作步骤激活此功能: 1.将飞机朝起飞方向放置。 2.不要解锁油门, 按住 “一键返航” 启动键数秒, 直至听到遥控器发出 “哔” 响, 此时方向舵会 摆动一次, 说明一键返航功能已经启动。 注意: 1.飞机每次接入电源, 都需要重新设定该功能。 2.飞行过程中, 在按下一键返航激活键 时,...
- Page 20 飞行前准备 起飞前的检查 每次飞行前须做严格的地面检查, 可有效避免飞行事故的发生。 1. 检查全机螺丝是否安装到位、 舵角摇臂连接可靠。 机翼快拆装置已锁紧。 2. 安装电池。 3. 动力电池、 遥控器发射机电池等已充满电, 处于可靠工作状态。 4.发射机油门杆保持在最低位 (推荐使用带有油门锁定功能的遥控设备) , 打开发射机, 随后 连接动力电池, 待电调初始化完成后检查各个舵面是否回中, 是否动作正确。 5. 轻推油门观察螺旋桨转向是否正确。 所有检查完成后, 方可进行飞行, 初学者首次飞行需要有经验的爱好者协助完成, 避免因操 作不当发生飞行事故。 合适的飞行场地 航模飞行须远离人群、 建筑物、 树木、 高压线及禁飞区的空旷场地 (至少 2-3 个足球场大小) 。 初学者飞行前需要向有经验的爱好者询问相关安全事宜。 关于飞行时间 厂家推荐的飞行时间是使用厂家推荐型号的电池,...
- Page 21 故障检修指导 问题 问题原因 解决方式 油门推杆无响应, ⸺电调未连接电机 ⸺降低油门推杆和油门微调设定 但舵机有响应 ⸺油门通道反向 ⸺反过来重新装油门通道 ⸺桨罩、 桨、 电机、 电机 ⸺更换损坏的配件 架坏了 桨的噪音过大或 ⸺把桨、 桨夹和桨罩的小部件拧紧 ⸺桨或者桨罩的小部 者震动过大 ⸺反过来重新装桨 件松动了 ⸺桨装反了 ⸺电池电量低 飞行时间变短, 飞 ⸺重新给电池充电 ⸺桨装反了 机无力 ⸺依照电池说明书更换新的电池 ⸺电池坏了 ⸺舵面、 舵角、 连接杆、 ⸺更换或者维修坏了的配件 飞舵面不动, 或者 舵机坏了 ⸺检查所有连接线, 确保所有接头无 动作响应较慢...
- Page 22 EPAA110 平尾 桨 EPAA103 EPPROP010 电池舱盖 直径10x20mm空心杯 EPAA104 EPMotor01 主翼撑杆 接收机 ( 四合一集成) EPAA105 EPRX01 发射器 (专用) 钢丝组 EPAA106 EPTX01 桨罩 3.7V 380mAh 电池 (JST 插头) EPAA107 EPBAT01 主起落架组 USB充电器 EPAA108 EPCHR01 如需查找产品图片, 请登录FMS官方淘宝店https://fmsmodel.taobao.com。 如需查找电 调说明书, 则在以上网址搜索栏中搜索关键词 “电调” , 即可在任何一款电调产品页面查看。...
Need help?
Do you have a question about the Eazy RC 540mm PA-18 Super Cub and is the answer not in the manual?
Questions and answers