GREAT PLAINS BD7600 Original Instructions Manual
Min-till drill
Hide thumbs
Also See for BD7600:
- Operator's manual (96 pages) ,
- Manual (43 pages) ,
- Original instructions manual (32 pages)
Table of Contents
Advertisement
Quick Links
Great Plains
Min-Till Drill
PRE-DELIVERY MANUAL
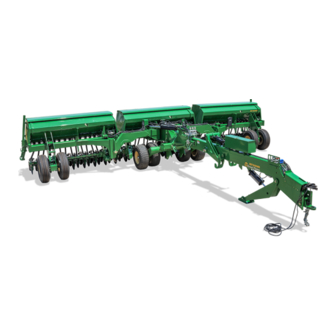
MODELS BD7600 50 Foot 3-Section Drill
Table of Contents
Original Instructions
!
Read the operator manual entirely. When you see
this symbol, the subsequent instructions and
warnings are serious - follow without exception.
Your life and the lives of others depend on it!
Illustrations may show optional equipment not
supplied with standard unit.
195-615Q
Advertisement
Table of Contents

Related Manuals for GREAT PLAINS BD7600


Summary of Contents for GREAT PLAINS BD7600
- Page 1 Table of Contents Great Plains Min-Till Drill PRE-DELIVERY MANUAL MODELS BD7600 50 Foot 3-Section Drill 195-615Q Original Instructions Read the operator manual entirely. When you see this symbol, the subsequent instructions and warnings are serious - follow without exception. Your life and the lives of others depend on it! Illustrations may show optional equipment not supplied with standard unit.
- Page 2 Trademarks of Great Plains Manufacturing, Inc. include: AccuShot, DrillCommand, Max-Chisel, Row-Pro, Singulator Plus, Short Disk, Swath Command, Terra-Tine, Ultra-Chisel, and X-Press. Registered trademarks of Great Plains Manufacturing, Inc. include: Air-Pro, Clear-Shot, Discovator, Great Plains, Land Pride, MeterCone, Nutri-Pro, Seed-Lok, Solid Stand, Terra-Guard, Turbo-Chisel, Turbo-Chopper, Turbo-Max, Turbo- Trill, Ultra-Till, Whirlfilter, and Yield-Pro.
- Page 3 Fold ....... 12 Lift, Hook, and Hydraulic Jack ... 13 Great Plains | 195-615Q | 12/02/2021...
- Page 4 Cover...
-
Page 5: Description Of Unit
Table of Contents Introduction Introduction Models Covered Great Plains wants you to be satisfied with any new machine delivered. To ease assembly and produce a BD7600-50 models with 100 rows on 6-inch row properly working machine, read this entire manual spacing, 80 rows on 7 .5-inch row spacing, and 60... -
Page 6: Safety Information
Non-Great Plains components on this machine may contain additional safety information not The notice symbol indicates a potential for found in this manual. -
Page 7: Machine Use
Avoid contacting overhead obstructions such as low bridges, overpasses, and power lines. Do not operate near ditches, holes, steep slopes, embankments, or other surfaces which may collapse under the machine’s weight or tip the machine over. Great Plains | 195-615Q | 12/02/2021... -
Page 8: Machine Maintenance
Detach the tractor. Secure the implement using Stay clear of and never step over any rotating blocks. parts. Great Plains | 195-615Q | 12/02/2021... -
Page 9: Before Starting
Hoist straps with proper load rating. transport position before unloading the drill. 4. Unload the mainframe/wing assembly from the truck. Place onto level ground with enough clearance to unfold the drill. Great Plains | 195-615Q | 12/02/2021... - Page 10 3. Repeat with the other shipping bracket. 71804 4. While the rockshaft is jacked up, install the two end rockshaft tires (4). Torque the wheel bolts to 170 lb-ft. 5. Carefully lower the jack and remove. 71805 Great Plains | 195-615Q | 12/02/2021...
- Page 11 7 . Take slack out of the truss tubes by adjusting the positioned behind the box lid (1). turnbuckles (6). Do not over-tighten. position chain or strap here position chain or strap here 71806 71807 Great Plains | 195-615Q | 12/02/2021...
- Page 12 For the wing walkboards, use the two with lights. The illustration below shows the cover for the right wing walkboard. Make sure to get the correct cover on the walkboard end. Great Plains | 195-615Q | 12/02/2021...
-
Page 13: Install Ladder
4. Connect the gas spring to the ladder mount and secure with a flange lock nut (11). 71811A 71811 5. Check that the walkboard folds freely up and down, and the spring-loaded pins lock (12) on both ends of the walkboard. 71812 Great Plains | 195-615Q | 12/02/2021... -
Page 14: Install Press Wheels
1. Check that there is enough clearance to unfold the drill. 2. Verify that the opener frames are raised and locked up (handles in ROAD position). 3. Slowly unfold the wing frames by completely 71809 extending the fold cylinders. Great Plains | 195-615Q | 12/02/2021... - Page 15 (page 27). long bolts (6), flat washers (7), lock washers (8), 1. Fit the transfer drive breakaway clutch to the and nuts (9). center drive breakaway clutch (1). 71813 Great Plains | 195-615Q | 12/02/2021...
- Page 16 50 Foot 3-Section Drill Table of Contents Assembly Electrical Harness Schematics Lighting Harness TP-75494b Hydraulic Diagrams Fold TP-75594b Great Plains | 195-615Q | 12/02/2021...
- Page 17 50 Foot 3-Section Drill Table of Contents Assembly Lift, Hook, and Hydraulic Jack TP-75598b Great Plains | 195-615Q | 12/02/2021...
- Page 18 50 Foot 3-Section Drill Table of Contents Assembly Split Box Center Section TP-75643b Great Plains | 195-615Q | 12/02/2021...
- Page 19 50 Foot 3-Section Drill Table of Contents Assembly Right Section TP-75642b Great Plains | 195-615Q | 12/02/2021...
- Page 20 50 Foot 3-Section Drill Table of Contents Assembly Left Section TP-75641b Great Plains | 195-615Q | 12/02/2021...
- Page 21 50 Foot 3-Section Drill Table of Contents Assembly Section Control with Closed Center Center Section D1 D1 D2 D2 Opener Opener Opener Opener TP-75607b Great Plains | 195-615Q | 12/02/2021...
- Page 22 50 Foot 3-Section Drill Table of Contents Assembly Right Section R1 R1 R2 R2 Opener Opener Opener Opener TP-75608b Great Plains | 195-615Q | 12/02/2021...
- Page 23 50 Foot 3-Section Drill Table of Contents Assembly Left Section L1 L1 L2 L2 TP-75609b Great Plains | 195-615Q | 12/02/2021...
- Page 24 50 Foot 3-Section Drill Table of Contents Assembly Non-Section Control with Closed Center Center Section P3 P3 P1 P1 Opener Opener P2 P2 Opener Opener TP-75630b Great Plains | 195-615Q | 12/02/2021...
- Page 25 50 Foot 3-Section Drill Table of Contents Assembly Right Section RL RL P3 P3 Opener Opener P1 P1 P2 P2 Opener Opener TP-75629b Great Plains | 195-615Q | 12/02/2021...
- Page 26 50 Foot 3-Section Drill Table of Contents Assembly Left Section RL RL P3 P3 Opener Opener P1 P1 P2 P2 Opener Opener TP-75628b Great Plains | 195-615Q | 12/02/2021...
- Page 27 50 Foot 3-Section Drill Table of Contents Assembly Hydraulic Drive Configuration TP75639a Great Plains | 195-615Q | 12/02/2021...
-
Page 28: Hydraulic Hose Connections
Do not stand or place any body part between drill and moving tractor when hitching drill. Keep others away. Stop tractor engine and set parking brake before installing hitch pins, attaching harnesses and hoses. TP-71826 Great Plains | 195-615Q | 12/02/2021... - Page 29 Install the hitch (1) onto the tongue and secure with the bolt (2), lock washer, and nut. Assemble the safety chain (3) and washer (4), and secure with the longer bolt (5), lock washer, and nut. 71337 Great Plains | 195-615Q | 12/02/2021...
- Page 30 Loosen the jam nut and adjust the stop bolts in or out until the outside ends of the boxes are 1 to 1-1/4 inch (2.5 cm to 3.2 cm) ahead of the inside ends. 71439 Great Plains | 195-615Q | 12/02/2021...
- Page 31 (4) until the jaws (5) make full contact bars. without compressing the clutch spring (6). If adjustment is necessary, adjust the truss length at the front of the clevis end (2). 71341 71343 Great Plains | 195-615Q | 12/02/2021...
- Page 32 1. Park the drill on a clean, level surface. 2. Adjust the nut (1) threaded on the adjustment bolt as necessary to level the walkboard. 71828 Great Plains | 195-615Q | 12/02/2021...
-
Page 33: Torque Chart
For assistance or Transport 380/55R16.5 73 psi 170 lb ft information, contact your nearest authorized farm tire Gauge Wheel 340/6R16.5 73 psi 76 lb ft retailer. Manufacturer Website Firestone www.firestoneag.com www.bkt-tires.com/en Goodyear www.titan-intl.com Great Plains | 195-615Q | 12/02/2021... - Page 34 50 Foot 3-Section Drill Table of Contents Setup Great Plains | 195-615Q | 12/02/2021...
- Page 35 Table of Contents...
- Page 36 Great Plains, Mfg. 1525 E. North St. P.O. Box 5060 Salina, KS 67402...
Need help?
Do you have a question about the BD7600 and is the answer not in the manual?
Questions and answers