Table of Contents
Advertisement
Available languages
Available languages
Quick Links
Advertisement
Table of Contents

Related Manuals for GYS GYSPRESS 10T


Summary of Contents for GYS GYSPRESS 10T
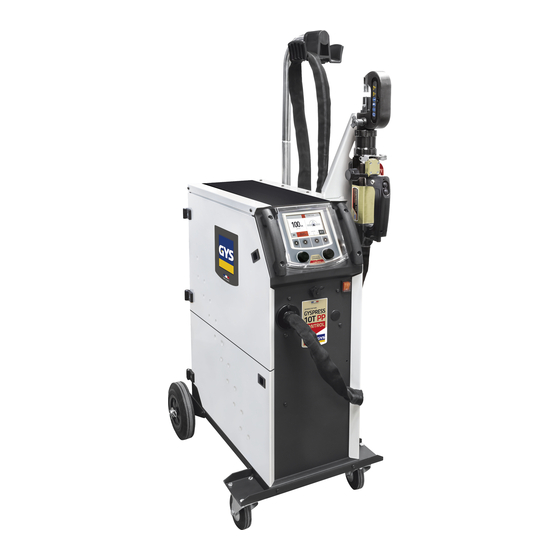
- Page 1 WORKSTATION GYSPRESS 10T PUSH-PULL CONTROL 2-9 / 10-24 / 112-116 2-9 / 68-82 / 112-116 2-9 / 25-39 / 112-116 2-9 / 83-97 / 112-116 2-9 / 40-53 / 112-116 2-9 / 98-111 / 112-116 2-9 / 54-67 / 112-116 www.gys.fr...
- Page 2 WORKSTATION GYSPRESS 10T PP CONTROL DESCRIPTION RIVETEUSE / RIVETING MACHINE DESCRIPTION / FLUSSBESCHREIBUNG / DESCRIP- CIÓN REMACHADORA / BESCHRIJVING VAN DE PONSNAGELTANG / ОПИСАНИЕ ЗАКЛЕПОЧНИК / DESCRIZIONE RIVETTATRICE FIG 1.
- Page 3 WORKSTATION GYSPRESS 10T PP CONTROL DESCRIPTIF WORKSTATION / WORKSTATION DESCRIPTION / ARBEITSPLATZBESCHREIBUNG / DESCRIPCIÓN DEL WORKSTATION / BESCHRIJVING WORKSTATION / ОПИСАНИЕ WORKSTATION / DESCRIZIONE WORKSTATION FIG 2. not included not included...
- Page 4 WORKSTATION GYSPRESS 10T PP CONTROL DÉBALLAGE / UNPACKING / AUSPACKEN / DESEMBALAJE / УПАКОВКА / UITPAKKEN / DISIMBAL- LAGGIO...
- Page 5 WORKSTATION GYSPRESS 10T PP CONTROL MONTAGE ROUES / MOUNTING THE WHEELS / RADMONTAGE / MONTAJE DE LAS RUEDAS / MONTAGE WIELTJES / УСТАНОВКА КОЛЕС / MONTAGGIO RUOTE M8x16 M8x16 M5x10 M8x16 M5x10 M5x10 M5x10 FR - À monter soi-même. EN - To assemble yourself...
- Page 6 WORKSTATION GYSPRESS 10T PP CONTROL MONTAGE POTENCE / ARM ASSEMBLY / VORBAUMONTAGE / MONTAJE DEL SOPORTE / MONTAGE STEUNARM / СБОРКА КРОНШТЕЙНА / MONTAGGIO DEL BRACCIO M6x20 M6x20 M5x10...
- Page 7 WORKSTATION GYSPRESS 10T PP CONTROL VUES GÉNÉRALES ASSEMBLÉES / THE MACHINE’S ASSEMBLY OVERVIEW / ALLGEMEINE MONTAGEAN- SICHTEN / OPINIONES GENERALES REUNIDAS / OVERZICHT GEASSEMBLEERDE APPARAAT / ОБЩИЙ ВИД ПОСЛЕ СБОРКИ / VISTE GENERALI ASSEMBLATE not included not included PORT USB / USB PORT / USB-ANSCHLUSS / PUERTO USB / USB POORT / РАЗЪЕМ USB / PORTA USB...
- Page 8 WORKSTATION GYSPRESS 10T PP CONTROL COMPOSITION DU KIT D’EMBOUTS / CONNECTOR KIT CONTENTS / ZUSAMMENSTELLUNG DES MATRIZEN-KITS / COMPOSICIÓN DEL KIT DE BOQUILLAS / СОСТАВ НАБОРА НАСАДОК / INHOUD MATRIJZEN KIT / COMPOSIZIONE DEL KIT DI TERMINALI - Matrices pour rivet auto-perçants (RAP) Ø 3,3 mm - Matrix for self-piercing rivets (RAP) Ø...
- Page 9 WORKSTATION GYSPRESS 10T PP CONTROL ACCESSOIRES ET OPTIONS / ACCESSORIES & OPTIONAL EXTRAS / ACCESORIOS Y OPCIONES / ACCESSOIRES EN OPTIES / АКСЕССУАРЫ И ОПЦИИ / ACCESSORI E OPZIONI INCLUS XT11.21 6 x 50 rivets RAP - Nieten SPR Extension for HR110 & HR210...
- Page 10 MANIPULATION Toutes les manipulations nécessaires à une utilisation correcte sont décrites dans cette notice. Il n’est pas permis d’avoir recours à des méthodes de travail qui ne sont pas explicitement autorisées par le fabricant GYS. MANIPULATION ÈRE Avant la première utilisation de votre appareil, merci de vérifier la présence de nouvelles mises à...
-
Page 11: Équipement De Protection Individuelle
WORKSTATION GYSPRESS 10T PP CONTROL ÉQUIPEMENT DE PROTECTION INDIVIDUELLE Pour bien se protéger et protéger les autres, respecter les instructions de sécurité suivantes : Porter constamment un équipement de protection oculaire résistant aux impacts lors de l’utilisation de l’appareil. Porter un casque de sécurité en cas de travaux en hauteur. -
Page 12: Commande De La Machine
WORKSTATION GYSPRESS 10T PP CONTROL REMPLACEMENT DES BRAS ET ACCESSOIRES Utiliser uniquement les bras et accessoires recommandés par GYS. BRUIT Niveau de puissance acoustique pondéré : L = 78dB DESCRIPTION RIVETEUSE (FIG.1) 1- Bras en acier Bouton de contrôle vérin 2- Axe vérin... - Page 13 / Rivet sélectionné Effort inatteignable La GYSPRESS 10T PP CONTROL en permanence si la pression du réseau d’air comprimé est suffisante pour atteindre l’effort de consigne affiché. Un message s’affiche à l’écran dès lors que la pression est insuffisante. Compte rendu d’opération Un compte rendu d’opération est affiché...
- Page 14 WORKSTATION GYSPRESS 10T PP CONTROL Sélection du mode de fonctionnement ou référence de rivet • À gauche sont affichées : - le mode de fonctionnement de la machine ou le fournisseur de rivet - le type d’opération que va effectuer la machine (rivetage, perçage, extraction de rivet) -le type de rivet sélectionné...
- Page 15 Ce logiciel a pour objectif d’éditer et de sauvegarder des rapports de chantier réalisés à l’aide d’une pointeuse GYSPOT ou d’une riveteuse GYSPRESS 10T PP CONTROL. Le logiciel GYSPOT peut être installé à partir de fichiers présents sur la clé USB fournie avec le produit. Dans le répertoire \GYSPOT V X.XX , double cliquer sur le fichier INSTALL.EXE, et suivre les instructions pour installer le logiciel sur votre...
- Page 16 WORKSTATION GYSPRESS 10T PP CONTROL Pour sélectionner la GYSPRESS, dans le menu, cliquez sur Modes puis GYSPRESS puis Traçabilité. Lors du prochain démarrage de GYSPOT, il sera automatiquement en mode GYSPRESS. Identité de l’utilisateur : Afin de personnaliser les éditions avec vos informations personnelles, certaines informations sont requises. Pour les renseigner, dans le menu, cliquer sur Options puis sur Identité.
- Page 17 Statut: Etabli par: Arnaud FRISON Date: 22/10/2021 montage bras Indice: Feuille: Produit: Assemblage Nom du fichier CAO: 21_01466 Ce document est la propriété de la société GYS et ne peut en aucun cas être transmis à quiconque sans son accord.
- Page 18 (voir page 8) et serrer. Produit: Assemblage Nom du fichier CAO: 21_01466 Ce document est la propriété de la société GYS et ne peut en aucun cas être transmis à quiconque sans son accord. Matrice rivet Matrice / support rivet Désignation: Désignation:...
- Page 19 WORKSTATION GYSPRESS 10T PP CONTROL Une fois la matrice et le support poinçon mis en place, finir le serrage avec la clé spéciale fournie. Vérifier que les embouts tiennent bien en place après chaque procédure de rivetage. Un desserrage est dangereux et peut provoquer une détérioration de la riveteuse.
- Page 20 WORKSTATION GYSPRESS 10T PP CONTROL 90° RÉSULTAT DE POSE D’UN RIVET AUTO-PERÇANT POINÇONNER ET CALIBRER DES TROUS POUR RIVETS FLOW-FORM Pour poinçonner la tôle et calibrer des trous, il est nécessaire d’utiliser une matrice spécifique appelée dévêtisseur. Cette matrice permet de retenir la tôle lors de l’extraction du poinçon.
- Page 21 WORKSTATION GYSPRESS 10T PP CONTROL En cas d’utilisation de rivets Flow-Form, il est nécessaire de percer les tôles au préalable pour permettre la mise en place du rivet. Le poinçon et la matrice ci-dessus permettent un perçage précis ainsi que le calibrage des trous de rivet Flow-Form.
- Page 22 WORKSTATION GYSPRESS 10T PP CONTROL La matrice F2 est munie d’un orifice d’évacuation pour les résidus de colle. Après chaque procédure de rivetage, retirer les résidus de colle sur tous les outils contaminés. RÉSULTAT DE POSE D’UN RIVET FLOW-FORM EXTRACTION DE RIVETS Dans le cas de réparations de tôles de carrosserie, des rivets anciens ou défectueux doivent...
- Page 23 éventuelle en cours d’utilisation. Nettoyer la riveteuse GYSPRESS 10T PP CONTROL au moins une fois par semaine afin d’éliminer toute poussière et les salissures qui pourraient dégrader le bon fonctionnement du produit sur le long terme. Utiliser des chiffons autonet- toyants ne pas utiliser d’eau ni de liquides inflammables ou corrosifs.
-
Page 24: Conditions De Garantie
La garantie exclut les incidents dus à un mauvais usage, chute, démontage ou toute autre avarie due au transport. La garantie ne couvre pas l’usure normale des pièces. Seules les pièces de rechange provenant de chez GYS doivent être utilisées pour effectuer une réparation sur la riveteuse GYSPRESS. - Page 25 OPERATING THE MACHINE All the instructions needed for correct use are stated in this user manual. Working methods that are not explicitly autho- rised by the manufacturer, GYS, are prohibited. FIRST-TIME USE Before using your device for the first time, please check for new updates.
- Page 26 Pressure settings: Once the machine has started, adjust the air pressure until a pressure of 7 bars is dis- played on the screen. REPLACING ARMS AND ACCESSORIES Use only arms and accessories that are recommended by GYS.
-
Page 27: Machine Control
WORKSTATION GYSPRESS 10T PP CONTROL NOISE The instructions must include a declaration of noise emissions in accordance with ISO 15744. Weighted sound pressure level: LWA = 78 dB RIVETING MACHINE DESCRIPTION (FIG.1) 1 - Steel Arm Cylinder-control dial Cylinder shaft... - Page 28 Operating mode / Rivet selected UNATTAINABLE EFFORT The GYSPRESS 10T PP continuously checks whether the compressed-air network’s pressure is sufficient to reach the set-point pressure displayed. A message is displayed on the screen when the pressure becomes insufficient. Operation report An operation report is displayed at the end of each riveting operation (set-point pressure, measured force, date, time, operating mode or manufacturer and rivet size).
-
Page 29: Product Settings
WORKSTATION GYSPRESS 10T PP CONTROL Choosing the correct operating mode and rivet • Displayed on the LEFT are: - the machine’s operating mode or the rivet supplier - the type of operations the machine can perform (riveting, drilling or rivet removal, etc.) -the type of rivet being used (self-piercing or Flow-Form, etc.) -
Page 30: Gyspot Software
The purpose of this software is to edit and save worksite reports produced using a GYSPOT spot-welding machine or a GYSPRESS 10T PP CONTROL RIVETING MACHINE. The GYSPOT software can be installed from files on the USB stick that comes supplied with the appliance. In the \ GYSPOT V X.XX directory, double click on the INSTALL.EXE file and follow the instructions to install the software on your... - Page 31 Importing spot-welding reports from a USB stick: To import the worksite reports made with a GYSPRESS 10T PUSH-PULL CONTROL into your PC, previously saved in your USB stick directly from the machine (read the ‘Traceability’ section), insert the USB stick into your PC’s USB port.
- Page 32 Etabli par: Arnaud FRISON Statut: Date: 22/10/2021 montage bras Indice: Feuille: Produit: Assemblage Nom du fichier CAO: 21_01466 Ce document est la propriété de la société GYS et ne peut en aucun cas être transmis à quiconque sans son accord.
- Page 33 (see page 8) and tighten. Produit: Assemblage Nom du fichier CAO: 21_01466 Ce document est la propriété de la société GYS et ne peut en aucun cas être transmis à quiconque sans son accord. Rivet die Die/rivet support Désignation: Désignation:...
- Page 34 WORKSTATION GYSPRESS 10T PP CONTROL Once the die and the header die support are in place, finish tightening with the special key supplied. Check that the tips are securely in place after each riveting procedure. Loosening is dangerous and can damage the riveter.
- Page 35 WORKSTATION GYSPRESS 10T PP CONTROL 90° THE OUTCOME OF INSTALLING SELF-PIERCING RIVETS PUNCHING AND CALIBRATING HOLES FOR FLOW-FORM RIVETS To punch the sheet and calibrate holes, a specific die called a stripper is needed. This die makes it possible to retain the...
- Page 36 WORKSTATION GYSPRESS 10T PP CONTROL If Flow-Form rivets are used, the metal sheets must be drilled beforehand to allow the rivet to be fitted. The aforemen- tioned header die and die allow precise drilling as well as the calibration of Flow-Form rivet holes.
- Page 37 WORKSTATION GYSPRESS 10T PP CONTROL The F2 die is provided with an evacuation orifice for adhesive residues. After each riveting procedure, remove any glue residue from all tools. THE OUTCOME OF USING FLOW-FORM RIVETS RIVET EXTRACTION When making repairs to body panels, old or defective rivets must be removed from the joined panels.
-
Page 38: Checks And Maintenance
Clean the GYSPRESS 10T PP CONTROL riveter at least once a week to remove any dust and dirt that may affect the long-term performance of the product. Use self-cleaning cloths. Do not use water, flammable or corrosive liquids. -
Page 39: Technical Specifications
WORKSTATION GYSPRESS 10T PP CONTROL In the event of a fault, return the device to your distributor enclosing: - dated proof of purchase (receipt or invoice, etc.) - a note explaining the breakdown TECHNICAL SPECIFICATIONS The air network’s max. pressure... - Page 40 HANDHABUNG In dieser Packungsbeilage sind alle für den korrekten Gebrauch notwendigen Vorgänge beschrieben. Es darf nicht auf Arbeitsmethoden zurückgegriffen werden, die nicht ausdrücklich vom Hersteller GYS freigegeben sind. HANDHABUNG Bevor Sie Ihr Gerät zum ersten Mal verwenden, prüfen Sie bitte, ob neue Updates verfügbar sind.
- Page 41 Druckeinstellung: Stellen Sie nach dem Start der Maschine den Luftdruck so ein, dass ein Druck von 7 bar auf dem Bildschirm angezeigt wird. AUSTAUSCH VON WAFFEN UND ZUBEHÖR Verwenden Sie nur von GYS empfohlene Arme und Zubehör.
- Page 42 WORKSTATION GYSPRESS 10T PP CONTROL LÄRM Die Anleitung muss eine Deklaration der Geräuschemissionen nach ISO 15744 enthalten. Bewerteter Schallleistungspegel: L = 78dB FLUSSBESCHREIBUNG (ABB. 1) 1- Stahlarm Zylindersteuerungstaste 2- Zylinderachse Entladungstrigger 3- Sicherungsstift Luftaustritt 4- Steueranschluss für 50kN-Adapter Öleinfüllverschluss 5- Zylindersteuerungstaste 10- Statusanzeige des Nietgeräts...
- Page 43 Betriebsart / Niet aus- gewählt EFfort unerreichbar Der GYSPRESS 10T PP KONTROLLIERT kontinuierlich, ob der Druck des Druckluftsystems ausreicht, um den gewün- schten Anzeigeaufwand zu erreichen. Wenn der Druck nicht ausreicht, wird eine Meldung auf dem Bildschirm an- gezeigt. Betriebsbericht Am Ende jedes Arbeitsgangs wird ein Arbeitsprotokoll angezeigt (Sollkraft, gemessene Kraft, Datum, Uhrzeit, Betrieb- sart bzw.
-
Page 44: Allgemeines Menü
WORKSTATION GYSPRESS 10T PP CONTROL ALLGEMEINES MENÜ Um von der allgemeinen Anzeige auf das allgemeine Menü zuzugreifen, drücken Sie die Taste 1 Die Navigation zwischen den verschiedenen Blöcken erfolgt über Drehknöpfe und Drucktasten. 1: Rückkehr 2: Validierung Einstellun- System Rückver-... -
Page 45: Gyspot-Software
Die Funktionen von GYSPOT sind abhängig vom verwendeten Maschinentyp (Spitzmaschine oder angeschlossene Niet- maschine). Um die GYS-PRESSEauszuwählen, klicken Sie im Menü auf Modi, dann auf GYSPRESS und dann auf Rückverfolg- barkeit. Beim nächsten Start von GYSPOT befindet es sich automatisch im GYSPRESS-Modus. - Page 46 WORKSTATION GYSPRESS 10T PP CONTROL Rückverfolgbarkeit : Standardmäßig öffnet sich die GYSPOT-Software im «Traceability»-Modus. Importieren Sie die von einem USB-Stick erstellten Punktberichte : Um die mit einer GYSPRESS CONTROL erstellten Standortberichte in Ihren PC zu importieren (zuvor auf Ihrem USB-Stick vom Gerät gespeichert, siehe Abschnitt „Rückverfolgbarkeit“, stecken Sie den USB-Stick in den USB-Anschluss Ihres PCs.
- Page 47 Indice: Feuille: Produit: Nom du fichier CAO: Assemblage 21_01466 Ce document est la propriété de la société GYS et ne peut en aucun cas être transmis à quiconque sans son accord. Etabli par: Arnaud FRISON Statut: Date: 22/10/2021 24 kN...
- Page 48 WORKSTATION GYSPRESS 10T PP CONTROL Die Nietmaschine ist jetzt betriebsbereit. Schrauben Sie die mit dem Arm gelieferte Verlängerung fest. MONTAGE DER BITS Schrauben Sie das für den Nietvorgang benötigte Bit-Kit in den Armhalter ein. Prüfen Sie vor jeder Montage, ob Matrize und Nietträger richtig verbunden sind (siehe Seite 8) und festziehen.
- Page 49 WORKSTATION GYSPRESS 10T PP CONTROL NIETBOX MITGELIEFERT Die Nietmaschine wird mit einer Schachtel mit 300 selbststanzendenStahl- nieten (RAP) geliefert. Diese Prüfnieten dienen zum Testen der Nietmaschine und sollten auf keinen Fall für die Autoreparatur verwendet werden. VERLEGEN VON SELBSTBOHRENNIETEN Ø 3,3 mm Ø...
- Page 50 WORKSTATION GYSPRESS 10T PP CONTROL ERGEBNISSE SELBSTBOHRENDE NIETVERLEGUNG STANZEN UND KALIBRIEREN VON LÖCHERN FÜR FLOW-FORM NIETE Um das Blech zu stanzen und die Löcher zu kalibrieren, ist es notwendig, eine spezielle Matrize zu verwenden, die als Abstreifer bezeichnet wird. Diese Matrize ermöglicht es, das Blech beim Herausziehen des Stempels festzuhalten.
- Page 51 WORKSTATION GYSPRESS 10T PP CONTROL Nach dem Stanzen wird die Stanze in die zu montierenden Bleche eingetrieben. Das Blech wird vom Stempel gelöst und zum Vernieten vorbereitet. Wenn der Stempel nicht aus dem Blech kommt, verwenden Sie die PULL-Funktion der Nietmaschine.
-
Page 52: Kontrollen Und Wartung
Störungen oder mögliche Ausfälle während des Gebrauchs zu vermeiden. Reinigen Sie die Nietmaschine GYSPRESS 10T PP CONTROL mindestens einmal pro Woche, um Staub und Schmutz zu entfernen, die die einwandfreie Funktion des Produkts auf Dauer beeinträchtigen könnten. Verwenden Sie selbstrei-... -
Page 53: Technische Eigenschaften
Die Garantie deckt alle Herstellungsfehler oder Mängel für 2 Jahre ab Kaufdatum (Teile und Arbeit). Von der Garantie ausgeschlossen sind Vorfälle durch Missbrauch, Fallenlassen, Zerlegen oder sonstige Transportschäden. Die Garantie erstreckt sich nicht auf den normalen Verschleiß der Teile. Zur Reparatur der Nietmaschine GYSPRESS 10T PUSH PULL dürfen nur Ersatzteile von GYS verwendet werden. -
Page 54: Seguridad Eléctrica
En este manual se describen todas las operaciones necesarias para su correcta utilización. No está permitido utilizar métodos de trabajo que no estén explícitamente autorizados por el fabricante GYS. 1ª MANIPULACIÓN Antes de utilizar su dispositivo por primera vez, compruebe si hay nuevas actualizaciones. - Page 55 7 bares en la pantalla. SUSTITUCIÓN DE BRAZOS Y ACCESORIOS Utilice únicamente los brazos y accesorios recomendados por GYS. RUIDO El manual debe incluir una declaración de emisión de ruido según la norma ISO 15744.
- Page 56 WORKSTATION GYSPRESS 10T PP CONTROL DESCRIPCIÓN REMACHADORA (FIG.1) 1- Brazo de acero Pomo de control del cilindro 2- Eje del cilindro Disparo de la descarga 3- Pasador de bloqueo Escape de aire 4- Conector de control para adaptador de 50kN Tapón de llenado de aceite...
- Page 57 / Remache seleccionado FUERZA INALCANZABLE El GYSPRESS 10T PP supervisa continuamente si la presión en el sistema de aire comprimido es suficiente para alcan- zar la fuerza ajustada indicada. Si la presión es insuficiente, aparece un mensaje en la pantalla.
- Page 58 WORKSTATION GYSPRESS 10T PP CONTROL MENÚ GENERAL Para acceder al menú general desde la pantalla general, pulse el botón nº 1. La navegación entre los distintos bloques se realiza mediante las ruedas y los botones. 1 : Volver 2 : Calibrado Parámetros...
- Page 59 WORKSTATION GYSPRESS 10T PP CONTROL VISUALIZACIÓN DE LA TRAZABILIDAD Cuando se está grabando un trabajo, aparece el símbolo en la parte superior izquierda de la pantalla, seguido del nombre del trabajo y el número de operación. El número de operación se incrementa automáticamente y no se puede cambiar).
- Page 60 WORKSTATION GYSPRESS 10T PP CONTROL Trazabilidad Por defecto, el programa GYSPOT se abre en modo «Trazabilidad». Importación de informes de puntos desde una memoria USB: Para importar a su PC los informes de trabajo realizados con un GYSPRESS CONTROL (previamente guardados en su llave USB desde la máquina, véase el párrafo «Trazabilidad», inserte la llave USB en el puerto USB de su PC.
- Page 61 Indice: Feuille: Produit: Nom du fichier CAO: Assemblage 21_01466 Ce document est la propriété de la société GYS et ne peut en aucun cas être transmis à quiconque sans son accord. Etabli par: Arnaud FRISON Statut: Date: 22/10/2021 24 kN...
- Page 62 WORKSTATION GYSPRESS 10T PP CONTROL La remachadora ya está operativa. Atornille la extensión suministrada con el brazo. MONTAJE DE ACCESORIOS FINALES Atornille el kit de boquillas necesario para el procedimiento de remachado en el soporte de brazo. Antes de cada mon- taje, compruebe que el troquel y el soporte del remache coinciden correctamente (véase la página 8) y apriételos.
- Page 63 WORKSTATION GYSPRESS 10T PP CONTROL CAJA DE REMACHES SUMINISTRADA La remachadora se suministra con una caja de 300 remaches autoperforantes de acero (RAP). Estos remaches de prueba se suministran para poder probar la remachadora y no deben utilizarse en ningún caso para la reparación de automóviles.
- Page 64 WORKSTATION GYSPRESS 10T PP CONTROL RESULTADO DE LA COLOCACIÓN DE UN REMACHE AUTOPERFORANTE PERFORACIÓN Y CALIBRACIÓN DE LOS AGUJEROS PARA LOS REMACHES EN FORMA DE FLUJO Para perforar la chapa y calibrar los orificios, se debe utilizar una matriz específica llamada expulsor. Esta matriz permite retener la chapa cuando se extrae el perforador.
- Page 65 WORKSTATION GYSPRESS 10T PP CONTROL Tras la perforación, el punzón se hunde en la chapa que se va a ensamblar. La chapa se libera del punzón y se prepara para el remachado. Si el punzón no sale de la chapa, utilice la función PULL de la remachadora.
- Page 66 Limpie la remachadora GYSPRESS 10T PP CONTROL al menos una vez a la semana para eliminar el polvo y la sucie- dad que puedan afectar al rendimiento del producto a largo plazo. Utilice paños autolimpiables. No utilice agua ni...
-
Page 67: Condiciones De Garantía
La garantía no cubre incidentes debidos al mal uso, caída, desmontado o toda avería debida al transporte. La garantía no cubre el desgaste normal de las piezas. Para la reparación de la remachadora GYSPRESS 10T PUSH PULL sólo deben utilizarse piezas de recambio GYS. -
Page 68: Algemene Instructies
BEDIENING Alle handelingen die nodig zijn voor een correct gebruik van dit apparaat staan beschreven in deze handleiding. Het is verboden om werkmethodes uit te voeren die niet expliciet door de fabrikant GYS zijn toegestaan. 1E BEDIENING Voordat u het apparaat voor de eerste keer gebruikt, moet u controleren of er nieuwe updates bestaan. - Page 69 WORKSTATION GYSPRESS 10T PP CONTROL UITRUSTING PERSOONLIJKE BESCHERMING Bescherm uzelf en bescherm anderen, respecteer de volgende veiligheidsinstructies : Draag voortdurend een oogbescherming die bestand is tegen wegspattende onderdeeltjes tijdens het gebruik van dit apparaat. Draag een veiligheidshelm wanneer u op hoogte werkt.
- Page 70 WORKSTATION GYSPRESS 10T PP CONTROL VERVANGEN VAN DE ARMEN EN ACCESSOIRES Gebruik alleen de door GYS aanbevolen armen en accessoires. GELUID Conform de norm ISO 15744 moet de handleiding een verklaring bevatten betreffende de geluidsemissies. Geluidsniveau : L = 78dB BESCHRIJVING VAN DE PONSNAGELTANG (FIG.
- Page 71 Werking / Gekozen rivet ONBEREIKBARE KRACHT De GYSPRESS 10T PP controleert voortdurend of de druk van het persluchtnetwerk voldoende is om de aanbevolen druk te genereren. Wanneer de druk onvoldoende is zal er een melding op het scherm worden getoond.
- Page 72 WORKSTATION GYSPRESS 10T PP CONTROL Keuze van de gebruiksmodule of referentie van de klinknagel • links wordt getoond : - de gebruiksmodule van het apparaat of de leverancier van de rivets - het type werkzaamheden die het apparaat gaat uitvoeren (riveting,...
- Page 73 Met dit software programma kunt u verslagen van gerealiseerde klussen met een GYSPOT puntlas apparaat of een GYSpress 10T PP Control uitgeven en opslaan. Het GYSPOT software programma kan worden geïnstalleerd met behulp van de bestaande files op de USB-stick, die meegeleverd wordt met dit apparaat.
- Page 74 WORKSTATION GYSPRESS 10T PP CONTROL Om een taal te kiezen klikt u in het menu op Opties en vervolgens op Taal. Waarschuwing : wanneer u een taal gekozen heeft, zal GYSPOT automatisch opnieuw opstarten, met de nieuwe door u gekozen taal.
- Page 75 WORKSTATION GYSPRESS 10T PP CONTROL Het wissen van de traceability files die aanwezig zijn op de USB-stick : Het wissen zal alle op de USB-stick geregistreerden verslagen verwijderen. Voor het verwijderen van traceability files moet u de USB stick in de PC inbrengen, en vervolgens in het menu klikken op Opties, vervolgens op GYSPRESS, en vervolgens Wissen traceability USB.
- Page 76 Produit: Assemblage Nom du fichier CAO: 21_01466 Ce document est la propriété de la société GYS et ne peut en aucun cas être transmis à quiconque sans son accord. Matrijs ponsnagels Matrijzen / rivet houder Désignation: Désignation: Etabli par:...
- Page 77 WORKSTATION GYSPRESS 10T PP CONTROL Wanneer de matrijs en de pons-houder correct geplaatst zijn, kunt u het geheel aan- draaien met behulp van de meegeleverde sleutel. Controleer na iedere pons-procedure of de tips nog goed op hun plaats zitten. Het eventueel losraken van de tips is gevaarlijk en kan de ponsna- geltang beschadigen.
- Page 78 WORKSTATION GYSPRESS 10T PP CONTROL 90° RESULTAAT VAN HET AANBRENGEN VAN SELF-PIERCING PONSNAGELS PONSEN EN KALIBREREN VAN GATEN VOOR FLOW-FORM RIVETS Voor het ponsen van plaatwerk en het kalibreren van gaten is een speciale matrijs nodig (genaamd afstrijker). Deze matrijs blokkeert het plaatwerk tijdens het extraheren van de pons.
- Page 79 WORKSTATION GYSPRESS 10T PP CONTROL Wanneer u Flow-Form klinknagels gebruikt is het noodzakelijk om de platen eerst voor te boren, zodat u de rivet kunt plaatsen. Dankzij de pons en de bovengenoemde matrijs kunt u zeer precies boren en zijn de gaten voor de Flow-Form rivets perfect gekalibreerd.
- Page 80 WORKSTATION GYSPRESS 10T PP CONTROL De matrijs F2 is uitgerust met een opening voor het eva- cueren van lijmresten. Na iedere ponsnagel procedure moeten de lijmresten van ieder onderdeel verwijderd worden. RESULTAAT VAN HET AANBRENGEN VAN FLOW- FORM RIVETS VERWIJDEREN VAN RIVETS Bij reparaties van carrosserie-plaatwerk moeten de oude en/of versleten rivets eerst uit het plaatwerk verwijderd worden.
- Page 81 Reinig de GYSPRESS 10T PP CONTROL ten minste één keer per week om alle mogelijke stofdeeltjes en vervuiling te verwijderen. Deze kunnen een efficiënt gebruik van het apparaat op de lange termijn ondermijnen. Gebruik zelfrei- nigende doekjes, gebruik geen water of ontvlambare of bijtende vloeistoffen.
-
Page 82: Technische Eigenschappen
WORKSTATION GYSPRESS 10T PP CONTROL TECHNISCHE EIGENSCHAPPEN Maximale luchtdruk netwerk 10 bars - 145 psi Bereik voedingsspanning 1~ 100-240 Vac 50-60 Hz Voedingsstroom apparaat 1.4A (100 Vac) – 0.57A (240 Vac) Maximale klemkracht 100 kN Gewicht van de ponsnageltang 3.9 kg... -
Page 83: Общие Указания
образом модифицировать данное изделие. ОБРАЩЕНИЕ С ИНСТРУМЕНТОМ Данное руководство описывает, как нужно обращаться с инструментом для правильного использования. Прибегать к методам работы, которые явно не одобрены изготовителем GYS, не дозволено. 1ОЕ ИСПОЛЬЗОВАНИЕ Перед первым использованием вашего аппарата проверьте наличие обновлений. -
Page 84: Средства Индивидуальной Защиты
WORKSTATION GYSPRESS 10T PP CONTROL СРЕДСТВА ИНДИВИДУАЛЬНОЙ ЗАЩИТЫ Что бы правильно защитить себя и окружающих, соблюдайте следующие правила безопасности: При использовании оборудования всегда надевайте прочные средства защиты глаз. Надевайте защитную каску при работе на высоте. Надевайте защитные перчатки, чтобы снизить риск воздействия вибрации и таких опасных... - Page 85 WORKSTATION GYSPRESS 10T PP CONTROL ЗАМЕНА ОРУЖИЯ И ПРИНАДЛЕЖНОСТЕЙ Используйте только плечи и принадлежности, рекомендованные компанией GYS. ШУМ Инструкция должна содержать декларацию о шумовыделении в соответствии с ISO 15744. Уровень звуковой мощности : LWA = 78дБ ОПИСАНИЕ ЗАКЛЕПОЧНИК (РИС.1) 1- Стальные плечи...
- Page 86 Режим работы / Выбор заклепки НЕПОСИЛЬНЫЕ УСИЛИЯ GYSPRESS 10T PP постоянно контролирует, достаточно ли давления в системе сжатого воздуха для достижения заданного отображаемого усилия. Если давление слишком низкое, на дисплее появляется сообщение. Отчет о проведенной операции В конце каждой операции отображается отчет о работе (целевое усилие, измеренное усилие, дата, время, режим...
-
Page 87: Основное Меню
выполнить. Показания давления должны быть сняты по показанию красной стрелки и введены в машину. ОТСЛЕЖИВАЕМОСТЬ Этот интерфейс позволяет регистрировать клепальные операции в виде отчета о работе и экспортировать их на USB-накопитель, чтобы их можно было извлечь и оценить с помощью ПК и программного обеспечения GYS- POT (см. параграф «Программное обеспечение GYSPOT»). - Page 88 ПРОГРАММНОЕ ОБЕСПЕЧЕНИЕ GYSPOT Это программное обеспечение предназначено для редактирования и сохранения отчетов о проделанной работе на пробивной машине GYSPOT или клепальной машине GYSpress 10T PP Control. Программное обеспечение GYSPOT может быть установлено из файлов на USB-накопителе, поставляемом вместе с изделием. В папке \GYSPOT V X.XX дважды кликните на файл INSTALL.EXE и следуйте инструкциям, чтобы...
- Page 89 WORKSTATION GYSPRESS 10T PP CONTROL Выбор оборудования : Функциональность GYSPOT связана с типом используемой машины (точечная сварка или заклепочник) Чтобы выбрать GYSpress, в меню нажмите на Modes, затем GYSPRESS, затем Отслеживаемость. При следующем запуске GYSPOT автоматически перейдет в режим GYSPRESS.
- Page 90 Etabli par: Statut: Arnaud FRISON Date: 22/10/2021 montage bras Indice: Feuille: Produit: Assemblage Nom du fichier CAO: 21_01466 Ce document est la propriété de la société GYS et ne peut en aucun cas être transmis à quiconque sans son accord.
- Page 91 Nom du fichier CAO: 21_01466 сборкой проверьте правильность сопряжения матрицы и держателя заклепок (см. стр. 3) и затяните их. Ce document est la propriété de la société GYS et ne peut en aucun cas être transmis à quiconque sans son accord. Désignation: Désignation:...
- Page 92 WORKSTATION GYSPRESS 10T PP CONTROL После установки матрицы и держателя пуансона затяните их с помощью специального ключа (поставляется в наборе). Убедитесь, что торцевые крышки надежно закреплены после каждой процедуры заклепывания. Ослабление зажима опасно и может привести к повреждению клепального инструмента.
- Page 93 WORKSTATION GYSPRESS 10T PP CONTROL 90° РЕЗУЛЬТАТ УСТАНОВКИ САМОПРОНИКАЮЩЕЙ ЗАКЛЕПКИ ПРОБИВАТЬ И КАЛИБРОВАТЬ ОТВЕРСТИЯ ДЛЯ ЗАКЛЕПОК FLOW-FORM Для перфорации листа и калибровки отверстий необходимо использовать специальный штамп, называемый съёмником. Эта матрица удерживает лист металла во время извлечения пуансона.
- Page 94 WORKSTATION GYSPRESS 10T PP CONTROL При использовании заклепок Flow-Form необходимо предварительно просверлить листы, чтобы обеспечить установку заклепки. Вышеуказанные пуансон и матрица позволяют точно сверлить и определять размеры отверстий под заклепки Flow-Form. После пробивки отверстия пуансон забивается в соединяемые листы металла. Лист металла освобожден от...
- Page 95 WORKSTATION GYSPRESS 10T PP CONTROL Матрица F2 имеет отверстие для вывода остатков клея. После каждой операции клёпки удаляйте остатки клея со всех загрязненных инструментов. РЕЗУЛЬТАТ УСТАНОВКИ ЗАКЛЕПКИ ТЕКУЩЕЙ ФОРМЫ FLOW-FORM ИЗВЛЕЧЕНИЕ ЗАКЛЕПОК В случае кузовного ремонта нужно извлечь старые или дефектные заклепки из...
-
Page 96: Неисправности, Их Причины И Устранение
осуществлять обычный визуальный осмотр с тем, чтобы предупредить возможную поломку или сбой во время использования. Как минимум раз в неделю очищайте клепальный инструмент GYSPRESS 10T PP от пыли и загрязнений, которые могли бы помешать хорошей работе аппарата в долгосрочной перспективе. Используйте... -
Page 97: Условия Гарантии
и рабочая сила). Гарантия не распространяется на случаи неправильного использования, падения, разбора или повреждений во время транспортировки. Гарантия не распространяется на нормальный износ деталей. Для ремонта клепального инструмента GYSPRESS 10T PP могут использоваться только запчасти производителя GYS. В случае поломки, верните устройство своему дистрибьютору, предоставив: - доказательство... -
Page 98: Istruzioni Generali
MANIPOLAZIONE Tutte le manipolazioni necessarie per un uso corretto sono descritte in questo manuale. Non è permesso ricorrere a metodi di lavoro che non siano esplicitamente autorizzati dal fabbricante GYS. 1A MANIPOLAZIONE Prima di utilizzare per la prima volta il vostro apparecchio, vogliate verificare se ci sono nuovi aggiornamenti. -
Page 99: Dispositivi Di Protezione Individuale
Regolazione della pressione : Una volta avviata la macchina, impostare la pressione dell’aria a 7 bar sul display. SOSTITUZIONE DI BRACCI E ACCESSORI Usare solo bracci e accessori raccomandati da GYS. - Page 100 WORKSTATION GYSPRESS 10T PP CONTROL RUMORE Il manuale deve includere una dichiarazione di emissione di rumore secondo la norma ISO 15744. Livello di potenza sonora ponderato : L = 78dB DESCRIZIONE RIVETTATRICE (FIG.1) 1- Braccio in acciaio Manopola di controllo del pistone...
- Page 101 Modalità operativa / Rivetto selezionato SFORZO IRRAGGIUNGIBILE Il GYSPRESS 10T PP controlla continuamente se la pressione nel sistema dell’aria compressa è sufficiente per raggiun- gere la forza impostata visualizzata. Un messaggio appare sul display se la pressione è insufficiente. Rapporto sull’operazione Alla fine di ogni operazione viene visualizzato un rapporto dell’operazione (forza obiettivo, forza misurata, data, ora,...
- Page 102 WORKSTATION GYSPRESS 10T PP CONTROL MENU GENERALE Per accedere al menu generale dal display generale, premere il pulsante n. 1. La navigazione tra i diversi blocchi avviene per mezzo di manopole e pulsanti. 1 : Indietro 2 : Validazione Parametri Sistema Tracciabilità...
- Page 103 WORKSTATION GYSPRESS 10T PP CONTROL VISUALIZZAZIONE DELLA TRACCIABILITÀ Quando un lavoro viene registrato, il simbolo viene visualizzato in alto a sinistra dello schermo, seguito dal nome del lavoro e dal numero dell’operazione. Il numero dell’operazione viene incrementato automaticamente e non può...
- Page 104 WORKSTATION GYSPRESS 10T PP CONTROL Tracciabilità: Per default, il software GYSPOT si apre in modalità «tracciabilità». Importazione di rapporti di punti da una chiavetta USB : Per importare nel vostro PC i rapporti di lavoro fatti con un GYSPRESS CONTROL (precedentemente salvati nella vostra chiave USB dalla macchina, vedi paragrafo «Tracciabilità», inserite la chiave USB nella porta USB del vostro PC.
- Page 105 Indice: Feuille: Produit: Nom du fichier CAO: Assemblage 21_01466 Ce document est la propriété de la société GYS et ne peut en aucun cas être transmis à quiconque sans son accord. Etabli par: Statut: Arnaud FRISON Date: 22/10/2021 24 kN...
- Page 106 WORKSTATION GYSPRESS 10T PP CONTROL La rivettatrice è pronta all’uso. Avvitare la prolunga fornita con il braccio. MONTAGGIO DEI TERMINALI Avvitare il kit di terminali richiesti per la procedura di rivettatura nei supporti del braccio. Prima di ogni montaggio veri- ficare che la matrice e il supporto del punzone siano correttamente associati (vedi pag.
- Page 107 WORKSTATION GYSPRESS 10T PP CONTROL CONFEZIONE DI RIVETTI rivettatrice è fornita scatola rivetti acciaio auto-perforanti (RAP). Questi rivetti di prova sono forniti per per- mettere di testare la rivettatrice e non devono essere utilizzati in nes- sun caso per le riparazioni delle automobili.
- Page 108 WORKSTATION GYSPRESS 10T PP CONTROL PUNZONARE E CALIBRARE I FORI PER RIVETTI FLOW-FORM Per punzonare la lamiera e calibrare i fori, è necessario utilizzare una matrice specifica chiamata estrattore. Questa matrice permette trattenere la lamiera quando si estrae il punzone.
- Page 109 WORKSTATION GYSPRESS 10T PP CONTROL Dopo la punzonatura, il punzone resta inserito nelle lamiere da assemblare. La lamiera viene rilasciata dal punzone e preparato per la rivettatura. Se il punzone non esce dalla lamiera, usare la funzione PULL della rivettatrice.
-
Page 110: Controlli E Manutenzione
è consigliato e raccomandato per prevenire eventuali guasti o diffetti durante l’uso Pulire la rivettatrice GYSPRESS 10T PP CONTROL almeno una volta alla settimana per eliminare la polvere e la spor- cizia che potrebbero compromettere, a lungo termine, il buon funzionamento del prodotto. Usare panni autopulenti -... -
Page 111: Anomalie, Cause, Rimedi
La garanzia non copre l’usura normale dei pezzi. Per effettuare una riparazione sulla GYSPRESS 10T PUSH PULL devono essere utilizzati esclusivamente pezzi di ricambio proveniente da GYS. - Page 112 Etabli par: Arnaud FRISON Date: 25/11/2021 schema hydraulique 10Tconnect Indice: Feuille: Produit: Nom du fichier CAO: Assemblage 21_06381 Ce document est la propriété de la société GYS et ne peut en aucun cas être transmis à quiconque sans son accord.
- Page 113 WORKSTATION GYSPRESS 10T PP CONTROL PIÈCES DE RECHANGE RIVETEUSE / THE RIVETING MACHINE’S SPARE PARTS / RIVETER-ERSATZ- TEILE / PIEZAS DE RECAMBIO REMACHADORA / ONDERDELEN PONSNAGELTANG / ЗАПАСНЫЕ ЧАСТИ RIVETER / PEZZI DI RICAMBIO RIVETTATRICE Support de gaine / Cable support / Scheidenstütze / Soporte de la vaina / Mantel-houder / Держатель для оболочки /...
- Page 114 WORKSTATION GYSPRESS 10T PP CONTROL PIÈCES DE RECHANGE RIVETEUSE / THE RIVETING MACHINE’S SPARE PARTS / RIVETER-ERSATZ- TEILE / PIEZAS DE RECAMBIO REMACHADORA / ONDERDELEN PONSNAGELTANG / ЗАПАСНЫЕ ЧАСТИ RIVETER / PEZZI DI RICAMBIO RIVETTATRICE Carter plastique / Plastic casing / Kunststoffgehäuse / Carcasa de plástico / Kunststoffen behuizing / Пластмассовый...
- Page 115 WORKSTATION GYSPRESS 10T PP CONTROL PICTOGRAMMES / DIAGRAMS / PIKTOGRAMME / PICTOGRAMAS / СИМВОЛЫ / PICTOGRAMMEN - Attention ! Lire le manuel d’instruction avant utilisation. - Caution ! Read the user manual. - Achtung! Lesen Sie die Betriebsanleitung. - Cuidado, leer las instrucciones de utilización.
- Page 116 SAS GYS 1, rue de la Croix des Landes CS 54159 53941 SAINT-BERTHEVIN Cedex France...
Need help?
Do you have a question about the GYSPRESS 10T and is the answer not in the manual?
Questions and answers