Table of Contents
Advertisement
Available languages
Available languages
Quick Links
Advertisement
Chapters
Table of Contents

Related Manuals for Maico ECA 100 ipro RC


Summary of Contents for Maico ECA 100 ipro RC
- Page 1 Montage- und Betriebsanleitung Installation and operating instructions Notice de montage et mode d'emploi ECA 100 ipro RC ECA 100 ipro RCH www.maico-ventilatoren.com Kleinraumventilatoren (Funk) Small room fans (radio-controlled) Aérateurs pour petites pièces (radio)
- Page 2 Inhaltsverzeichnis Deutsch......... English .......... Français ........
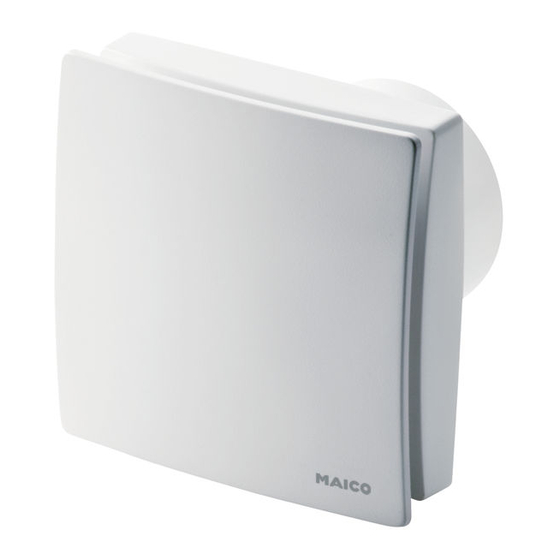
- Page 3 Geräteübersicht Geräteübersicht 1 Gehäuse mit Motor 2 Flügelrad 3 Leitungstülle 4 Elektronikabdeckung 5 Innengitter, feststehend 6 Abdeckung 7 Designabdeckung 8 Elektronikplatine 9 Feuchtesensor...
-
Page 4: Table Of Contents
Sicherheitshinweise ......4.1 Allgemeine Sicherheitshinweise ..4.2 Sicherheitshinweise zu Installation, Betrieb, Reinigung und Wartung ..Produktinformation ......5.1 ECA 100 ipro RC ......5.2 ECA 100 ipro RCH ......5.3 Systembeschreibung MAICOsmart Technische Daten ......... 6.1 Umgebungsbedingungen ....6.2 Technische Datentabelle .... -
Page 5: Lieferumfang
Vorwort Vorwort 4 Sicherheitshinweise Lesen Sie diese Anleitung vor der Montage und 4.1 Allgemeine Sicherheitshinweise ersten Benutzung bitte sorgfältig durch. Folgen Das Gerät darf in folgenden Situationen auf kei- Sie den Anweisungen. Übergeben Sie die Anlei- nen Fall eingesetzt werden: tungen an den Eigentümer zur Aufbewahrung. -
Page 6: Produktinformation
Feuerstätten durch Koh- lenstoffmonoxid. 5 Produktinformation Die maximal zulässige Druckdifferenz pro Wohn- einheit beträgt 4 Pa. Die Ausführung bedarf 5.1 ECA 100 ipro RC grundsätzlich der Zustimmung des Bezirks- • Kleinraumventilator zum Entlüften von Räumen. schornsteinfegers. • Funkgesteuerter Ausführung für das Abluftsys- Bei Betrieb mit raumluftabhängiger Feuerstätte... -
Page 7: Eca 100 Ipro Rch
• Nicht drehzahlsteuerbar. bis der gespeicherte Referenzwert wieder un- Master-Slave-Betrieb der RC-Ventilatoren nur im terschritten wird. sortenreinen System ECA 100 ipro RC und RCH Wird der Referenzwert unterschritten, wird auch möglich (Raumluftsteuerung RLS RC erforder- die Leistungsstufe zurückgeschaltet: lich). Kombinationen mit ECA 150 ipro RC/KRC/ •... - Page 8 5 Produktinformation • ECA 100 ipro RCH-Ventilatoren besitzen zu- • Wird ein Funkschalter betätigt, schaltet der zu- sätzlich eine Feuchtesteuerung (Feuchte-Voll- geordnete Ventilator in die manuell gewählte automatik). Leistungsstufe. • Das MAICOsmart-System lässt sich mit einem • Nach 30 Minuten ohne Betätigung (Timeout) Funkschalter und/oder der Raumluftsteuerung wird wieder auf die Einstellung gemäß...
-
Page 9: Technische Daten
Kondenswasserbildung im • Ventilator / Ventilator 30 m Ventilatorgehäuse. • Signalverstärker / Lüftungsleitungen fachgerecht thermisch isolie- Ventilator 40 m ren. Kondenswasserableitung oder Kondensat- Für weitere technische Daten → Typenschild. sammler in der Steigleitung einplanen. Für Kennlinien → www.maico-ventilatoren.com. -
Page 10: Rohr
8 Montage und Inbetriebnahme 7.3 Rohr 8.2 Gehäuseeinbau 1. Kanten der Rohrinnenseite entgraten. ACHTUNG Gerätebeschädigung/Funktions- störung bei streifendem Flügelrad. 2. Montagevorbereitungen wie in Kapitel Wand Flanschhülse weder verspannt noch gequetscht beschrieben vornehmen. einbauen. 8 Montage und Inbetriebnahme Für ebenen Untergrund sorgen. 1. -
Page 11: Elektrischer Anschluss
8 Montage und Inbetriebnahme 8.4 Endmontage ACHTUNG Kurzschlussgefahr und Gerätebe- schädigung. Eindringende Feuchtigkeit bei falsch eingesetzter Elektronikabdeckung. Elektronikabdeckung fest an das Gehäuse drücken, so dass diese ringsum dichtend und plan anliegt. Dabei nicht auf die Einstelltasten drücken. 5. Leitungstülle in Gehäuse einsetzen. 6. -
Page 12: Inbetriebnahme
9 Funkkomponenten 4. Mit der linken Einstelltaste die Funkkompo- 3. An den Slaveventilatoren (max. 2 Ventilatoren) Funkschalter und Funk-Fensterkontakte ein- nenten einlernen → Tipps zum Einlernen von lernen. Funkkomponenten [} 12]. 4. Gehäuseabdeckung inkl. Designabdeckung vorsichtig auf das Gehäuse drücken, bis diese im Schnapper einrastet. -
Page 13: Programmebenen
9 Funkkomponenten 9.3 Programmebenen Grundzustand 2 s halten Takt Telegramme anderer Learn - Modus Funkteilnehmer > 2 s halten 1x lang 1x drücken Send-Learn Learn-Telegramm wird versendet Modus > 2 s halten 2x drücken Speicher Delete-Modus gelöscht 1x drücken Repeater - Aus >... -
Page 14: Sender Löschen
9 Funkkomponenten ð Das Einlerntelegramm wird gesendet. Bei 1. Um den gewünschten Sender zu löschen, erfolgreichem Einlernen leuchtet die LED muss der Einlernvorgang des Senders (RLS ca. 1 Sekunde. Bei fehlerhafter Übertra- RC, Funkschalter oder Fensterkontakt) wie- gung blinkt die Tasten-LED 3-mal kurz. derholt werden →... -
Page 15: Bedienung
0 stufe 1 stufe 2 stufe 3 tem ECA … ð Die Einstellung ist gespeichert. ipro RC/RCH 10 Bedienung + ER 100 RC ECA 100 ipro RC Pro- Mas- Leis- Leis- Leis- Ein- und ausgeschaltet werden die Ventilatoren gram tungs-... -
Page 16: Störungsbehebung
13 Störungsbehebung • Feuchtesteuerung bei RCH-Geräten arbeitet nicht korrekt/ist de- fekt. Fachkraft hinzu- ziehen. Thermischer Überlas- • Motor zu heiß. War- tungsschutz des Mo- ten, bis der Motor ab- tors schaltet den Ven- gekühlt ist. Die Abkühl- tilator aus. zeit kann bis zu 10 Mi- nuten betragen. -
Page 17: Demontage
Entsorgen Sie die Verpa- ckungsmaterialien sowie das Gerät umweltge- recht nach den in Ihrem Land geltenden Bestim- mungen. Impressum © Maico Elektroapparate-Fabrik GmbH. Deut- sche Original-Betriebsanleitung. Druckfehler, Irr- tümer und technische Änderungen vorbehalten. Die in diesem Dokument erwähnten Marken,... - Page 18 Unit overview Unit overview 1 Housing with motor 2 Impeller 3 Cable grommet 4 Electronics cover 5 Internal grille, fixed 6 Cover 7 Designer cover 8 Electronic circuit board 9 Humidity sensor...
- Page 19 4.1 General safety instructions ....4.2 Safety instructions regarding install- ation, operation, cleaning and main- tenance..........Product information ......5.1 ECA 100 ipro RC ......5.2 ECA 100 ipro RCH ......5.3 MAICOsmart system description ..Technical data ........6.1 Ambient conditions ......
-
Page 20: Scope Of Delivery
Preface Preface DANGER Risk of combustion/fire from Please read the instructions carefully before in- flammable materials, liquids or gases in the stalling and using for the first time. Follow the in- vicinity of the unit. structions. Pass these instructions on to the Do not place any flammable materials, liquids or owner for safekeeping. -
Page 21: Product Information
5 Product information DANGER Risk of death from carbon monoxide when operating with air-ventilated 5.1 ECA 100 ipro RC fireplaces. • Small room fans for extracting air from rooms. The maximum permitted pressure difference per • Radio-controlled model for the MAICOsmart ex- residential unit is 4 Pa. -
Page 22: Eca 100 Ipro Rch
• With the RLS RC room air control, the three system levels can be switched on manually • All the ECA 100 ipro RC models can be com- bined with each other in the network. (→ table in chapter Operation [} 30]). -
Page 23: Technical Data
6 Technical data • This function is deactivated ex works in order to D: Radio window contact (EnOcean switch) guarantee continuous ventilation. If need be, • Radio window contacts can be taught-in for this function can also be activated (→ RLS RC each fan. -
Page 24: Technical Data Table
40 m to unit if condensation builds up in the fan For more technical data → rating plate. housing. For characteristic curves → www.maico-ventil- Thermally insulate ventilation ducts properly. Al- atoren.com. low for a condensation drain or condensate col- lector in the riser. -
Page 25: Housing Installation
8 Installation and commissioning Cable grommet 2. Align housing horizontally and mark both dowel holes, see arrow. 3. Drill dowel holes with a Ø of 6 mm and insert 3. Fit supplied foam strip centred in socket. dowels. 4. Push cable grommet carefully out of housing and remove it. -
Page 26: Electrical Connection
8 Installation and commissioning 7. Insert housing into wall breakthrough/wall sleeve and secure with two screws. Do not in- sert the housing such that it is twisted or crushed. Make sure you use mounting mater- ial which is sized for the purpose. 8.3 Electrical connection NOTICE Risk of damage to unit in the event of short-circuits. -
Page 27: Commissioning
9 Radio components 4. Carefully press the housing cover (incl. de- signer cover) onto the housing, until it en- gages with the safety catches. 5. Perform function test with all system compon- ents. 9.2 Tips for teaching-in radio com- ponents A fan automatically becomes a master if the master fan is set to receive mode and a teach- in telegram is received from a slave fan. -
Page 28: Program Levels
9 Radio components 9.3 Program levels Basic state Hold 2 sec. Cycle Telegrams of other Learn mode radio devices Hold > 2 1x long sec. Press 1x Send-learn Learn telegram is sent mode Hold > 2 sec. Press 2x Memory Delete mode deleted Press 1x... -
Page 29: Deleting Transmitters
9 Radio components ð The teach-in telegram is sent. If teaching-in 1. In order to delete the required transmitter, the was successful, the LED lights up for ap- transmitter teach-in process (RLS RC, radio prox. 1 second. If transfer was faulty, the switch or window contact) has to be re- button LED flashes briefly 3 times. -
Page 30: Operation
1 level 2 level 3 tem ECA … ð The setting is saved. ipro RC/RCH 10 Operation + ER 100 RC ECA 100 ipro RC Pro- Mas- Power Power Power The units are switched on/off either on the RLS gram... -
Page 31: Fault Rectification
ABD ECA 100 ipro 3 E059.2022.9200 hooks. Check impeller and clean if necessary. Electronics covers ABDE ECA 100 ipro 1 E059.2010.0000 ABDE ECA 100 ipro 2 E059.2010.9000 In case of questions, please contact: Maico Elektroapparate-Fabrik GmbH Steinbeisstraße 20 78056 Villingen-Schwenningen, Deutschland... -
Page 32: Dismantling
15 Dismantling Tel. +49 7720 694 445 Fax +49 7720 694 175 E-mail: ersatzteilservice@maico.de Spare parts can be ordered at www.shop.maico- ventilatoren.com. 15 Dismantling Dismantling only permitted by a qualified elec- trician. 1. Remove covers. 2. Remove the electronics cover. - Page 33 Vue d'ensemble de l'appareil Vue d'ensemble de l'appareil 1 Boîtier avec moteur 2 Hélice 3 Manchon de câble 4 Cache électronique 5 Grille intérieure, fixe 6 Cache de protection 7 Cache de protection design 8 Platine électronique 9 Détecteur d'humidité...
- Page 34 Sommaire 16 Élimination dans le respect de l'envi- Sommaire ronnement ..........Volume de fourniture......35 Schémas de branchement ....50 Qualification de l'installateur spécia- lisé ............Utilisation conforme ......35 Consignes de sécurité ......35 4.1 Consignes de sécurité générales ... 4.2 Consignes de sécurité...
-
Page 35: Volume De Fourniture
Avant-propos Avant-propos 4 Consignes de sécurité Veuillez lire attentivement cette notice avant le 4.1 Consignes de sécurité générales montage et la première utilisation. Suivez les ins- Ne jamais utiliser l'appareil dans les situations tructions. Remettez les notices au propriétaire suivantes : pour conservation. -
Page 36: Consignes De Sécurité Pour L'instal- Lation, Le Fonctionnement, Le Net- Toyage Et L'entretien
4 Consignes de sécurité 4.2 Consignes de sécurité pour l'ins- AVERTISSEMENT Risque de blessure tallation, le fonctionnement, le net- lors des travaux en hauteur. Utiliser des auxiliaires d'accès vertical (échelles) toyage et l'entretien appropriés. Assurer la stabilité. Le cas échéant, faire appel à DANGER Danger pour les enfants et les une 2ème personne pour maintenir l'échelle. -
Page 37: Information Produit
5 Information produit • Marche/Arrêt par interrupteur radio DS RC op- DANGER Danger en cas de non-respect tionnel ou commande d'air ambiant séparée des consignes en vigueur relatives aux instal- RLS RC. lations électriques. • Aucune temporisation de démarrage et durée Avant toute installation électrique, couper tous de fonctionnement par temporisation. -
Page 38: Description Du Système Maicos- Mart
5 Information produit • En cas de fonctionnement sans RLS RC (appa- L'actionnement de l'interrupteur radio en mode reil individuel), le ventilateur retourne au dernier Humidité entraîne également l'enregistrement niveau de puissance activé avant le fonctionne- d'une nouvelle valeur de référence. ment en mode Humidité. -
Page 39: Caractéristiques Techniques
6 Caractéristiques techniques B : Interrupteur radio DS RC (interrupteur En- E : Commande d'air ambiant RLS RC (com- Ocean) : mande radio EnOcean) Ventilateur avec plusieurs interrupteurs radio Pour des informations sur la commande en mode de fonctionnement individuel d'air ambiant RLS RC, voir notice de montage Fonctionnement comme décrit précédemment. -
Page 40: Tableau De Données Techniques
3. Poser le câble secteur (montage encastré) taires → plaque signalétique. jusqu'au lieu d'installation, pour les écarts à Pour courbes caractéristiques → www.maico- respecter, voir plus haut. Ce faisant, faire sor- ventilatoren.com. tir le câble secteur d'au moins 110 mm du mur. -
Page 41: Montage Et Mise En Service
8 Montage et mise en service 8.2 Montage du boîtier 8 Montage et mise en service ATTENTION Endommagement de l'appareil / 8.1 Ventilateur Dysfonctionnement en raison du frottement 1. Déballer l'appareil et retirer le cache de pro- de l'hélice. tection. Installer le manchon d'assemblage sans tension ni écrasement. -
Page 42: Branchement Électrique
8 Montage et mise en service 8.4 Montage final ATTENTION Risque de court-circuit et d'en- dommagement de l'appareil. Pénétration d'hu- midité en cas de mauvais positionnement du cache électronique. Appuyer fortement le cache électronique sur le boîtier de manière à ce qu'il assure l'étanchéité et qu'il repose bien à... -
Page 43: Mise En Service
9 Composants radio 3. Effectuer le test de fonctionnement avec tous RCH : Ne pas toucher la membrane sur le côté les composants du système. plat de la paroi de détecteur / ne pas lui faire sup- porter de charges, car elle sera endommagée. Réseau maître / esclave 3. -
Page 44: Niveaux De Programme
9 Composants radio 9.3 Niveaux de programme État initial maintenir enfoncée Cadence Télégrammes d'autres Mode Initialisation parties prenantes au réseau radio maintenir enfoncée >2 s 1 fois longtemps Appuyer Un télégramme d'ini- Mode Émission - 1 fois tialisation est envoyé Initialisation maintenir enfoncée >2 s... -
Page 45: Effacement Des Émetteurs
9 Composants radio ð Le télégramme d'initialisation est envoyé. Initialisation du contact de fenêtre radio Une initialisation réussie est signalée par 1. Activer le mode Initialisation sur le ventilateur l'allumage de la LED de la touche (1 fois) récepteur. pendant environ 1,5 seconde. L'échec de la ð... -
Page 46: Utilisation
10 Utilisation Valeurs de réglage Programmes Niveau RLS RC pour veau veau veau • arrêt ECA ... ipro RC/ sys- • Level 1 = amplification des télégrammes d'ori- KRC/RCH/ sys- sys- tème 2 sys- gine KRCH tème tème tème • Level 2 = amplification des télégrammes d'ori- gine et des télégrammes déjà... -
Page 47: Entretien
11 Entretien Programmes Niveau Niveau Niveau Niveau ATTENTION Endommagement de l'appareil en RLS RC du sys- cas d'utilisation de produits de nettoyage in- pour sys- tème 0 sys- sys- sys- corrects. tème mixte tème 1 tème 2 tème 3 Nettoyer le cache de protection uniquement avec ECA …... -
Page 48: Pièces De Rechange
ABDE ECA 100 ipro 2 E059.2010.9000 fonction de l'humidité des appareils RCH ne fonctionne pas cor- Adressez vos questions à : rectement / est défec- Maico Elektroapparate-Fabrik GmbH tueuse. Contacter un Steinbeisstraße 20 spécialiste. 78056 Villingen-Schwenningen, Allemagne La protection ther- • Moteur trop chaud. Tél. +49 7720 694 445... -
Page 49: Élimination Dans Le Respect De L'envi
Mentions légales © Maico Elektroapparate-Fabrik GmbH. Traduc- tion du mode d'emploi d'origine en langue alle- mande. Sous réserve de fautes d'impression, d'erreurs et de modifications techniques. Les marques, marques commerciales et marques dé-... -
Page 50: Schaltbilder
Schaltbilder / Wiring diagrams / Schémas de branchement Schaltbilder / Wiring diagrams / Schémas de branchement ECA 100 ipro RC, ECA 100 ipro RCH... - Page 51 Notizen...
- Page 52 Maico Elektroapparate-Fabrik GmbH Steinbeisstr. 20 78056 Villingen-Schwenningen Deutschland Service +49 7720 6940 info@maico.de 0185.1148.0000_RLF.9_12.21_DSW-AS...
Need help?
Do you have a question about the ECA 100 ipro RC and is the answer not in the manual?
Questions and answers