Precor Vitality Series Assembly Manual
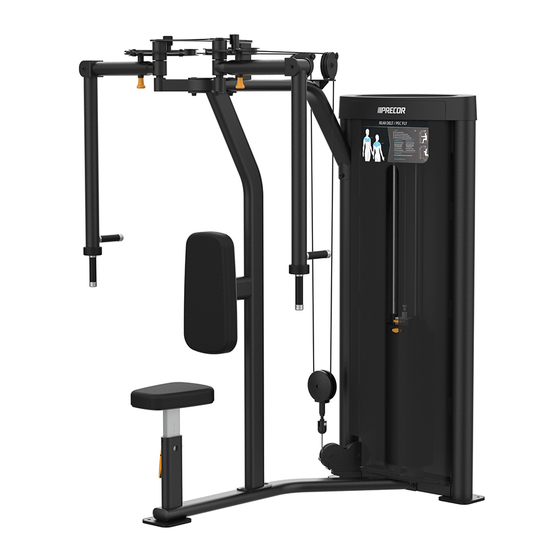
Selectorized rear delt/pec fly
Hide thumbs
Also See for Vitality Series:
- Assembly manual (8 pages) ,
- Getting started manual (6 pages) ,
- Maintenance manual (5 pages)
Advertisement
Quick Links
Vitality™ Series Selectorized Rear Delt/Pec Fly
Assembly Guide
Assembly requirements
Precor recommends at least two people for this installation. DO NOT attempt
assembly by yourself.
When assembling the equipment, we recommend you:
Follow the steps in the order listed in this assembly guide.
l
Unpack the box and assemble the equipment close to where you plan to use it.
l
Locate the equipment at least 40 inches (1 meter) away from walls or furniture on either side
l
of the equipment, and 40 inches (1 meter) away from objects behind or in front of the equip-
ment.
Assemble the equipment on a solid, flat surface, so that it remains level and stable.
l
Required tools
Adjustable wrench
l
l
Torque wrench
l
l
Rubber mallet
l
Equipment dimensions: W53.7 x D55.7 x H78.4 inches/W136.3 x D141.4 x H199.2 cm (in-use) -
W101.9 x D89.1 x H78.4 inches/W258.9 x D226.2 x H199.2 cm (idle)
Hex wrench sets, metric and standard, with extensions
Socket wrench set, metric and standard, with extensions
Figure 1
Begin Assembly
CAUTION: Do not fully tighten fasteners until instructed to do so.
The equipment is designed to be freestanding; however, it can be bolted to the floor for extra
stability. Precor highly recommends that the equipment be bolted to the floor to reduce the risk of
toppling the equipment due to improper use. Since floor construction varies, please consult a
professional building engineer for proper fastening.
Assemble frame
1. Attach the seat frame to the weight tower frame using:
2 – M10 x 100 mm hex head bolts
4 – 11 mm flat washers
2 – M10 nylon lock nuts
2. Attach the upright support to the seat frame using:
2 – M10 x 60 mm hex head bolts
2 – 11 mm flat washers
3. With assistance, lift the cam assembly and place it on top of the upright support frame. Have
your assistant hold the cam assembly in place while you attach the cam assembly to the weight
tower frame using:
2 - M10 x 125 mm hex head bolts
4 – 11 mm flat washers
2 – M10 nylon lock nuts
4. With your assistant still supporting the cam assembly, attach the cam assembly to the upright
support frame using:
3 - M10 x 80 mm hex head bolts
6 – 11 mm flat washers
3 – M10 nylon lock nuts
Partially tighten the fasteners.
|
©2021 Precor Incorporated
VSL Rear Delt/Pec Fly
Figure 2
|
|
Assembly Guide
P/N CWR157777-102 ENU 31 July 2021
|
1
Advertisement

Related Manuals for Precor Vitality Series


Summary of Contents for Precor Vitality Series
- Page 1 The equipment is designed to be freestanding; however, it can be bolted to the floor for extra stability. Precor highly recommends that the equipment be bolted to the floor to reduce the risk of toppling the equipment due to improper use. Since floor construction varies, please consult a Vitality™...
- Page 2 Use a second lint-free cloth to remove any remaining alcohol before applying labels. 10. Apply the weight plate labels (select LBs or KGs) to the left of the weight selection holes. ©2021 Precor Incorporated VSL Rear Delt/Pec Fly Assembly Guide...
- Page 3 Note: The screws are attached to the cam assemblies for shipment. At each end of the move- ment arm cable, first remove the screw, then thread the cable in the slot on the cam, and finally replace the screw. ©2021 Precor Incorporated VSL Rear Delt/Pec Fly Assembly Guide...
- Page 4 5. Once tightened, verify alignment between the selector and the add-on weight. 6. Check the adjustment by inserting the weight pin into every weight plate hole. The weight pin should slide easily in and out of each weight plate. ©2021 Precor Incorporated VSL Rear Delt/Pec Fly Assembly Guide...
- Page 5 CAUTION Standards can change. Precor recommends you keep apprised of Install weight stack shroud and top cap your local industry standards. Precor shall not be held liable for failure to properly bolt the strength equipment to the floor. The inside shroud has a slot for weight selection. Both shrouds have three slotted tabs on each side that fit into the shroud clips mounted to the inside of the weight tower uprights.
-
Page 6: Disassemble The Equipment
NEVER attempt to disassemble by yourself. Maintenance information It is important that the equipment be maintained in accordance with the Vitality Selectorized Line Maintenance Guide. Visit any Vitality Selectorized product page at www.precor.com to view the guide. ©2021 Precor Incorporated...
Need help?
Do you have a question about the Vitality Series and is the answer not in the manual?
Questions and answers