Table of Contents
Advertisement
SAFETY NOTICE:
If this appliance is not properly installed, a house fire may
result. For your safety, follow the installation directions.
Contact local building or fire officials about restrictions
and installation inspection requirements in your area.
Travis Industries, Inc.
12521 Harbour Reach Dr..
Mukilteo, WA 98275
Masonry Fireplace Insert
Zero-Clearance (Metal) Fireplace Insert
Save these instructions for future reference
French language manuals at fireplacex.com.
Manuels de langue Française à fireplacex.com
Copyright 2021, T.I.
$10.00 100-01560
11/5/2021
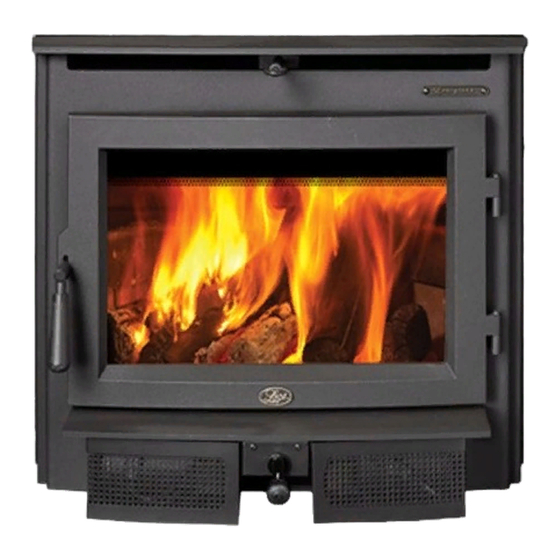
Evergreen
Insert
Manual
Omni-Test Laboratories, Inc.
Report #0028WN119S & 0028WS119E
Certified to UL STD 1482-11 (R2015)
Certified to ULC S268-93
Listed by
Advertisement
Table of Contents

Subscribe to Our Youtube Channel
Related Manuals for Lopi Evergreen NexGen-Fyre Insert


Summary of Contents for Lopi Evergreen NexGen-Fyre Insert
- Page 1 Evergreen Insert Manual Masonry Fireplace Insert Zero-Clearance (Metal) Fireplace Insert Save these instructions for future reference SAFETY NOTICE: If this appliance is not properly installed, a house fire may result. For your safety, follow the installation directions. Contact local building or fire officials about restrictions and installation inspection requirements in your area.
-
Page 2: Introduction
Introduction Introduction We welcome you as a new owner of a Lopi Evergreen wood-burning insert. In purchasing a Lopi Evergreen, you have joined the growing ranks of concerned individuals whose selection of an energy system reflects both a concern for the environment and aesthetics. The Lopi Evergreen is one of the finest appliances the world over. -
Page 3: Table Of Contents
Table of Contents Understanding Your Heater’s Combustion Introduction ............2 System ..............21 Important Information ..........2 Burning Your Heater ..........21 Installation Options ..........6 Ash Removal ............22 Features ..............6 Optional Blower Operation ........ - Page 4 Safety Precautions The viewing door must be Gasoline or other flammable closed and latched during liquids must never be used to operation. start the fire or "Freshen Up" the fire. Do not store or use Smoke from this appliance may gasoline or other flammable active a smoke detector when liquids in the vicinity of this...
- Page 5 Safety Precautions Never try to repair or replace any part of this appliance unless Do not place clothing or other instructions are given in this flammable items on or near this manual. All other work must be appliance. done by a trained technician. Do not make any changes or modifications to an existing masonry fireplace or chimney to...
-
Page 6: Installation Options
Fireplace Insert Installation (for qualified installers only) Installation Options Features Masonry Fireplace Insert Single Operating Control Zero-Clearance (Metal) Fireplace Insert Steel Plate Construction (1/4" & 3/16") Heavy Duty Refractory Firebrick Optional High-Tech Blower Heating Specifications Approximate Maximum Heating Capacity (in square feet)* up to 2,000 (185 square meters) EPA Tested Cord Wood BTUs per Hour**... -
Page 7: Planning The Installation
Fireplace Insert Installation (for qualified installers only) SAFETY NOTICE: Please read this entire manual before you install and use your new room heater. Failure to follow instructions may result in property damage, bodily injury, or even death. Contact local building or fire officials about restrictions and installation inspection requirements in your area. -
Page 8: Fireplace Requirements
Fireplace Insert Installation (for qualified installers only) Fireplace Requirements Minimum fireplace size requirements are shown below. Minimum Fireplace Size 23-1/4” (a) Height (front) (591mm) 23-1/4” (b) Height (rear) (591mm) 26-1/4 (c) Width (front) (667mm) 23-3/4 (d) Width (rear) (603mm) 15-1/4 (e) Depth* (388mm) 20-1/4”... -
Page 9: Insert Placement Requirements
Fireplace Insert Installation (for qualified installers only) Insert Placement Requirements The insert must be placed so that no combustibles are within, or can swing within (e.g. drapes, doors), 36" of the front of the insert. Insert and hearth must be installed on a level, secure floor ... -
Page 10: Masonry Fireplace Requirements
Fireplace Insert Installation (for qualified installers only) Masonry Fireplace Requirements CANADA ONLY: The fireplace insert must be installed with a continuous chimney liner of 6” diameter extending from the fireplace insert to the top of the chimney. The chimney liner must conform to the Class 3 requirement of Can/ULC S635, Standard Lining Systems for Existing Masonry or Factory- Built Chimney &... -
Page 11: Mantel Requirements
Fireplace Insert Installation (for qualified installers only) Mantel Requirements See minimum mantel clearances below. © Travis Industries 11/5/2021 - 1560 Evergreen Insert... -
Page 12: Zero-Clearance (Metal) Fireplace Requirements
Fireplace Insert Installation (for qualified installers only) Zero-Clearance (Metal) Fireplace Requirements Must be manufactured by one of the following manufacturers: • Marco • Majestic • Heatilator • Preway • Tempco • Superior • Heat N Glo • Lennox • Martin •... -
Page 13: Drafting Performance
Fireplace Insert Installation (for qualified installers only) Drafting Performance Draft is the force that moves air from the appliance up through the chimney. The amount of draft in your chimney depends on the length of the chimney, local geography, nearby obstructions, and other factors. Too much draft may cause excessive temperatures in the appliance and may damage the heater. -
Page 14: Insert With Positive Connection
Fireplace Insert Installation (for qualified installers only) Insert with Positive Connection REQUIRED IN CANADA. Sealing the Flue to the Insert IDB1133 The flue connection is vitally important. To ensure proper draft, and to prevent smoke spillage during re-loading, it is crucial for the flue to be sealed with fireplace cement. -
Page 15: Insert With Direct Connection (Masonry Fireplace)
Fireplace Insert Installation (for qualified installers only) Insert with Direct Connection (Masonry Fireplace) NOT ALLOWED IN CANADA. IDB1134 A block-off plate or other non-combustible sealing device (e.g. damper adapter) is required. It must seal the chimney to ensure smoke does not enter the home while providing the chimney system with sufficient draft. -
Page 16: Surround Panel Installation
Fireplace Insert Installation (for qualified installers only) Surround Panel Installation Height Width Custom Panel 96100593 Custom Custom Small Panel 96100394 30-1/2” (775mm) 40” (1016mm) Large Panel 96100395 34” (864mm) 44” (1118mm) Packing List Panel Installation 1. The insert should be in position but pulled out slightly to allow access to the sides and top of the insert. -
Page 17: Safety Notice
Operating Your Appliance Safety Notice If this appliance is not properly installed, a house fire may result. For your safety, follow the installation directions. Contact local building or fire officials about restrictions and installation inspection requirements in your area. The air control may become hot during operation - use gloves or a tool to prevent burns. Use gloves when reloading wood. -
Page 18: Opening The Door
Operating Your Appliance Opening the Door To prevent smoke from entering the room, open the bypass (pull out) and the air control (pull out) before opening the door. You can also open the door a small amount and let air enter the firebox. The door becomes hot during use - use gloves or a tool to prevent burns. -
Page 19: Adjusting The Burn Rate
Operating Your Appliance Adjusting the Burn Rate Use the air control slider to control the burn rate of the stove. See the illustration below for details. Approximate Air Control Settings Overnight Burn Fully in Medium Burn Pulled out approximately 5/16” High Burn Fully out The air control may become hot during operation - use gloves or a tool to prevent burns. -
Page 20: Starting A Fire
Operating Your Appliance Starting a Fire The bypass control becomes hot during operation - use gloves or a tool to prevent burns. Make sure the air control is pushed in. If additional air is needed, open the doors 1/4" during the first five minutes of start-up. -
Page 21: Understanding Your Heater's Combustion System
Operating Your Appliance Understanding Your Heater’s Combustion System This heater uses a dual combustion system detailed below: Primary Combustion: This is the combustion (fire) that takes place directly on the wood. Primary combustion determines how fast the fire burns. Air for primary combustion is supplied through the air control. When you adjust the air control you control the amount of air that reaches the fire and creates primary combustion. -
Page 22: Ash Removal
Operating Your Appliance Ash Removal Whenever ashes get 3 to 4 inches deep in your firebox, and when the fire has burned down and cooled, remove excess ashes. Leave an ash bed approximately 1 inch deep on the firebox bottom to help maintain a hot charcoal bed. Let the stove cool completely before removing ashes (wait at least 2 hours after the last coal has extinguished). -
Page 23: Normal Operating Sounds
Operating Your Appliance Normal Operating Sounds Hints for Burning Get the appliance hot before adjusting to low burn Use smaller pieces of wood during start-up and high burns to increase temperature Use larger pieces of wood for overnight or sustained burns ... -
Page 24: Why Dry Wood Is Key
Operating Your Appliance Why Dry Wood is Key Wet wood, when burned, must release water stored within the wood. This cools the fire, creates creosote, and hampers a complete burn. Ask any experienced wood burner and he or she will agree: dry wood is crucial to good performance. -
Page 25: Troubleshooting
Operating Your Appliance Troubleshooting Problem Possible Cause Smoke Enters Room During Open the bypass and air control (pg. 18). Start-Up Cold Air Blockage - burn a piece of newspaper to establish a draft. If the flame is not getting enough air, a small crack in the door is all that is needed. -
Page 26: Maintaining Your Appliance
Maintaining Your Appliance Maintaining your Appliance Failure to properly maintain and inspect your appliance may reduce the performance and life of the appliance, void your warranty, and create a fire hazard. Establish a routine for the fuel, wood burner, and firing technique. Check daily for creosote build-up until experience shows how often you need to clean to be safe. -
Page 27: Monthly Maintenance (While Appliance Is In Use)
Maintaining Your Appliance Monthly Maintenance (while appliance is in use) Make sure the appliance has fully cooled prior to conducting service. Door and Glass Inspection The door must form an air-tight seal to the firebox for the stove to work correctly. Inspect the door gasket to make sure it forms an air-tight seal to the firebox. -
Page 28: Yearly Maintenance
Maintaining Your Appliance Yearly Maintenance Make sure the appliance has fully cooled prior to conducting service. Touch-Up Paint Included with the owner's pack of this appliance is a can of Stove-Brite® paint. To touch up nicks or dulled paint, apply the paint while the appliance is cool. -
Page 29: Door Parts
Maintaining Your Appliance Door Parts ID # Description Qty. Part # ID # Description Qty. Part # Gasket Cement, 3 oz. 250-04477 Glass 250-03605 Door Gasket 250-02832 Glass Gasket 99900405 Screws (8) 10-24 x ½” 250-03656 Door Handle Assy. 250-03606 Door Retainer 250-03657 Door Handle... -
Page 30: Firebox Parts
Maintaining Your Appliance Firebox Parts ID # Description Qty. Part # ID # Description Qty. Part # Secondary Air Tubes 98900252 Baffle Insulation Protectors 250-03659 Air Tube Pins 250-03658 Bypass Support 250-03594 Baffle Cap 250-03597 Bypass Slider 250-03596 Baffle Plates (ceramic) 250-03598 Bypass Yoke 250-03595... -
Page 31: Air Tube Identification
Maintaining Your Appliance Air Tube Identification Caution: Use only Travis Industries replacement parts. Do not use substitute materials. Firebrick Removal & Replacement Do not pry firebricks - they chip and crack easily. Remove the firebricks by lifting them out by the bottom edges as shown below (the photos do not show the side firebricks). -
Page 32: Air Tube Removal & Replacement
Maintaining Your Appliance Air Tube Removal & Replacement © Travis Industries 11/5/2021 - 1560 Evergreen Insert... -
Page 33: Baffle Removal & Replacement
Maintaining Your Appliance Baffle Removal & Replacement NOTE: The baffle rests on the top of the air tubes. Make sure to support the baffle while removing the tubes. Removal 1. Open the door of the insert to gain access to the baffle and related components shown below (baffle shown without the unit for clarity). - Page 34 Maintaining Your Appliance 3. Remove the front air tube by following the steps below. Use penetrating oil (WD-40™ or similar) on the bolts before removing them. Let the oil soak in for several minutes before attempting to remove the bolts. 4.
- Page 35 Maintaining Your Appliance 5. Remove the Baffle Cap from the front edge of the baffle board and blanket (see below). 6. Remove the second air tube following the same steps illustrated in step 3. NOTE: You will need to support the remainder of the baffle components with your hand as you remove the second air tube.
- Page 36 Maintaining Your Appliance 9. Lift the bypass damper off the slide plate and remove it from the insert (see below). Remove the slide plate from the insert (see below). What remains should look like this (see below). 11. The illustration below shows what the front edge of the baffle should look like. Notice the baffle board is made of two separate pieces and there is a ceramic fiber blanket laying on both pieces of board.
- Page 37 Maintaining Your Appliance 12. With the baffle board overlapping each other, both baffle board pieces and the blanket should now fit through the insert door opening. NOTE: To reassemble the baffle, follow the steps above in reverse. © Travis Industries 11/5/2021 - 1560 Evergreen Insert...
- Page 38 Limited 7 Year Warranty Register your TRAVIS INDUSTRIES, INC. Limited 7 Year Warranty online at traviswarranty.com. TRAVIS INDUSTRIES, INC. warrants this appliance (appliance is defined as the equipment manufactured by Travis Industries, Inc.) to be defect-free in material and workmanship to the original purchaser from the date of purchase as follows: Check with your dealer in advance for any costs to you when arranging a warranty call.
-
Page 39: Listing Label
Listing Information Listing Label © Travis Industries 11/5/2021 - 1560 Evergreen Insert... -
Page 40: Front Blower (Part # 99000132) -Optional
Optional Equipment Front Blower (part # 99000132) -Optional To Switch the Power Cord to the Left Side: The power cord is installed on the right side from the factory. If you would rather have the cord on the left side of the blower assembly, use a pair of slip-joint pliers to disconnect the strain relief which holds the power cord in place. - Page 41 Optional Equipment 2. Remove the (2) Phillips head screws that secure the rheostat mounting plate to the blower assembly (set the screws aside for reinstallation). Lift the rheostat mounting plate out of the way but leave the wires connected. You will now see the (2) holes on the blower assembly used to mount the assembly.
- Page 42 Index Adjusting the Burn Rate ........19 Insert Rollers ............ 13 Air Tube Identification ........31 Installation Options ..........6 Air Tube Removal & Replacement ....32 Introduction ............2 Ash Removal ............ 22 Maintaining your Appliance ......26 Baffle Removal & Replacement ....... 33 Mantel Requirements ........
Need help?
Do you have a question about the Evergreen NexGen-Fyre Insert and is the answer not in the manual?
Questions and answers