Table of Contents
Advertisement
Quick Links
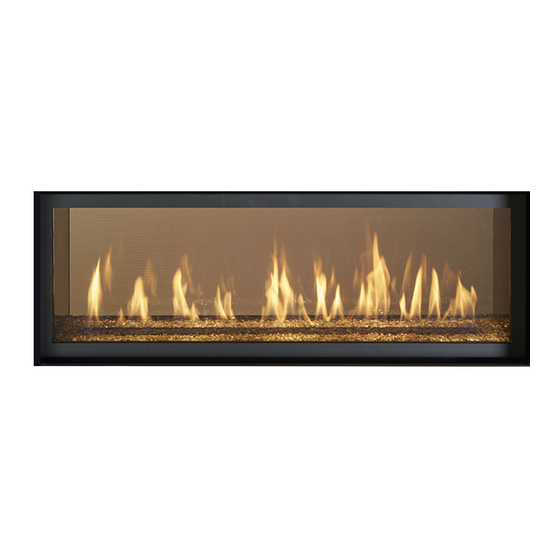
GreenSmart™ 2 Fireplace
WARNING: If the information in these instructions is not followed exactly, a fire or explosion
may result causing property damage, personal injury or loss of life.
DO NOT PLACE ARTICLES ON OR AGAINST THIS APPLIANCE.
DO NOT USE OR STORE FLAMMABLE MATERIALS NEAR THIS APPLIANCE.
DO NOT SPRAY AEROSOLS IN THE VICINITY OF THIS APPLIANCE WHILE IT IS IN OPERATION.
DO NOT MODIFY THIS APPLIANCE.
-
Do not store or use gasoline or other flammable vapors and liquids in the vicinity of this or any
other appliance.
WHAT TO DO IF YOU SMELL GAS
• Do not try to light any appliance.
• Do not touch any electrical switch; do not use any phone in your building.
• Immediately call gas supplier from a neighbor's phone. Follow the gas supplier's instructions.
• If you cannot reach your gas supplier, call the fire department.
-
Installation and service must be performed by a qualified installer, service agency or the gas
supplier.
This appliance may be installed in an aftermarket
permanently located, manufactured home (USA only)
or mobile home, where not prohibited by local codes.
This appliance is only for use with the type(s) of gas
indicated on the rating plate. A conversion kit is
supplied with the appliance.
Owner's Manual
Copyright 2014, T.I.
4415 HO (Aust)
Operation
Maintenance
$10.00
100-01369
Listed by
AS 4553-2008
IAPMO-R&T OCEANA
Dragon Wholesaling Pty. Ltd.
Unit 4, 16 Lexington Drive
Bella Vista NSW 2153
4140115
GMK10166
Australia
Advertisement
Table of Contents

Related Manuals for Lopi 4415 HO


Summary of Contents for Lopi 4415 HO
- Page 1 4415 HO (Aust) Listed by GreenSmart™ 2 Fireplace Operation AS 4553-2008 GMK10166 Maintenance IAPMO-R&T OCEANA WARNING: If the information in these instructions is not followed exactly, a fire or explosion may result causing property damage, personal injury or loss of life.
-
Page 2: Introduction
Introduction Introduction We welcome you as a new owner of a 4415 HO gas fireplace. This manual details operation and maintenance of this fireplace. Please familiarize yourself with the Owner's Manual before operating your heater and save the manual for future reference. -
Page 3: Table Of Contents
Introduction Table of Contents Introduction ........... 2 Mode Controls (continued) ......13 Accent Light ............13 Important Information ........2 Display Fahrenheit or Celsius ....13 Installation Warnings ........2 Low Battery Indicator ......... 13 ... - Page 4 Safety Precautions IF YOU SMELL GAS: * Do not light any appliance * Extinguish any open flame * Do not touch any electrical switch or plug or unplug anything * Open windows and vacate building * Call gas supplier from neighbor's house, if not reached, call fire department This unit must be installed by a qualified installer to prevent the possibility of an explosion.
- Page 5 Safety Precautions Do not place clothing or other Light the heater using the built-in flammable items on or near the igniter. Do not use matches or heater. Because this heater can any other external device to light be controlled by a thermostat your heater.
-
Page 6: Before You Begin
Operation Before You Begin Read this entire manual before you use your new fireplace (especially the section "Safety Precautions" on pages 4 & 5). Failure to follow the instructions may result in property damage, bodily injury, or even death. Remote Control Warnings KEEP BATTERIES AND COVER INSTALLED AT ALL TIMES... -
Page 7: Remote Set-Up
Operation Remote Set-Up Verify the Switch is on “REMOTE” The battery holder has a switch built into it (see below). This switch must remain in the REMOTE position for the remote to operate. Synchronize the Transmitter to the IFC The transmitter will need to be synchronized to the IFC (Integrated Fireplace Control) before the remote will work correctly. -
Page 8: Starting The Heater For The First Time
Operation Starting the Heater for the First Time Burn the heater at a low setting with the blower off for an extended period (up to 48 hours). This will cure the painted surfaces. Fumes from the paint curing and oil burning off the steel will occur. This is normal. -
Page 9: Continuous/Intermittent Pilot Switch
Operation Continuous/Intermittent Pilot Switch This heater may run with the pilot continuously running or in Intermittent mode. For most homeowners, Intermittent mode is preferable (this saves fuel, doesn’t give off un-needed heat). However, in some situations the homeowner may prefer to switch the heater to Continuous Pilot mode. The most typical reasons for switching to Continuous Pilot are: ... -
Page 10: Remote Operation
Operation Remote Operation When the switch on the battery holder is set to “REMOTE” the transmitter operates the fireplace. Once you understand how the transmitter works, you will be able to operate your fireplace quickly and easily. Display Overview The transmitter display has four main sections (see below). Thermostat Display Room Temperature Display Read-Out (Thermostat Setting, Function, etc.) -
Page 11: Manual On-Off / Smart Thermostat / Standard Thermostat
Operation Manual On-Off / Smart Thermostat / Standard Thermostat Use the thermostat button to cycle through the three thermostat settings (see below). Look here for the Press the thermostat button to cycle thermostat setting. through the thermostat settings. SMART MANUAL ON/OFF – The burner will turn on and off using the remote (see below). Press the On/Off button to control the burner. -
Page 12: Mode Controls (Flame, Blower, Light)
Operation Mode Controls (Flame, Blower, Light) Press the Mode button to cycle through the four mode controls (see below). Press the mode button to cycle through the mode settings. Flame Height Accent Look here for Light mode controls. Optional Blower Flame Height Flame height may be controlled using the UP and DOWN buttons when in Flame Height Mode (see below). -
Page 13: Travis Industries
Operation Mode Controls (continued) Accent Light The Accent Light (night light) inside the heater may be turned on and off using the up and down buttons when in Accent Light mode (see below). The center display will display the 7 settings, from “OFF” to “HI” for full on. -
Page 14: Battery Replacement
Operation Battery Replacement Battery Installation Install four AA batteries into the battery holder (see below). These batteries act as a power backup in case the household (AC) current goes out. Transmitter Battery Installation Install the three included AAA batteries into the remote. Power Outages The remote will work if household current (AC power) is disconnected. -
Page 15: Child-Proof Feature
Operation Child-Proof Feature The child-proof feature disables the control buttons, preventing unwanted use of the remote. Press both the MODE and UP buttons simultaneously to turn this feature on or off. HINT: This feature is especially useful while using the thermostat setting. Child Proof Indicator Normal Operating Sounds The appliance may creak with change of... -
Page 16: Yearly Service Procedure
Maintenance Yearly Service Procedure Failure to inspect and maintain the heater may lead to improper combustion and a potentially dangerous situation. We recommend the following procedures be done by a qualified technician. 1. Turn the pilot flame to continuous. It should touch approximately 3/8" of the top of the flame sensor. If it does not, contact your dealer for service. -
Page 17: Accent Light Replacement
Maintenance Accent Light Replacement The accent lights in your heater provide additional lighting. The bulbs will burn out over time. To replace, follow the directions below: Shut off gas to the heater and let it cool for 15 minutes. ... -
Page 18: Glass Frame Removal And Installation
Maintenance Glass Frame Removal and Installation Do not remove the glass frame with the screen attached – it will not disengage correctly and may damage the screen. The appliance must be completely cool before removing the glass. Do not strike or slam the glass. Warning: Do not operate appliance with the glass front removed, cracked or broken. - Page 19 Maintenance 2. Remove the three screws holding the screen in place (1/4” nutdriver- magnetic driver recommended). Then pivot the screen down slightly until the clips on the bottom disengage from the glass frame. 3. Use the glass tool to unlatch the glass frame. Remove the glass frame. The glass frame is held in place with four tabs inserted into four slots at the bottom of the firebox opening.
-
Page 20: Crushed Glass Installation
Maintenance Crushed Glass Installation Do not allow the crushed glass to block the air slots or to become too thick (maximum 1 layer deep on the burner). Failure to properly install glass may lead to sooting and improper burning. If converting to LP (propane), convert the appliance prior to placing the crushed glass. Install the crushed glass on the glass tray following the directions below. -
Page 21: Glass Cleaning
Maintenance Glass Cleaning The glass may be cleaned with a non- abrasive cleaner. To clean the inside of the glass, simply remove the glass frame, place it on a non-scratching surface, and clean the surface. WARNING: do not operate the fireplace without the glass frame in place. ©... -
Page 22: Troubleshooting Table
Maintenance Troubleshooting Table Don't Call for Service Until Problem: Possible Cause: You: The battery box switch is turned to "OFF" Turn the battery box switch to "ON". The remote control is not working correctly See the remote control instructions. Burner Will Not Start The thermostat is disconnected or set too low See "Thermostat Operation". -
Page 23: Wiring Diagram
Maintenance Wiring Diagram Caution: Label all wires prior to disconnection when servicing controls. Wiring errors can cause improper and dangerous operation. Accessory Power White Black Black White Accent Light (s) Optional Blower(s) Power 3 Amp Fuse 3 Amp Fuse Appliance Ground 3.15A FUSE... -
Page 24: Conditions & Exclusions
Maintenance Register your Dragon Wholesaling Limited 7 Year Warranty online at lopi.com.au or complete the enclosed Warranty card and mail it within ten (10) days of the appliance purchase date to: Dragon Wholesaling Pty. Ltd. Unit 4, 16 Lexington Drive Bella Vista NSW 2153 Australia. Dragon Wholesaling warrants this gas appliance (appliance is defined as the equipment manufactured by Travis Industries, Inc.) to be defect-free in material and workmanship to the original purchaser... - Page 25 Limited 7 Year Warranty © Travis Industries 4140115 100-01369...
-
Page 26: Index
Index Index Accent Light Replacement ....... 17 Low Battery Indicator ........13 Battery Replacement ........14 Manual On-Off / Smart Thermostat / Standard Before You Begin ..........6 Thermostat ..........11 Child-Proof Feature .......... 15 Mode Controls (Flame, Blower, Light) ..12 Continuous/Intermittent Pilot Switch ....
Need help?
Do you have a question about the 4415 HO and is the answer not in the manual?
Questions and answers