
Related Manuals for Nice SwingSmart CNX 20


Summary of Contents for Nice SwingSmart CNX 20
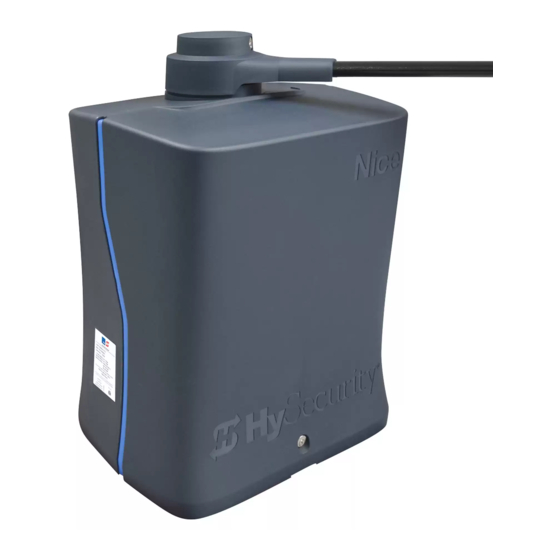
- Page 1 SwingSmart ™ SwingSmart CNX 20 Swing gate operator EN - Basic installation and programming manual...
-
Page 2: Table Of Contents
TABLE OF CONTENTS SwingSmart CNX 20 Table of Contents............. 2 Connect to The SmartCNX Installer App ....37 Safety Requirements ........3 - 10 Maintenance ............38 Features ..............11 Firmware Updates and Debug Data ...... 39 Unpack the Operator ..........12 Troubleshooting/Alerts/Faults/Errors .... -
Page 3: Safety Requirements
SAFETY REQUIREMENTS SAFETY MESSAGES COMMON INDUSTRIAL SYMBOLS The safety messages below inform you about potential These international safety symbols may appear on hazards that can result in injury. Safety messages product or in its literature to alert of potential personal specifi cally address level of exposure to operator and are injury hazards. - Page 4 SAFETY REQUIREMENTS IMPORTANT SAFETY INSTRUCTIONS Hazards, associated with automatic gates, WARNING can be reduced with proper site design, installation, and use. Installers, maintenance To reduce the risk of injury or death: crews, and owners/users must read and 1. READ AND FOLLOW ALL INSTRUCTIONS. follow the safety requirements found in HySecurity®...
- Page 5 SAFETY REQUIREMENTS IDENTIFYING GATE OPERATOR CATEGORY AND UL 325 USAGE CLASS The UL 325 standard covers gate operators. Within this safety standard several Usage Classes are described that defi ne diff erent types of installations where gate operators can be applied. Some operators are restricted in their usage application. Appropriate Usage Classes are shown in the Specifi cations.
- Page 6 SAFETY REQUIREMENTS VEHICULAR TRAFFIC ONLY WARNING This automatic gate operator is not designed nor is it intended for pedestrian traffi c. Vehicular gate operators must by their nature be powerful to function reliably. This power can cause injury or death. Accordingly, direct all pedestrian traffi c to a separate walk-through gate.
- Page 7 SAFETY REQUIREMENTS GATE CONSTRUCTION AND SAFETY Gate construction plays a very important role in ensuring The following provisions shall apply to Class I, Class the safety of any automated gate system. The standard II, Class III, and Class IV vehicular horizontal slide for gate construction is ASTM F2200.
- Page 8 • Using a suitable obstruction in the path of the All Nice HySecurity gate operators feature an Inherent gate (a solid, immovable object), run the gate in Entrapment System (IES) (UL 325 Type A) that monitors the open direction until it contacts the obstruction.
- Page 9 SAFETY REQUIREMENTS Installers must identify all potential entrapment zones and install sensors that protect these areas. Review your installation plan for entrapment zones. Install entrapment sensors anywhere within the motion of the gate or gate operator where it has a clearance less than 16 inch (41 cm). Swing Gate Potential PUBLIC Entrapment Zones...
- Page 10 SAFETY REQUIREMENTS STOP BUTTON EMERGENCY RELEASE Teach all users how to turn off electric power, loosen the The stop button clears entrapment mode and resets taper clamp, and move the gate manually. some faults, errors, and alarms. The stop button on SmartCNX operators is located on the When you set DC power to OFF: cover.
-
Page 11: Features
Additionally, confi gure email alerts to communicate issues to installer, facility or security responders. Compatible with Nice accessories. OXI receiver, ERA and INTI transmitters and BlueBUS photo eyes. MX4777 Rev. D ©2021... -
Page 12: Unpack The Operator
UNPACK THE OPERATOR UNPACK THE OPERATOR GENERAL OPERATOR DIMENSIONS 1. Open the box and remove the front cover, rear cover, photo eye, and ship-with kit. 2. Check the contents of the ship-with kit: a. Basic Manual b. UL 325 required gate safety signs and zip ties 28 1/8”... -
Page 13: Operator Position
OPERATOR POSITION NEW INSTALLATION RETROFIT INSTALLATION 1. Make sure the pad is completely level before 1. Remove any existing operator and anchor bolts. installation. 2. Check the level of the concrete pad and level it if 2. Determine the location of the operator from the gate needed. -
Page 14: Prepare An Installation Site
PREPARE AN INSTALLATION SITE GATE ASSEMBLY BRACKET Figure 3. Operator Position Right Hand Opening 24” (61.0 cm) 12” (30.5 cm) OUPTUT SHAFT CENTER 6 1/4” 3/16” (15.9 cm) (0.5 cm) 17” 7” (43.2 cm) (17.8 cm) 6 3/16” BLOCKED WHEN USING (15.7 cm) 35AH BATTERIES (TYPICAL 12 3/8”... - Page 15 PREPARE AN INSTALLATION SITE HySecurity recommends a concrete pad with a minimum 2 inch extension 3 FOOT ROUTE 6 AWG (91cm) above ground and a pad depth of EARTH GROUND MAXIMUM WIRE THROUGH 16 inches or at least to the frost line, CONDUIT AND whichever is deeper.
-
Page 16: Install Arm Assembly
GATE BRACKET INSTALL ARM ASSEMBLY LINKAGE ARMS 1. Set the DC power switch to OFF. NOTICE 2. Loosen the taper clamp bolt with the taper wrench Top cap installation requires 6 in (15 cm) of exposed (Figure 9). length of the small A arm (Figure 29). 3. - Page 17 INSTALL ARM ASSEMBLY TAPER CLAMP TIGHTEN OPERATOR TAPER LOOSEN CLAMP GATE ASSEMBLY WRENCH BRACKET TAPER CLAMP BOLT Figure 9. Taper Clamp Bolt Figure 10. Operator Arm to Figure 11. Installation and Taper Clamp Wrench Taper Clamp Dimensions Set Bolt Set Bolt Figure 12.
-
Page 18: Install And Adjust The Limit Sensors
INSTALL AND ADJUST THE LIMIT SENSORS The factory default positions of the limit sensor bracket screws ADJUST THE LIMIT SENSORS are 1 and 5 for a LEFT-HAND installation (Figure 17). 1. Loosen the taper clamp bolt with the taper bolt wrench to allow the gate and arm assembly to rotate freely (Figure 19). - Page 19 INSTALL AND ADJUST THE LIMIT SENSORS LEFT-HAND RIGHT-HAND LIMIT SENSOR BRACKETS LIMIT SENSOR BRACKETS AT 1 & 5 AT 3 & 7 TARGET MAGNET TARGET MAGNET AT 5 (CLOSE) AT 3 (CLOSE) TARGET MAGNET TARGET MAGNET AT 1 (OPEN) AT 7 (OPEN) MX4777 Rev.
-
Page 20: Attach Back Cover
ATTACH BACK COVER 1. Remove the screws holding the operator arm to the 3. Install M6 hex bolts at the front cover latch posts taper clamp (Figure 22) and set the arm assembly to (Figure 25). the side. Note: These bolts are critical to cover fit and security of Note: If the incoming power is 208V/230VAC, then set the the front cover. -
Page 21: Attach Top Cap And Adjust Taper Clamp
1. Loosen the taper clamp with the taper wrench and manually swing the gate half way between the open and close position (at least 45 degrees from close position). 2. Tighten the taper clamp 1/8th turn at a time until it only breaks free with a strong push at the end of the gate (approximately 50 lbs.). -
Page 22: Wiring And Power
WIRING AND POWER WIRING 115VAC OR 208/230VAC Operators are factory set for incoming power of 115VAC. If 208/230VAC, change the voltage switch on the power POWER supply to 230VAC with a flathead screwdriver (Figure 33 and Figure 34). ● Verify AC power supply wires and low voltage accessory wires run through separate conduits. - Page 23 WIRING AND POWER DANGER Turn off AC power at the source (circuit breaker panel) before accessing the wires in the CNX junction box. Follow facility Lock Out/Tag Out procedures. 1. Make sure both the DC and AC power switches are in the OFF position.
-
Page 24: Controller Connections
3. Hy5B OUTSIDE Loop – Reversing loop on public 19. Dual Gate Connection side. 20. BlueBUS – For use with NICE BlueBUS devices 4. Hy5B CENTER Loop – Detect vehicle in swing arc of 21. Programmable Inputs 1-3 the gate 22. -
Page 25: User Interface
USER INTERFACE Figure 41. SmartCNX Controller User Interface 1. OLED Display – 16 characters per line, 2 line display. 5. Limit Open/Close – Solid green when target magnet Displays current operator status, menus, and alerts/ activates limit sensor. faults/errors. In h6.03 and later firmware, the display 6. -
Page 26: Initial Setup
INITIAL SETUP CONFIGURE THE SETUP MENU NAVIGATE THE MENUS (SWING) Press MENU/BACK to enter the menus or to exit the current screen (up one level without saving any changes). The first time you power on the SmartCNX controller you must select an option for three settings: SET CLOCK, Press the UP or DOWN arrow to change the current USAGE CLASS, and GATE HANDING. -
Page 27: Operator Configurations
OPERATOR CONFIGURATIONS ● USAGE CLASS: UL 325 designations 1-4 (refer to OPERATOR Safety Requirements page 5) CONFIGURATIONS ● CLOSE TIMER: Number of seconds before open gate initiates closure after all inputs are clear. † USAGE CLASS 0 (GATE DISABLED) 1 (RESIDENTIAL) ●... -
Page 28: Bi-Parting Gate Setup
BI-PARTING GATE SETUP Keypad or Card Reader Mount access control devices at least 6 ft (1.8 m) beyond gate. Wind Load Factors Design gate panels to minimize wind loads. Photo Eye Earth Ground Edge Sensor Reflector for photo eye Place the WARNING WARNING Dual Gate signs on both sides of the gate. -
Page 29: Controller Inputs
INPUT 1 & 2. Edge Sensor When wiring 10k monitored inputs to INPUTS 1 or 2, the COM needs to be connected to one of the COM terminals near SENSOR 1 or 2. Photo Eye NICE BlueBUS Photo Eyes MX4777 Rev. D ©2021... -
Page 30: Entrapment Sensor Wiring - Bluebus
ENTRAPMENT SENSOR WIRING - BLUEBUS HySecurity provides one BlueBUS thru beam photo eye pair typically used as EYE CLOSE 1. Verify the jumpers on transmitter (TX) and receiver (RX) are in the same positions (Figure 44). 2. Install the BlueBUS photo eyes in appropriate locations for entrapment protection (page 9). -
Page 31: Entrapment Sensor Wiring
E-960-D90GQ Seco-Larm 90 ft max range limit 3 EDGE CLOSE (Through-Beam) 4 EYE OPEN BlueBUS Nice 65 ft max range limit 5 EDGE OPEN 6 EDGE BOTH Channel mount, high profi le AS1502-0440-05 7 NOT USED Channel mount, low profi le AS1502-0430-05 Figure 46. -
Page 32: List Of Entrapment Sensors
65 ft max range limit MX3990 Photo Eyes E-960-D90GQ Seco-Larm 90 ft max range limit (Through-Beam) BlueBUS Nice 65 ft max range limit Channel mount, high profi le AS1502-0440-05 Channel mount, low profi le AS1502-0430-05 Sentir Series ASO Safety Round, wraparound... -
Page 33: Set Ies Sensitivity
SET IES SENSITIVITY To comply with UL 325 Safety Standards, CNX operators ENTRAPMENT are equipped with a Type A, Inherent Entrapment Sensor SENSOR RESPONSE (IES). The IES software monitors the average motor current when a gate is in motion and reverses direction †... -
Page 34: Smartcnx - Hy5B Module
SMARTCNX - HY5B MODULE INSTALL AN HY5B AND VEHICLE LOOP LOOP OPTIONS DETECTOR OUTSIDE OBS LOOP 0 PAUSE ONLY † There are 4 Hy5B ports on the SmartCNX controller: Free 1 REVERSE 2 OPEN Exit, Outside Obstruction, Inside Obstruction, and Center. INSIDE OBS LOOP 0 PAUSE ONLY †... -
Page 35: Relay Outputs - Basic
RELAY OUTPUTS - BASIC The three relays on the SmartCNX Controller are 4. Press MENU on the SmartCNX Controller. configurable to perform a wide range of options for 5. Press the UP or DOWN arrow to navigate to USER integration with external devices. For more information, RELAY OUTPUTS, press SELECT, see Advanced Manual. -
Page 36: Oxi Installation And Programming
OXI INSTALLATION AND PROGRAMMING Note: The button on the OXI receiver is not needed for Remove a single fob in hand: programing fobs for the SmartCNX and should 1. Open OXI RADIO MENU OPTIONS (steps 4 - 6 to not be pressed during the following installation install OXI). -
Page 37: Connect To The Smartcnx Installer App
CONNECT TO THE SMARTCNX INSTALLER APP Set bluetooth jumper: 1. Set the DC and AC switches to OFF. 2. Remove the rubber plug or OXI receiver from OXI receiver slot (Figure 52). 3. Move the jumper or switch to the ON position. (Left two pins on three pin version or to the left on slide switch, Figure 53) 4. -
Page 38: Maintenance
MAINTENANCE MECHANICAL MAINTENANCE DC BATTERY REPLACEMENT The SwingSmart CNX requires minimal mechanical HySecurity provides a one year warranty from the date of maintenance. Check the following on a routine basis: shipment for all batteries supplied with the SwingSmart CNX operator. ●... -
Page 39: Firmware Updates And Debug Data
FIRMWARE UPDATES AND DEBUG DATA Download the firmware to a USB drive: 1. Go to support.hysecurity.com, click on Software, click SmartCNX Code vh6.##, and click h.6.##.cnx to download the .cnx firmware file. 2. Connect a USB drive to your computer. Note: FAT32 is the preferred file system for USB drives used for CNX firmware updates. -
Page 40: Troubleshooting/Alerts/Faults/Errors
TROUBLESHOOTING/ALERTS/FAULTS/ERRORS Table 7. SmartCNX Controller - Troubleshooting Display Description Possible Causes Solutions Condition Alert, Error or Fault 1. Activate any operate command. Occurs when an edge sensor or Inherent Entrapment Sensor (IES) trips. Gate binding, 2. Remove obstruction. wind, or a faulty edge sensor can cause SAFE MODE Safe Mode Alert a false alert. - Page 41 TROUBLESHOOTING/ALERTS/FAULTS/ERRORS Table 7. SmartCNX Controller - Troubleshooting Display Description Possible Causes Solutions Condition Alert, Error or Fault 1. Verify AC power. 2. Check all connections. Clean or repair as Occurs when battery voltage has dropped required. to less than 22V. At this level, batteries have 3.
- Page 42 TROUBLESHOOTING/ALERTS/FAULTS/ERRORS Table 8. SmartCNX Controller - Alerts Display Description Possible Causes Solutions Condition Alert, Error or Fault ALERT 1 FORCE Gate forced open. Gate has been forced off the full close limit Will self-clear after an open OPEN Alarm will sound. and is being prevented from re-closing.
- Page 43 TROUBLESHOOTING/ALERTS/FAULTS/ERRORS Table 8. SmartCNX Controller - Alerts Display Description Possible Causes Solutions Condition Alert, Error or Fault Caused by degrading gate hardware or A gate takes more ALERT 13 debris in track. This alert appears in history Check and correct gate power to move over STIFF GATE log.
- Page 44 TROUBLESHOOTING/ALERTS/FAULTS/ERRORS Table 9. SmartCNX Controller - Faults Display Description Possible Causes Solutions Condition Alert, Error or Fault 1. Tighten taper clamp. The motor is on FAULT 1 2. Check limit sensors. ● Taper clamp slipping longer than the MOTOR RUN TIME Replace as required.
- Page 45 TROUBLESHOOTING/ALERTS/FAULTS/ERRORS Table 10. SmartCNX Controller - Errors Display Description Possible Causes Solutions Condition Alert, Error or Fault 1. Switch limit sensor plugs or reset operator SmartCNX handing Left Hand/ ERROR 1 Controller detects Limit sensor plugs switched on drive module. Right Hand.
- Page 46 TROUBLESHOOTING/ALERTS/FAULTS/ERRORS Table 10. SmartCNX Controller - Errors Display Description Possible Causes Solutions Condition Alert, Error or Fault 1. Update controller firmware to latest Indicates version. communication ERROR 6 failure between Drive module communication failed or the 2. Verify connection DRIVE BOARD drive module drive module may have failed.
-
Page 47: Appendix A - Vehicle Detector Loops
APPENDIX A - VEHICLE DETECTOR LOOPS PUBLIC SIDE This layout illustrates a ACCESS CONTROL ENTER EXIT bi-directional traffic system with DEVICE controlled access entry (card (Card reader, etc.) reader, radio control, etc.) and a MINIMUM 6FT FROM free exit loop. The gate is closed GATE by a TIMER TO CLOSE. - Page 48 APPENDIX A - VEHICLE DETECTOR LOOPS PUBLIC SIDE ENTER EXIT This layout illustrates a ACCESS CONTROL bi-directional traffic system with DEVICE controlled access entry (card (Card reader, etc.) reader, radio control, etc.) and a MINIMUM 6FT FROM OUTSIDE OUTSIDE free exit gate. The gate is GATE closed by a TIMER TO CLOSE.
- Page 49 APPENDIX B - FRENCH TRANSLATIONS FRENCH TRANSLATIONS The following French translations provided below are found in the Safety Section located at the beginning of the manual. English French INSTRUCTIONS DE SÉCURITÉ IMPORTANTES IMPORTANT SAFETY INSTRUCTIONS AVERTISSEMENT – Pour réduire les risques de WARNING –...
-
Page 50: Appendix B - French Translations
APPENDIX B - FRENCH TRANSLATIONS English French 2.3 Install the gate operator only when: 2.3 N’installez l’ouvre-barrière que si : a. The operator is appropriate for the a. l’ouvre-barrière est approprié pour la structure construction of the gate and the usage Class of et la classe d’utilisation de la barrière;... - Page 51 APPENDIX B - FRENCH TRANSLATIONS English French 2.6 La barrière doit être bien installée et 2.6 The gate must be properly installed and work fonctionner librement dans les deux directions freely in both directions prior to the installation avant d’entreprendre l’installation de l’ouvre- of the gate operator.
- Page 52 APPENDIX B - FRENCH TRANSLATIONS English French a. Au moins un capteur de contact doit être a. One or more contact sensors shall be located situé où il existe un risque de coincement ou where the risk of entrapment or obstruction d’obstruction, comme sur le bord d’ouverture, exists, such as at the leading edge, trailing edge, sur le bord de fermeture et sur les poteaux...
- Page 53 Page intentionally left blank. MX4777 Rev. D ©2021...
-
Page 54: Warranty
6705 S 209 St, Ste 101 WARRANTY Kent, WA 98032 800-321-9947 WARRANTY www.hysecurity.com 1. Warranty. terrorism or war; or (3) damaged through improper opera�on, maintenance, storage Hy-Security Gate, Inc. (“HySecurity”) warrants that at the �me of sale each or abnormal or extraordinary use or abuse. Any modifica�on made to products will HySecurity-branded product that it sells will, in all material respects, conform to its void the warranty unless the modifica�ons are approved in wri�ng by HySecurity in then applicable specifica�on and will be free from defects in material and... -
Page 55: Specifications
Visit support.hysecurity.com for Installation manuals, replacement part instructions, part diagrams and more. Qualified Nice | HySecurity distributors are experienced and trained to assist in resolving installation problems. For the name of a qualified distributor near you, call HySecurity at 800-321-9947. *Before contacting your distributor or HySecurity Technical Support, obtain the serial number of your operator. - Page 56 Nice North America | HySecurity Gate & Barrier Division 6705 S 209th St, Ste 101 hysecurity.com Kent, WA 98032...
Need help?
Do you have a question about the SwingSmart CNX 20 and is the answer not in the manual?
Questions and answers