Table of Contents
Advertisement
Quick Links
Advertisement
Table of Contents

Subscribe to Our Youtube Channel
Related Manuals for Colorjet AURAJET II Series


Summary of Contents for Colorjet AURAJET II Series
- Page 2 Disclaimer The information and instructions provided in this manual have been checked for accuracy, uniqueness, and reliability. ColorJet group reserves all the rights to modify and revise this manual as per the company requirements without any prior notice. “No part of this document shall be reproduced or used by externals without prior permission of the ColorJet group”.
-
Page 3: Table Of Contents
Table of Contents 1. Site Layout ................................4 2. Site Preparation ..............................5 System Requirements ............................5 Tool Requirements ..............................5 Environmental Requirements ..........................5 3. Safety Requirements .............................. 6 4. Electrical Requirements ............................7 5. Preparation before Installation ..........................7 6. - Page 4 Performing the Alignment Test ..........................47 LCD Operations for Calibration ..........................48 16. Do’s and Don’t of the Machine .......................... 51 17. Troubleshooting Guide ............................52 Printer Not Initialized ............................52 Printer Manager Not Showing READY........................58 Print Stop During Printing ............................ 58 Print is Blur ................................
-
Page 5: Site Layout
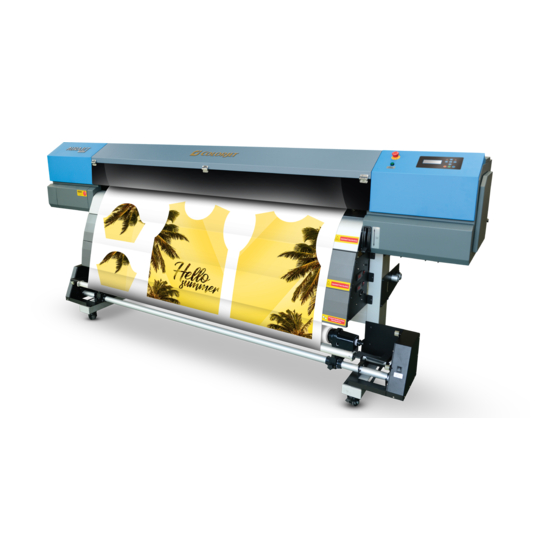
1. Site Layout The site layout of the printer is shown as below: Fig 1: Displaying the Site Layout AuraJet Series II Page | 4... -
Page 6: Site Preparation
2. Site Preparation System Requirements The system requirements for the printer manager software are given as follow: Table 1: Recommended System Requirements Requirements Specifications Operating System Windows 7 and Windows 8 Processor 64 Bits 1 GB Minimum Hard Disk Space 80 GB Tool Requirements The tool requirements for printer installation are given as follow:... -
Page 7: Safety Requirements
3. Safety Requirements Before operating the printer and Printer Manager software for the first time, please read the document carefully and follow all the usage instructions. While using the printer, kindly follow all the safety instructions which are given below: Fire Prevention Inks and solvents must be enclosed in a special storage cabinet for inflammable liquids or within a separate storage room and must be clearly identified to meet the professional requirements of safety regulations. -
Page 8: Electrical Requirements
4. Electrical Requirements Before installing the printer, the below mentioned electrical requirements should be confirmed: • Printer requires a single phase power and a good dedicated ground connection • Ground resistance should be less than 10 Ω • Power supply range should be 220V voltage (± 10%) and AC 50Hz or 60Hz •... -
Page 9: Handling Precautions
6. Handling Precautions Before operating the printer, the below mentioned instructions should strictly be followed: • Printer o Pay full attention to the box handling marks o Follow all the safety and handling precautions o Avoid excess load on the printer o Don’t touch the internal parts of the printer like ink cartridge ports o Don’t cover the ventilation area of the printer o Properly cover the printer while it is not in use... -
Page 10: Packing List Details
7. Packing List Details The checklist of the packing boxes is shown as below: Box 1 Box 2 Box 3 Box 4 Box 5 Accessories Box Upper & Lower Cartridge Dummy Box Cartridges Heater Panels Support Brackets 4/8 NOS Box 6 Box 7 Box 8 TakeUp System... - Page 11 The front view of the printer’s box is shown as follow: Box No-6 Box No-5 Box No-8 Box No-7 Fig 2: The Front View of the Printer's Box The back view of the printer’s box is shown as follow: Box No-1 Box No-3 Box No-2 Box No-4...
-
Page 12: Unpacking The Printer Box
8. Unpacking the Printer Box This is advisable that please open the printer box in the presence of a service engineer. If any damage is found in the box, kindly report the same to the dealer with their respective picture. The printer’s box and its dimensions are shown as follow: Fig 4: Displaying the Printer's Box Dimensions Open the top cover and remove the side walls, as shown below:... -
Page 13: Assembling Printer
9. Assembling Printer Assembling of the printer is done in the presence of a service engineer. The total weight of the printer, including box is above 270KG. For the safety concerns, the assembling process requires at least 6 persons. Follow these steps to assemble the printer: Step 1: Fix the screws with slider nuts in the bridge section, as shown below: Step 2: Assemble the machine legs with side stand and slide the bridge section into the side stand by aligning the slider nuts, as shown below:... - Page 14 Step 4: Lift the upper main body of the printer and place it on the stands, as shown below: Step 5: Press the locking device on the wheel till it touches the ground, as shown below: Step 6: Place the upper body of the printer on the stand so that its screw holes align with the side stand, as shown below: AuraJet Series II Page | 13...
- Page 15 Step 7: Fix the media supply brackets, as shown below: Step 8: Insert the pipes into both sides of the supply brackets, as shown below: Step 9: Insert the supply pipes into the other side bracket and fix the screws, as shown below: AuraJet Series II Page | 14...
- Page 16 Step 10: Install the waste bottle holder, as shown below: Step 11: Fix the extended heater mounting brackets, as shown below: Step 12: Fix the extended heater base cover. Step 13: Fix the heater controller cover, as shown below: AuraJet Series II Page | 15...
- Page 17 Step 14: Fix both the extended heaters, as shown below: Step 15: Fix the Take-Up assembly on the base stand legs, as shown below: Step 16: Fix the ink cartridge supporter, as shown below: AuraJet Series II Page | 16...
- Page 18 Step 17: Install the sublimation kit (If applicable), as shown below: AuraJet Series II Page | 17...
-
Page 19: Head Installation
10. Head Installation Use this section, if print head is not installed in the printer. The installation of print heads is done only by a service engineer. If the print head is not installed correctly, it can affect the printing quality and damage the critical parts of the printer during printing. Note: Don’t apply much pressure on print head while installing it. - Page 20 Step D: Mount the Print Head on the Head Carriage Plate The Head Carriage Plate (for single print head) is shown below: Fig 7: The Head Carriage Plate (for Single Print Head) Fix the print head on the Head Carriage Plate (Refer to Fig 8). Fix the print head screws gently with the help of screw driver provided with the printer, as shown below: Fig 8: Fixing the Print Head Screws Note: Fix the screws as per the given numbering.
- Page 21 Step E: Ready the Head Dampers Follow these steps to ready the head dampers: 1. Insert the nut into the damper pipe. 2. Insert the o-ring into the damper pipe. 3. Insert the pipe in the damper. 4. Fix the nut with the damper, as shown below: Fig 9: Displaying the Damper AuraJet Series II Page | 20...
- Page 22 Step F: Fix All the Dampers and Pipes on the Print Head Fixing the damper on the print head, as shown below: Fig 10: Fixing Damper over the Print Head Similarly, fix other dampers on the print head. Step G: Connect the Head Cable to the Head Board Gently insert the other end of the head cables in the head board by following the cables’...
- Page 23 The line diagram of the Head Cable connection is shown in the image below: Fig 12: The Line Diagram of the Head Cable Connection In the above diagram, the connection between the head board and head cables are shown. Thus, it is advisable to carefully observe the connection diagram and establish the connection by matching the terminal numbering at both ends (print head and head board).
-
Page 24: Ink Filling
11. Ink Filling Please use the recommended ink in the printer for high printing quality and long life of it. Follow these steps to fill ink in the cartridges: Step A: Insert Cartridges in the Cartridge System The Cartridge System is shown in the below figure: Fig 13: Displaying the Cartridge System Insert a cartridge in the Cartridge System, as shown below: Fig 14: Inserting a Cartridge... - Page 25 Step B: Fill Ink in All the Cartridges by Fixing the Ink Bottle Upside Down onto the Junction / Socket The inserted cartridge is shown in the image below: Fig 15: Displaying the Inserted Cartridge Insert the ink bottle in the cartridge (Refer to Fig 16) by gently pushing it. By holding the ink bottle and pushing it down, move the knob anti-clock wise to lock the ink bottle with cartridge, as shown below: Fig 16: Locking the Ink Bottle in the Cartridge Note: To unlock, move the knob in the clock wise direction.
- Page 26 Step C: Switch on the Printer Power on the printer from the front panel. Step D: Check the Captop Alignment Carefully observe the alignment of the Captop and the print head. If the Captop is not aligned correctly with the print head, then ink will not be sucked up by the captop and also not reach to the dampers.
- Page 27 Step F: Issue the Fill Command from the LCD Screen Follow these steps to start the ink filling process: 1. Switch on the printer. 2. Press the Menu button. 3. Select the Head Cleaning option from the menu list, as shown below: Fig 19: Selecting the Head Cleaning 4.
- Page 28 7. Select the Fill option from the list, as shown below: Fig 22: Selecting the Fill Option Now, the ink filling process gets started. Observe the process carefully, if ink is not reached to the dampers, then again check the alignment settings between the Captop and the print head. Some of the reasons in which you need to adjust the settings between the captop and the print head are given as follows: •...
- Page 29 The clean parameter settings window is shown in the below image: Fig 23: The Clean Parameter Settings Window AuraJet Series II Page | 28...
-
Page 30: Installing Printer Manager
12. Installing Printer Manager Before installing the printer manager software, please confirm that the DotNet framework is available in your system. If it is not installed, then first install it. Follow these steps to install the DotNet framework: Step 1: Insert the installer CD in the CD-ROM. Step 2: Double-click on the DotNet_FrameWork_4 icon to start the installation process. - Page 31 The initial screen of the DotNet framework installation window appears as shown below: Fig 26: The Initial Screen of the DotNet Frame Work Installation Now, the installation process gets started and the Setup window appears on the screen. Step 4: Click on the Install button on the Setup window. The Installation Progress window appears, as shown below: Fig 27: Displaying the Installing Process Progress On completing the installation process, the Installation Is Completed window appears.
- Page 32 Step 5: Click on the Finish button to complete the DotNet Framework installation process, as shown below: Fig 28: Displaying the Installation is Completed window Now, the DotNet Framework 4 is installed in your system. Let’s discuss the installation of the printer manager software.
- Page 33 Immediately after the Windows Installer screen, the Welcome to the PrinterManager Setup Wizard appears, as shown below: Fig 30: The Welcome Printer Manager Setup Wizard Step 2: Click on the Next button to start the installation of the printer manager (Refer to Fig 30). The Select Installation Folder window appears as shown below: Fig 31: The Select Installation Folder Window Step 3: Click on the Browse button to navigate to the location where you want to store all the setup files and then...
- Page 34 The Confirm Installation window appears, as shown below: Fig 32: The Confirm Installation Window Step 4: To confirm the printer manager installation, click on the Next button (Refer to Fig 32). The User Account Control window appears on the screen, as shown below: Fig 33: The User Account Control Window Step 5: Click on the Yes button to confirm that it an authorized program installation (Refer to Fig 33).
- Page 35 The Installing Printer Manager window appears and displays the progress in installation, as shown below: Fig 34: The Installing Printer Manager Window The above window shows the progress of the installation process. When the installation process completed, the Next button gets enabled. Step 6: Click on the Next button to complete the installation process (Refer to Fig 34).
- Page 36 Now, the Printer Manager software is installed on your system and a shortcut for the Printer Manager appears on the desktop. To open the Printer Manager screen, double-click on it. The Printer Manager window appears as shown below: Fig 36: Displaying the Printer Manager Window Note: To open the printer manager window, you must connect the printer with the system (Laptop) using the USB cable and switch on it from the front panel (Printer Front Panel).
-
Page 37: Advanced Operations
13. Advanced Operations In this section, several advanced options viz. Quality, Head Parameter, Disable Head, and Language are discussed to improve the printing quality and head firing parameter of the machine. Note: Head Parameter and Disable Head options are only used by the service engineer. Quality The Quality option is used for enhancing the printing quality and controlling some additional features of the printer. -
Page 38: Head Parameters
To specify the feather level, you have to select the Feather Level option from the given list of items (Refer to Fig 37). On selecting the Feather Level option, the following screen appears as shown below: Fig 39 Sub-Options Related to the Feather Level Option Note: Prefer to select the Feather Strong and Feather SupStrong (Feather Huge) along with Feather Intensity) option. -
Page 39: Head Alignment
14. Head Alignment If heads are pre-installed, then need not to perform the alignment but it recommended to cross the alignment settings using the below mentioned tests. To improve and enhance the printing quality, you must carefully align the print head. The head alignment process for single and dual heads consists the following five tests: •... - Page 40 The head interleave test and position of print head are shown in the image below: Top View of the Print Head Fig 42: The Head Interleave Test and Head Position in it Let’s see the actual result of the head interleave test. The head interleave test result is shown in the below figure: Fig 43: The Head Interleave Test In the above figure, the base reference color is Black (best known as K).
-
Page 41: Head Slant Test (Angle Test)
Head Slant Test (Angle Test) The head slant test or angle test checks whether the print head is properly placed on the head plate or not. There are several reasons through which print head is not parallel to the printing platform. Sometimes, it may happen that screws on the print head are not fixed or tighten correctly. -
Page 42: Head Space Alignment
Head Space Alignment The Head Space alignment test checks the spacing between two heads of the machine. If two heads are not placed horizontally correct, then they can hamper the printing quality. After getting the head space alignment result, observe the printed patterns and select the best pattern from all the available. Enter the correction value in the given field in the LCD control panel screen to align the head. -
Page 43: Horizontal Adjustment
Note: Feed Adjustment test should be done for every pass. Thus, before performing this test, select the pass in which printing has to be done. Horizontal Adjustment This adjustment calibrates all the color channels with respect to the base color so that each color is properly aligned with others. - Page 44 The BI Direction test result is shown in the image below: Fig 49: The BI Direction Test Result From the above figure, check all the test patterns and select the one that is aligned correctly. After that, fill this correction value in the given field using the LCD control panel. Moreover, you should calibrate the printer for each mode in which printing has to be done.
-
Page 45: Head Alignment Process Description
15. Head Alignment Process Description Before aligning the print head, you should first enable the service mode (Refer Enabling the Service Mode section). The print head is aligned in two ways viz. physical and software alignments. The print head alignment categorization is shown as follow: •... - Page 46 The head alignment process diagram is shown as follow: Enable the Service Mode For Dual Heads For Single Head Head Interleave (1 Head) Head Interleave Test Head Slant Test Head Slant (1 Head) Horizontal Adjustment Head Interval (Adjusting 2 (Includes Left, Right, and Bi- head) Direction) Head Interleave (Adjusting...
-
Page 47: Enabling The Service Mode
Enabling the Service Mode The head alignment process can only be performed when service mode is ON in the printer. Perform the following steps to enable the service mode: Step 1: Press the Menu key. Step 2: Select the System option from the menu list, as shown below: Fig 50: Selecting the System Option Step 3: Enter the password (or contact Head Office (HO) for the password), as shown below: Fig 51: Entering the Password... -
Page 48: Performing The Alignment Test
Performing the Alignment Test Follow these steps to perform the head alignment tests: Step 1: Press the menu key. Step 2: Select the Adjustment option from the menu list. Fig 52: Selecting the Adjustment Option The list of calibration options viz. Dot Check, Interleave Check, Head Slant Check, and more, as shown below: Fig 53: Displaying the Head Calibration Options Step 3: Select the alignment test one by one and then press the OK button from the LCD panel. -
Page 49: Lcd Operations For Calibration
LCD Operations for Calibration Head Space Alignment Follow the Menu→Adjustment→Head Space Alignment path. The following screen appears as shown below: Fig 55: The Head Space Alignment Select the High Speed option from the screen (Refer to Fig 55). Select the VSD 3 option from the list, as shown below: Fig 56: The List of High Speed Options The Correction Value screen appears where you have to enter the correction value and recheck it, as shown below:... - Page 50 Feed Adjustment Follow the Menu→Adjustment→Feed Adjustment path. The following screen appears, as shown below: Fig 58: The Feed Adjustment Screen Select the Pass Number option from the Feed Adjustment screen (Refer to Fig 58) for which adjustment is to be done.
- Page 51 Horizontal Adjustment Follow the Menu→Adjustment→Horizontal Adjustment path. The following screen appears, as shown below: Fig 60: The Horizontal Adjustment Screen If the Left Alignment option is selected, then the following screen appears as shown below: Fig 61: The Left Alignment Similar for the Right Alignment option.
-
Page 52: Do's And Don't Of The Machine
16. Do’s and Don’t of the Machine Do’s • Perform Nozzle test daily before using the machine • Use only the recommended ink in the machine • Check and refill the ink cartridge regularly to avoid air lock • Check the waste bottle regularly •... -
Page 53: Troubleshooting Guide
17. Troubleshooting Guide Printer Not Initialized Reasons: 1. Head Board power supply incorrect 2. Initialization of the Wiper and Capping is incomplete or stuck 3. Carriage Motor not ON or faulty 4. Carriage Safety switch is activated 5. Home, Wiping, and Capping sensors are not working 6. - Page 54 Case 2: Initialization of the Wiper and Capping Station is Incomplete or Stuck a) Clean and lubricate the main parts of the Wiper and Capping station. b) Replace any part of it if required. Case 3: Carriage Motor not ON or Faulty a) Check and fix the Power Connector.
- Page 55 b. Loosen all the mounting screws (four screws) on the Carriage Motor, as shown below: Fig 65: Loosing the Mounting Screws c. Remove the Pulley on the Carriage Motor, as shown below: Pulley Fig 66: Removing the Pulley a. Remove the Carriage Motor gently. b.
- Page 56 Case 5: Home, Capping, and Wiping Sensors are Not Working a) Check the Sensing Brackets, if bend. b) Check the Connector and fix it, if not connected. c) Replace the Home, Wiping and Capping Sensors, if faulty. Case 6: Capping and Wiping Motor not Working a) Replace the Gear and Belt, if not working smoothly.
- Page 57 e. Replace the Capping Motor by reversely following all the above mentioned steps. Note: By following the same procedure, you can also replace the pulley, gear, and belt. Steps to change the Wiping motor: a. Loosen both screws on the Motor Bracket, as shown below: Fig 69: Loosing the Wiping Motor Screws Now, the Wiping Motor can easily be removed.
- Page 58 Case 8: Main Board is Faulty or it’s Settings are Incorrect a) Replace the Main Board and gets corrected its factory settings. The Main Board is shown in the image below: Fig 70: Displaying the Main Board Case 9: Head Board is Faulty a) Replace the Head Board, if required.
-
Page 59: Printer Manager Not Showing Ready
Printer Manager Not Showing READY Reasons: 1. USB cable is loosely connected to the printer 2. USB cable is faulty 3. Printer not initialized Remedial Actions: Case 1: Tighten the USB cable. Case 2: Replace the USB cable, if faulty. Case 3: Please refer “Printer Not Initialized”... - Page 60 c. Loosen the screws available on the other side of the Encoder Scale to remove it, as shown below: Fig 73: Loosing Encoder Scale Screw d. Gently remove the Encoder Scale. e. Measure the Encoder Scale length and cut it as per the requirements. Replace the scale by reversely following all the above given steps.
-
Page 61: Print Is Blur
e. Remove the Head Board by loosing its screws. Now, you are able to access the Encoder Sensor. Remove Encoder Sensor gently and replace it. While replacing the Encoder Sensor, align the sensor centrally with respect to the Encoder Scale. Case 6: Replace the Pulley (Refer to the Carriage Movement is not Smooth section). -
Page 62: Lines In Print
2 - Post Heater: Procedure: a. Remove all the screws from both ends of the Heater Cover. b. Disengaged the Heater Connector. c. Remove the Heater by peeling it off. d. Replace the heater by reversely following the above mentioned steps. 3 - Extended Heater 1: Procedure: a. - Page 63 Remedial Actions: Case 1: Perform the Nozzle Test (Refer to the Nozzle Testing section). Case 2: Use the Feed Adjust option to adjust the feed value (Refer to the Print Head Calibration section). Case 3: Correct the alignment settings by following steps mentioned in the Head Alignment section. Case 4: Tighten the Connectors from both places viz.
- Page 64 Case 7: Replace the Feed Motor, if faulty. Procedure: Steps to replace the Feed Motor: a. Remove the side cover. b. Disconnect the Control Panel connector by removing it. c. Disconnect the Power ON/OFF connector. d. Remove both screws on the Control Panel board. e.
-
Page 65: Printed Image Is Shifting Or Junk Printing
g. Loosen all the screws on the motor and hold the motor (Refer to Fig 80). h. Lift up the motor and remove the attached belt gently, as shown below: Belt Fig 80: Loosing the Belt Remove all the screws on the motor (Refer to Fig 80). Remove the motor and replace it by reversely following all the above given steps. -
Page 66: Heaters Not Working
Heaters Not Working Reasons: 1. Check heater continuity Remedial Actions: Case 1: Check and replace the heaters if required (Refer to Case 2 of the Print is Blur section). Ink Not Reached to the Damper Reasons: 1. Ink level is low in cartridges 2. -
Page 67: Head Not Firing
Head Not Firing Reasons: 1. Head is not getting cleaned 2. Insufficient power supply to the Head Board 3. No ink in dampers 4. Print Head is disabled 5. Print Head is faulty 6. Head Cables are faulty Remedial Actions: Case 1: Perform the Nozzle Testing to clean the nozzles (Refer to the Nozzle Testing section). - Page 68 Carriage Belt Procedure: Steps to replace the Carriage Belt: a. Loosen the belt tensioner screws, as shown below: Belt Tensioner Screws Fig 81: Loosing the Tensioner Screws b. Remove both screws on the Carriage Plate from both ends, as shown below: Carriage Plate Screws Fig 82: Removing the Carriage Plate Screws c.
- Page 69 Idle Pulley Procedure: Steps to replace the Idle Pulley: a. Perform the above mentioned steps a to c. b. Press the Pulley Shaft to remove it, as shown below: Pulley Shaft Fig 83: Pressing Pulley Shaft c. Remove the Pulley and replace it by reversely following the above mentioned steps. Double Pulley Procedure: a.
- Page 70 Case 3: Correct Motor parameters. Case 4: Replace LM block, if required. Procedure: Steps to replace the LM Block: a. Disengaged the Capping Unit. b. Switch OFF the printer. c. Remove the front and top covers of the Carriage. d. Remove the Y connectors from the Pipe Separator Unit, as shown below: Y Connector Fig 85: Displaying the Y Connector e.
-
Page 71: Ink Spot In Printing
g. Remove the top Carriage Plate by loosing both screws. h. Remove the carriage belt by loosing both screws from both ends. Remove all the LM screws (four screws). Now, you are able to view the LM Block, as shown below: LM Screws Fig 87: Removing LM Screws Remove the LM block and replace it by reversely following all the above mentioned steps. -
Page 72: Cleaning Pump Not Working
Case 2: Check Vacuum and replace Blower, if required. Procedure: Steps to replace the Blower: a. Disengage both the Extended heaters by removing its screws and disconnecting the attached connectors. b. Disengage the Post heater by removing its screws and disconnect the attached connectors. c. - Page 73 Case 6: Replace the Pump if required Procedure: Steps to replace the pump: a. Remove the IN and OUT pipes from the pumps, as shown below: IN & OUT Pipes Fig 88: Displaying Pump Pipes and Bracket Screw b. Remove the IN and OUT connectors gently, as shown below: IN &...
-
Page 74: Carriage Left Movement Command Not Working
Carriage Left Movement Command not Working Reasons: 1. Loose connection of wire between Motor and Main Board 2. Encoder Scale is damaged 3. Encoder Sensors are faulty Remedial Actions: Case 1: Check the connection and tighten the wire. Case 2: Replace the Encoder Scale (Refer Case 4 of the Print Stop During Printing section). Case 3: Replace the Encoder Sensors (Refer Case 5 of the Print Stop During Printing section). -
Page 75: Error Handling
18. Error Handling Error Name Error Code Error Description #define STATUS_SVC_SX2 (STATUS_SVC+0) USB Chip: USB chip can’t run normally after 0.5 second as it may possible that the USB chip is damaged. #define STATUS_SVC_FPGA0 (STATUS_SVC+1) FPGA Chip 1: The STATUS keeps on the high level after Power ON. - Page 76 Error Name Error Code Error Description #define (STATUS_FTA+4) This error occurs when the quantity of STATUS_FTA_INTERNAL_BANDDATASIZE band data and actual band data is different in the Band Header. #define (STATUS_FTA+5) This error occurs when the format of STATUS_FTA_INTERNAL_WRONGFORMA serial port data is wrong. #define (STATUS_FTA+6) This error occurs when DMA0 still...
- Page 77 Error Name Error Code Error Description This error occurs when the board is not #define STATUS_FTA_FACTORY_DATA (STATUS_FTA+19) processed factory initialization settings. #define This error occurs when the Head Board is STATUS_FTA_HEADBOARD_RESET (STATUS_FTA+20) restarted. #define STATUS_FTA_SPECTRAHVBINITS1 (STATUS_FTA+21) Spectra High Voltage Board: This occurs when the first stage initialization gets failed.
- Page 78 Error Name Error Code Error Description #define STATUS_FTA_NOT_SUPPORT_2C_SHARE_ This error occurs when the current (STATUS_FTA+34) setting does not support one head. #define STATUS_FTA_LIMITEDINK_RUNOUT (STATUS_FTA+35) This error occurs when ink gets finished or out of ink limit. #define This error occurs when the Firmware STATUS_FTA_SWVERSION_ERR_INK_PW requests for the PM version which (STATUS_FTA+36)
- Page 80 For Any Query Please Contact Us www.colorjetgroup.com Call on +91-120-4548195 Email on info@colorjetgroup.com For Ink Enquiry:- sales@colorjetgroup.com For Support:- support@colorjetgroup.com...
Need help?
Do you have a question about the AURAJET II Series and is the answer not in the manual?
Questions and answers