Kwikset HomeConnect 620 Installation Manual
Keypad electronic smart lock
Hide thumbs
Also See for HomeConnect 620:
- Frequently asked questions and troubleshooting manual (9 pages) ,
- Installation and user manual (4 pages)
Advertisement
Advertisement

Related Manuals for Kwikset HomeConnect 620


Summary of Contents for Kwikset HomeConnect 620
- Page 1 English / Spanish 69371-003 Rev 03 Installation Guide...
- Page 2 Welcome to the Kwikset family! This guide will get you up and running with your new Home Connect 620 Smart Lock. If you have any issues, please visit our support center: kwikset.com/support or call us at 1-866-863-6584.
-
Page 3: Table Of Contents
Table of contents Parts in the box ..........2 Required tools ..........3 Installation ............5 Smart home system setup......15 Reference guide ..........17... -
Page 4: Parts In The Box
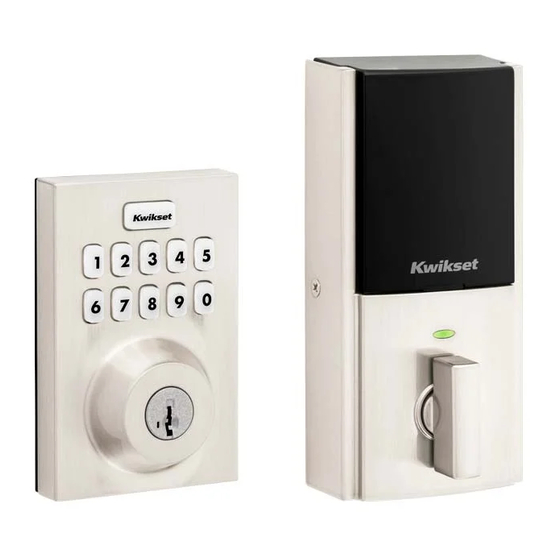
Parts in the box Exterior assembly Battery pack Interior assembly Interior cover Step actual 03809 size Latch Step actual 46780 size Strike... -
Page 5: Required Tools
Required Step Step tools actual 69316 Mounting size plate Keys Adaptor ring actual 68272 size Step Batteries SmartKey™ tool actual 68611 size Phillips head screwdriver No electric drills... -
Page 6: Installation
Installation... - Page 7 Remove your existing deadbolt and strike 1-3/8” to 2” (35mm - 51mm) 2-1/8” (54mm) If drilling a new door, use the supplied template and instructions available at: kwikset.com/doorprep...
- Page 8 Install the latch Extend the latch bolt. If your door requires a drive-in latch, please contact Kwikset at 1-866-863-6584. UP is on top. 03809* (2X) If the D-shaped hole is not centered in the door hole, rotate the latch face to extend the latch.
- Page 9 Install the strike 46780* (4X) *Install the longer screws closest to the door jamb. DOOR JAMB 1" (25 mm) hole depth...
- Page 10 Install the exterior assembly [OUTSIDE] If the hole in the door is 2-1/8" Cable goes under the latch. (54 mm), install the adapter ring. If the hole in the door is 1-1/2" (38 mm), the adapter ring is not needed.
- Page 11 [INSIDE] Keep parallel to the door edge Tighten the screws evenly. DO NOT over-tighten. 68272 Make sure the torque blade is centered in the (2X) mounting plate hole. Route the cable Push the cable into Insert the key and through the center the bottom hole of test the latch.
- Page 12 Install the interior assembly Make sure the turnpiece shaft is pointing up as shown below. Remove the interior cover from the interior assembly. MMMYYWWSSSSSSS Incorrect: If the turnpiece shaft is not pointing up, put the cover back on and rotate the turnpiece until you hear a click.
- Page 13 Connect the cable. Ensure a tight cable connection. align Secure the interior assembly onto the mounting plate. Lay cable flat inside the bottom of the interior housing. 69316 (2X) Ensure the spindle Note: The remaining fully engages with the turnpiece shaft. three screws will be used in the next step.
- Page 14 Perform the door handing process With the door open, install Install 4 AA batteries into the battery pack. the battery pack to initiate auto-handing. NOTE: Lock must be installed on the door before installing the battery. The latch will retract and extend to learn the orientation of the door.
- Page 15 You may need to rotate the turnpiece to align with the Secure the interior turnpiece shaft. cover onto the interior assembly. For additional security, you may 69316 choose to lock the window by installing the security screw. (3X) When the window is locked, you will need to remove the entire cover to access the battery pack and buttons.
-
Page 16: Smart Home System Setup
Smart Home System Setup... - Page 17 “A” on the lock one time. MMMYYWWSSSSSSS Perform steps A-C again. 5-digit PIN If still unsuccessful, consult the Programming and Troubleshooting Guide on the Home Connect 620 page at kwikset.com/support.
-
Page 18: Reference Guide
Reference Guide... - Page 19 Add user codes (250 max) During programming, if no button is pressed for five seconds, the system will time out (indicated by three beeps and a red flashing Kwikset button), and you will need to restart the procedure. Make sure Enter user code.
- Page 20 Factory reset A Factory Reset will delete all codes associated with the lock and the lock’s network settings but will not remove the lock from the panel. Please run the Exclusion process to properly remove this lock from the network before performing a Factory Reset. Please use this procedure only when the network primary controller is missing or otherwise inoperable.
- Page 21 Manual Door Handing If needed, the door handing process can be initiated manually. This is useful if the lock is being moved to a different door. 1. Remove battery 2. Press and HOLD pack. the “Program” button while reinserting the battery MMMYYWWSSSSSSS MMMYYWWSSSSSSS pack.
- Page 22 Interior (cover removed) Kwikset button 1-Touch Locking Battery pack MMMYYWWSSSSSSS Keypad Button “A” “Program” button Status LED SmartKey™ tool access Turnpiece shaft Keyway Troubleshooting If you have any issues, please visit our support center: kwikset.com/support or call us at 1-866-863-6584.
- Page 23 Z-Wave device. And, regardless of the vendor, always powered nodes may act as a repeater for Kwikset/ Weiser/Baldwin products. Z-Wave Configuration and Association Parameters are available on the...
- Page 24 Important Safeguards 1. Read all instructions in their entirety. 5. If using the Auto-Lock features, make sure you have your smartphone or standard key with you 2. Familiarize yourself with all warning and to prevent locking yourself out. caution statements. 6.
Need help?
Do you have a question about the HomeConnect 620 and is the answer not in the manual?
Questions and answers
can i order a new batter holder, and how