SCHUNK SPG 100 Assembly And Operating Manual
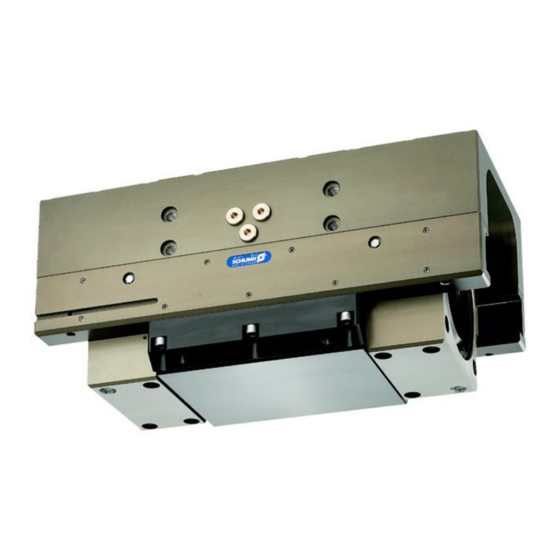
2-finger-parallel gripper
Hide thumbs
Also See for SPG 100:
- Assembly and operational manual (32 pages) ,
- Assembly and operating manual (32 pages)

Related Manuals for SCHUNK SPG 100


Summary of Contents for SCHUNK SPG 100
- Page 1 Translation of the Original Operating Manual 2-Finger-Parallel Gripper SPG 100 Assembly and Operating Manual Superior Clamping and Gripping...
- Page 2 Imprint Copyright: This manual remains the copyrighted property of SCHUNK GmbH & Co. KG. It is solely supplied to our customers and operators of our products and forms part of the product. This documentation may not be duplicated or made accessible to third parties, in particular competitive companies, without our prior permission.
-
Page 3: Table Of Contents
8.2 The module does not travel through the entire stroke? ........22 8.3 Module opens or closes abruptly? ................. 23 8.4 The gripping force drops? ..................23 8.5 Module does not achieve the opening and closing times? ........24 9 Maintenance and Care .................... 25 01.02|SPG 100|en... - Page 4 9.5 Servicing and assembling the module ..............27 9.5.1 Screw tightening torques ................27 10 Assembly drawing ....................28 11 Seal kit ........................29 12 Accessories kit ......................29 13 Translation of original declaration of incorporation ..........31 01.02|SPG 100|en...
-
Page 5: About This Manual
Non-compliance may cause irreversible injury or death. CAUTION Dangers for persons. Non-observance may cause minor injuries. NOTICE Information about avoiding material damage 1.1.2 Symbols Warning about a danger point Warning about hand injuries General mandatory sign to prevent material damage 01.02|SPG 100|en... -
Page 6: Variants
• General terms of business • Catalog data sheet of the purchased product • Assembly and Operating manuals of the accessories • Calculation program for gripping modules (SSG) The documents listed here, can be downloaded on our homepage www.schunk.com 01.02|SPG 100|en... -
Page 7: Basic Safety Notes
( 6, Page application parameters 13). SCHUNK assumes that application in question was tested with the calculation program for gripping modules (SSG). The product is designed for industrial use. To use this unit as intended, it is also essential to observe the technical data and installation and operation notes in this manual and to comply with the maintenance intervals. -
Page 8: Product Safety
2.4.3 Constructional changes, attachments, or modifications Additional drill holes, threads, or attachments that are not offered as accessories by SCHUNK may be attached only with permission of SCHUNK. Personnel qualification The assembly, initial commissioning, maintenance, and repair of the product may be performed only by trained specialist personnel. -
Page 9: Using Personal Protective Equipment
• Perform maintenance, modifications, and additions outside the danger zone. • Secure the product during all operations against uncontrolled activation. • Take a precautionary approach by maintenance and disassembly. • Only specially trained staff should disassemble the product. 01.02|SPG 100|en... - Page 10 ! WARNING Risk of injury from objects falling and being ejected • The danger zone must be surrounded by a safety fence during operation. WARNING While disassembling uncontrollable moves of parts of the gripper possible! 01.02|SPG 100|en...
-
Page 11: Warranty
Parts touching the work piece and wear parts are not part of the warranty. If necessary, check the application with the calculation program for gripping modules (SSG). Scope of delivery The scope of delivery includes: • 2-Finger-Parallel Gripper SPG in the ordered model. • Accessory pack 01.02|SPG 100|en... -
Page 12: Accessories
• Exact type designation of the compatible sensors see ☞ catalog. • If you require further information on sensor operation, contact your SCHUNK contact person or download information from our homepage. • For mounting the sensors, mounting kits are partly necessary. -
Page 13: Technical Data
Technical data Technical data Designation SPG 100 Min. pressure [bar] Max. pressure [bar] Nominal working pressure [bar] Stroke per jaw [mm] Closing force [N] 10000 Repeatability [mm] Ambient temperature [°C] Min. - 10 Max. + 90 Weight [kg] IP rating... -
Page 14: Configuration
Thread diameter and max. depth of engagement of the fastening thread: for gripper fastening from above M12 / 23 deep for lateral gripper fastening M12 / 23 deep for finger fastening from below M12 / 21 deep for lateral finger fastening M12 / 25 deep 01.02|SPG 100|en... -
Page 15: Air Connection
R1/4" / 15 deep for air purge connection • Only open the air connections required. • Seal air connections not required using the locking screws from the enclosed pack. • For hose-free direct connections use the two O-rings from the enclosed pack. 01.02|SPG 100|en... -
Page 16: Sensors
Configuration Fig. 3 SDV-P 07 from accessories supplied Valve SDV-P 07 from accessories supplied In case of design SPG 100 SDV-P please note: The gripper has to be connected as shown on the adjoining circuit diagram. Sensors The module is prepared for a number of sensors. Other sensors can be used with a mounting kit. -
Page 17: Programmierbarer Magnetschalter Mms 30
For example: Adapter plate made of ordinary steel. At ferromagnetic adapter plates: • The module must firstly be mounted on the adapter plate • Then, the positions of the magnetic switch have to be set Fig. 6 Magnetic switch 1 Magnetic switch 2 01.02|SPG 100|en... - Page 18 1 Clamp the part to be gripped. 2 Proceed as described under Points 2 – 4 under »Gripper closed«. Part gripped (I.D. gripping): 1 Clamp the part to be gripped. 2 Proceed as described under Points 2 – 4 under »Gripper closed«. 01.02|SPG 100|en...
-
Page 19: Inductive Proximity Switch In 80
• Parallel switching of several sensor outputs of the same type (npn, pnp) is permissible, but does not increase the permissible load current. • Note that the leakage current of the individual sensors (ca. 2 mA) is cumulative. 01.02|SPG 100|en... - Page 20 Configuration Mounting of the mounting kit Fig. 8 Attachment set SPG 100: ID number 0300765 Designation Quantity Control cam Nutenstein Bracket Screw Countersunk screw 1 Fasten the control cam (3) on the base jaw (1) with the screws (2).
- Page 21 2 Undo the countersunk screws (5) and shift the bracket (6) with the proximity switch 2 away from the centre of the gripper until the proximity switch is activated. 3 Proceed as described under Points 3 – 4 under »Gripper closed«. 01.02|SPG 100|en...
-
Page 22: Troubleshooting
Open the flow control valve. Component is broken, e.g. through Replace component or send the module overloading with a repair order to SCHUNK. Ensure that the module was only used within its defined application parameters.If necessary, check the application with the calculation program for gripping modules (SSG). -
Page 23: Module Opens Or Closes Abruptly
Check seals, if necessary disassemble module and replace seals. Too much grease in the mechanical motion Clean the module and relubricate it. ( 9, Page 25) spaces of the module Pressure drops below minimum. Check the air supply. ( 7.2, Page 15) 01.02|SPG 100|en... -
Page 24: Module Does Not Achieve The Opening And Closing Times
If, despite of optimal air connections, the opening and closing times are not achieved according to the catalog, we recommend the use of quick exhaust valves direct at the module. Load too high Review permissible weight and length of the jaws. 01.02|SPG 100|en... -
Page 25: Maintenance And Care
Replacement of housing and base jaws The base jaws and the guides in the housing are matched to each other. To have these parts replaced, send the complete module along with a repair order to SCHUNK. Maintenance and service intervals NOTICE At ambient temperature above 60°C the lubricants can... -
Page 26: Disassembly Of The Gripper
(16), or the sealing bolt (12) out of the piston rod (5). 12 Clean all parts thoroughly and check all parts for defects and wear. 13 Replace all seals according to the seal kit list. The gripper is assembled in reverse order. 01.02|SPG 100|en... -
Page 27: Servicing And Assembling The Module
Loctite no. 243 and tighten with the appropriate tightening torque.( 9.5.1, Page 27) 9.5.1 Screw tightening torques ( 10, Page 28) Position of the position numbers Screw tightening torques Item SPG 100 45 Nm 20 Nm 25,5 Nm 25,5 Nm 01.02|SPG 100|en... -
Page 28: Assembly Drawing
Assembly drawing Assembly drawing Fig. 9 Wearing part, replace during maintenance. Included in the seal kit. Seal kit can only be ordered completely. 01.02|SPG 100|en... -
Page 29: Seal Kit
Accessories kit Seal kit ID.-No. of the seal kit Seal kit for ID number SPG 100 0370889 SPG 100 - High-temperature-version [HT] 39370889 ( 10, Page Contents of the seal kit 28). Accessories kit Content of the accessories pack: • 3x O-ring •... - Page 30 Notes Notes 01.02|SPG 100|en...
-
Page 31: Translation Of Original Declaration Of Incorporation
Translation of original declaration of incorporation in terms of the Directive 2006/42/EG, Annex II, Part 1.B of the European Parliament and of the Council on machinery. Manufacturer/ SCHUNK GmbH & Co. KG Spann- und Greiftechnik Distributor Bahnhofstr. 106 – 134 D-74348 Lauffen/Neckar... - Page 32 01.02|SPG 100|en...
Need help?
Do you have a question about the SPG 100 and is the answer not in the manual?
Questions and answers