Table of Contents
Advertisement
Quick Links
Advertisement
Table of Contents

Subscribe to Our Youtube Channel
Related Manuals for Bosch COA565G.0


Summary of Contents for Bosch COA565G.0
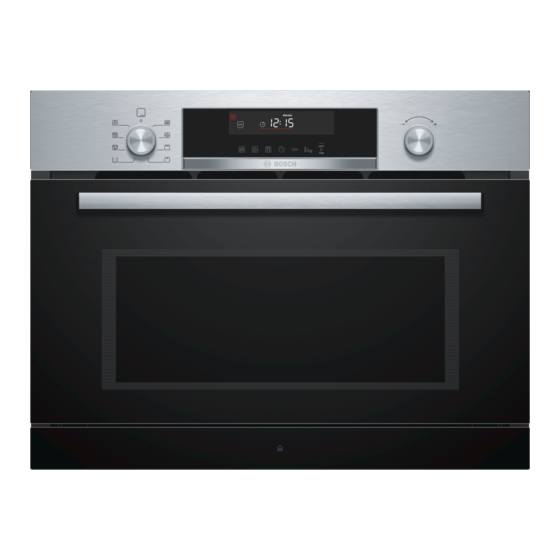
- Page 1 Microwave Oven COA565G.0 User manual and installation instructions [en]...
-
Page 2: Table Of Contents
en Safety 1.2 Intended use Table of contents This appliance is designed only to be built into kitchen units. Read the special installation instructions. USER MANUAL Only a licensed professional may connect ap- Safety .............. 2 pliances without plugs. Damage caused by in- correct connection is not covered under the Preventing material damage ....... -
Page 3: Safety
Safety en Hot steam may escape when you open the 1.4 Safe use appliance door. Steam may not be visible, de- Always place accessories in the cooking com- pending on the temperature. partment the right way round. ▶ Open the appliance door carefully. → "Accessories", Page 12 ▶... - Page 4 en Safety If the appliance or the power cord is dam- Food and its packaging and containers may aged, this is dangerous. catch fire. ▶ Never operate a damaged appliance. ▶ Never heat food in heat-retaining pack- ▶ Never operate an appliance with a cracked aging.
- Page 5 Safety en Airtight packaging may burst when food is Cookware and containers made from metal or heated. cookware with metal edging may lead to ▶ Always follow the instructions on the pack- sparks being formed during simple mi- aging. crowave operation. The appliance is dam- ▶...
-
Page 6: Preventing Material Damage
en Preventing material damage Hot liquid may spill over the sides of the ac- WARNING ‒ Risk of fire! cessory when it is removed from the cooking Due to the hot surfaces, vapours from flam- compartment. mable liquids may catch fire in the cooking ▶... -
Page 7: Environmental Protection And Saving En- Ergy
Environmental protection and saving energy en Hot water in the water tank may damage the steam 2.3 Steam system. Follow these instructions when using the steam func- Only fill the water tank with cold water. ▶ tion. If there is water on the cooking compartment floor ATTENTION! when operating the appliance at temperatures above Silicone bakeware is not suitable for combined opera-... -
Page 8: Microwave
en Familiarising yourself with your appliance Function selector Use the function selector to set the types of heating and other functions. On some product variants, the function se- lector can be pushed in. If you turn the function selector from the zero setting to a function, it takes a few seconds for the relevant function to be available. - Page 9 Familiarising yourself with your appliance en Symbol Name Meaning Timer If the symbol is highlighted, the timer appears on the display. Cooking time If the symbol is highlighted, the cook- ing time appears on the display. Clock If the symbol is highlighted, the clock appears on the display.
-
Page 10: Basic Settings
en Familiarising yourself with your appliance For most selection lists, e.g. programmes, the first Temperature display point begins again following the last point. For some The temperature display shows the heating progress. selection lists, e.g. cooking time, rotate the rotary se- lector back again once the minimum or maximum value has been reached. - Page 11 Familiarising yourself with your appliance en When you open the appliance door, the interior lighting Fill the water tank with water to operate the appliance switches on. This makes it easier to clean your appli- using steam modes. ance, for example. After approximately 15 minutes, the → "Filling the water tank", Page 19 interior lighting automatically switches itself off.
- Page 12 You will find a comprehensive range of products for Wire rack ¡ Wire rack for baking your appliance in our brochures and online: and roasting in oven www.bosch-home.com operation. Accessories vary from one appliance to another. When ¡ Wire rack for grilling, purchasing accessories, always quote the exact e.g.
- Page 13 Before using for the first time en 6 Before using for the first time Configure the settings for initial start-up. Clean the ap- Water hardness range Setting pliance and accessories. 3 (2.5 - 3.8 mmol/l) 3 hard 4 (above 3.8 mmol/l) 4 very hard 6.1 Setting the time To save the changes, press and hold for a few...
- Page 14 en Microwave Use the rotary selector to set the required cooking lights up. time. Press . 7.6 Stopping operation a The appliance starts heating. You can stop operation at any time. lights up. Turn the function selector to the off position. ▶...
- Page 15 Microwave en Set the function selector to . 8.3 Microwave output settings a The appliance is ready to use. The display shows This is where you can find an overview of the different the maximum microwave output as a default microwave power settings and when to use them. value.
- Page 16 en MicroCombi Remove the worst of the food residues from the 8.11 Drying the cooking compartment by cooking compartment immediately. hand Wipe away any moisture from the cooking compart- Always dry the cooking compartment after operation to ment floor. ensure that no moisture remains. Use the function selector to select ...
- Page 17 Steam en Press until is highlighted. Function Food Use the rotary selector to set the required cooking Full-surface grill Use the full-surface grill to grill time. large pieces of meat and bread Press . or to brown bakes. a The appliance starts heating. Centre-area grill Use the centre-area grill to grill lights up.
- Page 18 en Steam Centre-area grill ¡ WARNING ‒ Risk of scalding! Hot steam may escape when you open the appliance Setting the steam combined operation door. Steam may not be visible, depending on the tem- Switch on microwave mode in addition to a type of perature.
- Page 19 Steam en Fill the water tank with cold water up to the "MAX" 11.6 Filling the water tank mark. The water tank is located to the right behind the tank cover, below the appliance door. Before starting an op- eration with steam, open the tank cover and fill the wa- ter tank with water.
- Page 20 en Steam Open the control panel. Rub the seal on the lid until dry. Remove the water tank. Leave the water tank to dry with the lid open. Fill the water tank up to the "MAX" mark. Place the lid on the water tank and push down on it. Insert the full water tank and close the control panel.
- Page 21 Automatic programmes en 12 Automatic programmes Automatic programmes can help you prepare different ¡ Only use meat at refrigerator temperature. dishes by selecting the optimal settings automatically. ¡ Only use frozen food straight from the freezer. ¡ Take the food out of its packaging and weigh it. If you cannot set the exact weight on the appliance, 12.1 Tips on configuring the settings for round the weight up or down.
- Page 22 en Automatic programmes Vegetables, side dishes Food Accessories Shelf position Weight range in Information Broccoli, fresh Steam container 0.10 - 1.00 + glass tray Peas, frozen Steam container 0.10 - 1.00 + glass tray Sliced carrots, Steam container 0.10 - 0.75 The thicker the fresh + glass tray slices, the firmer the result.
- Page 23 Time-setting options en 12.3 Applying settings for dishes 12.4 Changing the dish Set the function selector to . Press for 4 seconds or open the appliance door. a The display shows the first dish number and a de- fault value for the weight. a The dish is reset Use the rotary selector to set the required weight.
- Page 24 en Childproof lock Use the rotary selector to set the cooking time to 13.6 Setting the cooking time ▶ : . Press twice. a The appliance applies the change after a few : is shown on the display and the time symbols seconds.
-
Page 25: Cleaning And Servicing
Cleaning and servicing en Display Basic setting Selection Description Button tone = off Switch the button tones on = on or off. Display brightness = low Set the brightness of the = medium display. = high Time indicator = off Show the clock time in the = on display. - Page 26 en Cleaning and servicing 16.4 Cleaning the front of the appliance ATTENTION! Unsuitable cleaning agents damage the surfaces of the ATTENTION! appliance. Incorrect cleaning may damage the front of the appli- Do not use harsh or abrasive cleaning products. ▶ ance. Do not use cleaning products with a high alcohol ▶...
- Page 27 Cleaning and servicing en Read the information on cleaning products. 16.8 Cleaning the door seal → Page 25 ATTENTION! Clean the drip tray using a dish cloth and hot soapy Incorrect cleaning may damage the door seal. water. Do not use metal scrapers or glass scrapers for ▶...
- Page 28 en Cleaning and servicing Remove and empty the water tank and drain any re- ATTENTION! sidual water. Using non-recommended descaler may damage the Rinse out the water tank thoroughly and fill it with appliance fresh water. Only use the descaler recommended by us for the ▶...
-
Page 29: Troubleshooting
Troubleshooting en Open the lid for the drip tray. Insert the drip tray into the tank shaft and slide it in fully. Empty the drip tray. Close the tank cover. a The appliance is ready to use. 17 Troubleshooting You can rectify minor faults on your appliance yourself. Read the troubleshooting information before contacting after- sales service. -
Page 30: Customer Service
en Troubleshooting Fault Cause and troubleshooting The appliance is not Malfunction working. Switch off the fuse in the fuse box. Switch the fuse back on after approx. 10 seconds. a If the fault was a one-off, the message disappears. If the message appears again, call the after-sales service. Please specify the exact error message when calling. - Page 31 Disposal en Fault Cause and troubleshooting Steam is not visible in Steam is not visible in every temperature range. The hotter the steam, the less visible it is. Hot air mode and grill No action required. ▶ combined operation. Drip tray is empty In normal steam operation and steam combined operation, the condensation is collected by after steam operation.
-
Page 32: How It Works
en How it works The contact details for Customer Service can be found 19.1 Product number (E-Nr.) and production in the enclosed Customer Service directory or on our number (FD) website. You can find the product number (E-Nr.) and the pro- This product contains light sources from energy effi- duction number (FD) on the appliance's rating plate. - Page 33 How it works en Both added-steam cooking and cooking with a type of 20.4 Tips for defrosting and heating steam heating necessitate the production of large Follow these tips for good results when defrosting and amounts of steam in the cooking compartment. Wipe heating.
- Page 34 en How it works Recommended settings for defrosting food Food Accessories/cookware Shelf posi- Type of Microwave Cooking tion heating setting in W time in mins Whole pieces of meat, on the Cookware without lid 1. 180 1. 15 bone or boned, 800 g 2. 90 2.
- Page 35 How it works en Food Accessories/cookware Shelf posi- Type of Microwave Cooking tion heating setting in W time in mins Bread, loaf, 1000 g Cookware without lid 1. 180 1. 5 2. 90 2. 15-25 Cakes, plain, e.g. sponge cake, Cookware without lid 10-15 12, 13 500 g Cakes, plain, e.g.
- Page 36 en How it works Food Accessories/cookware Shelf posi- Type of Microwave Cooking tion heating setting in W time in mins Slices or pieces of meat in Cookware with lid 25-30 sauce, e.g. goulash, frozen, 1000 g Bakes, e.g. lasagne, cannelloni, Cookware with lid 10-15 frozen, 450 g Side dishes, e.g.
- Page 37 How it works en Recommended settings for heating food Food Accessories/cookware Shelf posi- Type of Microwave Steam Cooking tion heating setting in W setting time in mins 2, 3 Baby food, e.g. baby Cookware without lid 0.5-1.5 bottles, 150 ml 5, 6 Drinks, 200 ml Cookware without lid 1000 5, 6...
- Page 38 en How it works 20.8 Poultry, meat and fish You can use your appliance to cook poultry, meat and fish. Recommended settings for poultry Food Accessories/ Shelf pos- Type of Temperat- Grill Microwave Steam Cooking cookware ition heating ure in °C setting setting in W setting time...
- Page 39 How it works en Food Accessories/ Shelf pos- Type of Temperat- Grill Microwave Steam Cooking cookware ition heating ure in °C setting setting in W setting time in mins Fish steaks, x Wire rack 8-12 2-3, 150 g each Glass tray Fish, whole, Glass tray 18-22 e.g.
- Page 40 en How it works Food Accessories/ Shelf posi- Type of Temperature Microwave Steam Cooking cookware tion heating in °C setting in W setting time in mins Asparagus, Glass tray 10-15 green, 250 g Steam con- tainer Courgettes, Glass tray 12-14 sliced, steamed, 500 g Steam con- tainer Potatoes, Glass tray...
- Page 41 How it works en Microwave cooking 20.11 Test dishes Please take note of the following information if you are These overviews have been produced for test institutes cooking test dishes using the microwave. to facilitate appliance testing in accordance with EN Use heat-resistant, microwave-safe cookware. 60350-1:2013 or IEC 60350-1:2011 and EN 60705:2012, IEC 60705:2010.
-
Page 42: Installation Instructions
en Installation instructions Recommended settings for grilling Food Accessories/cookware Shelf posi- Type of Grill set- Cooking tion heating ting time in mins Toast, browned Wire rack Beef burgers, x 12 Wire rack 35-45 Glass tray Turn the dish halfway through the cooking time. 21 ... - Page 43 Installation instructions en Ensure that surround units without a ventilation cut-out The required minimum worktop thickness is based have a ventilation opening measuring 200 cm² towards on the required minimum clearance . the rear of the side panels. Hob type raised in flush in Do not cover the ventilation slots and air intake open- ings.
- Page 44 en Installation instructions To ensure that the appliance door can be opened, you Connect the wires of the mains power cable accord- must take the minimum dimensions into consideration ing to the colour coding: when installing in a corner. The dimension is de- Green/yellow = Protective conductor ‒...
- Page 48 Expert advice for your Bosch home appliances, help with problems or a repair from Bosch experts. Find out everything about the many ways Bosch can support you: www.bosch-home.com/service Contact data of all countries are listed in the attached service directory.
Need help?
Do you have a question about the COA565G.0 and is the answer not in the manual?
Questions and answers